3D Printed Business Cards: How to Make Your Own Portrait Card

If you’re hoping to make an impression in the business world but want a quirky way to stand out, then perhaps this 3D printed business card is for you.
In this 5-step tutorial, you will be using Tinkercad online, which is free to use. You also need a login into Thingiverse. The whole process should take you around an hour to complete.
If you don’t have a 3D printer at hand, you can have the card printed by a professional 3D printing service. To get the best price, please use All3DP’s price comparison service.
Step 1: Create a Lithophane portrait
- Go to http://www.thingiverse.com/thing:74322
- Click on open in customizer
- Go to the option Pane Size and change it to small.
- Click the button for invert colours at the bottom of the screen
- Click choose file and find a .jpg file that you want to use as your business card picture.
- Click “create thing” in the corner at the bottom right and then title your lithopane. Then wait for your thing to be created, this may take a few moments to create.
- Go to “My Things” by clicking on the dropdown arrow at the top right of the page.
- Here, download your created .stl file by clicking on Thing Files and select the file.
Step 2: Create your Business Card Base
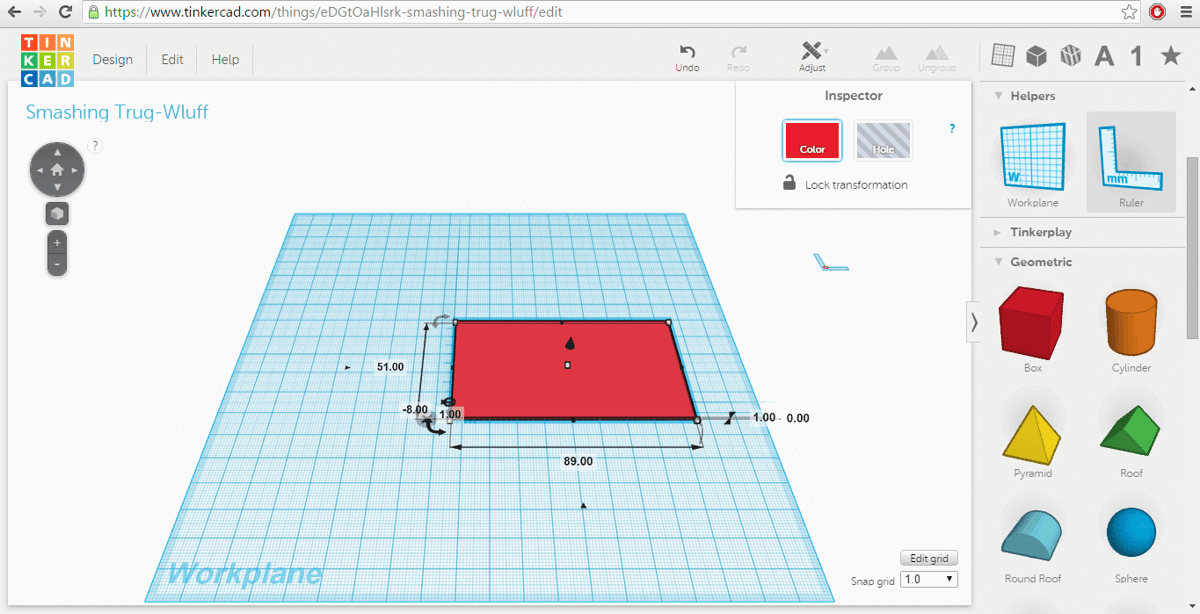
- Sign into Tinkercad and click on “Create New Design”
- Under shape generators select geometric option, select the red box, then drag it to the workplane and click.
- On the toolbar on the top, select the grid, then select the ruler. Drag it next to the red box and click. Now click on the red box, the dimensions will show up.
- To change the dimensions, click on the width and type 89 into the box. For the height type 51 and for the thickness type 1 – these are standard business card measurements.
Step 3: Add Text to your Business Card
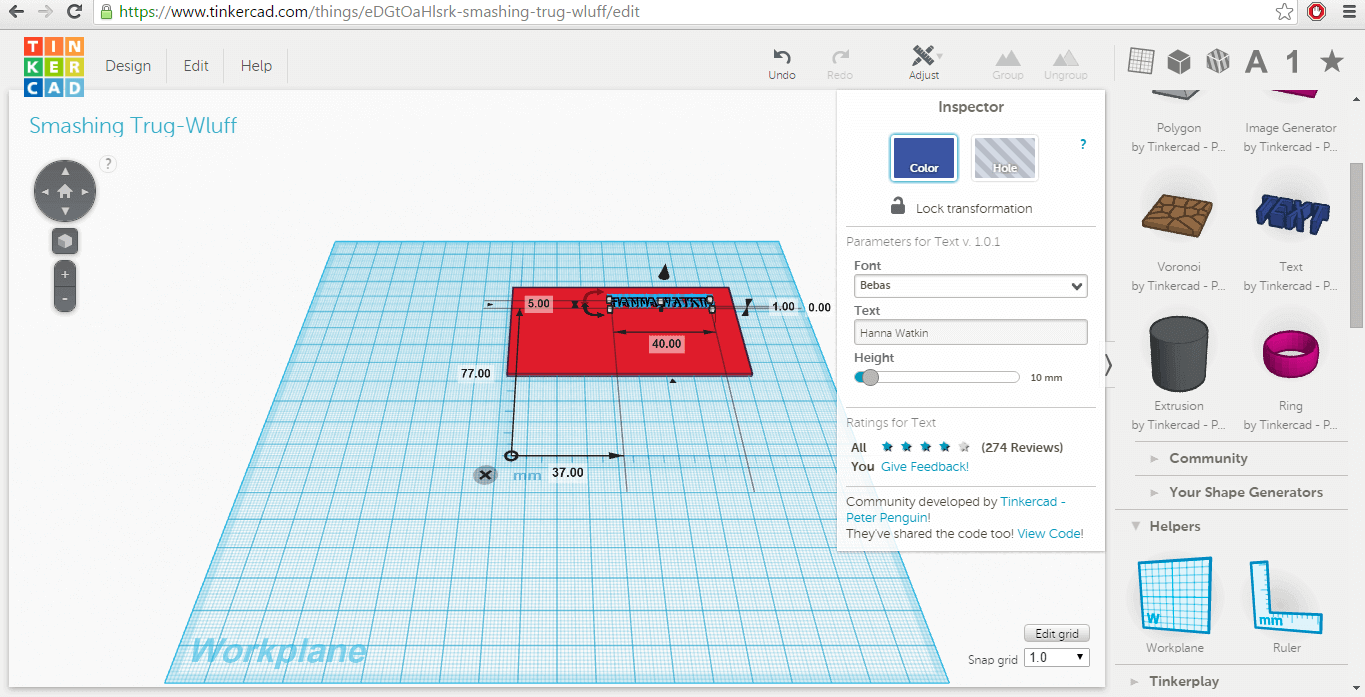
- Go to the menu on the side of the page and select Tinkercad. Then, click on the text icon and drag this to the workplane.
- An Inspector window should appear on the right and here you can enter your name.
- Click the ruler tool again from the Helpers section on the toolbar and type in the dimensions of 5mm high, 40mm wide, 0.5mm thick.
- From the Helpers section, click on the workplane tool and then click on the top surface of your base.
- Drag the text to be on top of the card. Then, on your keyboard, press “d” and the text gets “dropped” on top of the new workplane.
- Then, select the workplane tool again and click anywhere outside the orange workplane.
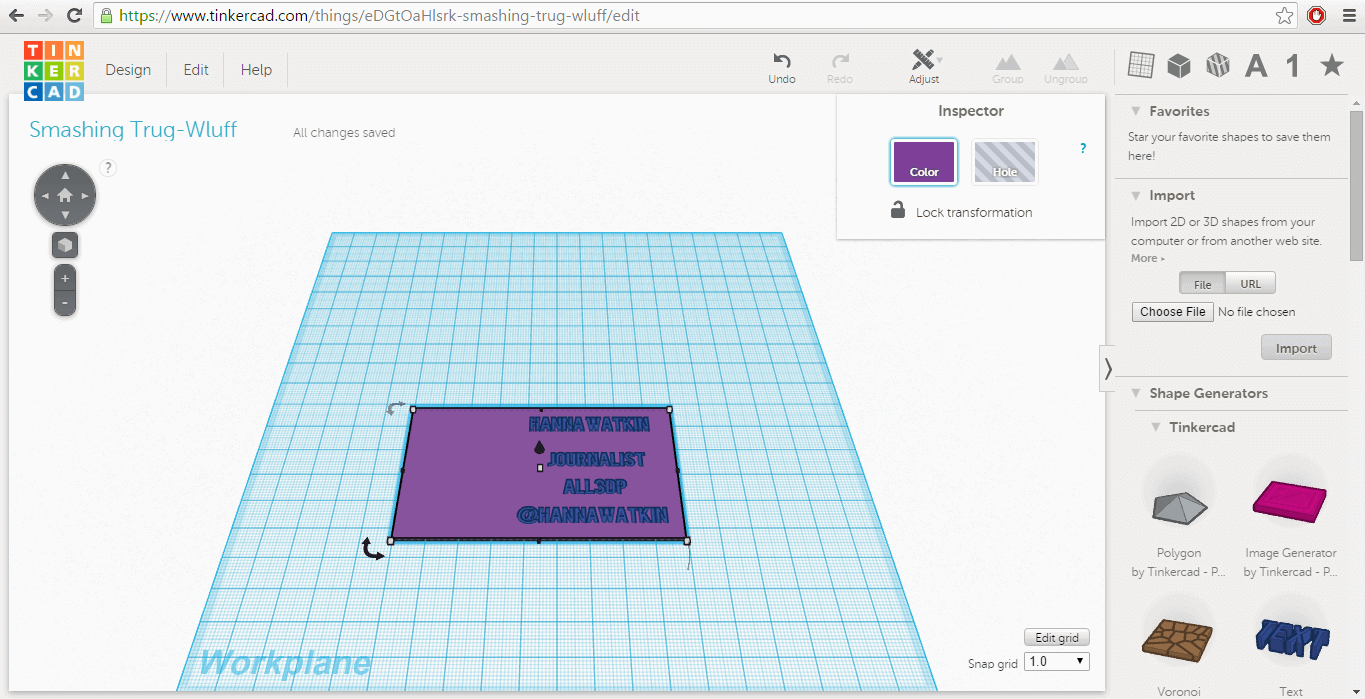
- To make the twitter handle, phone number, title and email fields, click on your name text, then copy and paste from the edit menu, 4 times. Drag these texts onto the card.
- To change the text, click on it and edit it with the Inspector that pops up.
- Group your text and the card base together by clicking and dragging to draw a square around the card, then click Group on the toolbar at the top of the page.
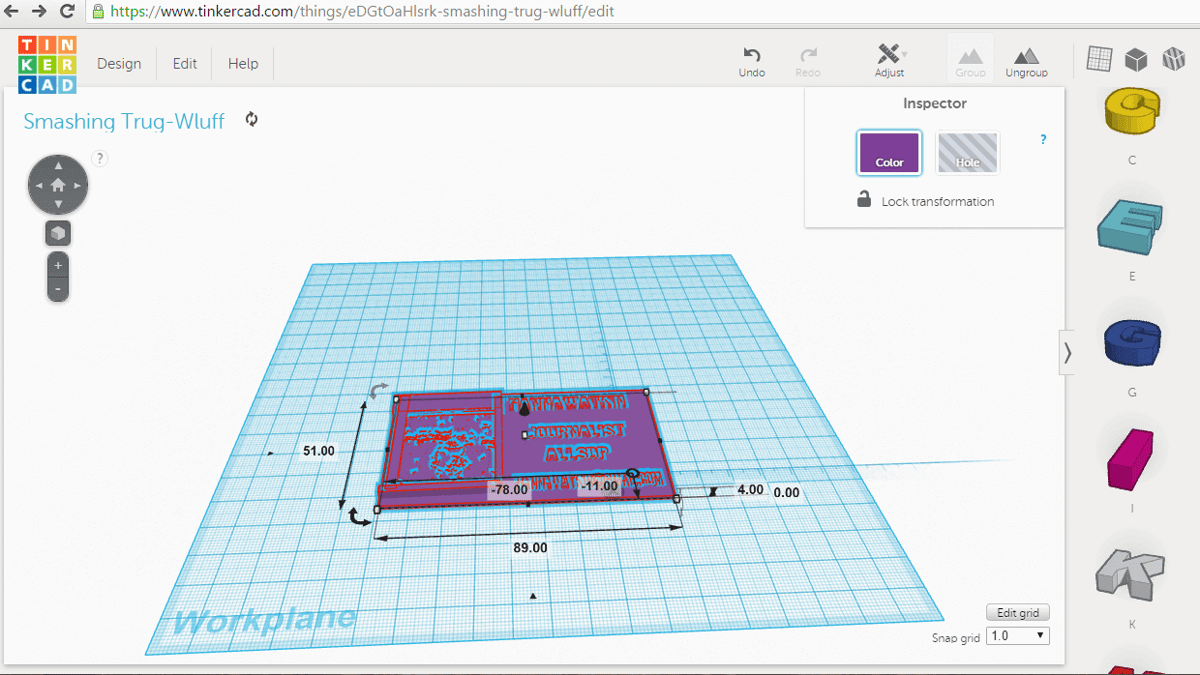
Step 4: Add your Prepared Lithopane Picture
-
- Below Import find the .stl file which you previously downloaded from Thingiverse.
- Click on Import and wait for it to upload.

-
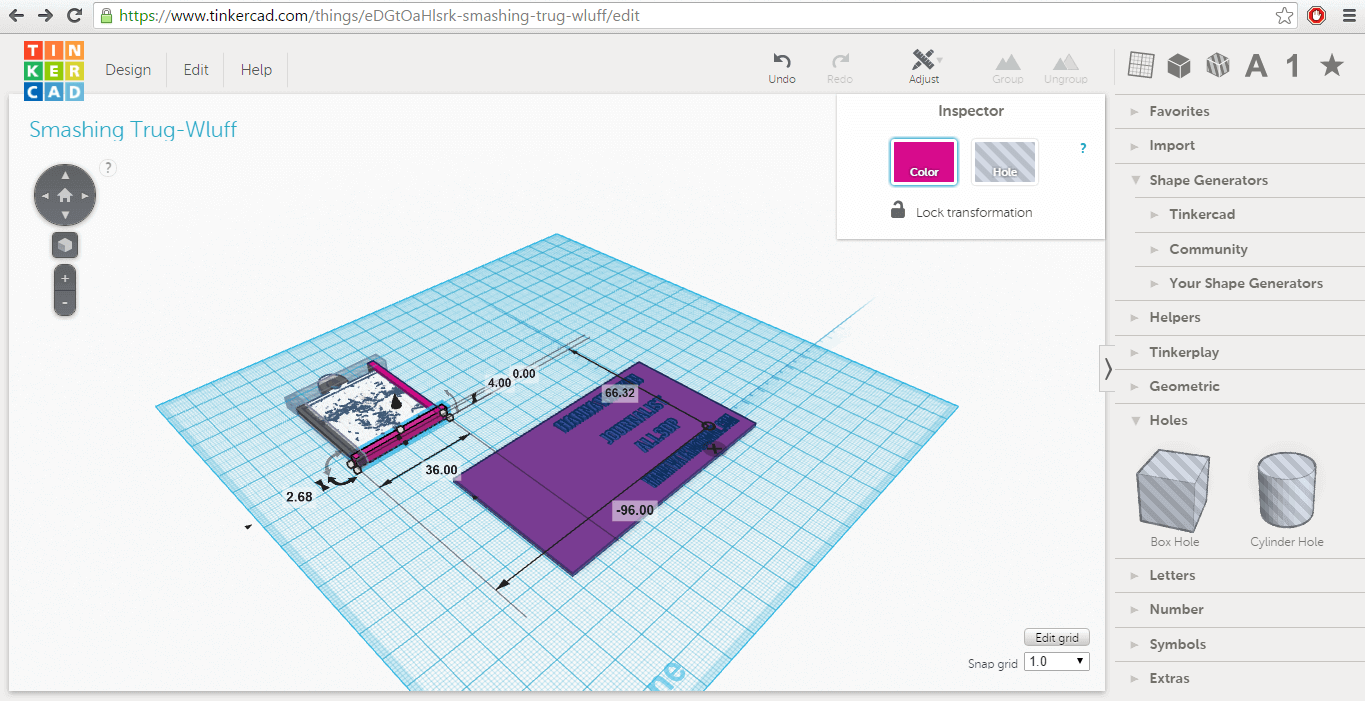
- You can then change the size by dragging the small white squares on each of the corners.
- Next, you need to get rid of the top loop and the raised edges so go to Letters on the right hand tool bar and select the letter “I” then drag it onto the workplane – do this three more times.
- Cover each of the raised edges by making the “I” big enough to cover it. You should do this away from the base.
- Remember to make sure that the top “I” is wide enough to cover the loop.
- Next, click on each of the “I” shapes in turn and in the Inspector box on the top right, choose Hole.
- With the mouse, draw a box around your lithopane and press Group to get rid of all the material where you have put the holes. Then, drag this onto your base and do the same – draw a box around the whole card and press Group.

Step 5: Print Out Your Business Card
- Save your business card and either create an .STL or .OBJ file for your 3D printer or send it directly to a 3D printing service (Tinkercad supports 3D Hubs, I.materialise, Ponoko, Sculpteo, and Shapeways).
- In order to be able to reuse the business card, open the Design menu, choose Save and then save the file to your disk.
- If you are able to use a 3D printer, select Design → Download for 3D Printing and then the .STL or .OBJ file format. Save the file to disk.
- If you want to have your name tag printed by a printing service, choose Design → Order a 3D Print and then select the service of your choice.
You can find the inspiration for this tutorial at Women in 3D Printing here.
License: The text of "3D Printed Business Cards: How to Make Your Own Portrait Card" by All3DP is licensed under a Creative Commons Attribution 4.0 International License.