Introduction
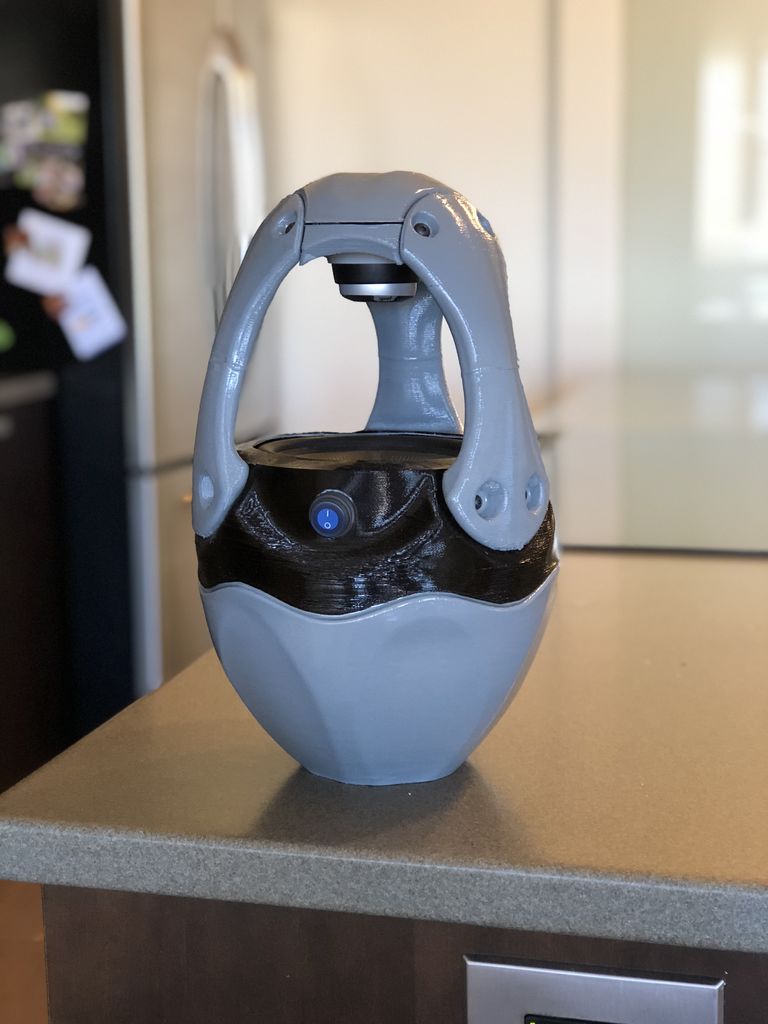
Who wants a regular speaker when you can get one that’s buoyant and waterproof? What better way to get your pool or boat party started?
This DIY project is a fun venture taken on by Instructables user BryantM, who toyed with the idea for more than a year. Even though there are still no CAD files available, the DIYer has promised to release them soon.
Required Components
Here’s a list of what you’ll need:
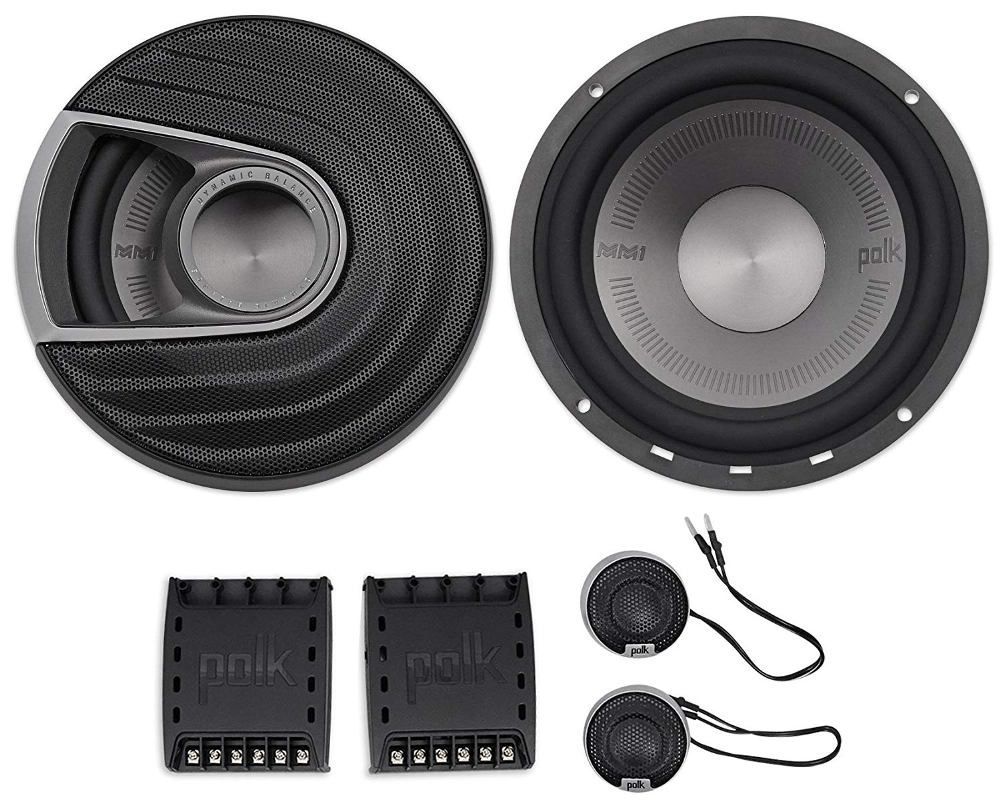
- Polk Audio MM-6502 speakers
- Raspberry Pi
- Expansion foam
- Silicone sealant
- Waterproof switch
- Wireless charging power tool battery (comes with lithium-ion battery)
- Button head cap screws
- Screw posts
- 3D print epoxy
Polk Audio MM-6502 speakers are marine-grade and are therefore manufactured to handle any kind of weather thrown at them. They are well sealed to prevent any leaking, even in the case that they are submerged in water. But that’s not all because they also have remarkable sound quality.
Please note that the battery used for this project is a Bosch WC18CF-102. According to BryantM, this battery is preferred because it has an induction charging feature, which allows for wireless charging. Induction charging makes sense for this project because it is wireless and can pass through a waterproof boundary.
CAD Design
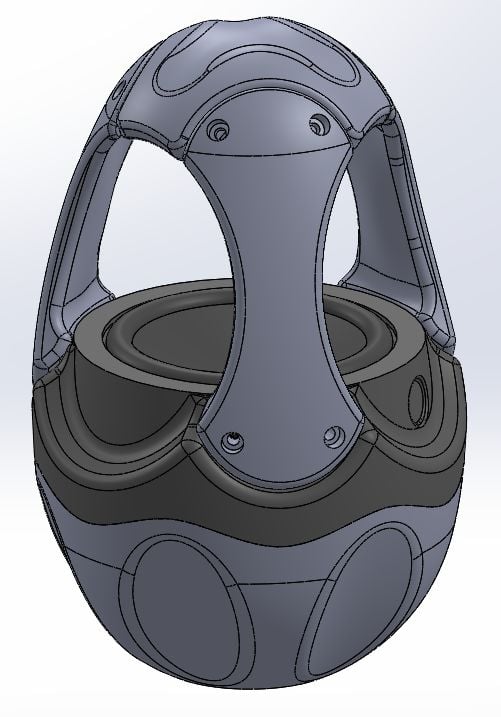
BryantM is yet to upload the STL files for this project. Therefore, you’ll have to design the parts on your own or hire the services of an experienced CAD user.
The DIYer admits that there were several incidences of trial and error along the way, but modifications were done until the CAD design was 3D printable in vase mode. (Printing in vase mode reduces the print time, cost, and the weight of the shell. Furthermore, a vase shape looks more appealing.)
Lessons from the designing process:
- Your design should ensure the nozzle is extruding continuously. This is important to avoid weak spots and strings. It’s better to 3D print the part first and make holes later.
- Include ribs or undulation to add strength to the shape.
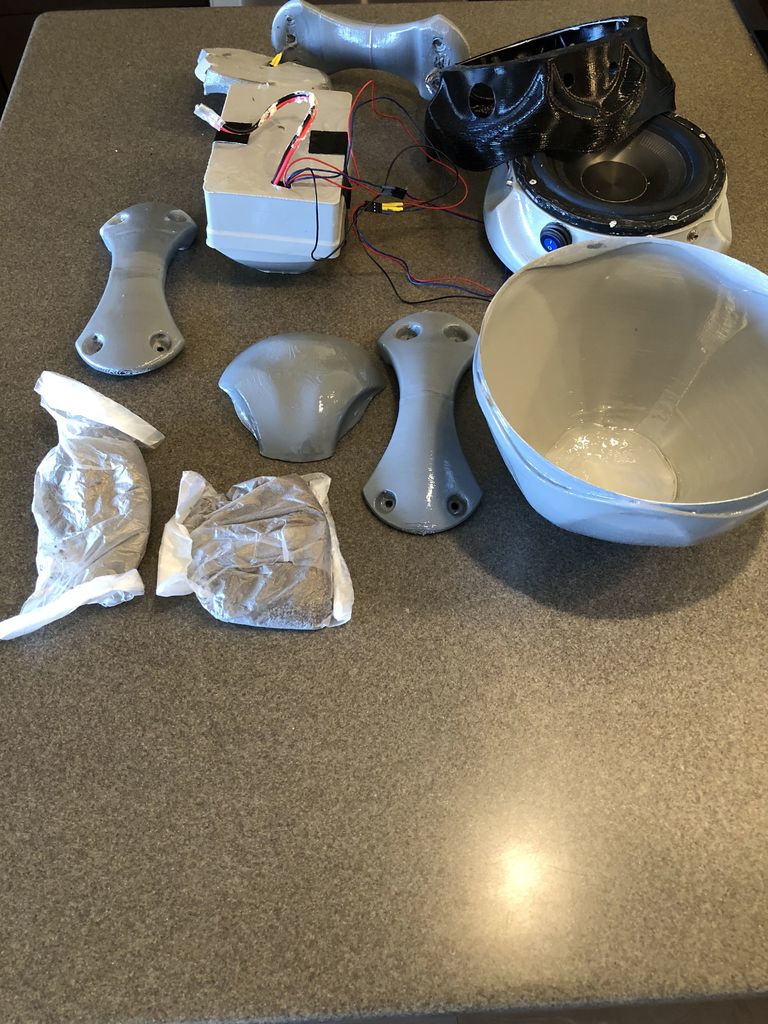
You’ll need to end up with nine printed pieces:
- Main body shell bottom
- Main body shell top
- Main body shell cover
- Arm bottom
- Arm top
- Tweeter mount bottom
- Tweeter mount top
- Electronics case bottom
- Electronics case top
Assembly
General notes:
- The button head cap screws will be used to mount the arms to the main body while the two main bodies – the top and bottom – will be glued together using a sealant.
- The screw posts will receive mounting bolts.
- Slide the lithium-ion cells into the shell and make the right connections. You may want to use a multimeter to confirm that you’re getting 18 V. You’ll also have to solder the induction coil and wire the PCB. The red-colored wire should be soldered to the (+) while the black goes to the (-).
BryantM advises that the batteries ought to be arranged in a way that will allow for induction charging. Typically, this means the batteries’ cells must be placed directly on top of the induction coil.
Programming
While there are a variety of receivers you can purchase, BryantM went for the Raspberry Pi with a HiFiBerry hat. Despite being a little pricey, the device is easy to set up.
Set up your Raspberry Pi and attach a “Pi hat” to improve the signal quality. Simply plug the hat into the Raspberry Pi ports. Just make sure the Pi knows what you’re adding.
Wiring, Waterproofing, and Gluing
- The wiring from the speaker to the Pi hat is straightforward: the Pi hat’s audio goes into the in-ports of the speaker. You’ll then have to screw the speaker in place and apply the sealant. The sealant should be applied anywhere where water can leak through.
- Paint some layers of the epoxy on your shell to make it waterproof.
- Fill the handles with the expansion foam, but only after running the speaker wire through one of them. Afterward, test your parts for leakages. BryantM insists that the electronics – including the switch – need to be made as waterproof as possible. Once your electronics are ready, cover them with plastic food wrap until you ascertain there isn’t a single leak. If you like, you can cover your electronics using a waterproof electrical potting, but this is permanent. Only go the permanent route if you’re sure you won’t need to change or upgrade anything.
- The wrapped electronics are placed into your printed box, then this box is sealed and positioned inside the main 3D printed shell.
- Connect the battery to the switch and to the Raspberry Pi. Not that, because you want a specific floating orientation, you’ll have to add counterweights to the bottom of your 3D printed main shell. Any weight that can help you attain the desired position in the water is fine.
- Place your electronics at the bottom of your printed main shell, then place the counterweights on either side of the box. When you’ve checked that everything is in place, use the sealant to hold the box in place.
- At this stage, you’ll want to apply a sealant over the screws and speaker edges before you glue the switch into place using the sealant.
- Mount the arms on the upper body and bolt them into place after placing the top tweeter into position.
- Glue the main shells together and use the sealant and the epoxy to strengthen the joint.