What Is It?
As the name suggests, velocity painting uses speed differences to add texture to your model. You don’t need to change any hardware for this, it’s purely a software trick.
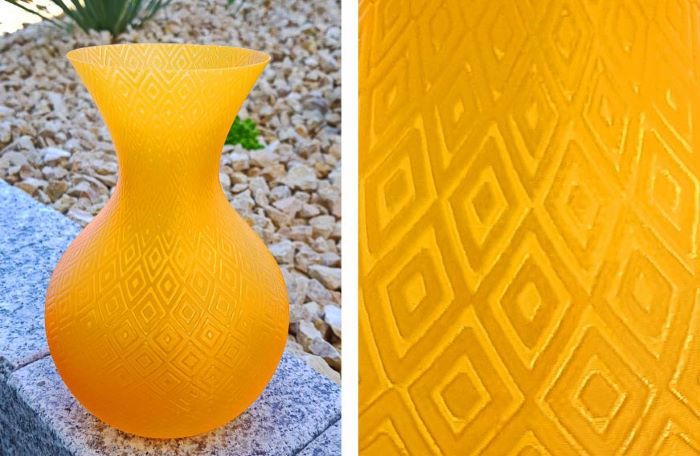
Developed by Mark Wheadon, this technique imprints any image you want onto your model by varying the feed rate of the 3D printer in a controlled manner. It changes the thickness of the model at the corresponding location, thus resulting in a pattern on the object. The areas with darker shades are printed slower, while the areas with a lighter shade are printed slightly faster. This creates a visible pattern on your print.
The result is an object which has a texture corresponding to your image.
Where to Get It?
This tool is available for free on Mark Wheadon’s website. He’s also uploaded the source code for the software on his GitHub page. The software itself is open-source, too, and the actual tool is straightforward to use.
Let’s take a look into how you can get your object velocity painted.
Prerequisites

Before getting going with velocity painting, you’ll need a few things:
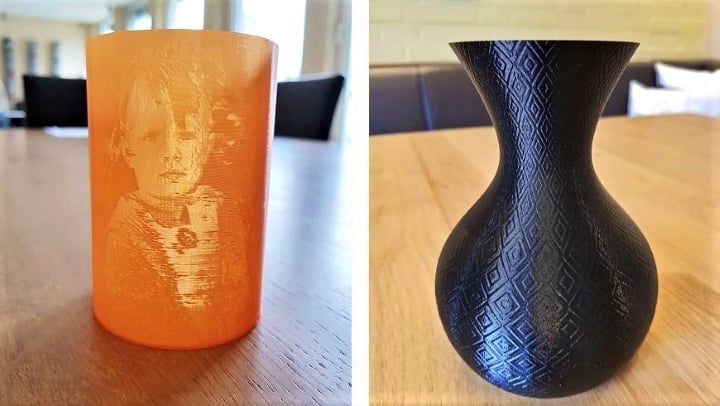
- A pre-sliced G-code file: The G-code file can be of any object you’d like. Vases, in particular, tend to look great. To showcase the texture, choose a model with simple surfaces rather than fine details. Note the dimensions and the printing speed of your object, as you’ll be needing them as inputs to the application.
- An image: A high-resolution image ensures that your final output doesn’t have pixelated edges. This technique works by varying the speed of the printer, after all.
- The velocity painting tool: The software itself is available for free and needs no installation. Guillaume Vigneron has developed an application that makes it easier for the user to use the script. The app is available on his page for Windows, Mac OS, and Debian Linux.
Using the Application

Let’s take a look at each section of the application:
- Source File Selection
- Here, you load the sliced G-code and the desired image. The supported image formats are JPG, PNG, JPEG, and TIFF.
- Image Details
- Width: In this column, you input the width of your object.
- Height: This will be the height of your model.
- Z-offset: This is the height from which you want your image to start.
- Printer Co-ordinates
- These are the center coordinates of your printer. The point at which the center of your build volume would be.
- Print Speeds
- Target speed: This is the printing speed you’ve set in the slicer.
- Low speed: This speed should be 3-4 times less than your target speed value.
- High speed: This speed can be set similar to the target speed value.
- Paint Type
- Projection X: The image is projected as a plane on the object in the X direction.
- Projection Y: The image is projected as a plane on the object in the Y direction.
- Projection Z: The image is projected as a plane on the object in the Z direction.
- Cylinder: The image is wrapped around the object as it would be around a bottle. You should be using this for the vase.
- Spherical: The object is considered as a sphere, and the image is wrapped around it accordingly. This is suitable for some geographic patterns.
- X offset: The offset value for the image to start in the X direction.
- Y offset: The offset value for the image to start in the Y direction.
Once you load the files and input all the values, click “Generate”. You can then choose to save the file in your desired location.
Pros & Cons
Pros:
- Easy setup
- Free and easy to install
- Works with any slicer, but best with Simplify3D and Slic3r
Cons:
- The G-code generated using Cura doesn’t retract material during the travel moves. This leads to oozing.
- Complex or unusual models often aren’t well-suited to the application.
Tips & Tricks
Now that you’re familiar with the tool, here are some tips to give you a head start:
- Material selection: Translucent materials give the best results using this technique.
- Start with the basics: It’s recommended to begin your velocity printing journey with some basic vases. It lets you figure out which settings work for you and how.
- Image selection: Select an image with a good contrast ratio. The darker shades should be clearly distinguishable from the brighter ones. Also, the higher the image resolution, the better the quality of the print.
- Saving profiles: Once you’ve dialed down your settings for speed and paint types, you should save the profiles. It saves you time and gives you consistent results.
Well, that’s it. Check out some of the ready-to-print models on the velocity painting site, along with the instructions to make them.
(Lead image source: Mark Wheadon via Twitter)