Ultimaker 3 Nozzle – How to Replace Worn Parts

Plug and play printers have significant advantages and are easy to handle, but with some drawbacks regarding maintenance. Here we show what you need to know.
Plug and Play Systems
Every 3D printer has some parts that wear, meaning they have to be replaced from time to time. Usually, the nozzle itself wears out, especially if you print with a lot of abrasive materials like metal- or carbon-filled filaments. Bowden tubes also need to be replaced on a regular basis, to keep the friction low and avoid under-extrusion.
The Ultimaker 3 and S5, known as plug and play printers, are no exceptions to the rule. Their nozzles wear out, too, but replacing them is a little trickier, as we’ll see in the following…
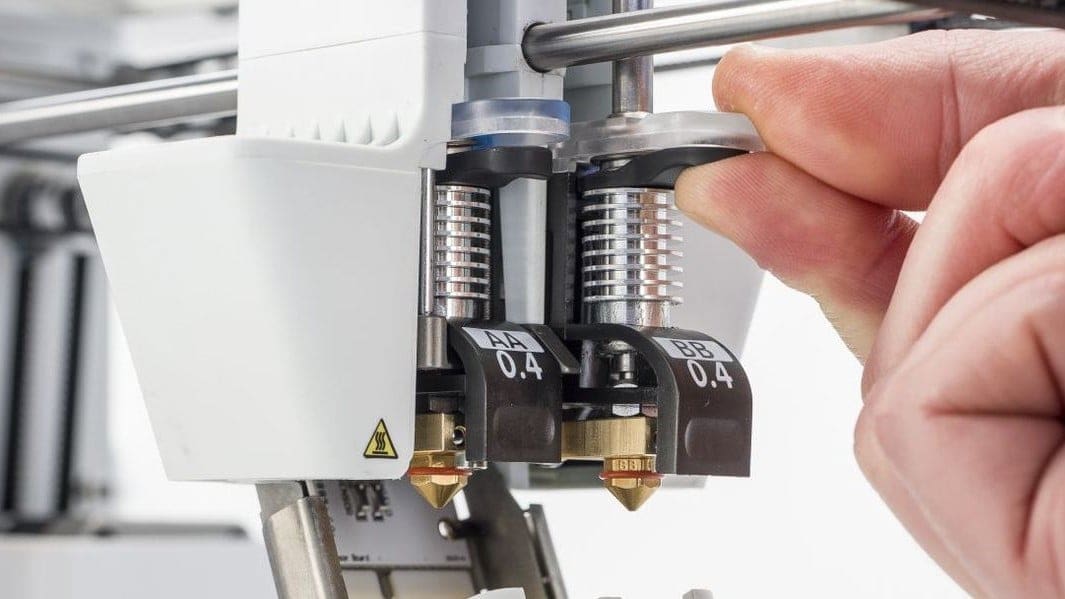
The Ultimaker Print Core

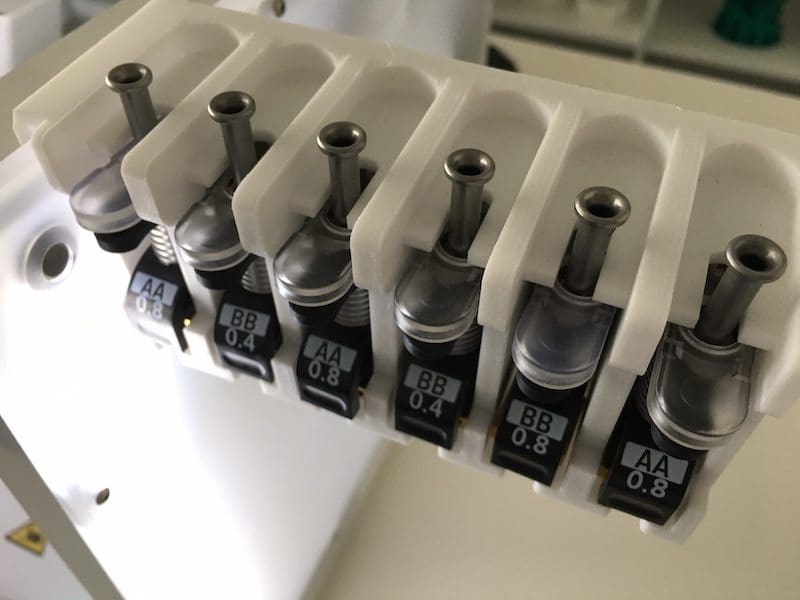
The Ultimaker 3 and S5 use print cores, which are plug and play hot ends that can easily be swapped out without any tools. The print core is available in three different nozzle sizes, 0.25, 0.4, and 0.8 mm, and two use case versions, AA and BB. The BB print core has a unique inner geometry to reduce the risk of clogging and is used exclusively for PVA support material. The AA print core is for every other material you want to use.
Particular to the S5, there’s also a third option: the CC red print core with a 0.6-mm nozzle. It has a hardened ruby nozzle for printing abrasive materials without the risk of being damaged.
The drawback with these print cores is that you cannot replace just the nozzle itself. Each core is very fragile, breaking easily if you try to unscrew the nozzle. Even if you disassemble the print core without damaging it, the thread of the nozzle is longer than most, and you can’t buy a spare nozzle that fits.
The only possibility to replace a worn nozzle on the Ultimaker 3 or S5 is to buy a new one. However, as we’ll see next, what you buy makes a difference!
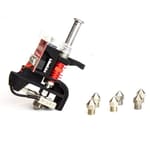
The Solution: 3D Solex HardCore
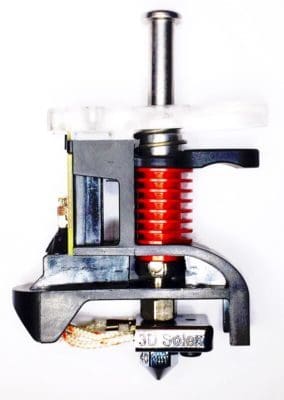
If you want to print with different nozzle sizes or with abrasive materials, you can use a third party solution. 3D Solex developed the HardCore, a print core for the Ultimaker 3 and S5 that allows you to easily change the hot end.
Just keep in mind that, with this approach, you’ll always have to remove the print head to change the nozzle. You’ll also have to hold the block with pliers (or the supplied tool), otherwise the HardCore will break.
Naturally, any filament will have to be unloaded every time you want to change the nozzle. That means it’s not as easy and fast as with other blocks, but it’s a great way to use different nozzles.
Several nozzle sizes in different materials are available to fit any requirement you might have. Just remember that these nozzles are shorter than standard ones, so you can’t reuse nozzles that you might have from another printer.
Although the HardCore is plug and play, your printer won’t recognize the currently equipped nozzle. As such, you’ll have to manually define the nozzle size in Cura by adjusting the “Line Width” parameter. (Usually 7/8 the nozzle size is good.)
Replacing the Bowden Tube
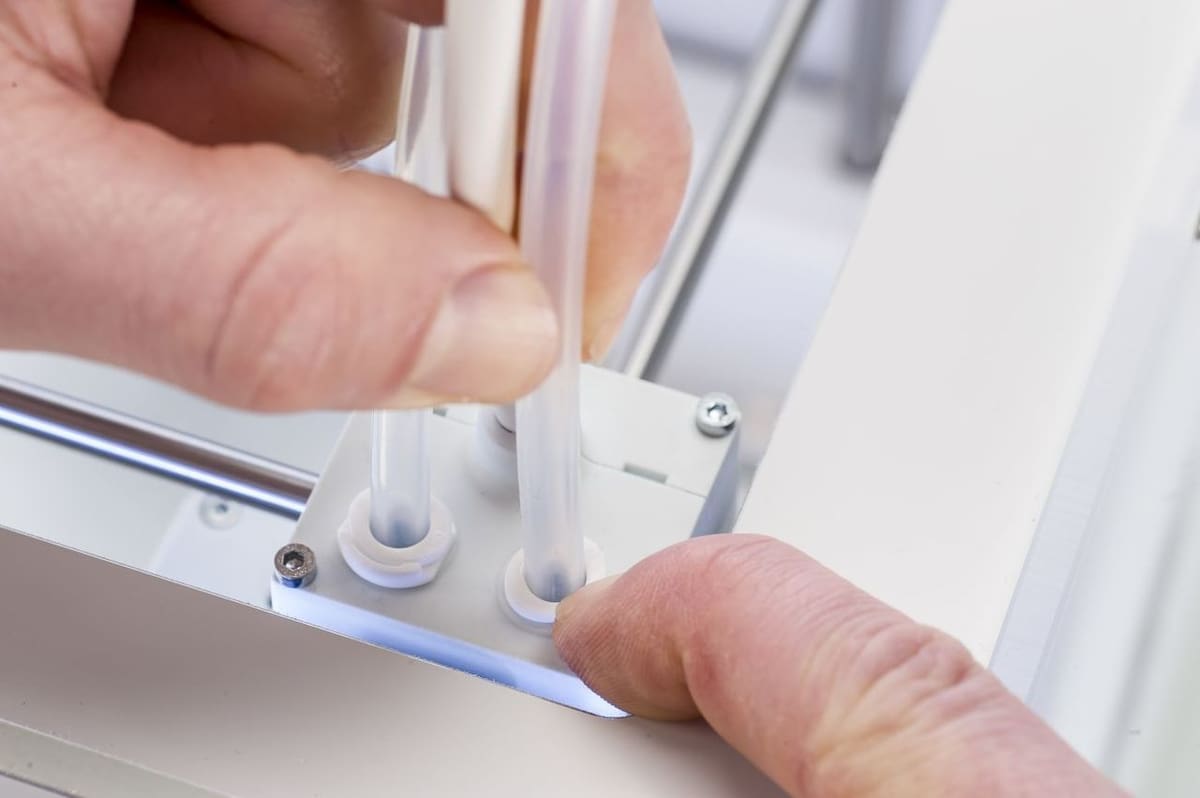
In addition to changing print cores or nozzles, you should also keep in mind that your Bowden tube wears out, which results in higher internal friction. Ultimaker’s advice is to replace the Bowden tube every year, but it really depends on how often the printer is in use and which materials you print with.
Changing the Bowden tube is easy:
- Use your fingernail to remove the clamp clips from the tube-coupling collets at the print head and feeder.
- Push down the white tube-coupling collet and pull the Bowden tube upwards at the same time.
For more detailed instructions, check out the Ultimaker manual.
Ultimaker Maintenance Kit
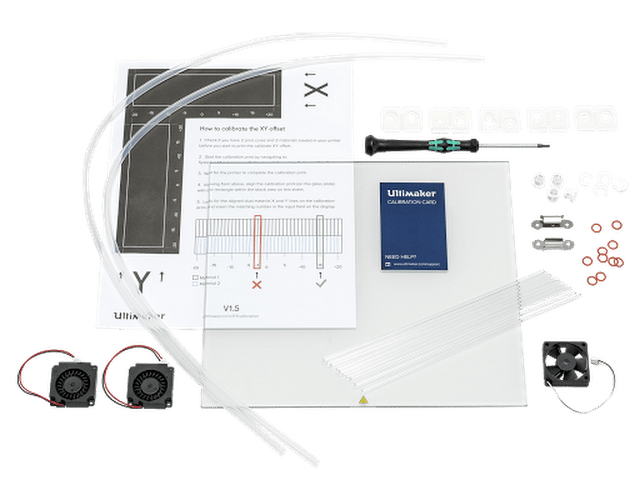
There’s also an Ultimaker maintenance kit, which includes all the parts (except the print cores) that you should replace regularly.
The kit includes the following parts:
- 2x Bowden tube
- 1x XY calibration sheet
- 1x Calibration card
- 1x Glass plate
- 1x Hex screwdriver 2.0
- 5x Silicone nozzle cover
- 4x Clamp clip
- 4x Tube coupling collet
- 2x Build plate clamp
- 10x Silicone nozzle ring
- 1x Ultimaker 3 cleaning filament (one pack)
- 1x Axial fan
- 2x Radial fan

That's All, Folks
Replacing worn parts on your Ultimaker 3 or S5 printer isn’t difficult, just different. It’s up to you if you think the closed print core system is a drawback. For some it is, but for industry it’s often much easier to change the whole print core than to fiddle with the nozzle.
If you’re interested in a full review of the Ultimaker printers, check out our reviews for the Ultimaker 3 and the Ultimaker S5.
Happy printing!
CERTAIN CONTENT THAT APPEARS ON THIS SITE COMES FROM AMAZON. THIS CONTENT IS PROVIDED ‘AS IS’ AND IS SUBJECT TO CHANGE OR REMOVAL AT ANY TIME.