TL Smoother: Should I Add One to My 3D Printer?

TL smoothers are a popular way of improving print quality. Read on to learn what they are, how they work, and whether you should get one.
Solid Steps
TL smoothers are popular little printed circuit boards (PCBs) that are often used in FDM 3D printers to not surprisingly, smooth out the look of prints. In other words, they reduce surface artifacts caused by irregular stepper motor motion, often dubbed “zebra stripes,” “salmon skin,” or “moire.”
They plug into any 3D printer between the stepper drivers and the stepper motors, working their electrical “magic” without any other setup needed. Their low cost, plug-and-play functionality, and seemingly magical effect have made them quite beloved, albeit slightly controversial.
It’s in the Name
It’s unclear how TL smoothers first got their name, but we can guess from how they work that the “T” likely stands for “torque” or “transmission”. In principle, they’re meant to smooth out stepper motor torque and movements for cleaner motion simply by placing diodes in series with the motor.
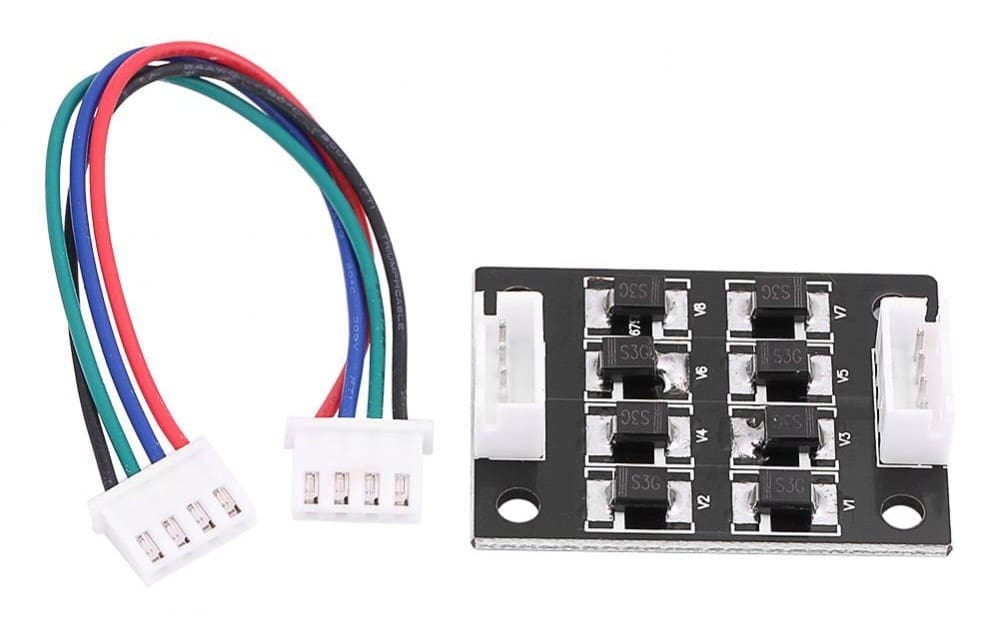
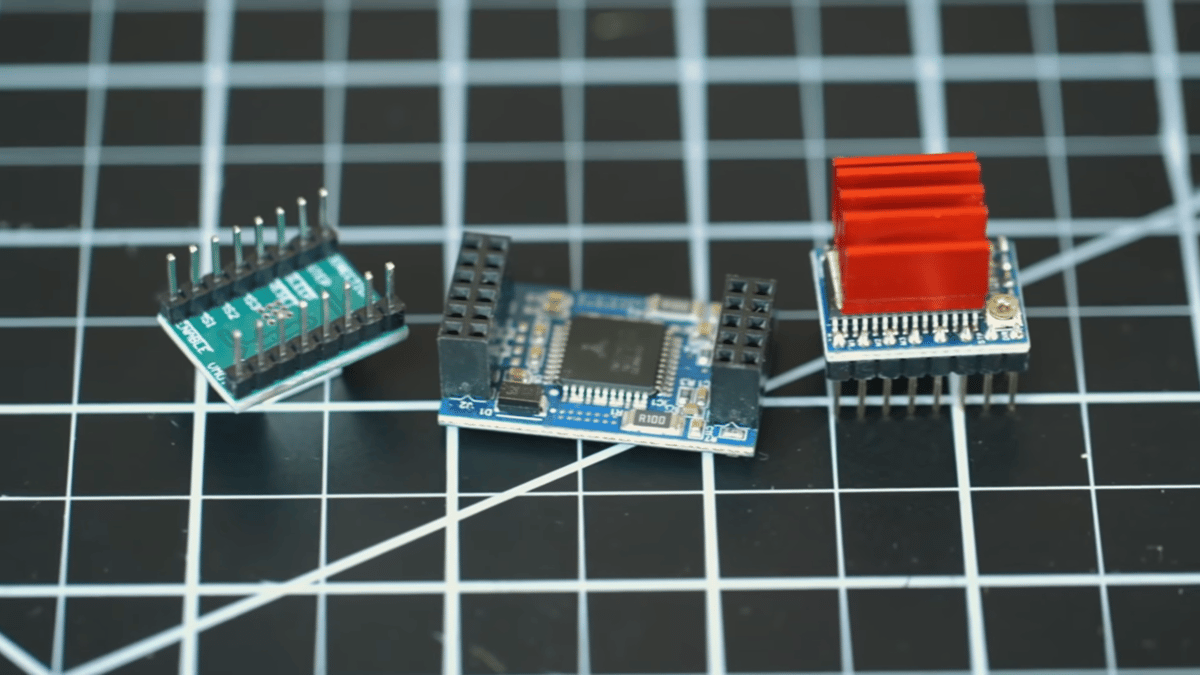
These smoothers are often sold as 4- and 8-diode variants, with the 8-diode ones (pictured above) offering a stronger smoothing effect.
But are these smoothers able to perform the simple magic they claim? Is their smoothening effect actually backed by any science? And, most importantly, should you get one?
Let’s find out!
Zebra Stripes, Salmon Skin, and Moire
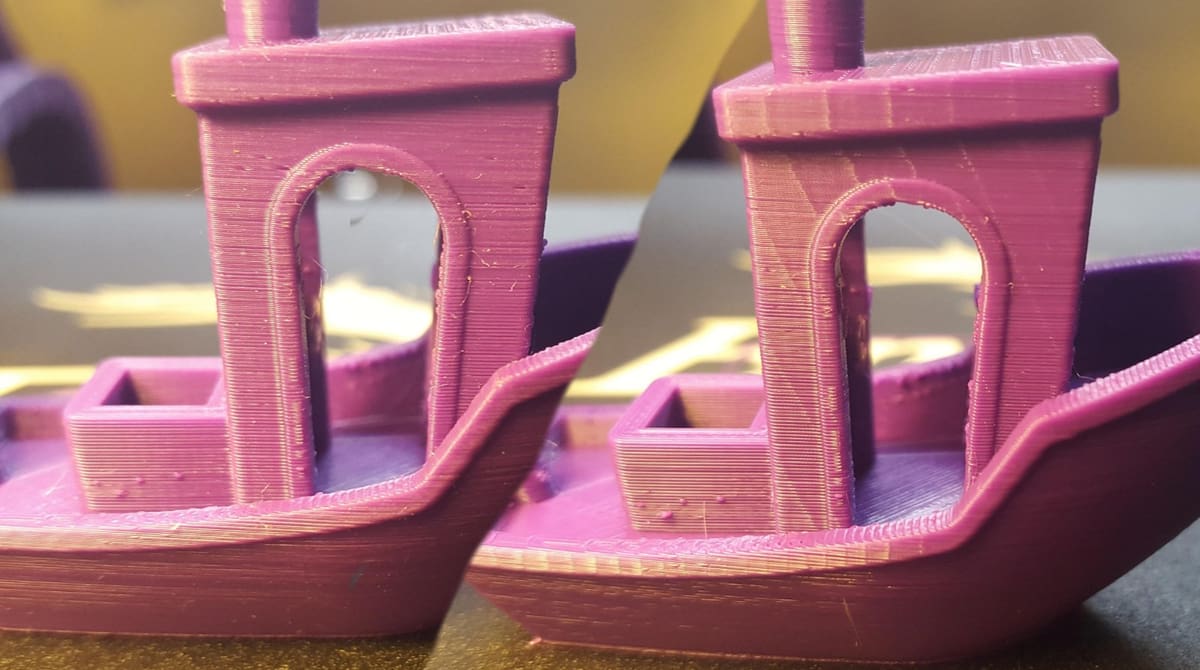
We briefly mentioned that TL smoothers reduce zebra stripes, salmon skin, and moire, but what exactly do these words mean?
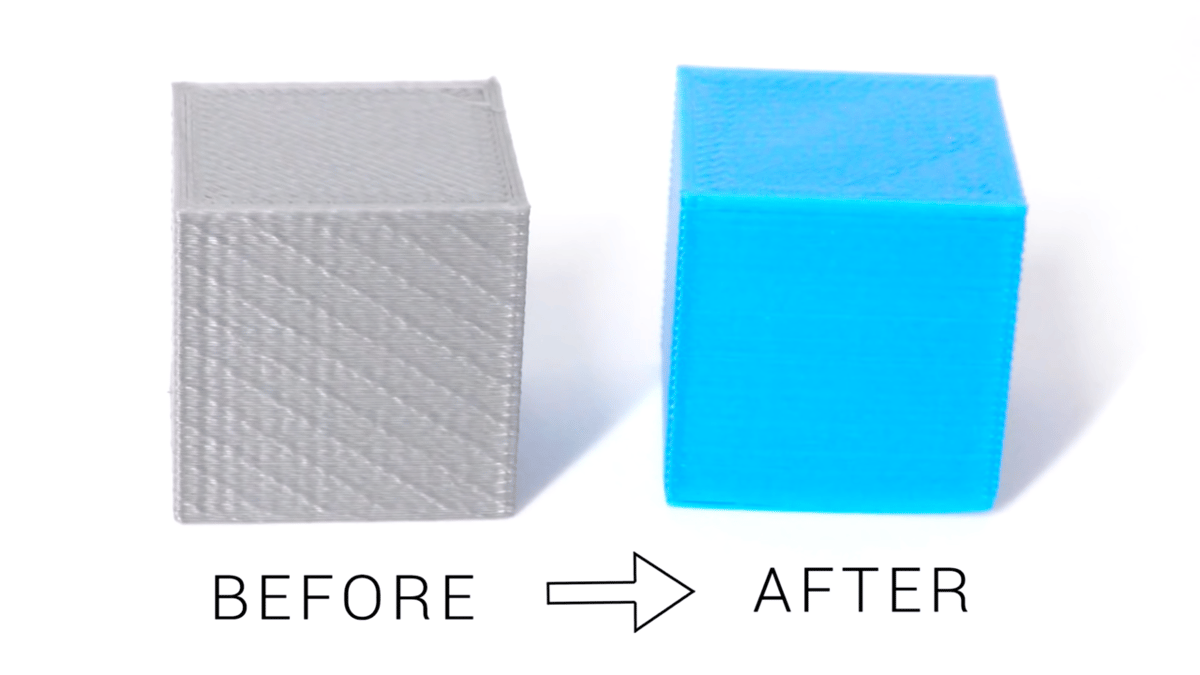
These three interchangeable terms are used to describe surface artifacts caused by irregular stepper motor motion. This can make your 3D prints have unsightly lines scattered evenly across their surfaces as shown in the image above.
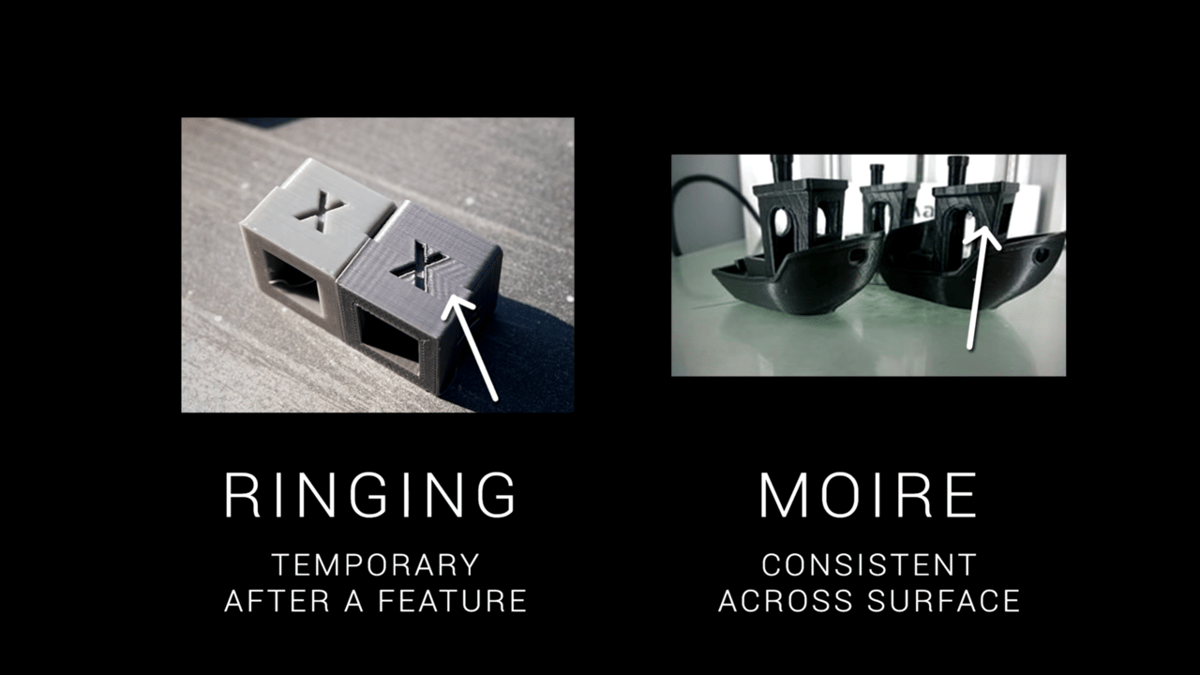
This should not be confused with ringing or ghosting, a phenomenon caused by vibrations, which follows the geometries of your prints and gradually fades away (as with the “X” in the print above). Nor should it be confused with infill showing through the walls of your prints; visible infill is a problem with print settings, while moire is a hardware and firmware issue.
As this artifact is caused by irregular stepper motor motion, most fixes involve some way of making the motors run more smoothly:
- Rounding your steps/mm settings to whole numbers
- Tuning the stepper drivers to deliver the right amount of power
- Adjusting print speed to a sweet spot where the effects are mitigated
Teaching Tech has an excellent YouTube video that details this process. For our purposes, just know that the solutions all require substantial patience and experimentation, not to mention a degree of expertise around the inner workings of 3D printers.
This is where TL smoothers fit in: a solution that involves seemingly no tuning, no experimentation, and very little knowledge of electronics. So, how exactly do they work?
Mythbusting: How It Really Works
You’ll see that most sellers market TL smoothers as adding flyback diodes to your stepper motors to reduce electrical noise. As you may have noticed, however, we said earlier that they add diodes in series with your stepper motors, which doesn’t make them flyback diodes. Clearly, there’s some questionable marketing going on.
The Origin Story
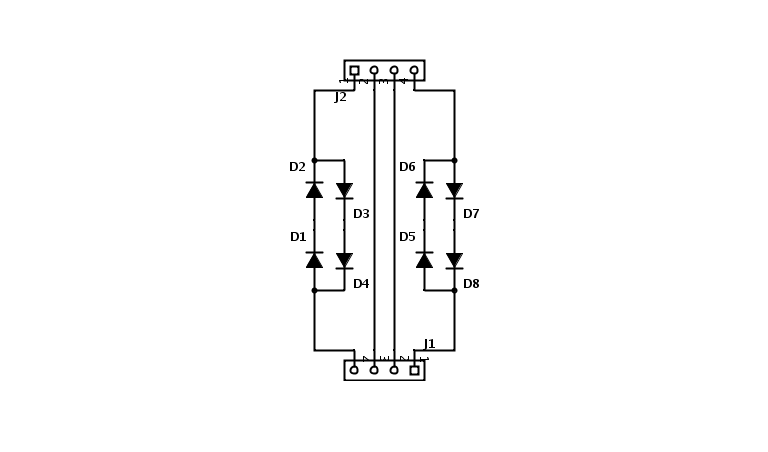
To find out, we’ve traced the origins of TL smoother technology to 2015, when user Schrodinger Z blogged about jerky stepper motor movement and investigated what was going on. As it turns out, the DRV8825 stepper drivers that he used weren’t generating smooth sine-wave signals for the motors. Upon further inspection, it was discovered that the drivers couldn’t properly output signals at low currents, as they were in a so-called “dead zone”.
After this discovery, Schrodinger Z proposed a circuit (pictured above) that would provide a voltage drop to span this “dead zone”. Essentially, this design forces the stepper drivers pump out more current so the motors move at the same slow speed, bypassing the low-current problem. (The energy lost at the diodes is simply dissipated as heat.)
TL Smoothers Today
As it turns out, this same circuit design is what’s used in TL smoothers, which leads us to conclude that TL smoothers were made to address a specific design flaw in DRV8825 drivers.
It’s a good explanation for why many users are confused as to how exactly TL smoothers offer “smoothing.” The slight electrical dampening provided by this circuit is a mere side effect of its main intended purpose, naturally making the smoothers seem questionable under the mislabeled marketing.
Should You Get One?
Evidently, TL smoothers are slightly misused and mismarketed now, which isn’t surprising since they’ll attach to any common stepper motor and stepper driver. So, should you get some for your 3D printer? Well, it all comes down to your stepper drivers.
It’s a yes if you’re running DRV8825 stepper drivers. This was what TL smoothers were designed to do: fix a design flaw in the DRV8825. Your mileage may vary based on your printer’s power supply, but you’ll likely see noticeable improvements in print quality.
It’s a no if you’re running newer Trinamic stepper drivers. Trinamic drivers have many “smart” features built in that don’t suffer from the same issues as the DRV8825 and already counter electrical noise. As a post from Trinamic notes, adding TL smoothers doesn’t provide any significant benefit; it only increases power consumption and heat generation.
It’s a maybe if you’re running other drivers. Other stepper drivers might not have the DRV8825’s design flaws, but they may benefit from the slight electrical dampening created by the TL smoother’s circuit. Considering the smoothers’ low cost (~$8-15 for packs of 3 or 4), it doesn’t hurt to try it out and let the results speak for themselves.
Just keep in mind that any noise that the TL smoothers do cut out is likely caused by some other design flaws in your printer’s electronics, which may be harder to fix.
Buying or DIY-ing
At this point, you probably already know if you want a TL smoother, but there’s still one more question: Do you buy them, or do you DIY?
To Buy
For most users, it’s much easier and cheaper to directly buy. The smoothers are usually sold in packs of either 4-diode (less smoothing) or 8-diode (more smoothing) variants.
With the simplicity of the electronics at hand and the countless manufacturers available, it’s hard to go wrong with any top rated options. If you need a recommendation, the smoothers from Triangle Labs have been found to be of sound quality (~$13 for a pack of 4).
DIY
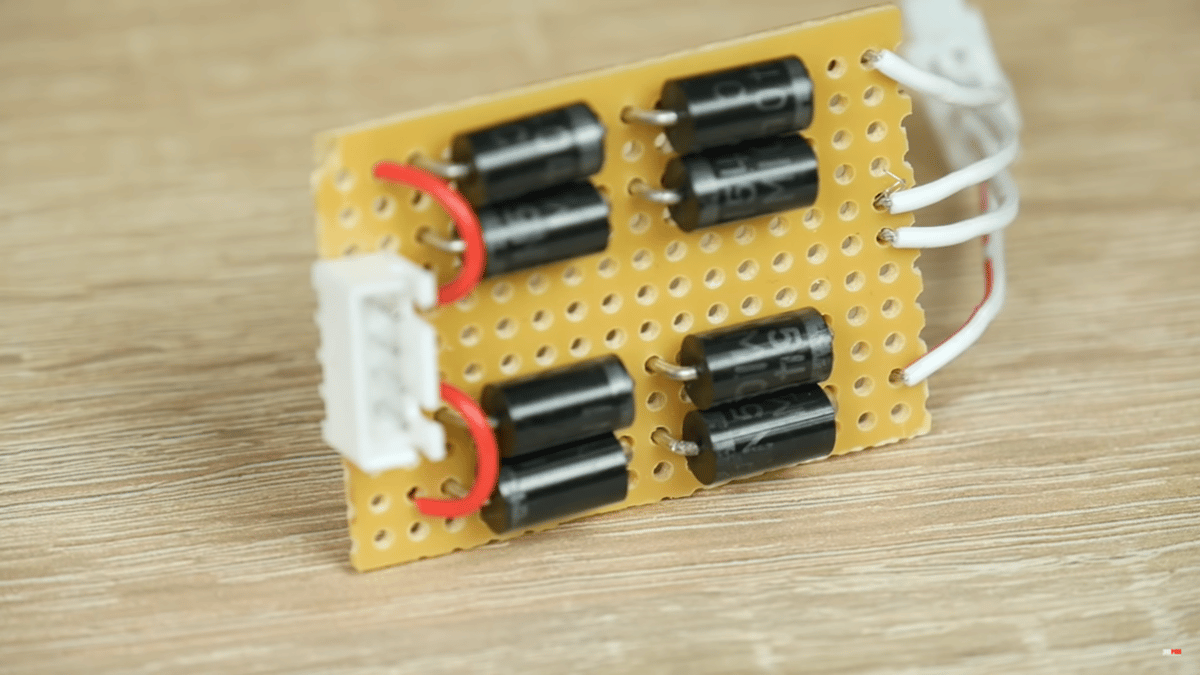
Some users, however, might be tempted to DIY their own boards after seeing the simplicity of the circuit diagram. It’s certainly possible and not too much work (see above), but unless you already have the parts on hand, DIY-ing may actually end up being more expensive.
To DIY, you need some diodes (anything from 1N5404 to 1N5408), some connectors that match your 3D printer’s stepper motors, wire, and a prototyping board.
Simply solder the diodes and connectors as depicted in the circuit diagram from earlier and add wire as necessary to make the connections. If you need help reading the circuit diagram, Sparkfun has a handy guide, but, in that case, directly buying TL smoothers will likely save you time and hassle.
Installation
Once you have your TL smoother, you’re done with the hard part!
Now, to install:
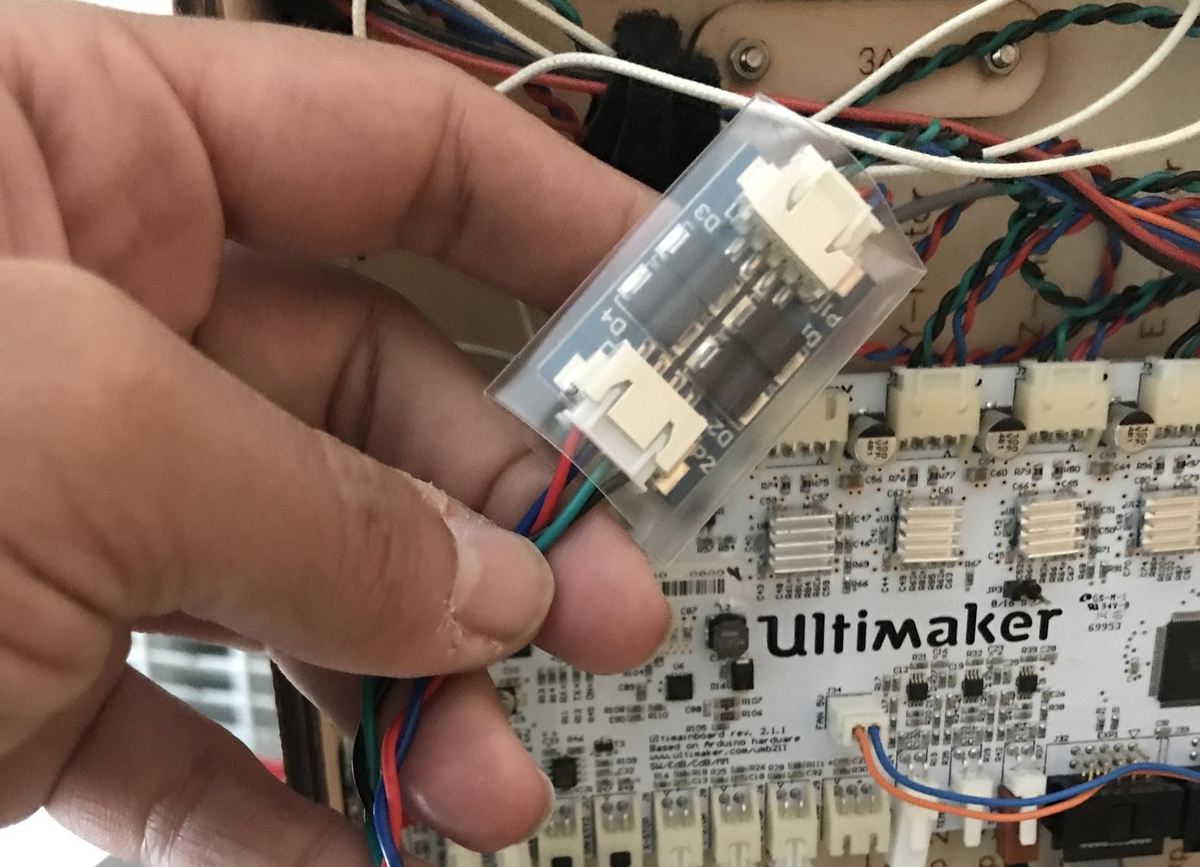
- Unplug your printer.
- Open your 3D printer’s electronics housing.
- Find your stepper drivers (your motors should be plugged directly into them).
- Unplug each motor and rewire it such that the motor connects to a TL smoother and the TL smoother to the driver (as pictured above).
You should end up with each TL smoother plugged in between a motor and its corresponding driver. Be sure to give the smoother some insulation (heat shrink, as used above, is a good choice) to prevent shorts, and you’re good to go!
Case Closed
Hopefully, this article cleared up some of the haze surrounding TL smoothers and offered some helpful advice for you and your 3D printer.
If you’re having any other issues with your prints, you can always check out our comprehensive troubleshooting guide.
Happy printing!
Lead image source: RogueCanoodle via Reddit