
Tinkercad: How to Split an Object in 5 Easy Steps

Many models exceed standard 3D printer build volumes. Check out our tutorial for Tinkercad, and split objects easily!
Once you learn how to split objects in Tinkercad, you’ll have unlocked a powerful tool in your 3D printing journey. For the unfamiliar, Tinkercad is a user-friendly, web-based 3D modeling software developed by Autodesk. It’s designed to make 3D design and creation accessible to beginners as well as more advanced users. With a simple drag-and-drop interface, it allows users to create, modify, and combine basic shapes and objects, making it an ideal platform for learning and prototyping.
Splitting objects within this platform is a fundamental skill that opens doors to endless creative possibilities. Whether you’re aiming to optimize print quality, incorporate intricate details, or assemble large structures that don’t fit your print bed, object splitting is your ticket to 3D printing excellence.
In this tutorial, we’ll walk you through the process of splitting an object in Tinkercad, ensuring that your 3D prints are produced in the best possible manner. While there are many ways to “split” an object in Tinkercad, this method works for both simple and complex objects. If you’re entirely unfamiliar with Tinkercad or have yet to set up an account, you may want to take a moment to look at this overview before moving on with the tutorial.

Getting Started
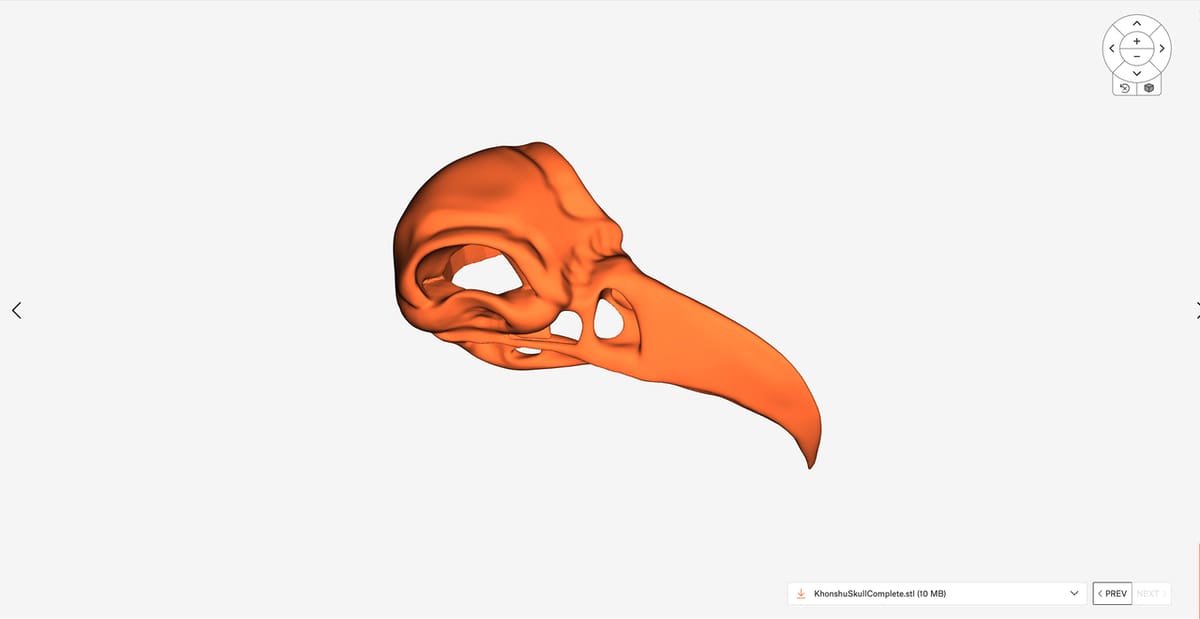
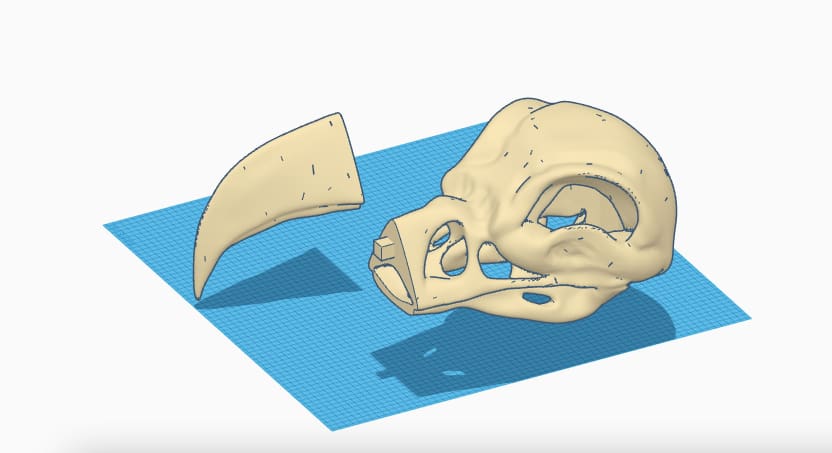
To demonstrate how to split objects in Tinkercad, we’ll be using a wearable Khonshu helmet model from Printables user joemag3D – specifically the file entitled “KhonshuSkullComplete.stl”. Feel free to download the model if you’d like to follow along or use a model of your choice.
Although we’re using an .stl file for this example, Tinkercad can handle .stl, .obj, and .svg files. All, however, are limited to a 25-MB file size for importing. Anything bigger than that will not load.
After you have an appropriately sized file saved to your computer, you’re ready to import it into Tinkercad. If you aren’t already logged in, sign in to your Tinkercad account to access the editor. Depending on how you set up your account, you’ll either choose educator, one of the student options, or a personal account.
Step 1: Import the Object
After logging in, you’ll be presented with Tinkercad’s landing page for your account.
- Click the “+ Create” blue button, then select “3D Design” from the menu that pops up.
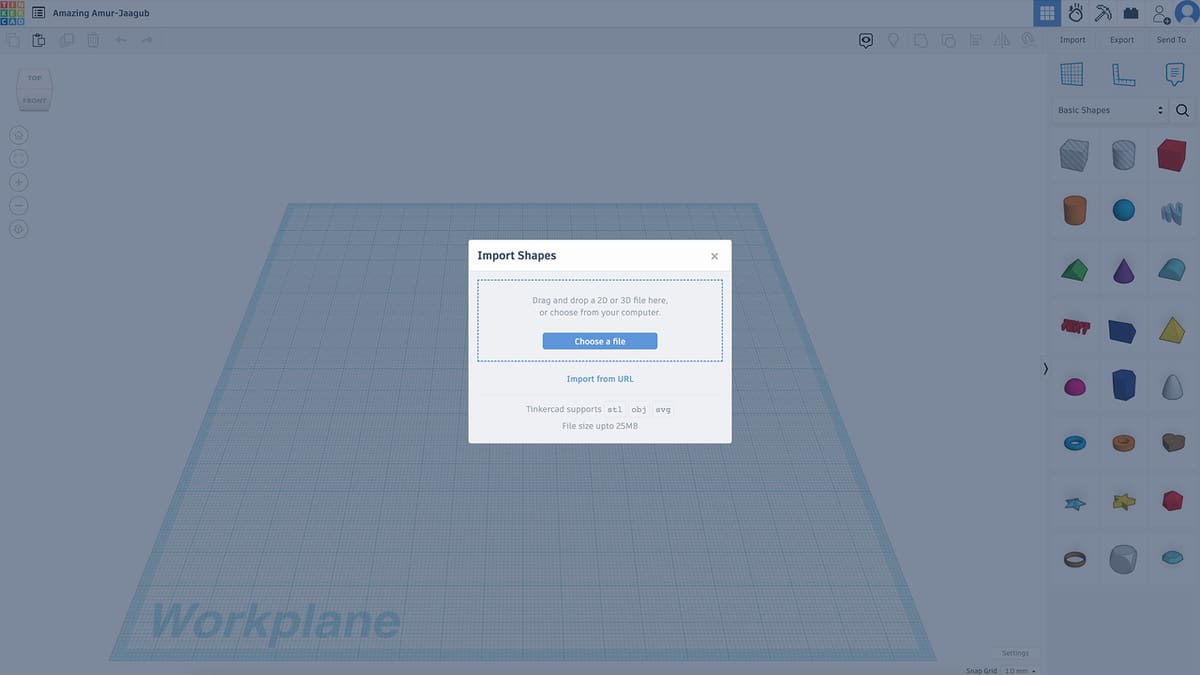
- Click the “Import” button on the right-hand side of the menu bar, then select the STL file you want to split.
- Once imported, position and scale the model as needed for your project. To do this, simply click and hold the model with the left mouse button and move to your desired location before letting go. You can scale it by manipulating the scaling boxes that appear once you’ve selected the model or by entering actual dimensions in the dialogue box that appears when moving the cursor over the scaling boxes.
- Lastly, duplicate the model by clicking the “Duplicate and Repeat” icon on the left-hand side of the menu bar (or by pressing “Control + D”). Leave it exactly on top of the original. This step is essential for splitting the model, as you’ll see below.
Before moving on, we should offer a word of caution. Have patience. The platform is web-based, which means there may be a slight lag as you import files, especially large ones like the Khonshu helmet. It’s approximately 600 x 300 x 300 mm and around 10 MB!
Step 2: Add a Splitting Shape
In order to split objects in Tinkercad, we’ll need a splitting shape, which is basically a geometric figure that defines the area where an object will be broken into different halves. You can use any shape you’d like, then position and scale it so that it encompasses and intersects with the part of the model where you plan to split it.
Tinkercad’s “Hole” function plays a key role in splitting objects. It’s a Difference Boolean operation, which subtracts the volume of the splitting shape from the original object. This is particularly valuable when you’re working with intricate designs that need to fit together seamlessly after printing.
Here’s how to do it:
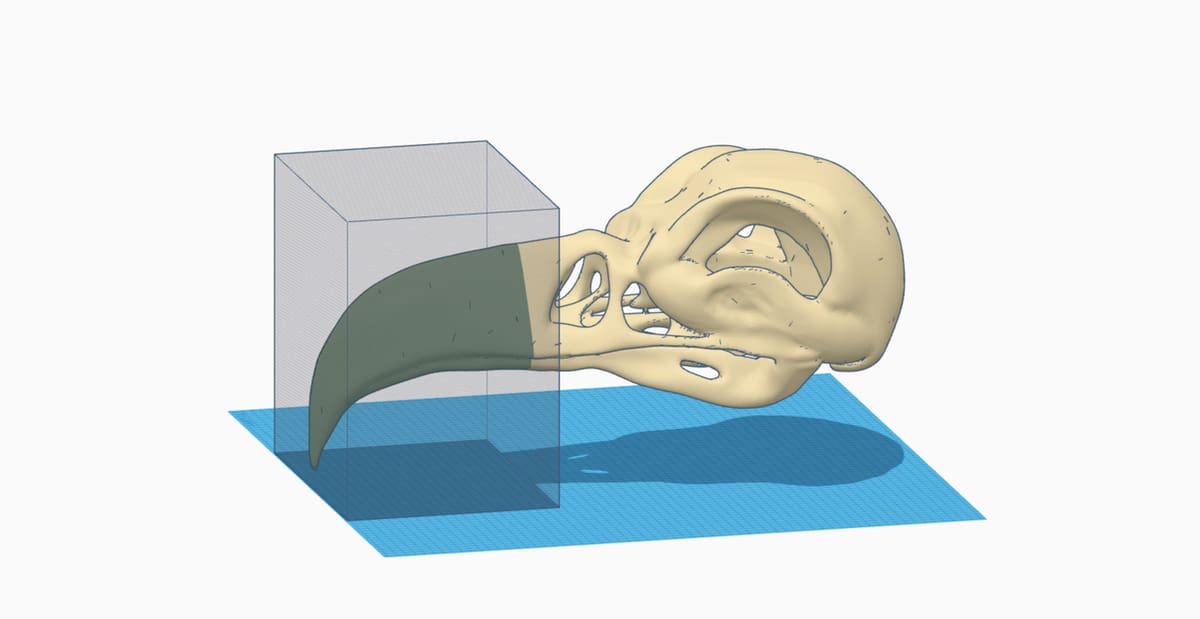
- Choose a suitable shape from the Shapes Library (the panel on the right-hand side of the UI) that matches your splitting needs. We’ll go with a simple box.
- Position and scale the shape to envelop only the region where you intend to split the object.
- Once positioned and scaled as desired, select the shape, then click “Hole” from the floating menu on the top right. The splitting shape will be filled with a gray diagonally striped pattern.

Now, we need a splitting shape for the rest of the model. Basically, we’ll use two boxes to split the object, so we can simply duplicate the shape we just created and use the duplicated version to envelop the rest of the object. This will ensure a perfect split along our chosen plane.
- Duplicate the splitting shape you just created by pressing “Control + D”.
- Select the shape, then position it to align with the split plane of the other splitting shape.
- Resize the newly created shape so that it surrounds the object, ensuring it’s large enough to fully encompass the object.
Step 3: Group
Now that we have a splitting shape, we can use it to manipulate our objects – remember that we made a duplicate of the original object and left it exactly in the same place. In this step, we’ll merge the splitting shapes with the objects to create the split parts of the model.
- Select the object and one of the splitting shapes while holding down the Shift key. It may be easier to select the object if you hide the other splitting shape by clicking it, followed by “Hide Selected” (the lightbulb icon) in the floating shape menu.
- Click the “Group” icon from the menu bar above the viewport (or simply press “Control + G”). As the splitting shape is set as a “Hole”, the Group function will execute the Boolean operation, merging the model with the splitting shape.
- Click the “Show All” lightbulb on the menu bar above the viewport to show the other splitting shape.
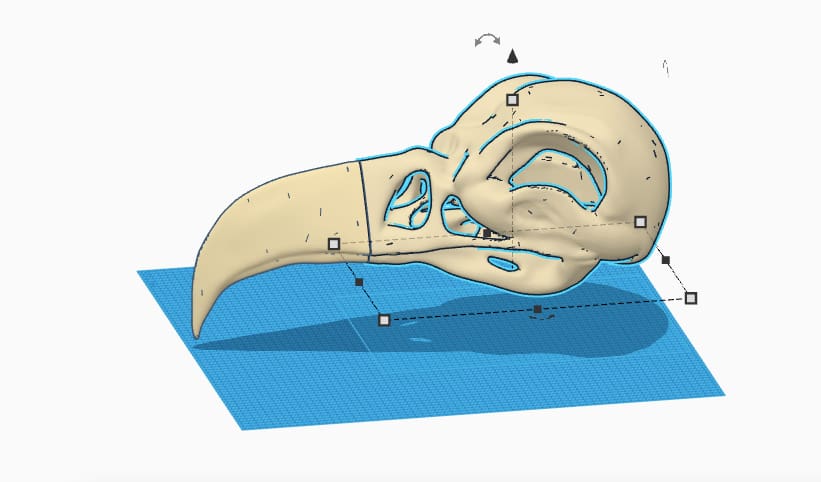
- Repeat steps 1 and 2 for the other splitting shape. That object should now be split along the splitting plane.
- Finally, verify that the object has been split into two separate parts by selecting and moving the individual parts.
If you wish to make additional slices to further split the object, repeat the process for each slice you want to remove, ensuring you duplicate and group the necessary boxes and objects.
Step 4: Add Keying for Assembly (Optional)
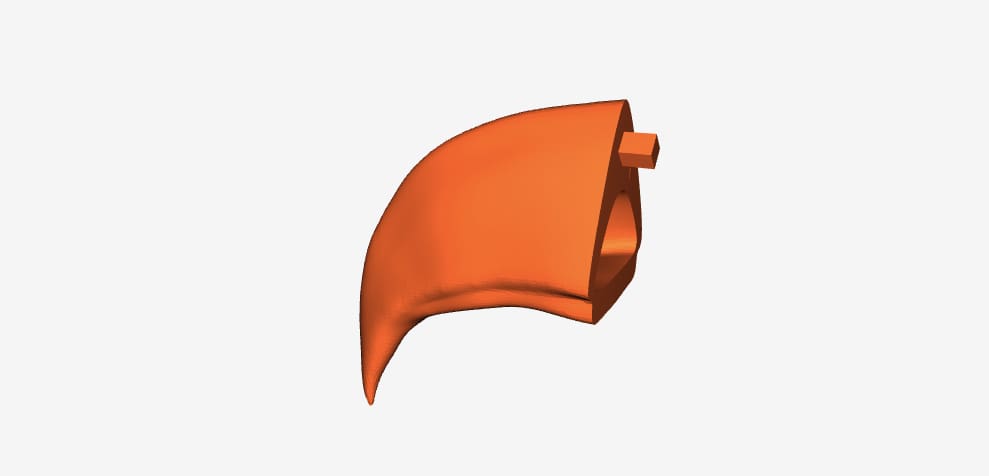
Maintaining alignment while assembling 3D printed parts can be difficult when an object is divided into several components, especially complicated ones like the Khonshu helmet. Keying helps to ensure the correct alignment and seamless fitting together of split parts. It involves creating complimentary features on split objects that act as puzzle pieces that guide the assembly process.
This isn’t an essential step, but here’s how it generally works:
- Identify keying points: Analyze the split parts and identify strategic points where you can place keying features. These could be specific locations where the parts naturally align.
- Create keying structures: Design corresponding keying structures at the identified points. These structures can take the form of protrusions (like pegs). Whatever shape you go for, make sure to design them so that they easily interlock when the parts are aligned.
- Duplicate keying structures: To achieve perfect symmetry, duplicate the keying structures on the opposing split part. This means that if you have a peg on one part, you should have a corresponding hole on the other part. Use the alignment tools to ensure you keep things where they need to be.
- Test the fit: Before finalizing your design, it’s a good practice to test the fit of the keying structures virtually. Simply align the split parts in Tinkercad and ensure that the keying structures interlock as intended.
To further illustrate this technique, take a look at the additional Khonshu helmet .stl files available under the Files tab of the model’s Printables page. The designer has split the single large object into five component parts, and some parts have rectangular protrusions that align with rectangular holes on corresponding parts.
Step 5: Finalize the Parts for 3D Printing
Before sending your split components to the 3D printer, make sure they’re optimized for printing. This step includes several crucial tasks that will help ensure your split components not only look great but also convert smoothly from the virtual to the physical world.
Remember that your attention to detail at this stage determines the success of your final printed object, so take the time to make sure your divided components are prepared for a straightforward 3D printing process. You’ll want to think about the following:
- Optimize for printing: Assess the split parts for printing suitability. This includes looking for potential concerns like overhangs, complex geometries, or intricate details that could compromise print quality and make modifications as needed.
- Refine geometry: Fine-tune the split part geometry, eliminating any unwanted details that could affect print quality.
- Add supports if necessary: At this point, you’ll also need to determine whether you should use Tinkercad’s support structures function to design supports or the supports tools in your slicer.
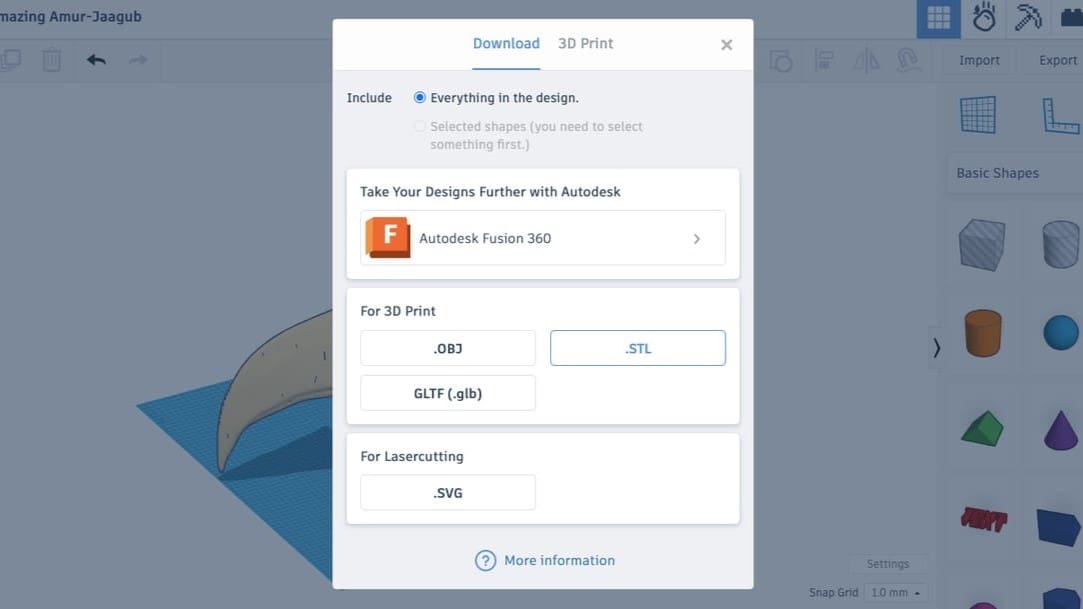
Once you’ve optimized the model, click “Export” on the menu bar. In the Export dialog box, you’ll have the option to export everything as one STL or just your selected objects. You can also select between a few file format options – .stl, .obj, and .glb – under the “For 3D Print” section. The “3D Print” tab at the top of the dialog box allows you to send the model directly to your printer from within Tinkercad (depending on your printer model) or to a 3D printing service.
License: The text of "Tinkercad: How to Split an Object in 5 Easy Steps" by All3DP is licensed under a Creative Commons Attribution 4.0 International License.