Making a Connection
Streaming services are now the norm. While Netflix and Disney+ have taken over our TV screens, Spotify is how people listen to music. In fact, it’s one of the largest music streaming services providers in the world. As of June 2021, there are over 365 million users, 165 million of which are paid subscribers.
Besides a wide variety of music available on the platform, paid users are also able to use Spotify Connect. With this feature, the current listening session is synced to the cloud, so you can connect any of your devices to control the music. For example, you can play your music from the computer, then switch songs from your smartphone. Now, imagine creating your own dedicated listening device and using Spotify on it.
With the Raspberry Pi, you can do just that! The Raspberry Pi is a single-board computer sporting a 40-pin GPIO (general purpose input/output pins). Wires can be connected directly to the Raspberry Pi through its GPIO pins, and various gadgets and projects can be created. What’s more, it has huge educational support including a range of HATs and pHATs – hardware that can be plugged directly on top of the Pi’s GPIO pins. One such add-on is the pHAT Beat, sporting dual audio amplifiers and terminals to connect speakers to.
On the software side of things, there’s Raspotify, a Spotify Connect client for the Raspberry Pi.
In this guide, we’ll walk you through the steps to turn your Raspberry Pi into a Spotify Connect device. First, we’ll discuss possible hardware solutions, including the use of a Raspberry Pi. Then, we’ll install Raspotify and configure its settings. Finally, we’ll go through the one-click step to connect your Raspotify device to Spotify. Let’s get started!
Setting Up the Hardware
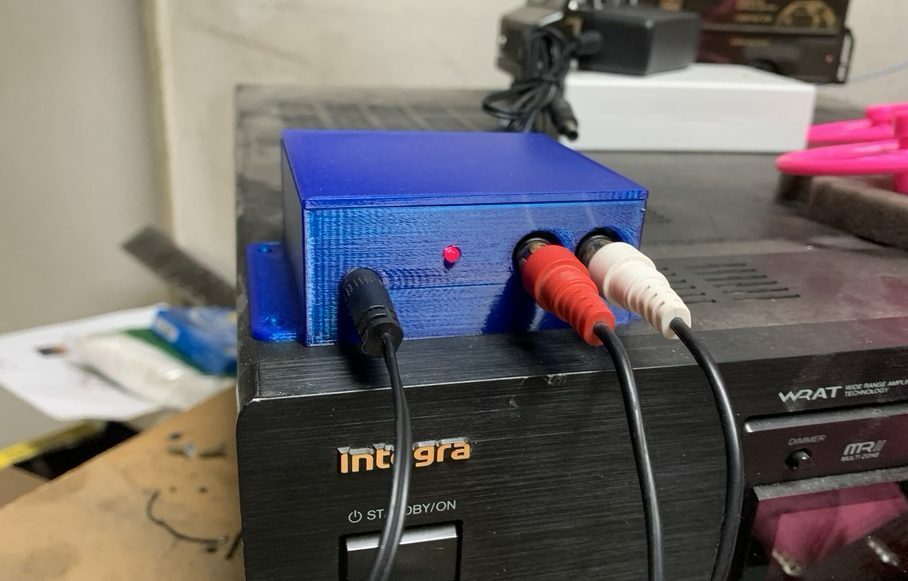
A quick way to get started is with the Pimoroni pHAT Beat and a set of 3” 4-Ω (5-W) speakers , and a 3D printed case. On its own, the speaker may not be very loud. However, you could chuck in an audio amplifier to boost the volume. Alternatively, for a louder or multi-speaker setup, change the speakers in your build: Other examples of 3D printed Raspberry Pi speakers include the Portable B&O-Create Speaker, Desktop Loudspeaker, and B&O Tile. All files are available for free on Thingiverse.
There are a variety of ways to create your set of Raspberry Pi speakers. There are builds you can follow that were designed for other purposes, but can still be turned into a Raspotify device, like Sphere, Hex One, and HiFiBerry Touch. All of these use B&O speakers, HiFiBerry, and a Raspberry Pi.
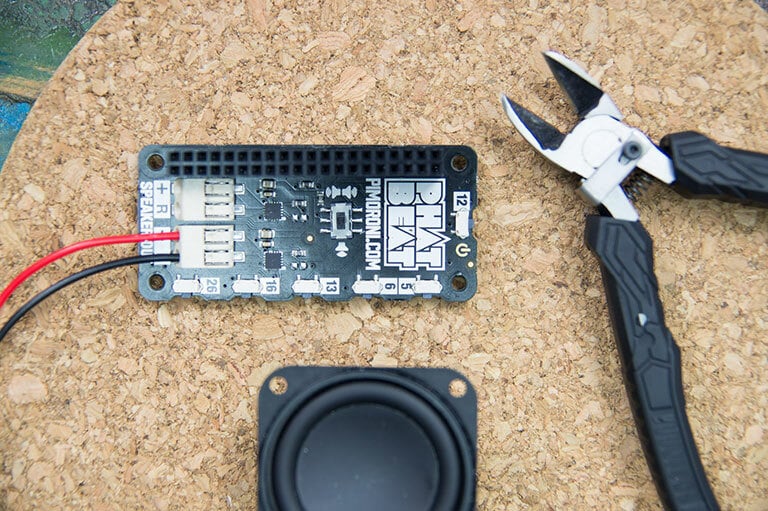
To connect the speakers, simply push them into the terminals of the pHAT Beat (pictured above). It’s critical to connect the red wire to the + terminal, and the black wire to the ground terminal. It’s also important to make sure that the wires have been firmly pushed into the terminal. Finally, plug in the pHAT Beat on top of the Raspberry Pi’s GPIO pins; the pins should be aligned to the 40-pin GPIO.
Installation
Once the hardware is connected, open up the terminal window in Raspberry Pi OS.
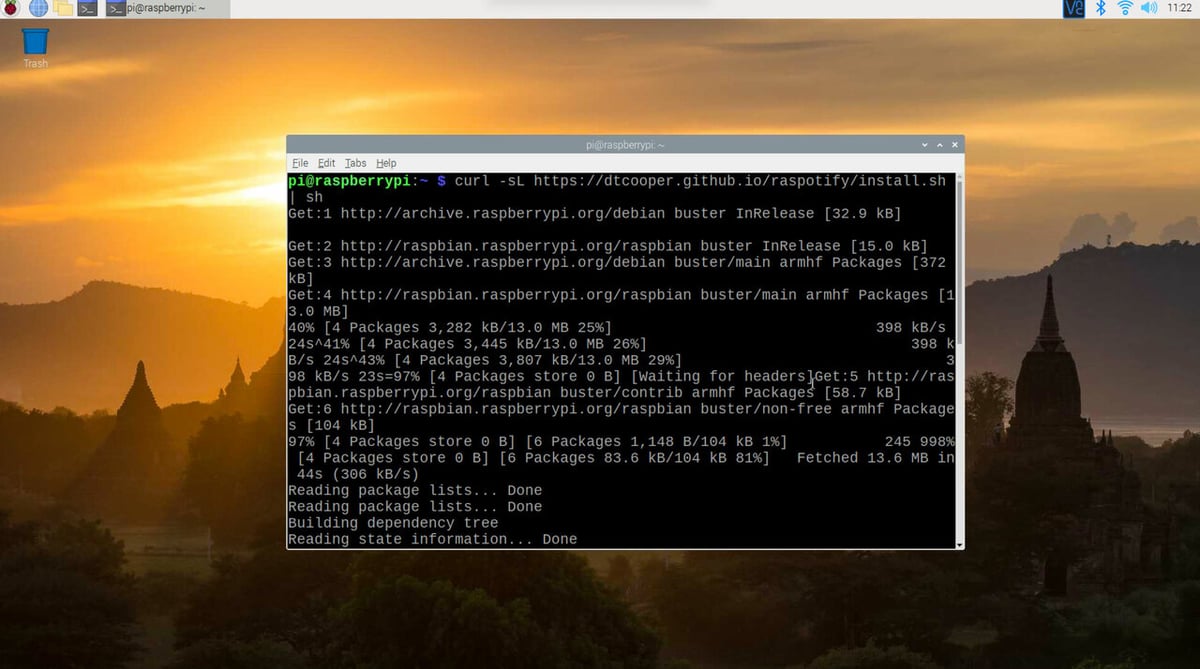
To install Raspotify, a Debian package and its associated repository, we’ll use the CURL command, which is an abbreviation for “client URL request library” (used to transfer data from one place to another).
We’ll also add -sL after the cURL. What this does can be seen in the curl documentation.
- ‘s’ stands for silent and activates quiet mode, which doesn’t show progress meter or error messages. Essentially, it makes CURL mute. It will still output the data you ask for, potentially even to the terminal/stdout, unless you redirect it.
- ‘L’ stands for location (HTTP). If the server reports that the requested page has moved to a different location (indicated with a Location: header and a 3XX response code), this option will make CURL redo the request on the new place.
So go ahead and install the Spotify Connect client on your Raspberry Pi by typing the command:
curl -sL https://dtcooper.github.io/raspotify/install.sh | sh
Configuring
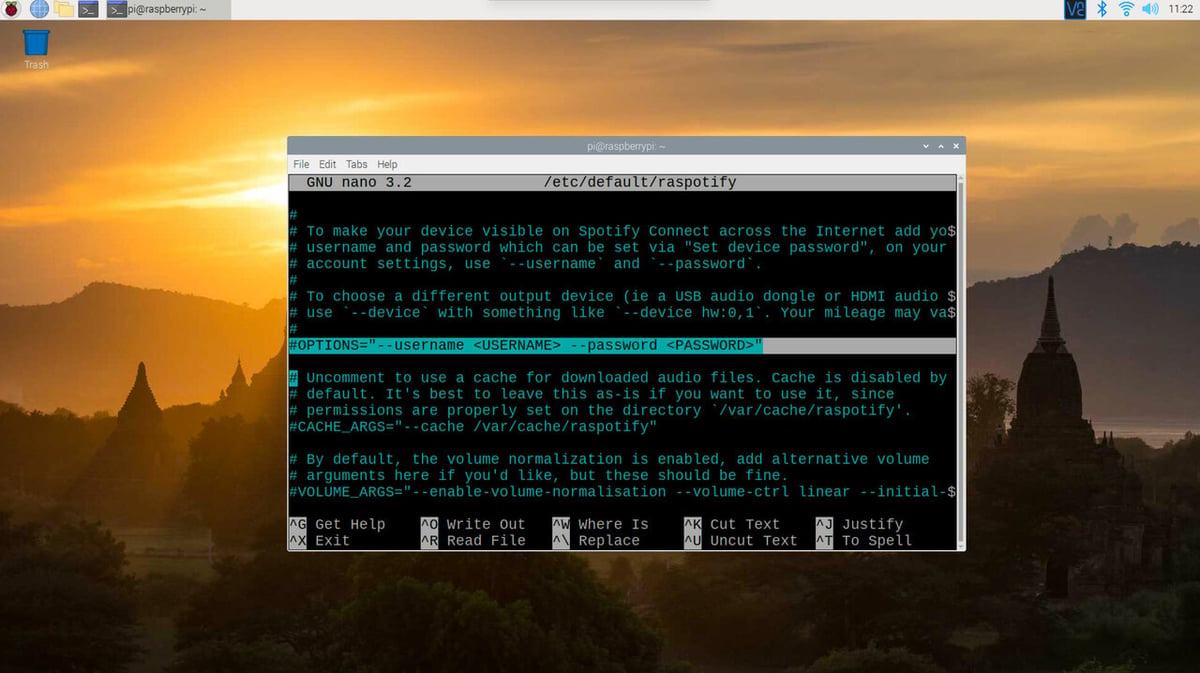
After the installation is complete, use the Nano editor to edit the settings in Raspotify. You can do so with the following command:
sudo nano /etc/default/raspotify
Within the nano editor or another editor of your choice, find the line that states:
#OPTIONS="--username <USERNAME> --password <PASSWORD>"
For this setting to apply, you must first uncomment this line (remove the # symbol at the start).
Now, simply enter the username and password of your Spotify account where indicated, then save the file by pressing Ctrl + O. To exit the Nano editor, type Ctrl + X.
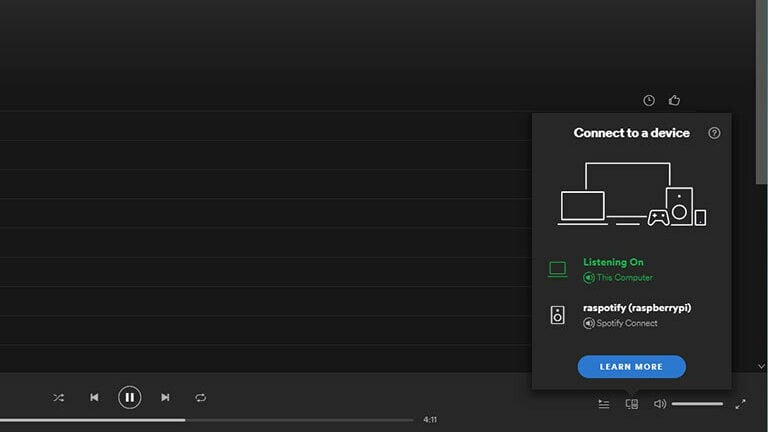
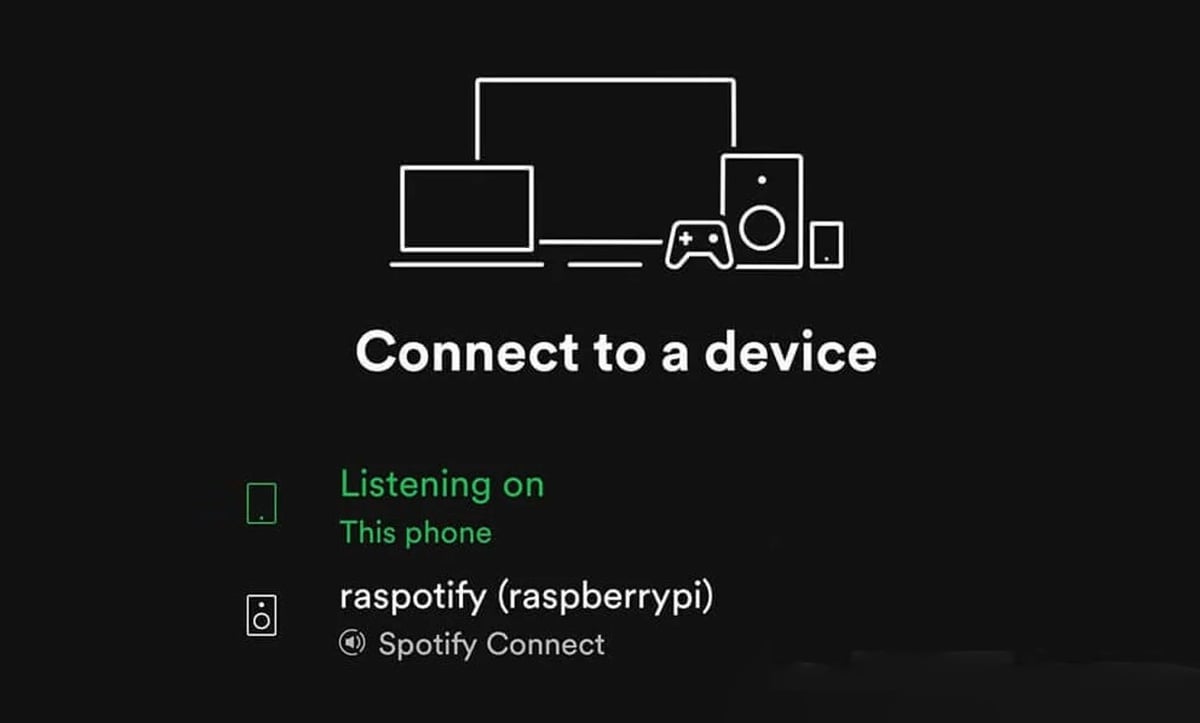
Now open up Spotify on your computer or mobile device.
There’s a button on the left, next to the volume control. This is the Devices Available button. Click on it. Select “raspotify (raspberrypi)” to connect to the Spotify Connect client. If it’s complete, you’ll hear the music playing through the Raspberry Pi-powered device!
Lead image source: sephtronics via Thingiverse
License: The text of "Raspotify: How to Use Spotify Connect on a Raspberry Pi" by All3DP is licensed under a Creative Commons Attribution 4.0 International License.