Raspberry Pi Smart Mirror: How to Make a Magic Mirror

A Raspberry Pi smart mirror combines a reflective display with customized features. Read on to learn more about how to build one!
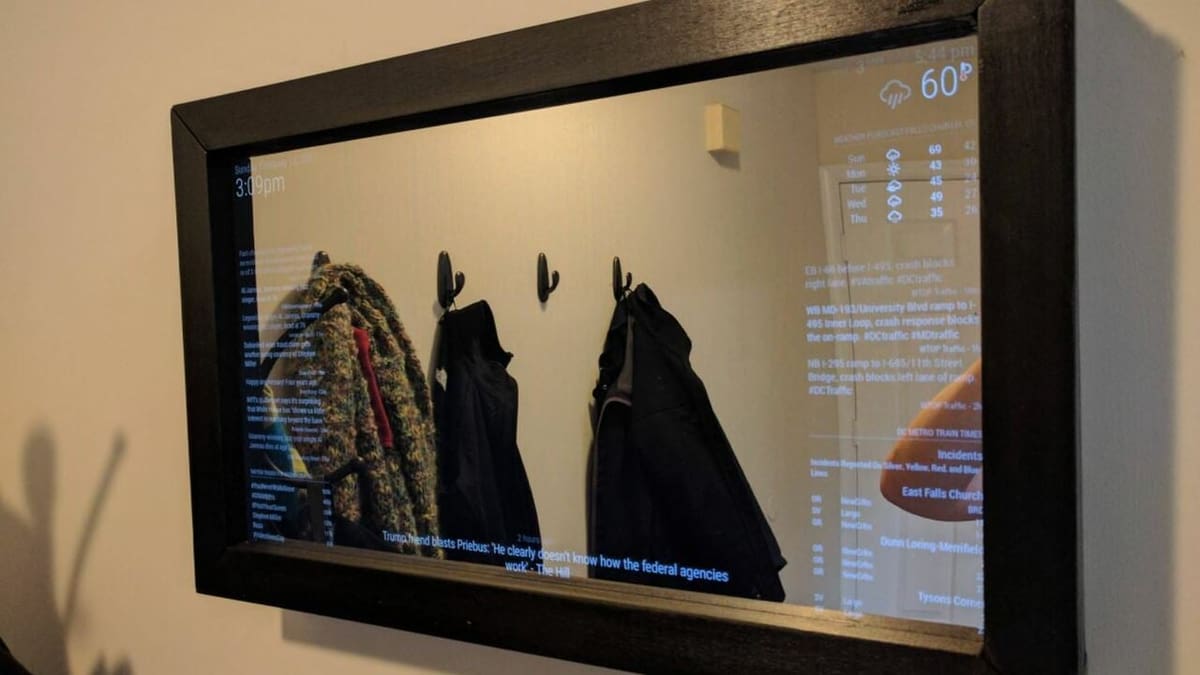
Whether in the bathroom, closet, or bedroom, chances are you probably use a mirror regularly for tasks like getting ready for the day or trying on new clothes. However, your mirror’s capabilities don’t have to stop at simply reflecting light.
With a Raspberry Pi and a few other components, you can make a customizable smart mirror that projects a computer display over a traditional reflective mirror. Some possible uses include displaying the time, a calendar, picture, or other applications in your reflection. These features can help make you more productive or simply allow you to integrate more smart tools into your home.
In this article, we’ll provide a broad tutorial of how you can make a smart mirror with a Raspberry Pi. As there are many different ways to build one, we won’t go over every nitty-gritty detail in the building process, just the main steps shared by most guides, directing you to additional resources along the way.
Before we get into the specific steps, let’s first discuss what you’ll need to build a smart mirror.
Building a Smart Mirror

The first DIY smart mirror project was started around 2014, but only really began to grow in popularity in 2016. As the concept has become more popular, purchasable smart mirrors have also been released, such as those from Capstone Connected. Still, building your own smart mirror is the most customizable and least expensive option, costing anywhere from $200-500.
DIY-ing a smart mirror is a bit complicated, and it involves a fair amount of physical and digital components. We’ve made a list of the principal components you’ll need to make one – but not every single screw or bolt you might need.
Using a Raspberry Pi is an easy way to make a smart mirror, as they’re open-source and very versatile. There are a couple of software options that enable the Pi to function as a smart mirror. The most popular is using a free, open-source program called MagicMirror2. This program runs on the Raspberry Pi OS and offers different features for your screen, such as a calendar.
DAKboard is another service that provides a customizable display program. The displays can be used on any wall-mounted display, not just reflective screens. Using DAKboard for your smart mirror involves a slightly different process than MagicMirror, as it’s an operating system, not an application for Raspberry Pi OS.
In this article, we’ll focus on using MagicMirror2. If you’re interested in going the DAKboard route, check out Thomas Sanladerer’s guide.
What You'll Need
Physical
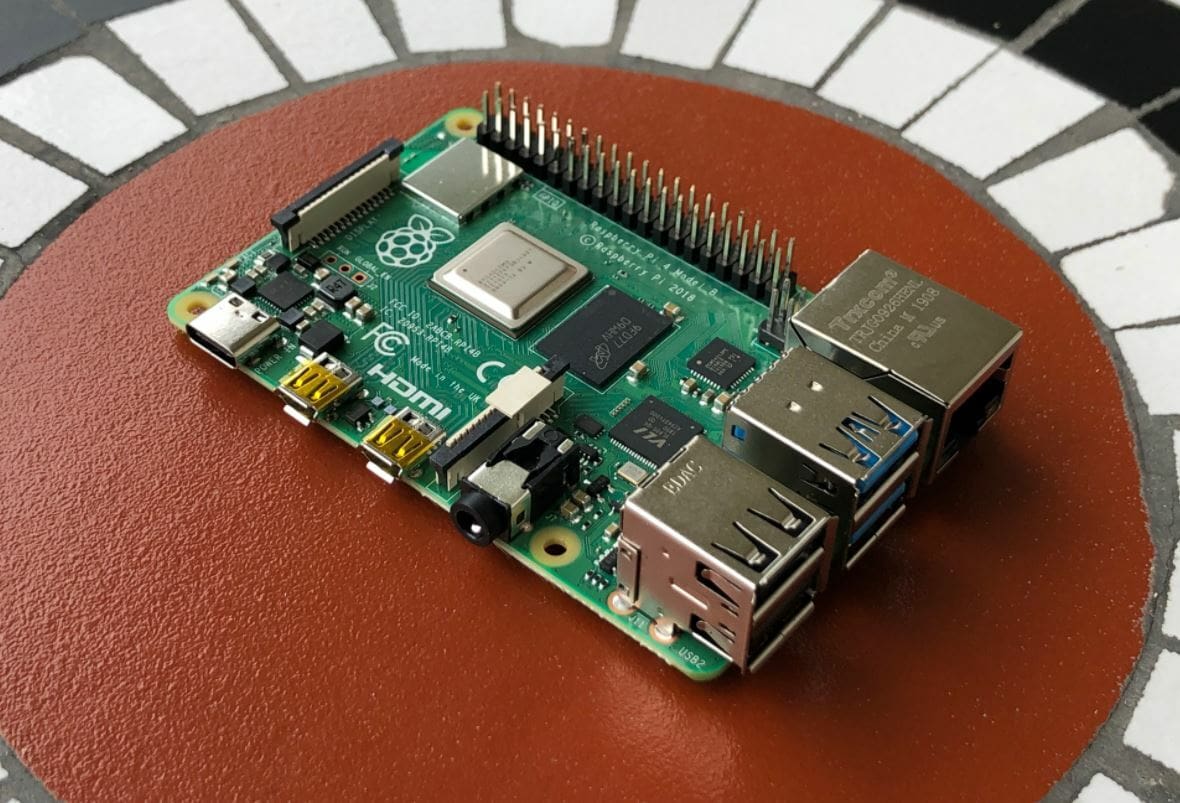
- Raspberry Pi board (e.g. Raspberry Pi 2, 3, 4, or other configuration of these models)
- Pi power cable
- Pi board case
- MicroSD card (at least 16 GB to be safe)
- Pi-compatible LCD, computer monitor, or TV screen (preferably a pretty thin one with an HDMI or another Pi-compatible port)
- HDMI cable
- USB keyboard
- Wooden beams for the frame (You can also use a picture frame if it’s the right size)
- Trim for the frame
- Two-way glass mirror (needs to be similar in size to your screen and frame)
Digital
- Raspberry Pi OS
- MagicMirror² program
- Raspberry Pi Imager (on your computer)
Other Parts
The following are a few extra parts that might make the build or mounting process easier:
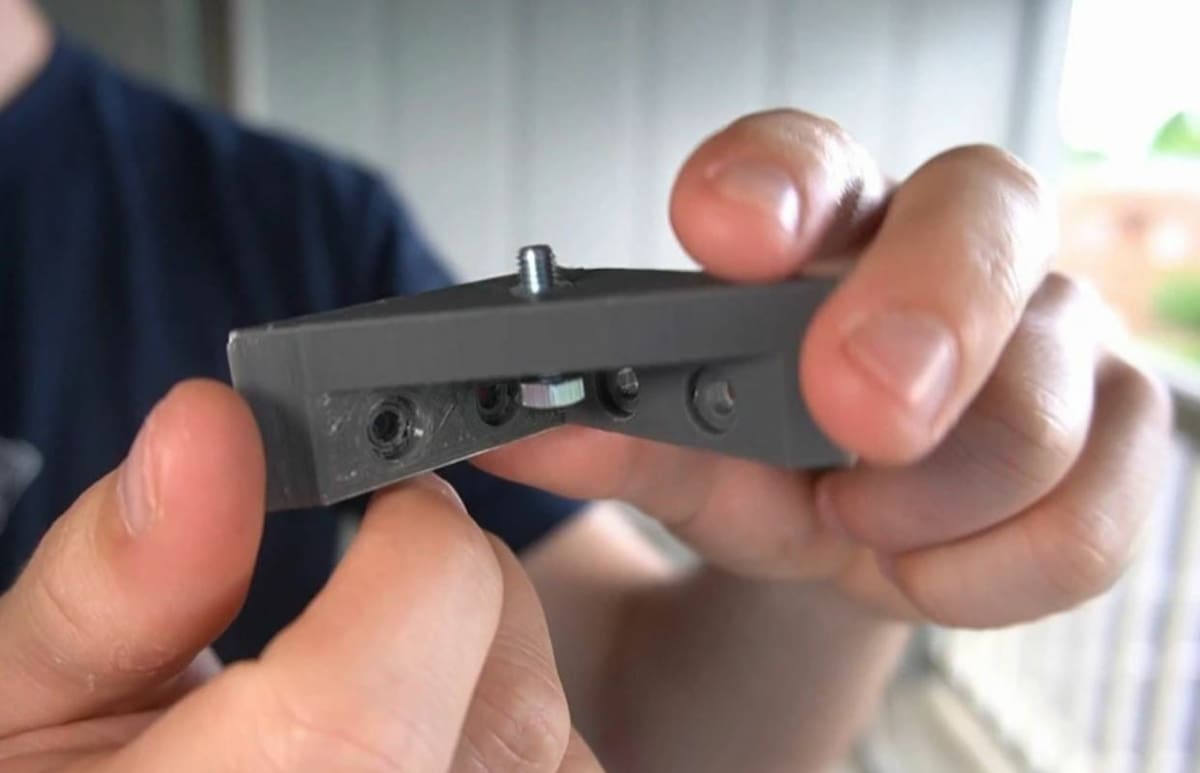
- Mounting brackets (for holding the LCD, mirror, and frame in place; can be 3D printed)
- Duct tape
- Zip ties
- Wood glue
- Screws (or nails) and other hardware
Once you have all the necessary parts, you’re ready for Step 1!
Step 1: Configuring the Pi
The first step of the building process is to configure your Pi. The Raspberry Pi OS needs to be installed before you install MagicMirror2. The steps are as follows:
- Plug your microSD card into your computer. Make sure the storage device is completely empty.
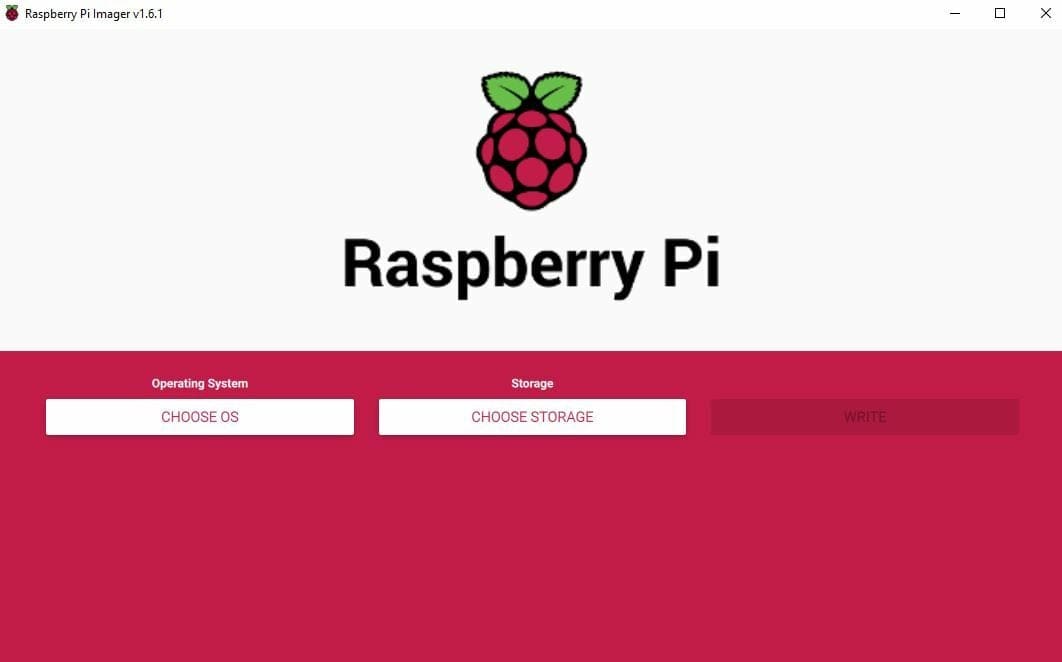
- Open Raspberry Pi Imager on your computer.
- Click the Choose OS button and select the first option, labeled Raspberry Pi OS (32-bit). If you don’t see this option, you can download the IMG file for this operating system from Raspberry Pi’s website.
- Select the Choose Storage option and find your inserted microSD card.
- Click the Write button and wait for the program to upload the OS to your storage device.
- Once complete, remove the microSD card from your computer and insert it into the board.
- Power on your Pi board and follow the instructions to install the OS onto your Pi.
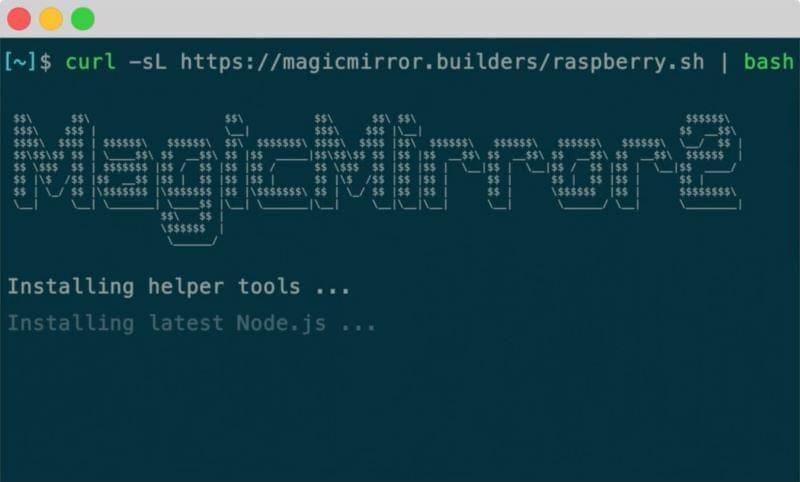
Installing MagicMirror2
Now that you have Raspberry Pi OS installed, it’s time to download MagicMirror2 to your Pi:
- Connect your USB keyboard.
- Connect your display screen to your Pi with an HDMI cable.
- Connect your Raspberry Pi to the internet using Wi-Fi or an ethernet cable.
- Open the programming terminal on your Pi interface.
- Type the following command into the terminal to download Node.js, a programming environment for the Pi:
curl -sL https://deb.nodesource.com/setup_14.x | sudo -E bash -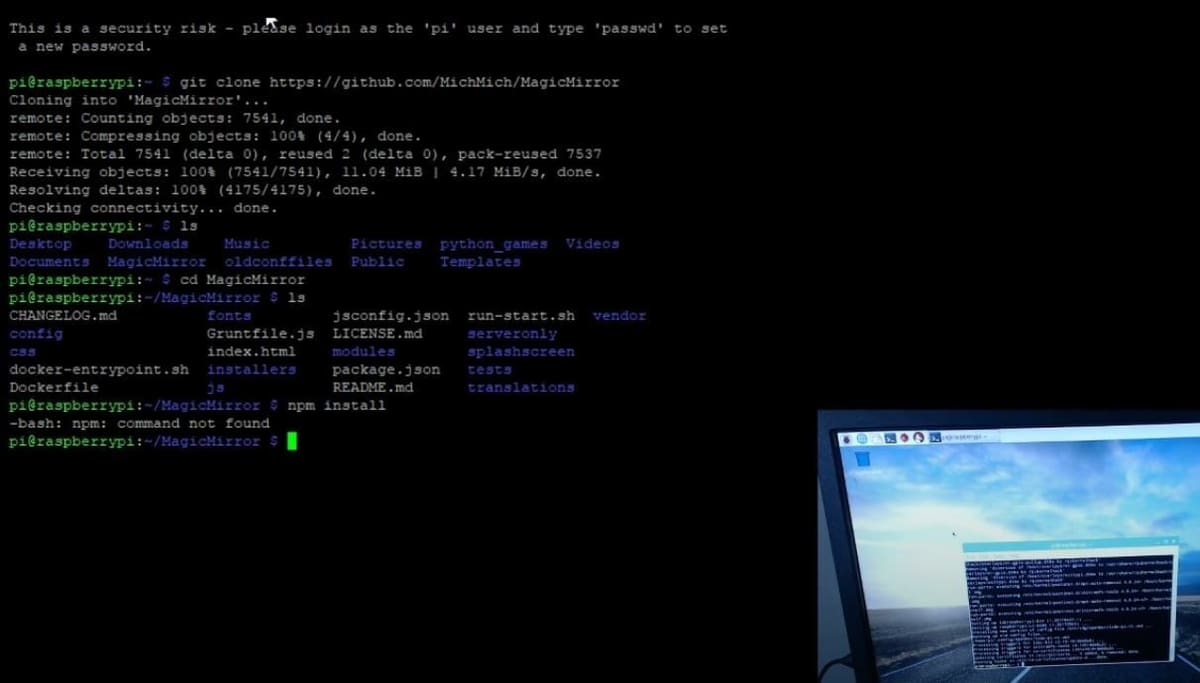
sudo apt install -y nodejs- Once downloaded successfully, enter the command below to clone the MagicMirror branch from GitHub:
git clone https://github.com/MichMich/MagicMirror- Enter the command to enter the MagicMirror repository:
cd MagicMirror/- Install the MagicMirror application using the command below:
npm install- Copy the sample configuration file by using the following command:
cp config/config.js.sample config/config.js- Restart the application by sending the command below:
npm run startIf you have any issues with this configuration process, you can check out MagicMirror’s documentation on common installation issues and solutions.
Step 2: Building a Frame
The second step to building a smart mirror is constructing a frame. Here, you have a lot of room for customization depending on your tastes. Below, we’ve created a list of instructions for making a wooden frame, one of the most popular types of DIY smart mirror frames:
- Measure the dimensions of your screen (e.g. LCD, TV, computer monitor).
- Find or modify (cut) a mirror that matches the dimensions of the full outline of the screen. It’s important to note that cutting a mirror is notoriously difficult, as the material is brittle. A failed cut could shatter the mirror or leave you with jagged edges.
- Place the two-way mirror over the screen, then measure the thickness, length, and width.
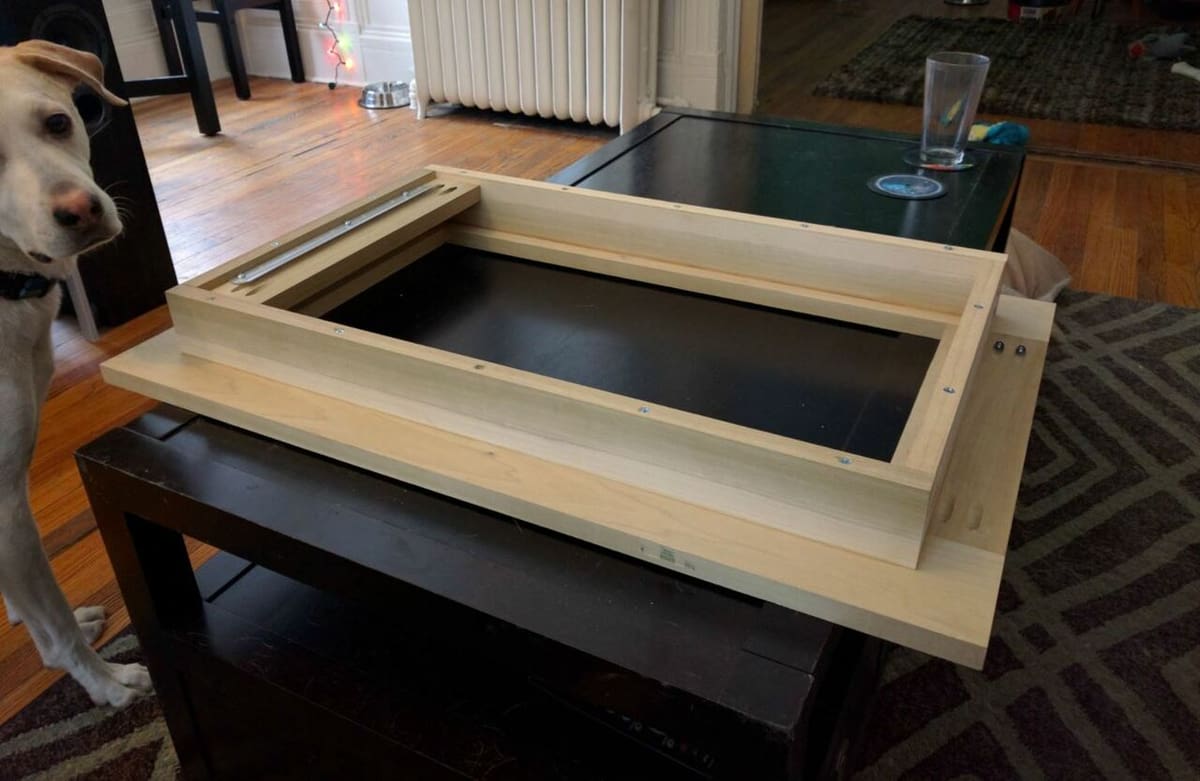
- Design a frame that will fit around your display and mirror. Make sure to leave room for some electronics, which we’ll discuss later. Also, don’t forget to include a back cover for the frame with mounting holes.
- Gather the necessary parts for your design. Some common materials include small wooden beams, nails, and trim to give the frame a nice aesthetic appeal. You may want some wood stain or paint, too.
- Construct the frame per your design. Make sure to check all your measurements before cutting!
- Finalize your frame by giving it a layer of color or a protective coating (e.g. polyurethane).
- Check that the frame holds the display and mirror tightly, then secure the two into the frame with mounting brackets.
Step 3: Installing the Electronics
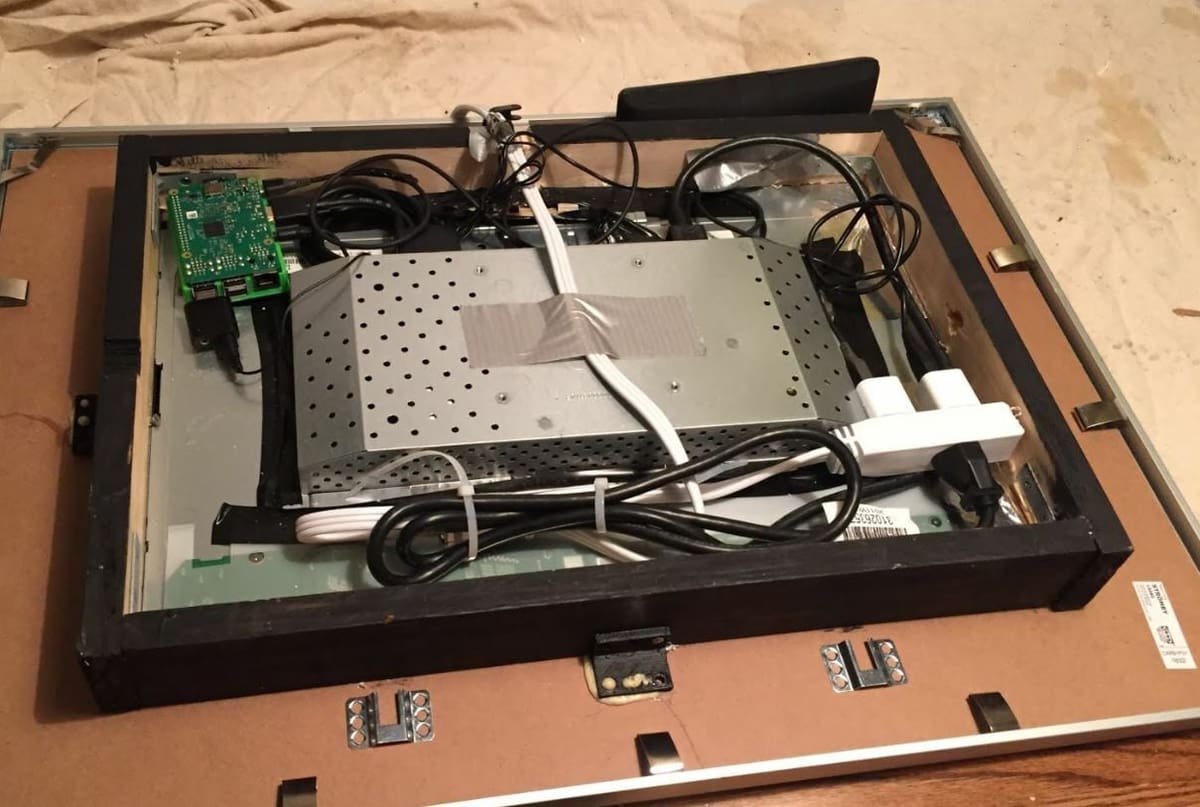
Now that your frame is built and your mirror and screen are securely nestled inside it, it’s time to install the electronics. For the most part, this just means connecting your Raspberry Pi board to the frame and wiring the device to your display screen. The following steps can help you do this:
- Remove the back cover of your frame so you can access your display screen. As with any electronics, be careful not to touch the circuit boards because static shock may cause a short circuit.
- Unplug the power cables from both your Raspberry Pi board and your display screen.
- Connect the board to the screen using your HDMI port (or another display cable).
- Plug the power cables back into your display screen and Pi board, then turn the screen and Pi on. Ensure that the screen’s input is set correctly and that you see the Pi’s interface on the screen.
- Once you confirm that the display and Pi are working together, unplug the power cables again.
- Mount the Pi to the frame. You can do this using the holes on the Raspberry Pi or a mountable 3D printed Pi case. Although you don’t want to see the Pi when looking at the mirror, make sure it’s accessible, especially the microSD card slot and the HDMI cable.
- Replug the power cables in again to do a final check that the display is working.
You’ve now finished building your smart mirror, but there’s still more to do if you want to make your smart mirror actually useful.
Step 4: Customizing the Display

The fourth step is customizing your smart mirror by integrating modules (applications for the smart mirror) into the MagicMirror platform. Unfortunately, unless you know how to program at an advanced level, you can’t integrate just any application.
Instead, you have to choose from MagicMirror’s compatible default modules, but don’t worry, many of these modules are super helpful. Examples include a calendar, news feed, alert system, clock, weather dashboard, a to-do list, and even a compliment function.
While we won’t get into the details of installing each module or application on your smart mirror, it involves using your Pi’s terminal to clone and install new sub-applications to the smart mirror platform. An excellent guide for this process can be found on the organization’s website.
Once customized, your smart mirror is complete! Now, save your module configurations to the platform, power on the devices, and you’re all set!
Additional Resources
We covered the main steps involved in making a smart mirror. If you’re looking to get more into the nitty-gritty, the following resources are all great guides:
Enjoy!
License: The text of "Raspberry Pi Smart Mirror: How to Make a Magic Mirror" by All3DP is licensed under a Creative Commons Attribution 4.0 International License.