The Raspberry Pi 4 is the fourth generation of the hugely successful Raspberry Pi single-board computer. Compared to its predecessors, it’s over three times as powerful and adds some useful features, such as dual HDMI ports and more memory. But this extra capability draws more power, and power generates heat.
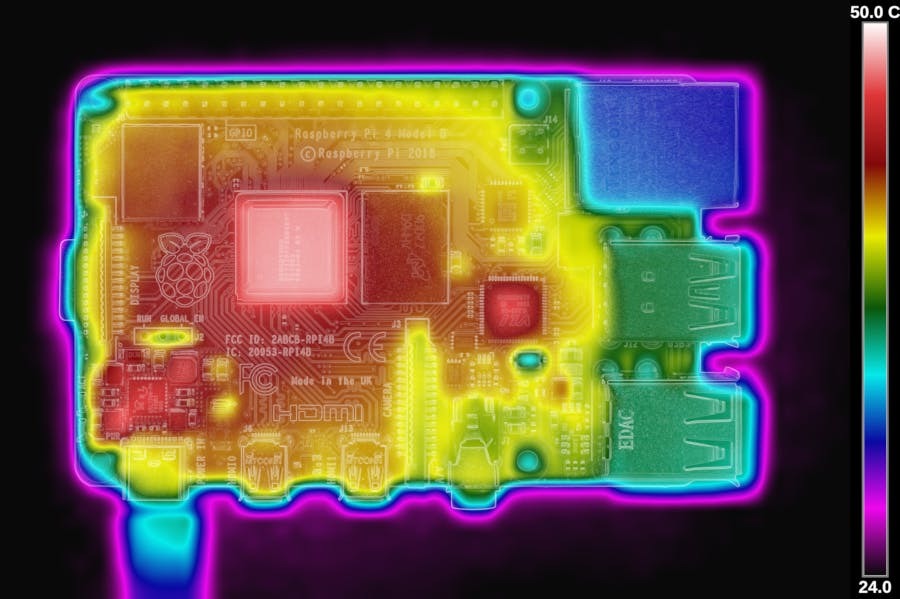
There are four components, in particular, that run hot: the processor, the USB controller, the Ethernet controller, and the RAM. And depending on how they’re being used, each can exceed its maximum recommended operating temperature (of 70 °C or 85 °C for the processor).
The Pi 4’s circuit board is designed to dissipate heat, but this is generally insufficient. Without additional cooling, the processor protects itself by throttling its clock speed, decreasing performance as it does so. Sustained high-temperature operation can also cause failures and reduce the working life of the Pi.
Dissipating excess heat is often done with “active cooling”, typically using fans. However, fans can generate noise, consume power, and reduce overall reliability. In such cases, a passive cooling solution using heatsinks might be the best option.
Cooling a Hot Pi
The Raspberry Pi’s processor has a built-in temperature sensor that can detect when it gets too hot. This happens when it’s working hard-to-run complex software, for example. To prevent further increases in temperature, it lowers the CPU clock speed. This “throttling” action slows down the whole processor and can significantly impact the performance of whatever program is running.
So how does one avoid this performance impact while still keeping the board cool? Well, there are several approaches.
Software Updates
Since the Pi 4 was launched, several firmware and operating system changes have been made to tune throttling and generally reduce power consumption by over 15%. Therefore, making sure these are up to date is important.
Board Orientation
Board orientation also makes a difference. Standing it upright with the GPIO header at the bottom and the HDMI ports at the top improves convection and cooling. Any natural airflow also has a positive impact, so avoiding tight, enclosed spaces helps, too.
Heatsinks
In the vast majority of cases, a heatsink will be required. They work by providing additional, thermally conductive paths to move heat away from the hot circuitry and dissipate it to the surrounding air.
Their simplicity and low cost make heatsinks appealing for many applications. Made of metal with a pattern of protruding fins or pins from which heat is lost through convection and radiation, they physically attach to the parts of the Raspberry Pi that get hot and help keep them cool.
Of course, the heat still needs somewhere to go. Heatsinks (or fans, for that matter) won’t work inside a fully enclosed and heat-insulated case, so ventilation and natural airflow are still necessary. Also note that heatsinks may not be good options where prolonged high-intensity processing is required, as the amount of heat generated may need to be actively dissipated.
Heatsink Considerations
For such a simple concept, the number of different designs and opinions about heatsinks can be bewildering! Here’s what you need to know.
Physical Characteristics
Size & Shape
The most important factor in the effectiveness of a heatsink is the surface area of the fins or pins – the greater the surface area, the more effective the heatsink. This can be achieved by having either a larger plan area or taller fins. However, tall fins can get in the way of additional hardware, so depending on the HAT or accessory you wish to use, you may need to choose low profile fins or add height extensions for the GPIO pins, for example.
Material
Heatsinks are often made of aluminum alloy, which is easy and cheap to make but still very effective. The exact alloy type is seldom specified, but some are up to twice as effective at conducting heat than others. The best aluminum alloy options have a value of 229 W/(m·K), while the lowest can be less than 150 W/(m·K).
Copper is one of the best materials for a heatsink, and Raspberry Pi-specific designs are available with values of up to 400 W/(m·K).
In theory, black heatsinks have an advantage, but this effect is negligible at the relatively low temperatures a Pi reaches, so feel free to ignore the color and just choose what you like the look of!
Placement

The most important location to attach a heatsink is over the processor (sometimes referred to as the SoC for Raspberry Pis), but you can essentially place one anywhere that it won’t interfere with the Pi’s connectors. Large, low-profile heatsinks need to be carefully positioned to avoid the risk of shorting connections near GPIO pins.
It’s good practice to align the fins across the board (i.e. pointing to the GPIO pins), as this improves performance when stacked vertically as recommended. If packaged in a case, make sure that any natural airflow around the heatsinks isn’t restricted.
Some heatsinks are designed specifically for the Raspberry Pi 4 and fit exactly on top of one or more of the areas that get hot. These are “safe” options, but any heatsink that can be fitted (whether the exact size or not) will perform much the same.
Adhesive
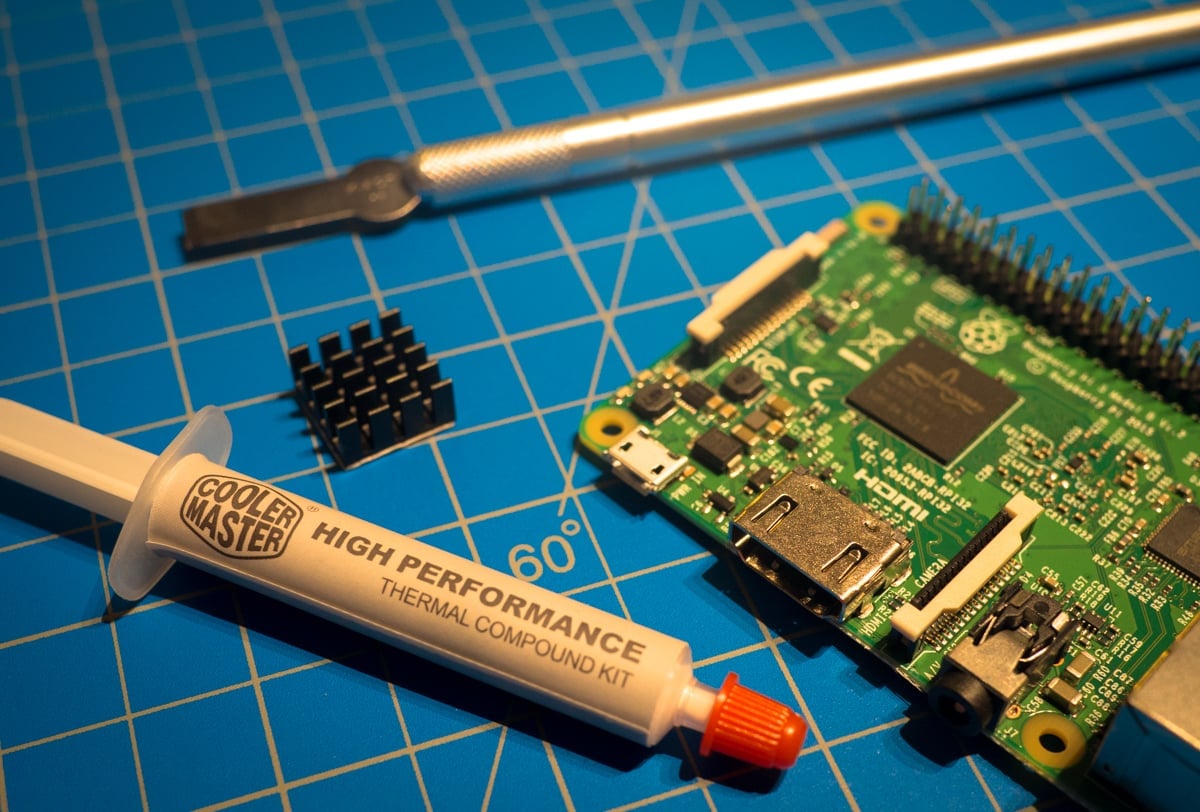
This is important! Heatsinks need to attach to components in a thermally effective way. Many heatsinks come with thermally conductive sticky tape, and it’s vital that this is applied properly. Any small amount of air trapped between the tape and the heatsink or processor will have a surprisingly negative impact on effectiveness.
Some users ignore the tape and instead use special thermally conductive epoxy resin. This also needs to be applied strictly according to the specific instructions. Take care to spread it smoothly and not too thickly.
Using adhesives may not be possible in some cases where heatsinks are integrated into a case. In these instances, using a thermally conductive paste is vital for the heatsink to work properly.
Heatsink Options
The final decision on a heatsink will depend on what your Pi is used for, its location, and its environmental considerations, as well as your budget and whether you use a case or attachments. As usual, it’s advisable to source parts from a reputable supplier (a heatsink made of poor alloy and poor thermal tape won’t be effective).
Standalone Heatsinks
There are three options for standalone heatsinks. The first, easiest, and most suitable for applications that aren’t computationally or I/O intensive is a single, processor-sized heatsink located on the processor itself.
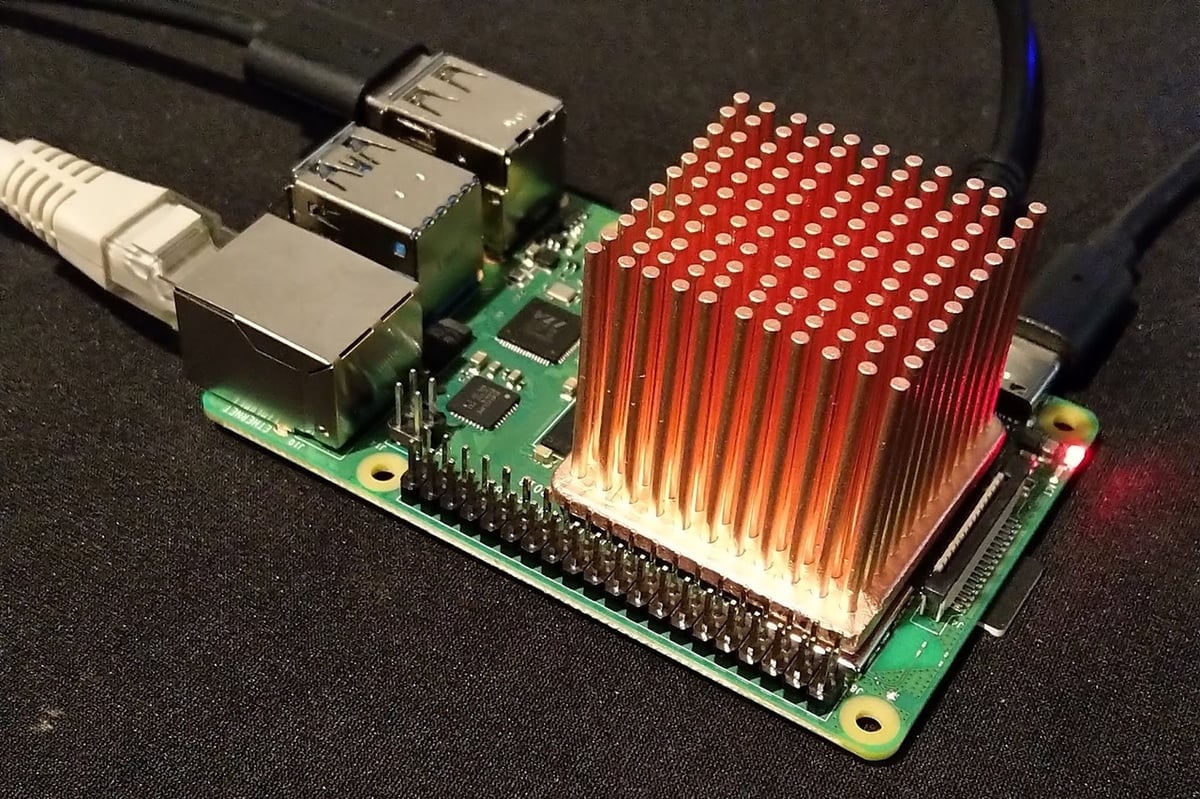
The second option is a large or oversized heatsink that occupies a space larger than the processor. These are more effective but require additional care to fit properly and can restrict wiring and choice of cases.
The third option is to buy a dedicated set of three or four heatsinks sized to fit each of the hot areas on the Raspberry Pi. This is a good option for hard-working Pis that are well connected using USB, Ethernet, and RAM, such as those being used as desktop computers.
In all of these instances, make sure that the heatsinks fit within any case you plan to use.
Heatsink Cases
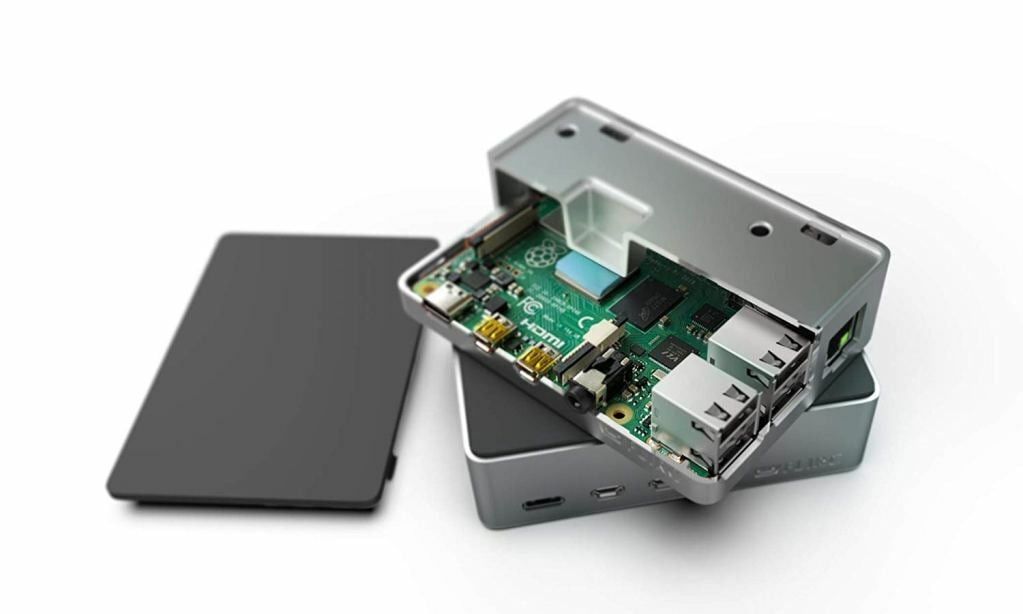
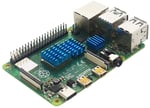
There are several makes of cases with heatsinks already integrated: One key example is the Flirc case, pictured above.
These cases are designed to enclose the Raspberry Pi 4 in a way that makes physical contact with the hot parts of the board. These can be simple, effective solutions and have keen followings among regular Pi users. They’re not the best for instances where HATs and other plug-in peripherals are used, and care needs to be taken to ensure good thermal connectivity between case and board, using thermal paste.
There are many comparisons of various heatsink cooling solutions to be found on the internet, although these may need to be interpreted depending on the application. In general, it’s agreed that the larger the heatsink surface area, the better. There are conflicting views on cases, but in general, they perform very well. The bottom line is that any cooling is better than no cooling!
License: The text of "Raspberry Pi 4 Heatsink: Placement, Size, & More" by All3DP is licensed under a Creative Commons Attribution 4.0 International License.
CERTAIN CONTENT THAT APPEARS ON THIS SITE COMES FROM AMAZON. THIS CONTENT IS PROVIDED ‘AS IS’ AND IS SUBJECT TO CHANGE OR REMOVAL AT ANY TIME.