Raspberry Pi 4 & Bluetooth: How to Configure Your SBC

Are you ready to take your Pi to the next level? Learn how to set up your Raspberry Pi 4 with Bluetooth to pair your devices!
The Raspberry Pi is an affordable (chip shortage notwithstanding), card-sized, single-board computer designed for makers, students, and electronics enthusiasts. With a huge and strong community and so many Raspberry Pi projects to carry out, it’s no surprise that it’s so popular.
Among the different boards, one of the most popular, the Raspberry Pi 4, has a range of powerful features such as dual-display support, Gigabit Ethernet, 802.11ac Wi-Fi, and Bluetooth 5.0 functionality. Hence, it’s possible to control the Raspberry Pi 4 without a mess of wires. To do so, you could opt for using a Bluetooth keyboard and mouse.
With the Raspberry Pi’s Bluetooth functionality, you can also control other Bluetooth devices, such as smart home devices or smartphones. Besides that, you can transfer data, create Bluetooth beacons, and stream audio! Although, configuring Bluetooth on the Raspberry Pi 4 can be tricky for first-timers and novice enthusiasts.
In this article, we’ll show you how to set up Bluetooth on the Raspberry Pi, and for a practical example, we’ll enable and connect it to a set of Bluetooth speakers. But first things first: What will you need?

Hardware Requirements
To follow along with this guide, you’ll need a couple of pieces of hardware. First, you will need a Raspberry Pi and a MicroSD card. The board could be a Raspberry Pi Zero W, 3B, 3B+, or 4. As long as it has built-in wireless and Bluetooth functionality, it will keep things simpler. Otherwise, you may need a Bluetooth dongle and you’ll have to connect it via USB, adding to the wire entanglement we’re hoping to avoid.
Besides the Raspberry Pi, these are the necessary components we recommend at the bare minimum: a Bluetooth speaker (or another Bluetooth device you want to connect), a Micro-HDMI cable with a display monitor, a keyboard, and a mouse.
Alternatively, you may choose to connect the Raspberry Pi with a pHAT Beat and a set of 3-inch 4-ohm or equivalent speakers. You could even opt to use an audio amplifier and 3D print a case.
With the hardware requirements out of the way, it’s time to get started with the software.
Enabling Bluetooth

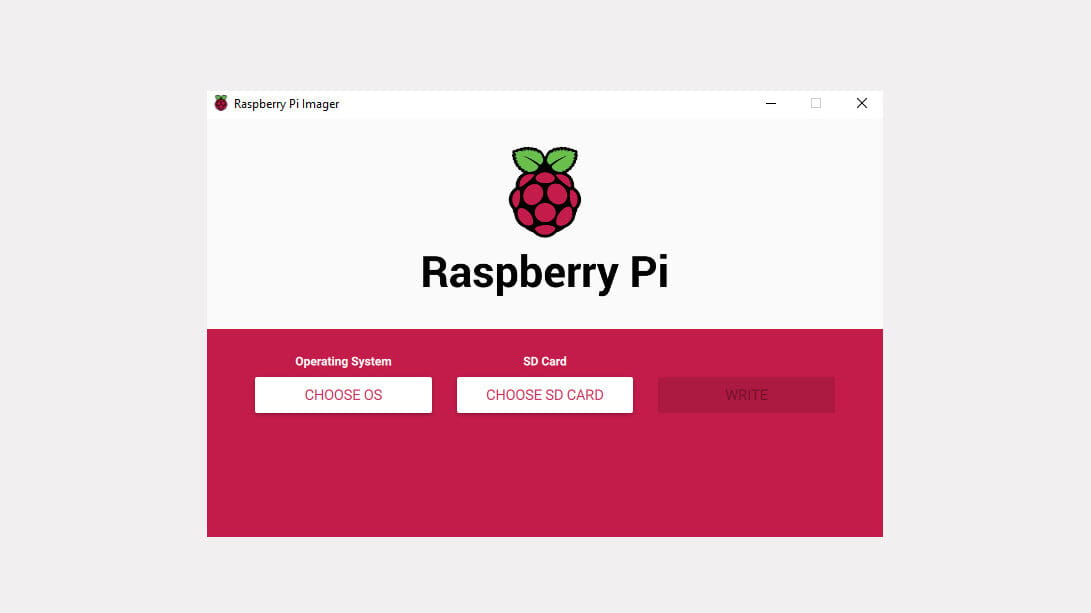
Gone are the days when you needed an SD card loaded up with NOOBS to run Raspbian. You can simply use Raspberry Pi Imager to install the Raspberry Pi OS onto a MicroSD card. By default, the latest version of Raspberry Pi OS should already have the Bluetooth module you need. For the rest of this guide, we’ll assume you already have the Raspberry Pi OS installed.
On the desktop, you should find the basic Raspberry Pi OS Bluetooth settings menu that allows you to enable or disable Bluetooth connectivity, but with additional libraries, you’ll be able to connect to more devices and you can improve your experience.
Libraries
There are several libraries – code that’s meant to optimize certain tasks – that you may want to keep in mind for using Bluetooth on the Raspberry Pi. First up there’s BlueZ, which we’re using in this guide. Using BlueZ, you can communicate with both Bluetooth Classic and Bluetooth Low Energy devices.
Raspotify is another popular library for streaming music and podcasts on Spotify with your Raspberry Pi. To learn how to do so, check out our guide on using Raspotify with the Raspberry Pi.
Finally, there’s the Pimoroni Pirate Audio library that turns your Raspberry Pi into an internet radio. It’s commonly used with the hardware audio boards of the same name sold by Pimoroni. These boards produce high-quality sound as well as provide onboard volume control.
Once you’ve enabled Bluetooth on your Pi and you’ve selected your library, it’s time to set things up. With the latest version of the Raspberry Pi OS, you should already have BlueZ installed and ready for use. However, just in case it isn’t, you’ll need to install BlueZ as follows:
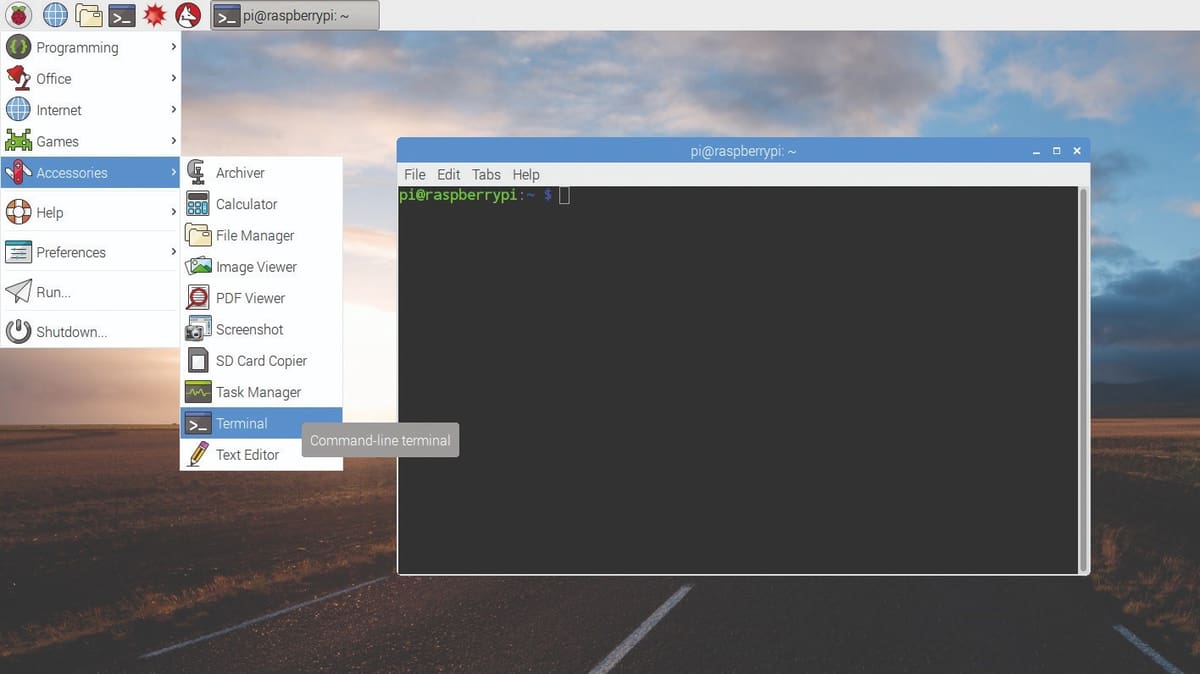
- Open a terminal window by going to the Raspberry Pi menu and then go to “Accessories > Terminal”.
- In the popup, type the following command:
sudo apt update && sudo apt upgrade. Alternatively, you could use the commandsudo apt update -y && sudo apt upgrade -y. The “-y” flag will automatically assume “yes” as the answer to any prompts. - Finally, install the BlueZ library with the following command:
sudo apt install bluetooth pi-bluetooth bluez blueman.
Pairing a Device

With BlueZ (or your library of choice) set up, it’s time to turn to your Bluetooth device. First, you need to restart your Pi, and after doing so, you should also see a second Bluetooth icon. To enable it, follow these steps:
- Click on the Bluetooth icon mentioned above, found on the top right-hand corner of the desktop.
- Click on “Make Discoverable” (and make sure that your device is powered on and discoverable, too).
- To enable and pair a new Bluetooth device, select “Setup New Device”.
- A list of available devices should appear, but if you can’t find yours, you can click on the search icon to scan for further options.
- Once you’ve found your device, select it, click on “Next”, then on “Pair Device”, and then on “Next” again.
- Click “Confirm” to authorize the pairing process.
- Select your preferred connection method, which for speakers is usually “Audio Sink“, to complete the setup process.
If you’re looking for devices that you already paired, in the same drop-down menu, click on “Devices” and, in the pop-up window, click on the search icon and select your Bluetooth device.
Congratulations! You should have a Bluetooth device connected to your Raspberry Pi. From here on out, you can advance to more complex projects.
There are plenty of projects you could dive into to further challenge yourself and learn even more, whether you have a Pi Zero W, you’re into Lego cars, or in case you want to set up Home Assistant.
License: The text of "Raspberry Pi 4 & Bluetooth: How to Configure Your SBC" by All3DP is licensed under a Creative Commons Attribution 4.0 International License.