RAMPS 1.4 3D Printer Controller Board – Review the Specs

Your 3D printer has a "brain" to do the processing and the "muscle" to do the work, but it's the RAMPS 1.4 that connects them. Find out what makes your 3D printer tick.
Background on Controller Boards
Every 3D printer has a small computer and control circuitry to amplify and direct the signals that perform all the functions the printer needs to operate. Some printer suppliers put all these functions on a single circuit board and use proprietary chips to control their printers.
Historically, that hasn’t always been the case. Development in this area was spurred by the appearance of the Arduino computer, and the Arduino Mega had enough digital and analog control circuitry to do the job. All that was needed was a means to make the raw power of the Mega available to the mechanical parts of the 3D printer.
These days, 3D printing has progressed to a point where commercial systems can be purchased that are literally plug and play. That’s great for people who just want to print and don’t care about the internal workings of these fascinating machines.
But if you do care or want to build your own, it’s useful to understand more about what all the parts do and how they fit together. In this article, we take you through one of the original circuit boards that made possible the control of the motors, switches, heaters, and sensors, all of which are essential to your 3D printer’s function.
RAMPS: What Is It and What's It For?
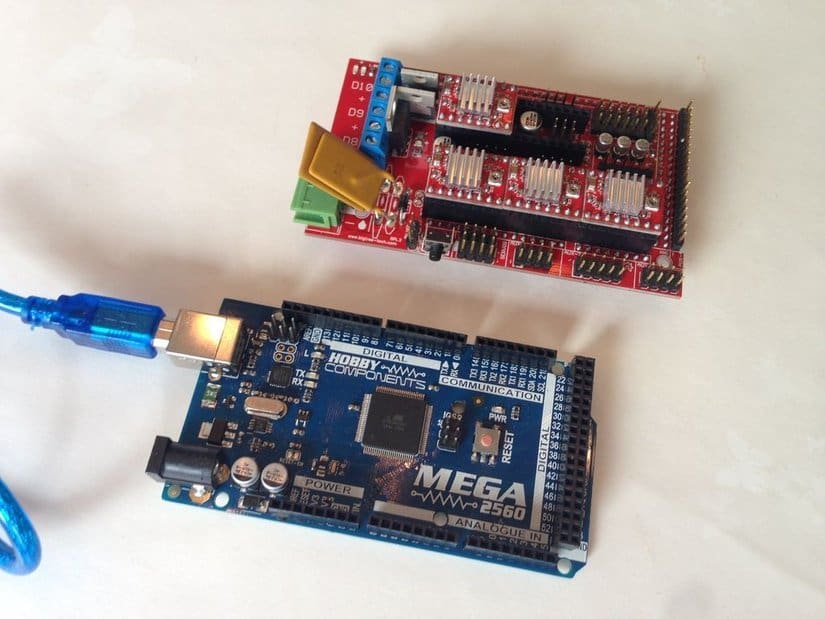
RepRap Arduino Mega Polulu Shield, or RAMPS, is a board that serves as the interface between the Arduino Mega — the controller computer — and the electronic devices on a RepRap 3D printer. The computer extracts information from files containing data about the object you want to print and translates it into digital events, like supplying a voltage to a specific pin.
It takes many, many such pins turning on and off to tell a printer what to do. Unfortunately, the Mega doesn’t have enough power to actually operate the printer’s hardware.
That’s where the RAMPS board comes in. It organizes and amplifies the information coming from the Mega so that they’re properly directed down the correct channels.
For example, if the hot end carriage needs to move one step to the left, the RAMPs board routes the signals from the Mega to the X-axis stepper motor via the appropriate pins and wires.
RAMPS 1.4

RAMPS 1.4 arose from years of development by the RepRap project. It satisfied the need for a single controller board that used the Arduino Mega and Pololu stepper drivers to manage all the functions of a 3D printer.
In the spirit of RepRap, it was originally designed to allow home production. Soon, it became too sophisticated and the design switched to favor commercial boards.
The basic layout of the board started with RAMPS 1.2 and has continued to (at least) 1.7. Nevertheless, the most popular version has remained 1.4 (with thru-holes or surface mount components). This board has been widely copied and can be obtained and assembled for under $10 from Asian manufacturers.
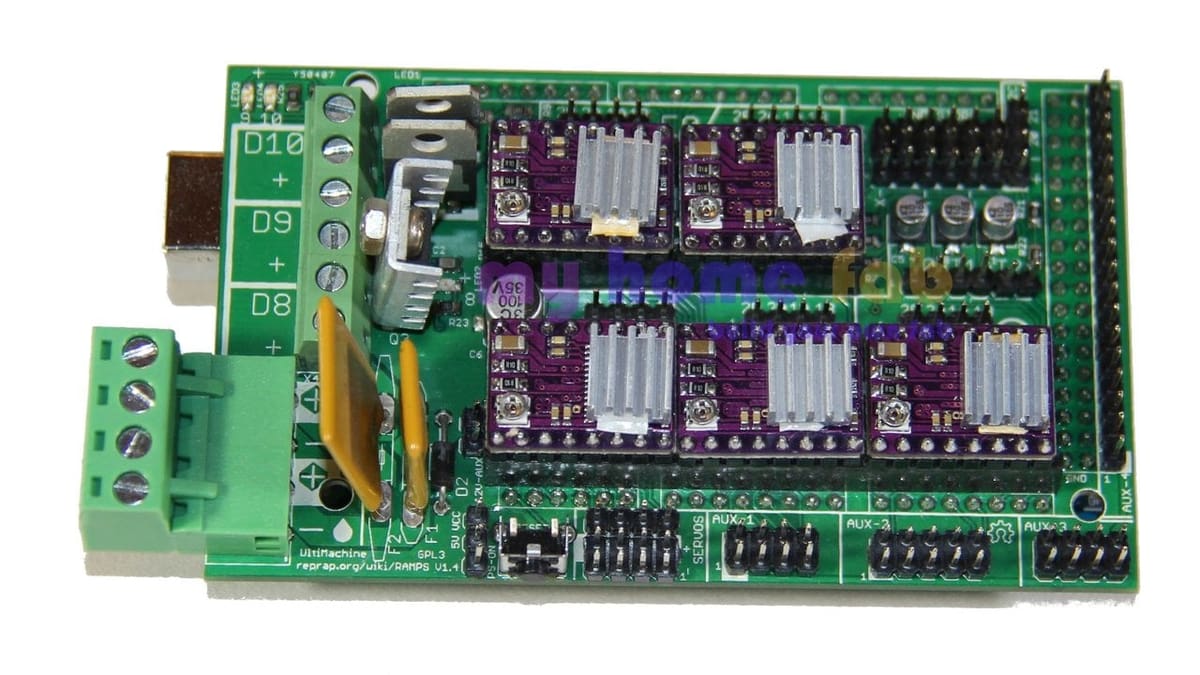
Connections
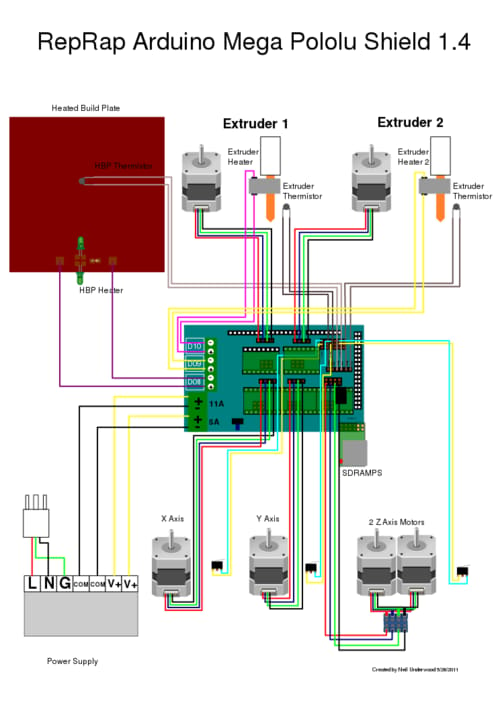
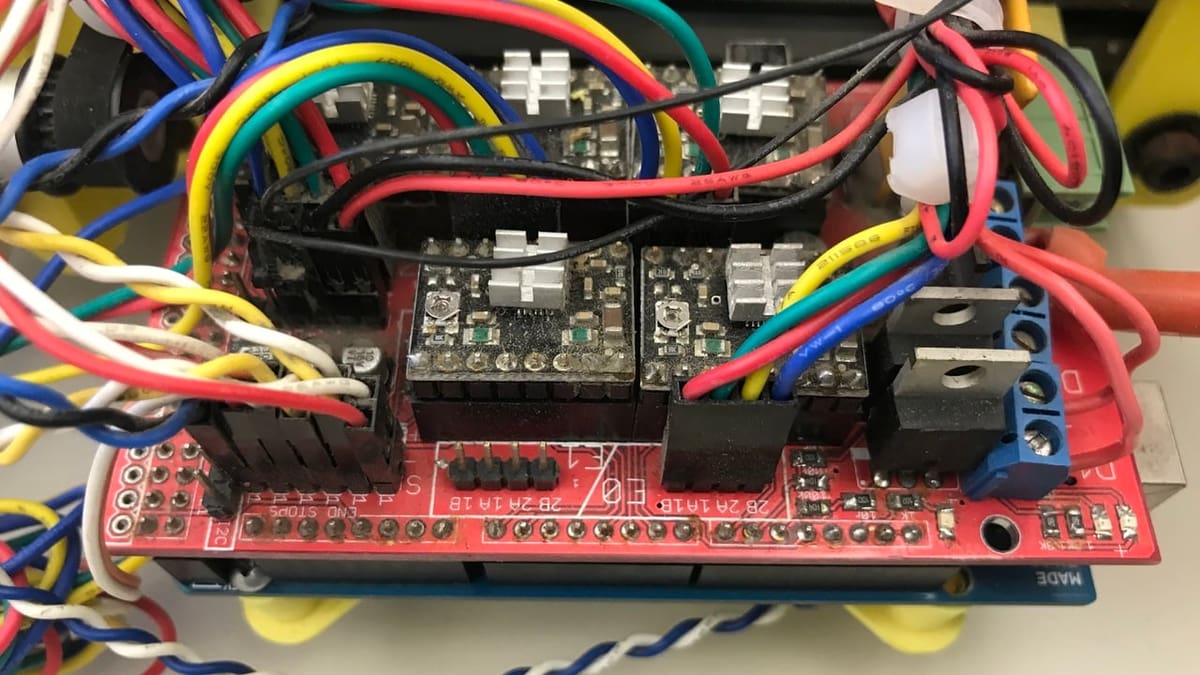
The RAMPS 1.4 comes with all the necessary components to run most 3D printers:
- Sockets for 5 stepper drivers: The stepper drivers are the common Pololu drivers that are available from many sources. Because they are detachable components, should one cease to function, it can easily be replaced by pulling it out and replacing it with a new driver. Three of the stepper drivers are designated for the X, Y, and Z axes of the printer, while two are designated for extruders. The Z-axis connector allows two stepper motors to be driven synchronously. Each stepper driver can be configured to move its motor 1, 1/2, 1/4, 1/8, or 1/16 steps per pulse.
- Screw terminals for 3 heaters: These are driven by MOSFETs and control the amount of power supplied to a device (and therefore the amount of heat produced). Typically, one driver will supply the hot end, one will supply the bed heater, and one will control a fan, which cools the plastic once it is extruded. The fan driver can also be used as a second hot end driver for dual-extrusion systems.
- Sockets for 3 thermistors: Thermistors measure the temperature of the devices connected to the heaters. The computer controller can use this information to monitor and control device temperatures.
- Sockets for 6 end stops: The RAMPS board supplies enough end stop control to allow a 3D printer to detect motion at both extremes of the X, Y, and Z axes (left-right, front-back, up-down) to limit the range over which a stepper motor can move the printer parts along any axis. The end stops can be either mechanical or optical.
- Option for SD card: The RAMPS board allows you to attach an SD card reader so that you can read printable files straight from the SD card instead of connecting to a computer.
- Connections for display: Two 10-pin ribbon connectors allow for the addition of a display unit.
- Power supply screw terminals: These include screw terminals for two 12-V connections, one for the bed heater and one for everything else. The power inputs are fused to prevent damage.
- Lots of other add-ons: Five additional sockets provide access to unused pins on the Arduino Mega. This allows for the addition of extra fans, LEDs, servos, and a wide range of peripherals that add additional capacity.
Benefits
The RAMPS 1.4 board comes with a number of advantages:
- Accessible and reliable: The board is cheap, readily available, and has a bulletproof time-tested design. Recent warnings have been posted on the RepRap site about some very cheap RAMPS boards that place power and ground traces very close together. However, this is not part of the default RAMPS design, so boards purchased from reputable suppliers should not have this problem.
- Adaptable: The board is available as an assembled board, a kit, a bare board, and as files to send to commercial circuit board manufacturers. The schematic of the board is widely available.
- Modular: The Pololu stepper drivers fit into sockets so they can be easily replaced.
- Open: The design is open-source.
- Integrated: The Arduino Mega runs Marlin firmware, a highly evolved middleware that is easy to modify, is constantly evolving, and allows the RAMPS 1.4 board to run nearly any kind of 3D printer.
What's Next?
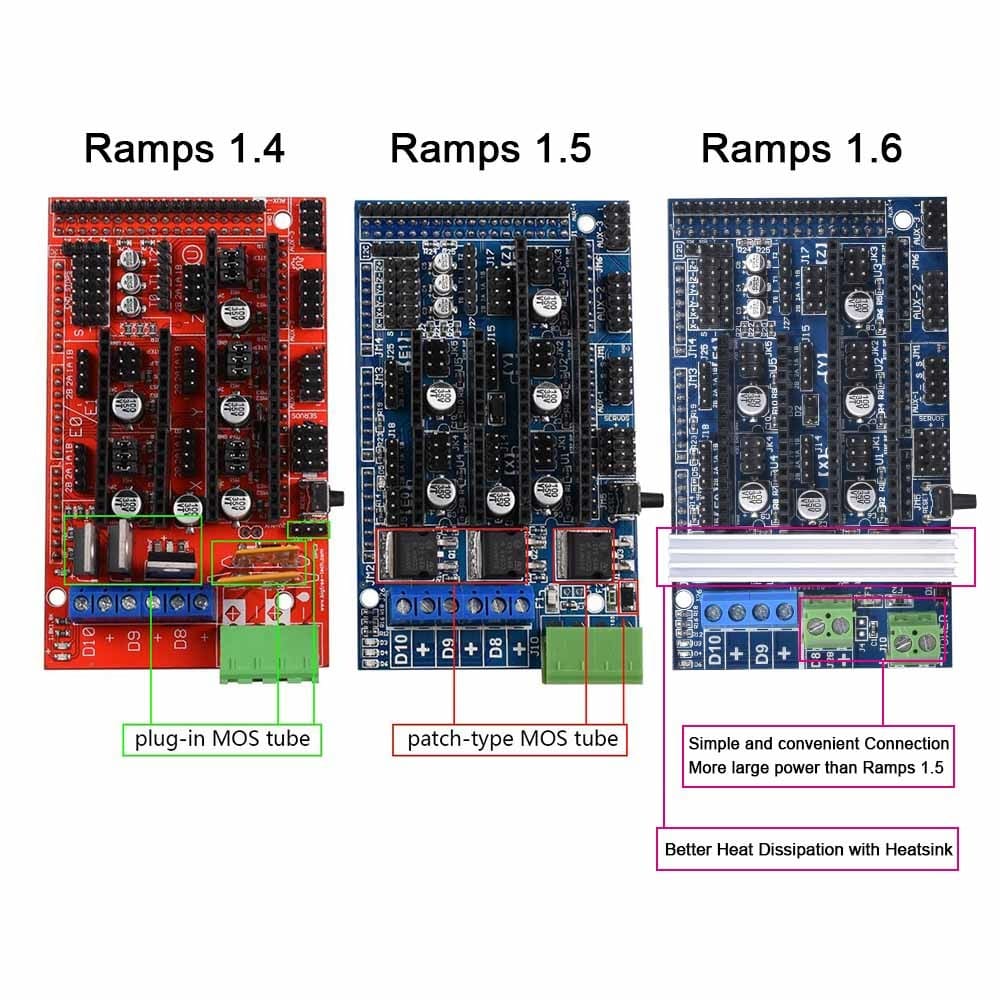
The RAMPS board is constantly evolving. Version 1.5 changed the configuration of the MOSFET transistors and changed the fuses. (Unfortunately, it’s also not open-source, which is in violation of the original hardware license).
Version 1.6 added screw terminals, improved cooling of the driver MOSFET transistors, and moved some components around. These are improvements but not functional changes. There’s also a version of the RAMPS board that allows it to be connected to an Arduino Due, which is a 3.3-V computer.
Final Thoughts
RAMPS 1.4 is an inexpensive, well-supported hardware controller for your 3D printer. Coupled to an Arduino Mega, it represents a basic and flexible control package that is highly suitable for most 3D printing needs.
It’s especially useful for “hacking” and trying out new software or hardware solutions for 3D printing development. Although you can buy more flexible and higher-level boards, the RAMPS 1.4 is the best bang for your buck.
Feature image source: Reef Morse / All3DP
CERTAIN CONTENT THAT APPEARS ON THIS SITE COMES FROM AMAZON. THIS CONTENT IS PROVIDED ‘AS IS’ AND IS SUBJECT TO CHANGE OR REMOVAL AT ANY TIME.