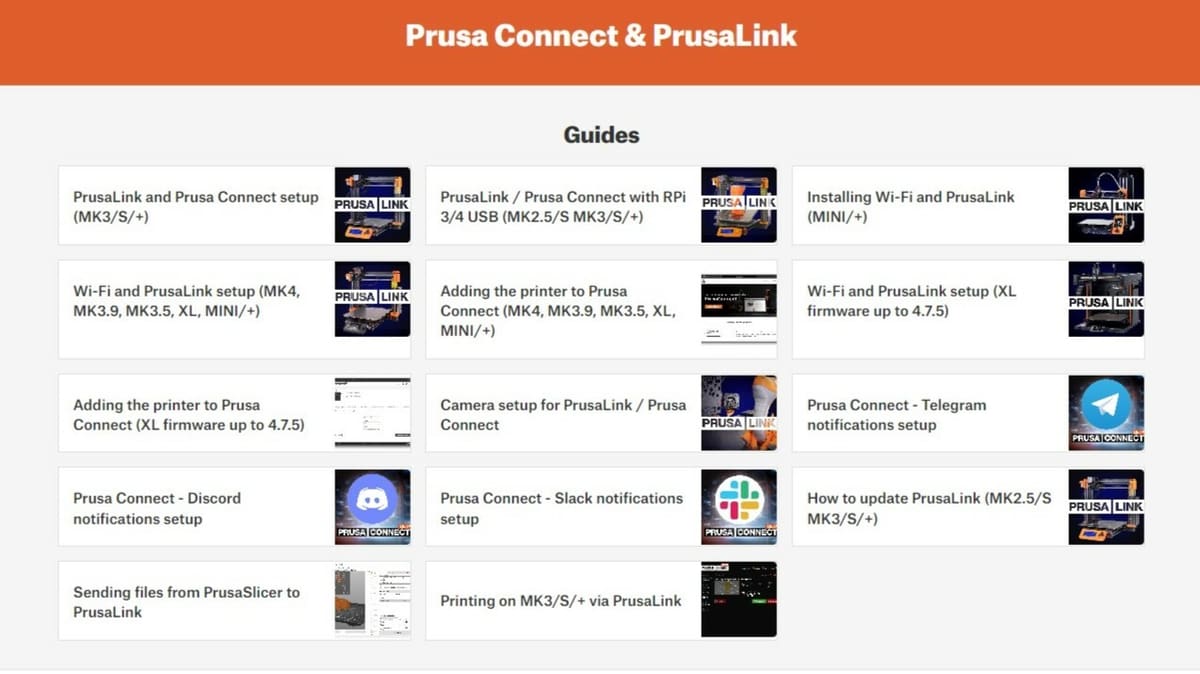
PrusaLink: All You Need to Know to Get Started

PrusaLink is the first step to controlling your Prusa printer fully remotely. Read on to learn how to get started!
Imagine not having to stay glued to your 3D printer while it works through a print job. With remote 3D printing, you can upload and start a print without physically going anywhere near the printer. Using your phone or computer, you can keep an eye on the print progress and even stop it if something goes wrong. This frees you up to handle other tasks, which is especially helpful for long print jobs.
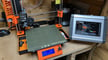
Companies have typically implemented remote 3D printing in two different forms: within the local area network (LAN) and from anywhere. With PrusaLink, Prusa Research went with the former. PrusaLink runs locally on your printer, and after you’ve connected the printer to your home’s local area network, you can use PrusaLink’s web interface to remotely upload G-codes, control the print, and monitor its progress. In this article, we’ll guide you through the initial steps of starting with PrusaLink and explain what you can do with it.
Let’s dive in!
Remote Prusa Printing
As a standalone remote print management system, PrusaLink’s features are pretty limited. As mentioned above, it works exclusively over your local area network and allows you to upload G-codes, initiate or cancel prints, and monitor your printer. Files can be directly uploaded from PrusaSlicer or your computer, eliminating the need to physically move between the computer and printer with a storage device.
While PrusaLink has only limited features, it is a crucial first step in establishing an ecosystem for managing remote 3D printing. PrusaLink is a prerequisite for Prusa Connect, a cloud-based remote printing solution that allows you to manage your Prusa printer from anywhere. PrusaLink essentially serves as a bridge between the printer and Prusa Connect.
Prusa Connect also offers more features like free cloud storage and support for managing multiple printers, with many more to come. That being said, users with concerns about sharing and storing data over the internet are likely to prefer PrusaLink alone, since their files and data will remain within their local network only.
Installation Overview

The process to get started with PrusaLink varies depending on the type of printer you have, but it generally involves several key steps:
- Install Wi-Fi module: If not already built-in, you’ll have to prepare and connect the Wi-Fi module to your Prusa printer.
- Update firmware and bootloader: After the installation is completed, you’ll have to confirm that your printer’s firmware and bootloader are up to date. If not, these will need to be updated.
- Configure Wi-Fi module: The Wi-Fi module will need to be configured by entering your network name and password.
- Retrieve IP address and API key: You’ll need to note down the IP address and API key of your printer.
- Open PrusaLink on web browser: Finally, PrusaLink can be opened in a web browser using the IP address and API key.
The difficulty of this installation ranges from easy to difficult, with the primary factor being the Wi-Fi module installation, which varies across the printer models. Fortunately, Prusa offers comprehensive step-by-step instructions specific to each printer model on their website.
Challenges
Some users have faced challenges while installing PrusaLink, reporting a whole host of issues including firmware flashing failures and difficulties loading Wi-Fi data (see the comments on Step 7).
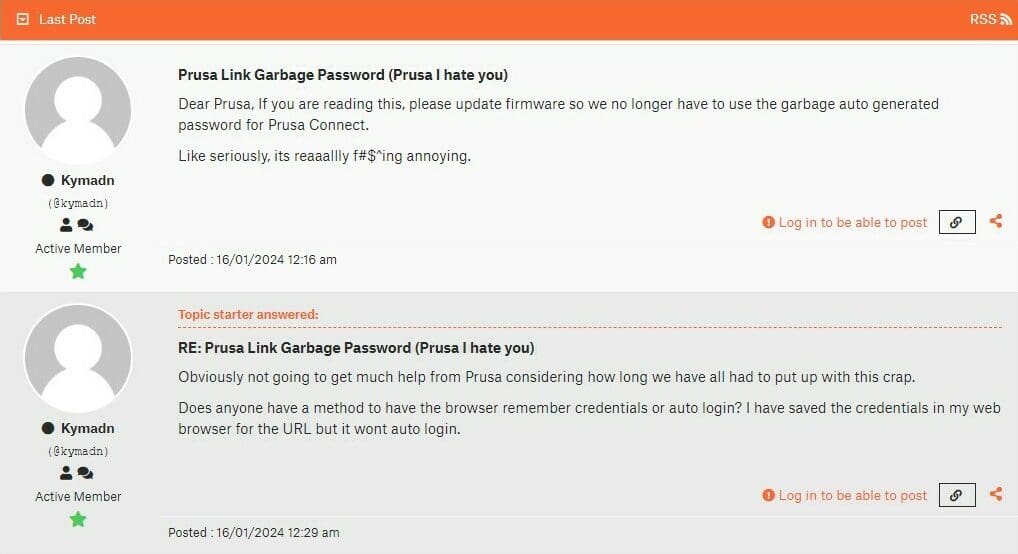
One notable limitation is that PrusaLink doesn’t support some special characters, and there’s not yet a list of which characters those are. This is especially problematic for users whose Wi-Fi network’s SSID includes them.
Moreover, PrusaLink generates user passwords automatically (Step 5 in the setup guide), and they tend to be long and hard to remember. Some users have found that the authentication process is not compatible with certain password managers and web browsers, leading to an unpleasant user experience.
It’s worth mentioning that Prusa Research’s team is actively responsive to these initial hiccups, consistently working to address and fix reported issues. However, some of these issues remain at the time of writing and may get fixed in future firmware releases.
Once successfully installed, the overall user experience with PrusaLink is generally satisfactory, although some users of other remote printing solutions have so far found no incentive to switch to PrusaLink.
User Interface

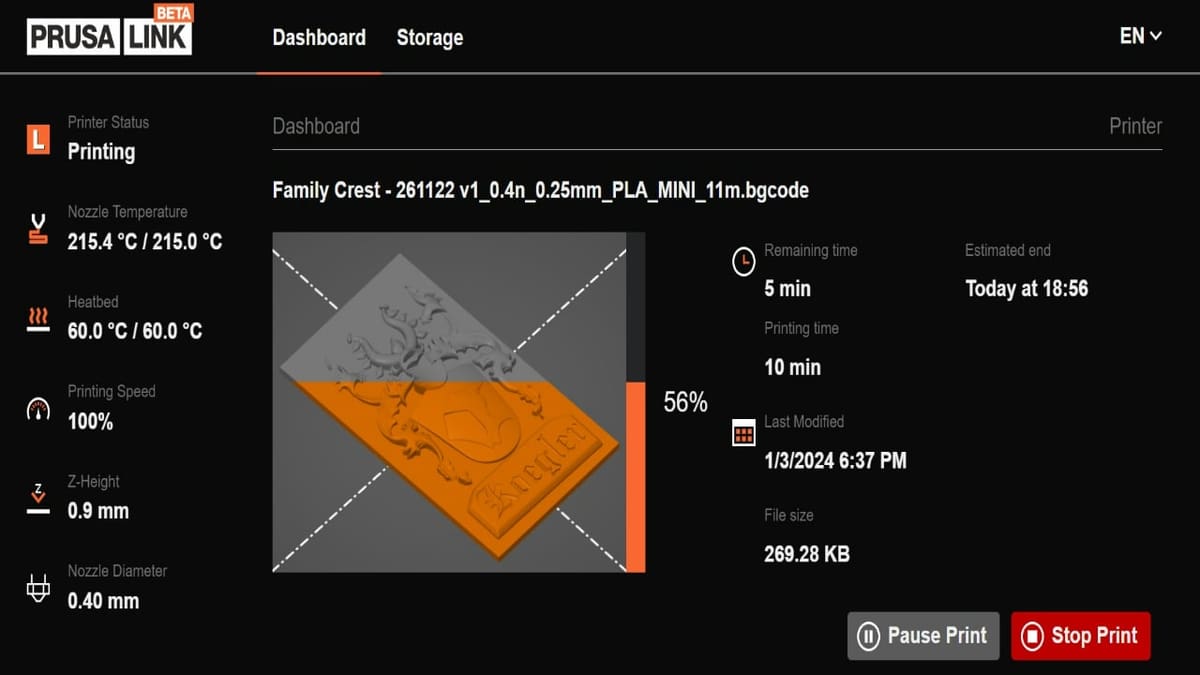
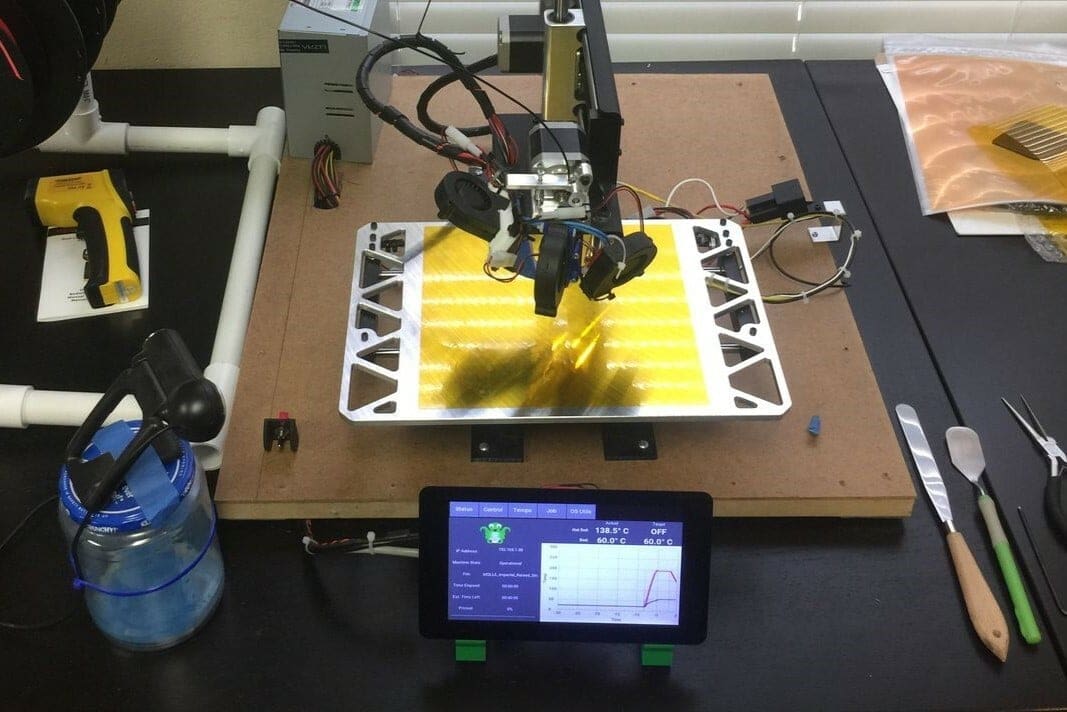
Once you’ve gotten through the installation process, PrusaLink’s web interace is pretty straightforward. The top of the interface has two tabs: “Dashboard” and “Storage”.
Dashboard displays a variety of information about the print, including basic print settings and details related to print time. Users’ interaction with the interface is limited to starting, pausing, or stopping the print.
Storage displays the print files available in the local storage. Users can either click to upload a file or drag-and-drop the file from your computer into the marked area. For those who don’t want to wait around for the upload to complete, it’s possible to enable the printer to start printing after completion of the file transfer.
Company & Community Support
Whether you’re looking for the newest software or need assistance, there are ample resources to connect with the Prusa community and get the help you need. For support and updates related to PrusaLink, you can find the latest software on GitHub. Prusa has an active forum for PrusaLink and Prusa Connect, where you can interact with the moderators from Prusa Research and find solutions to specific technical problems. The Prusa developers also provide updates on features and their short term plans.
Additionally, you can seek support through the Prusa Subreddit. You can post your technical questions or help requests in the forum and expect multiple responses that may help resolve the issues.
Alternatives
Looking at PrusaLink’s features, you might be curious to compare it with other choices for remote 3D printing. While users have multiple alternatives for the PrusaLink + Prusa Connect combination, let’s explore a couple of alternatives comparable to PrusaLink’s standalone features.
OctoPrint
OctoPrint stands out as a widely used open-source software for remote print management that also offers a web-based interface. When connected to your 3D printer via a Raspberry Pi, it provides detailed control, monitoring, slicing, and the convenience of wireless printing.
With a range of plug-ins, OctoPrint becomes a powerful tool for streamlining all your 3D printing tasks. It’s compatible with most commercially available 3D printers. Yet, it’s worth noting that some OctoPrint users find the need for frequent adjustments and complete reinstallation during upgrades to be a bit frustrating.
Repetier Server
Repetier Server is another option for remote 3D printing. Even though not as well-known as OctoPrint, it offers many features worth exploring. You can manage, control, and monitor your 3D printers through Repetier Server on your local network. It’s also possible to connect from outside your local network, but you would need to make the printer accessible from the internet through a VPN tunnel or by port forwarding.
Repetier Server can handle multiple printers simultaneously, but the number of printers you can control depends on your hardware. It has features like 3D views to spot G-code errors and color-coded schemes for different print settings. However, unlike OctoPrint, Repetier Server doesn’t have an extensive collection of plug-ins. There’s a basic free version of the software as well as a paid pro version with extra features, including webcam support.
License: The text of "PrusaLink: All You Need to Know to Get Started" by All3DP is licensed under a Creative Commons Attribution 4.0 International License.