Prusa First Layer Calibration: All You Need to Know

Prusa first layer calibration is key to achieving successful prints on Prusa printers. Discover the secrets of this tricky process!
Many people who have used a 3D printer before know the all too familiar feeling of checking on a print that’s hours in just to be greeted with a de-adhered spaghetti mess, or worse yet, the awful sound of a nozzle digging into a metal build surface.
The good news is that these issues can be mitigated on a Prusa printer with a great first layer calibration! This is a crucial step to ensure outstanding print quality for months or years, and it must be done right. Although this may seem like a daunting task, especially for first-time users, there are some tips and tricks one can use to get it perfect.
In this article, we’ll help uncover the key points to ensure an excellent first layer calibration!
What Is It?
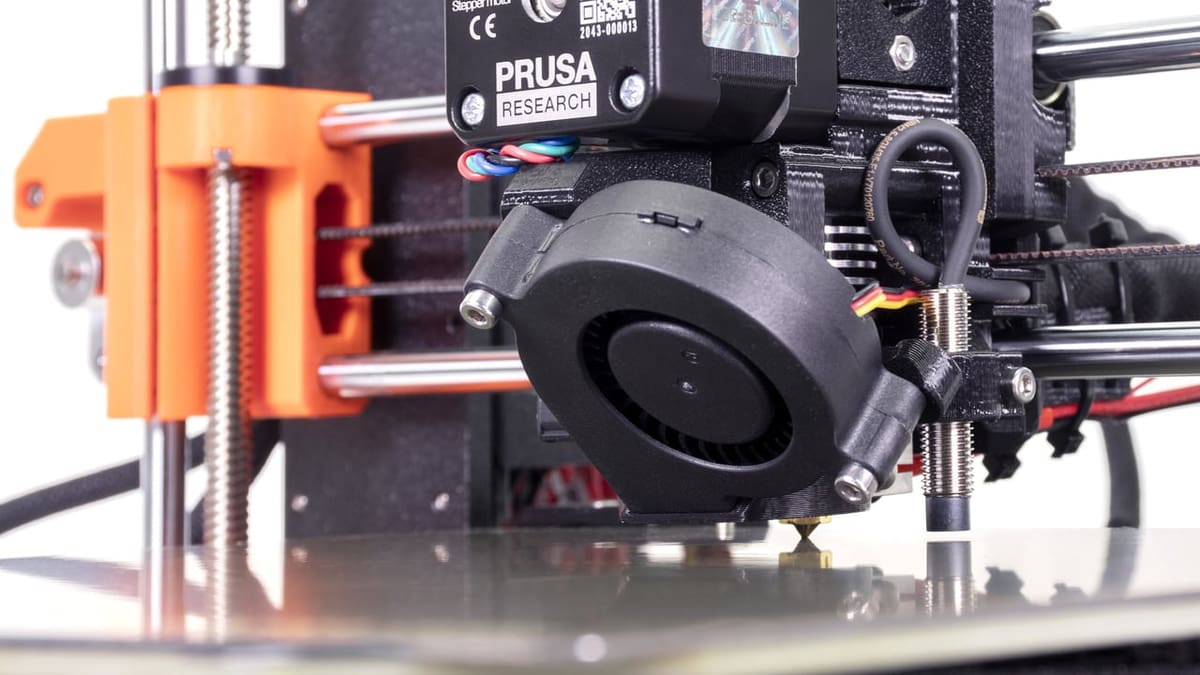
First layer calibration is simply the process of calibrating the distance between the nozzle and the print surface. As pre-assembled printers are calibrated before they leave the factory, this calibration is only required for kit builds or when the printer has undergone large changes, such as changes to extruder, nozzle, or the printer’s location, among other reasons.
For the former, the calibration is part of the Wizard, which guides users through all of the necessary tests and calibrations. Those who need to recalibrate the printer after a change can initiate the calibration by selecting “Calibration > First Layer Calibration” on the LCD menu.
Unlike leveling a bed in which points in different places on the bed are adjusted, first layer calibration shares more similarities with Z offset calibration. It basically adjusts the distance between the nozzle and the print surface all over the bed.
Although first layer calibration may not be exactly like leveling a bed, it aims to accomplish the same goal: allowing extruded plastic to adhere well to the build surface without damaging it. It’s that simple! Thus, a bad first layer calibration can lead to prints that don’t adhere or don’t stay adhered, which happens when the nozzle is too high. It could even end up damaging the build surface if the nozzle is too low.
The first layer calibration also varies between different surfaces, filaments, and nozzles. Not all surface types have the same thickness, flow rates vary depending on the nozzle size, and different filament types may also stick or “build up” differently than others.
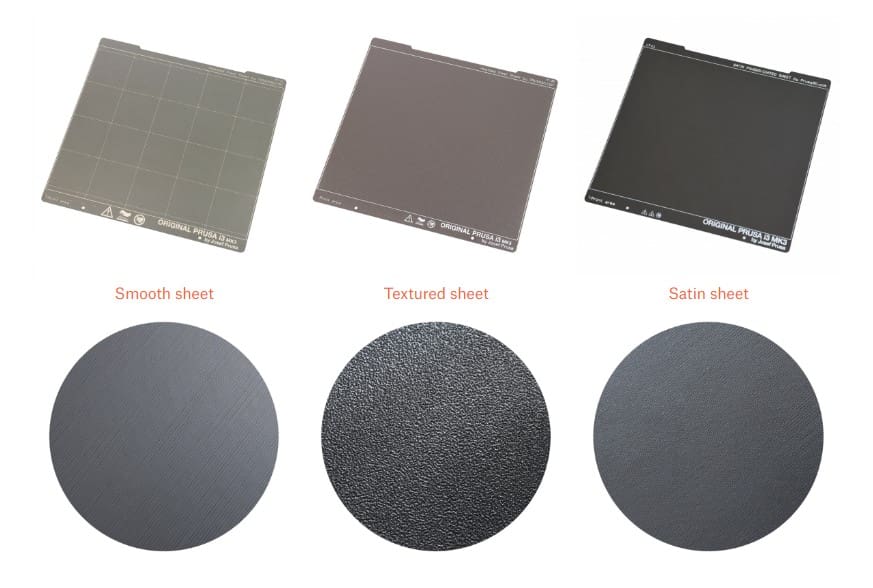
Fortunately, some build surface differences have been accounted for. Prusa has a feature called “steel sheet profiles” built into the printer that allows users to easily switch between, for example, a smooth or textured steel sheet of different thicknesses. The first layer calibration is completed beforehand for each profile (i.e. each sheet attached to the printer). Users can then apply the correct one for the sheet being used later on.
Pros & Cons

There are a few pros and cons associated with the first layer calibration.
Pros
- Unlike adjusting the Z offset, it allows for quick swaps between build surfaces of different heights, making use of profiles.
- Once it’s set, it almost never has to be re-calibrated – unless you make major changes to your printer.
Cons
- The calibration can be challenging to get perfect, especially for first-time users.
- It could also possibly damage the printer if done incorrectly.
How to Do It Right
Some find first layer calibration very difficult. To get it right, there are a few crucial considerations to keep in mind. Here’s what to look out for before, during, and after calibration.
Before
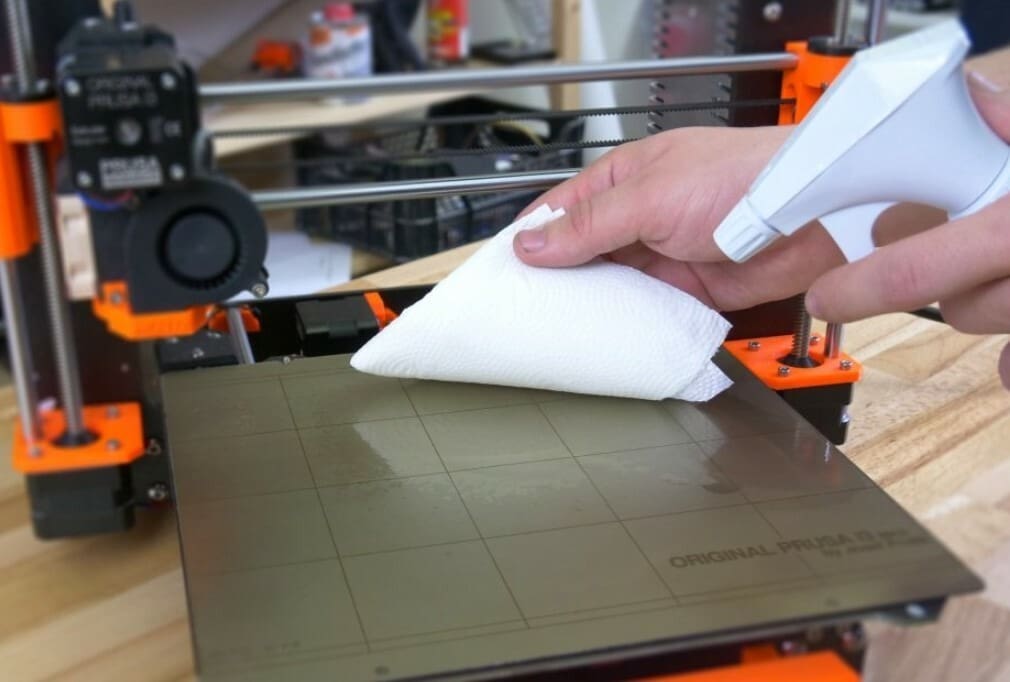
First things first, ensure the printer’s build surface is well-cleaned. Nothing is going to stick well to a dirty surface! Isopropyl alcohol should clean the surface in most cases, but warm water and dish soap can be used for a more thorough cleaning. Additionally, if the surface is clean and the lines still aren’t adhering, a glue stick can be used to increase adhesion.
Filament in poor condition can lead to poor extrusion, which affects the calibration process. Be especially wary of wet filaments!
Bad cable management can result in cables brushing against things they shouldn’t and causing issues with the calibration. So, ensure that you have followed all of Prusa’s cable management steps in their assembly guide.
While this isn’t likely to be an issue for users who have freshly assembled their Prusa printers, the nozzle’s condition is an important consideration if you’re doing the first layer calibration after making a significant change to your printer. An old, dirty, or degraded nozzle can contribute to issues with first layer calibration. Depending on the nozzle’s material and how often you print with abrasive materials, you may need to replace the printer’s nozzle relatively often.
During
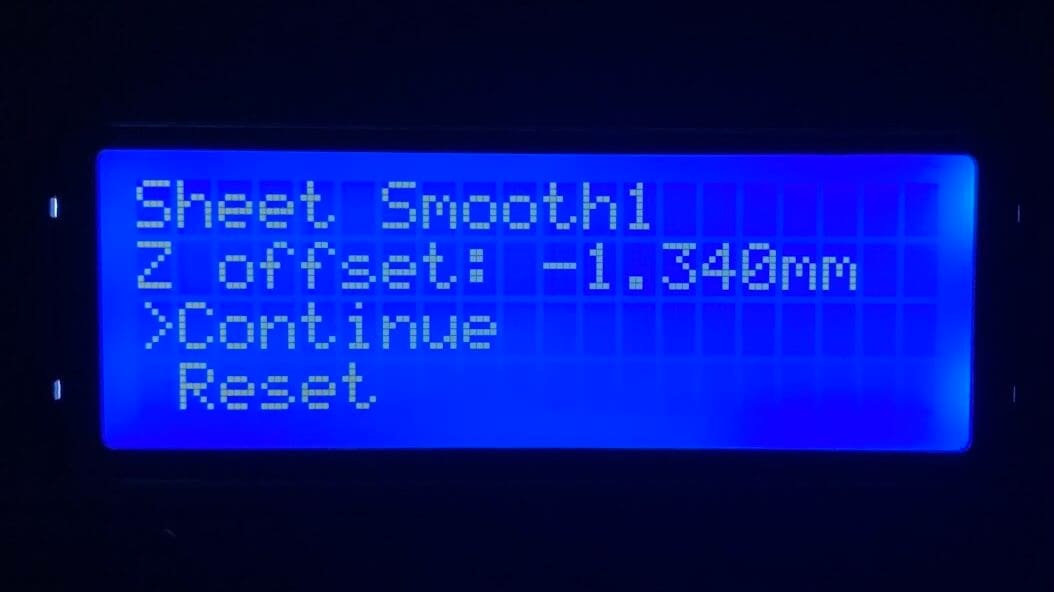
Prusa Research’s Knowledge Base covers the basic steps of how to do the first layer calibration. Definitely keep in mind that you should turn the knob counter-clockwise to make the value, and therefore the nozzle go lower, and clockwise to make the value and nozzle go higher.
The YouTuber Fred Be recommends that users try to wipe the extruded lines off with their finger – don’t use your nails, just your finger. If you’re able to wipe away the lines, the nozzle is too high and must be lowered. If you can’t, and the lines are adhering without the nozzle digging into the build surface, you’re good to go!
After

If your calibration print looks good according to Prusa’s guidance, well done! Make sure to set up the steel sheet profiles and calibrate those if you want to make use of multiple sheets. And remember first layer calibration should also be run again with any major changes to the printer, such as nozzle and extruder changes, axis changes, or location changes.
Now, if your calibration print doesn’t look good, it may be due to a number of causes. Here are the most common issues:
- PINDA height: If your offset is less than -2.00, consider raising the PINDA probe because its position may not be optimal. Similarly, if the PINDA is not triggering at all, it should be lowered.
- Mesh size and bed bevel correction: If you’re seeing the extruded lines adhere in some places but come unstuck in others, your bed’s level may require some extra attention. Turning on a 7 x 7 mesh instead of the default 3 x 3 in “Settings > Mesh bed leveling” may help alleviate this. Particularly uneven beds may also require bed level correction to be completed.
- Extruder inconsistencies: Inconsistencies in the extruder assembly can result in skipping as well as over- or under-extrusion, both of which may affect the calibration. Ensure the extruder is correctly assembled and in good working order with no audible skipping or grinding, and that extrusion looks consistent.
If you’re still struggling to get the calibration right, you’re not the only one! This calibration can be difficult to nail down. Be sure to check out the tips, tricks, and feedback from the user community. The Prusa3d subreddit as well as the comments in Prusa Research’s guidance on first layer calibration are good resources.
License: The text of "Prusa First Layer Calibration: All You Need to Know" by All3DP is licensed under a Creative Commons Attribution 4.0 International License.