Minecraft 3D Printing Guide

Minecraft's blocky terrain and creatures have cemented themselves in the zeitgeist. Bring your creations to life with this Minecraft 3D printing guide!
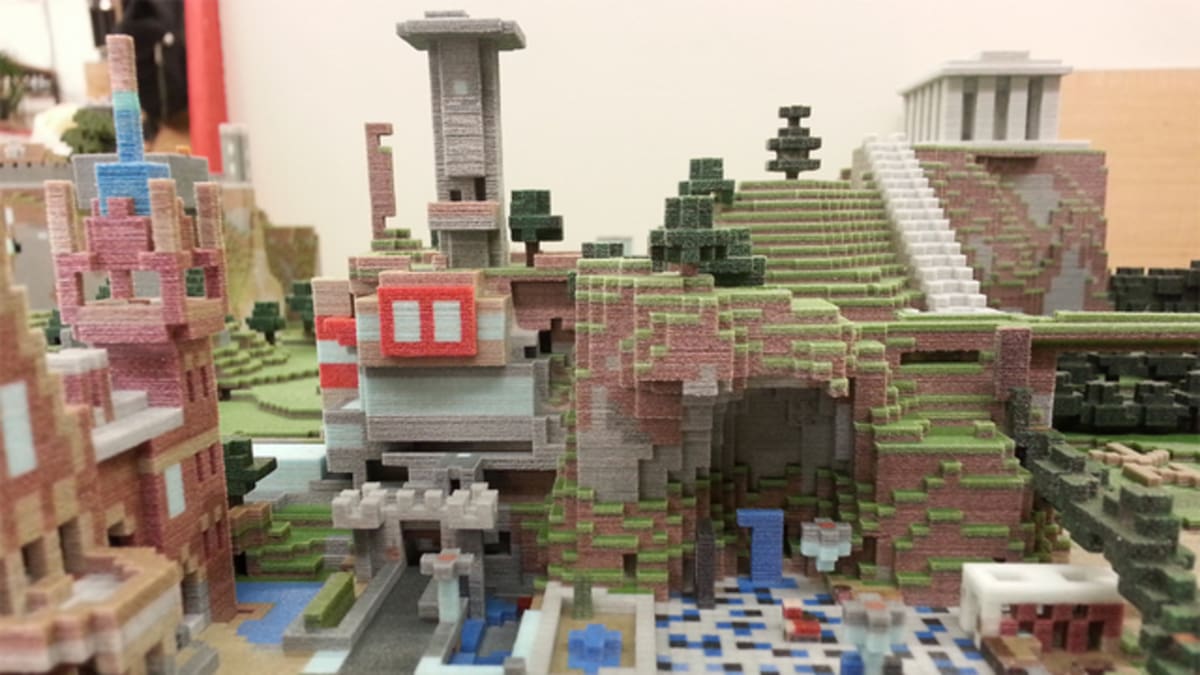
Blocks Come to Life

Minecraft is an open world. There’s not much you must do and nothing you can’t do. Players often use it like a limitless Lego bucket in the digital world, building all manner of blocky creations with the signature oversized blocks.
Unfortunately, there’s no easy way to showcase the models you toiled so hard to make in the game – that is, until now. With the on-demand manufacturing capabilities provided by FDM 3D printing and other mainstream printing processes, the blocky features of Minecraft creations are easily replicated in the real world.
Hold on – have you already got your Minecraft model and you just want a way to print it? In that case, check out Craftcloud. You’ll instantly find the best price and provider for your needs, without any extra fees!
And now, without further ado, let’s learn the ins and outs of Minecraft 3D printing.
Why Do This?

The simplest answer is, because you can. On a less philosophical note, Minecraft 3D models would make great gifts for Minecraft fans. Who wouldn’t want a replica of their creation on their desk?
The techniques discussed in this article might be useful for educators as well. After all, you’re much more likely to hold the attention of the class with a Minecraft project than if you try to replace a vacuum cleaner part together.
As with the game itself, the reasons matter little. Do you want a pixelated chicken? You can have one! The point is it can be done, and let’s find out how!
What to Print?

Naturally, you can print your in-game creations. If you’ve spent hours exploring countless biomes to find that shade of orange stone, or if you’ve used up several diamond pickaxes to have enough cobblestone for your perimeter walls, you might want something tangible in exchange for all that effort.
If you want to materialize some cute characters, tools, or other items in your inventory, you can download a great variety of designs from sites like Thingiverse for free, or you can use a 3D design tool yourself.
Some popular programs, like Tinkercad, have built-in tools to give you that Minecraft-look you desire. Tinkercad is the free little brother of AutoCAD, and it’s designed for easy use. In this program, you can quickly build whatever you want and import it into your Minecraft world, or you can print your model with your 3D printer.

If you’re more serious about building models outside of Minecraft, you can try several voxel-based design platforms that work with the same technology on which the game is based. VoxEdit and Cubic Studio are good examples of such software.
With these options, you can “Minecraftify” almost any 3D shapes, importing them on whatever scale you please with tools like WorldEdit or MCEdit. This would be the quickest way to build your own colossus without having to work on it for weeks. Importing things into Minecraft is a topic for another article, though, so let’s move on to exporting builds from the digital to the real world.
Export Guide

The simplest way to export your Minecraft creations from the game is by using a free program called Mineways. After unzipping, you just start the program with the EXE file, and you can already find your saved worlds ready to load under “File > Open world”. If all goes well, you’ll be treated with a top view of your realm.
By default, the map will be centered on the spawn area, but under the View tab, you can easily jump to the location of your avatar. Find the area you wish to export on the map, and select it by holding the right mouse button and dragging a rectangle around it.

1. Select Layer Height
Just under the menu bar, you’ll find two sliders for height and depth. The first one is the topmost layer that will be selected, while the latter indicates the bottom layer. By playing a bit with the slicers, you can see the purple selection area changing, as it becomes deeper or shallower.
The air above your building doesn’t matter in terms of selection, however, you should pay attention to the layer depth. You don’t want to export a large plastic base for your model unnecessarily.

2. Exporting
When you’re satisfied with your selection, choose one of the export options from the File menu. If you want to print your model, go for the “Export for 3D printing” option. For a simple, single-color print, the STL file format will do, but you have several options that will export textures and colors for finer details.
If you want, you can further work on your creations in 3D editing programs to create digital art or to refine them the way you want. If this is the case, you may want to choose “Export for rendering”. For all details regarding the different export options, refer to the Mineways documentation.

3. Export Settings
In the upcoming window, you’re presented with a plethora of options to fine-tune your exported model. For a simple print, the most important thing to set is the size of the model. You can either set the maximum height of the whole print, or you can set the height of one block, which will scale the model accordingly.
Here, you can also decide what to do with partial tunnels, floating objects (which obviously can’t be printed to float), or the edges of connected objects. You can find a detailed description of all of these options in the documentation.

4. Slice and Print
If all goes well, you should have an STL file that can be loaded into your favorite slicer. Set your preferred parameters, and you’re ready to print the model.
Keep an eye out for overhangs and set supports accordingly. One downside of voxel-based models is that it’s hard to avoid larger overhangs unless you work with tiny block heights. Keep that in mind when you’re building your Minecraft model for printing.
Finally, if you don’t have a printer, there are tons of options to have somebody help you out. As mentioned earlier, you can easily find the best materials, providers, and prices through Craftcloud.

(Lead image source: Kotaku)