How to Install OctoPrint/Klipper on an SBC: Tutorial

Want to use an old SBC with Klipper but can't find a tutorial for it? Check out this universal step-by-step guide!
When thinking about 3D printer upgrades, one of the first things that come to mind is remote control via OctoPrint or Klipper. The ability to keep an eye on the printer while you’re away from home unlocks a new set of possibilities (and gives you some peace of mind).
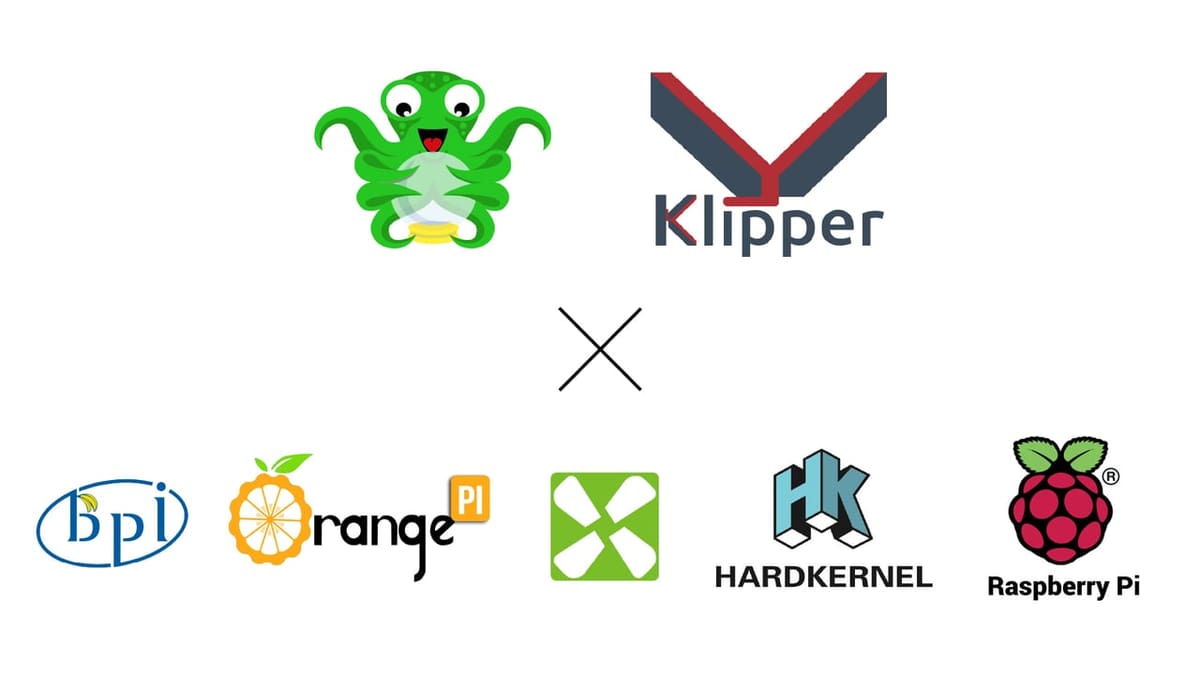
Both OctoPrint and Klipper require an external computer to work and communicate with the printer. Most users install them on a Raspberry Pi, which is a single-board computer (SBC for short). It’s small, cheap, efficient, and easy to program. Unfortunately, it is no secret that Raspberry Pis are nearly impossible to come by nowadays, primarily due to the ongoing chip shortage. Luckily for us, plenty of cheap alternatives (including drop-in replacements) are perfect for our purposes.
Sometimes it’s challenging to find an installation tutorial for a specific model. This article is a (more or less) universal step-by-step guide on how to run Klipper and OctoPrint on any SBC of your choice. Keep reading to find out how to do it yourself!
Background
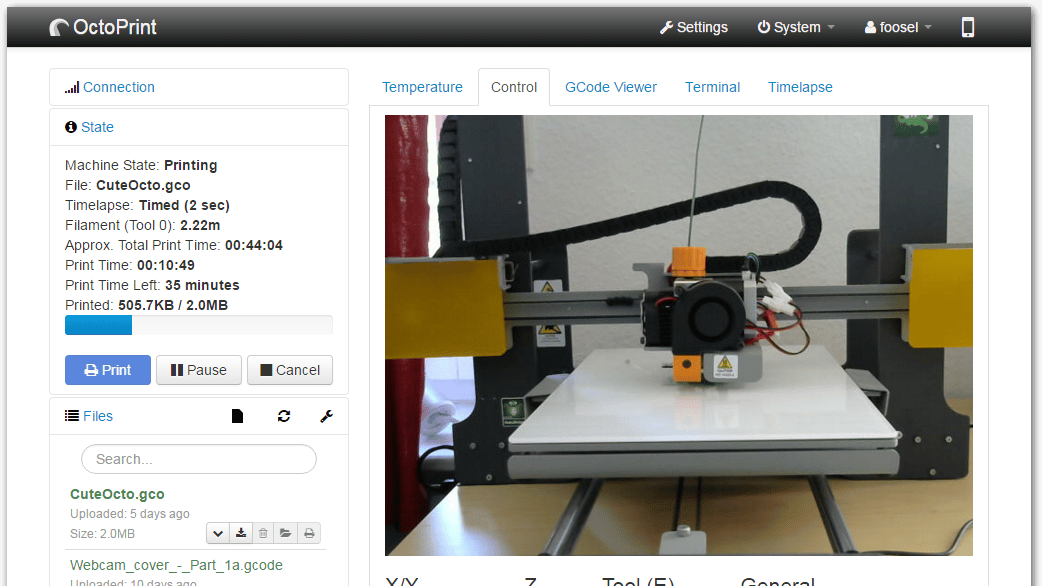
So what do OctoPrint and Klipper actually do? OctoPrint is a web control interface that runs on a separate computer. It interacts with a pre-existing machine firmware, like the ever-popular Marlin. It allows you to remotely give commands to your printer, as well as monitor the status of a job, even via a webcam’s video stream. You can access it from any browser on a PC connected to your home network.
Klipper, on the other hand, is standalone firmware that runs on the printer’s mainboard and a separate compute module. It’s also controlled and programmed via a web interface and offers a set of functionalities aimed at improving print speeds while reducing vibrations.
While they are both self-sufficient and independent from each other, you can set up OctoPrint’s interface to control Klipper. This is especially helpful for those who already have OctoPrint installed or aim at having everything displayed on the same page. If you don’t have a preference or are setting everything up for the first time, we suggest using one of the purpose-made interfaces instead. We will cover the procedure in the rest of this article, so stick around to find out more about the process.
Summary
While it might seem like a lot to handle, this guide doesn’t require any additional skill or knowledge. Plus, we’ll use well-known, well-documented tools with a standardized procedure. If you want to go more in-depth on any step, you can easily find the answer to your questions across several sources:
- The official Klipper Forum
- The Klipper subreddit
- The configuration docs for Klipper, Mainsail, Fluidd, Moonraker, and OctoPrint
In this article, we’ll go over the following:
- Selecting appropriate hardware and software: Klipper and OctoPrint require certain hardware and software capabilities to be installed and run properly. Mainly, a single-board computer (SBC) to run on, and another PC with specific software to help with the installation procedure. In this article, we recommend a set of tools and accessories in the Requirements section.
- Installing an OS on the SBC: Before Klipper or OctoPrint can be installed or run, an operating system has to be set up as the base layer to build upon. We will be using the free and open-source Linux, as it’s the most widespread among SBC manufacturers.
- Remotely connecting to the SBC: To control the board over the network, we will be using PuTTY and its command interface. This is necessary for those who don’t have a monitor and keyboard to plug in or want to control it from another computer.
- Installing Klipper and OctoPrint: For this part, the tool of our choice is KIAUH, which streamlines the installation process by reducing user inputs to the bare minimum and adding a graphical interface. It also helps manage updates and removal of every component. We will cover how to install KIAUH from the command line and every other component.
- Flashing the Klipper firmware to your printer’s mainboard: Klipper requires a part of code to run on the printer’s mainboard in order to communicate with it. KIAUH’s flash utility will guide you through the process.
- Setting up OctoPrint to communicate with Klipper: For those looking to control everything from a single interface, it’s just a matter of installing a plug-in from the official library. This is an additional step, not a requirement.
Let’s begin with the basics and go over what we’ll be using for this tutorial.
Requirements
Although it’s possible to install OctoPrint or Klipper on any computer running Linux, a few requirements need to be met. This is to ensure a smooth experience without any hiccups or performance degradation. You can learn more from the official Klipper documentation.
Hardware Requirements
Your computer will need the following hardware components to run OctoPrint or Klipper:
- A compatible mainboard: You must be able to flash new firmware onto your printer’s control board, so any obstruction (like a lack of USB connection, no bootloader pre-installed, or an unsupported MCU) will prevent you from installing Klipper. Resolve these issues before continuing with the tutorial.
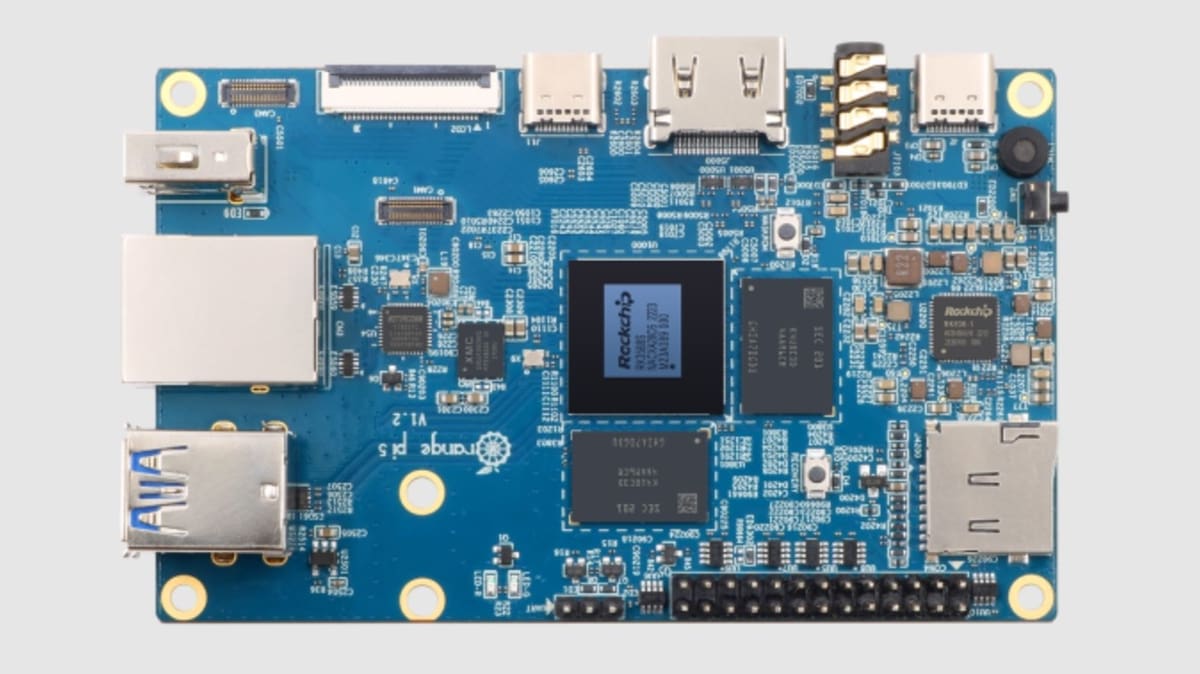
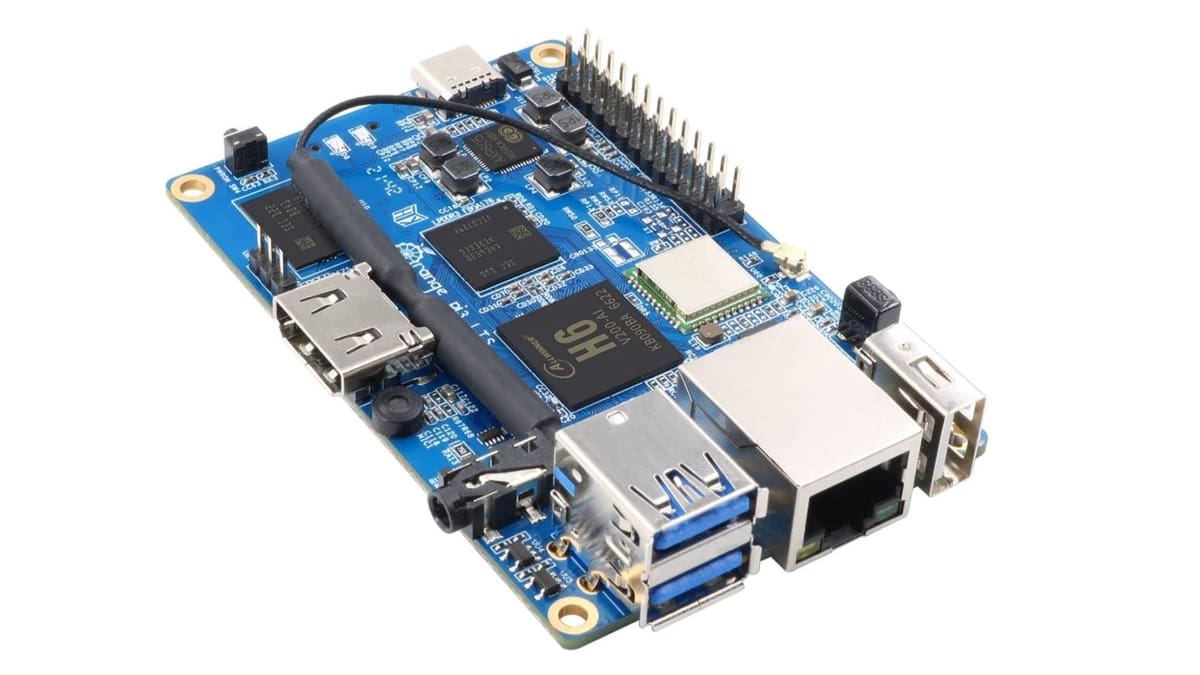
- Memory: An SBC with at least 512 MB of RAM, with 1 GB being the suggested amount. An ARM64 CPU is recommended. For this example, we’ll use the Orange Pi 3 LTS since it’s easy to find at a low price point.
- In case the SBC uses an SD card slot as a system disk, the card itself has to be a reliable unit, preferably with class U1 speeds. At least 8 GB of storage is recommended.
- Power supply: The SBC’s power supply has to match the board manufacturer’s specifications, in order to avoid involuntary resets due to power spikes.
- Network connection: The SBC has to connect to the local network in some way, either by LAN or Wi-Fi. In practical terms, it has to have a Wi-Fi module installed and/or a LAN port.
- USB connection to the printer: At least one , although it’s desirable to have at least two USB ports to plug in the mouse and keyboard for an eventual debugging session. In our case, the Orange Pi has three USB-A ports, as well as a USB-C power-only connector.
- USB data cable to the printer’s board: A trustworthy one to connect them.
Software Requirements
You will also need the following software features:
- A Linux OS that is Debian-based. It could be Armbian, Ubuntu, Debian itself, DietPi, or any other distribution that qualifies. This is needed to run KIAUH, which uses the
sudocommand to execute the installation utility. We’ll use the official Debian image for our Orange Pi 3 LTS, since it’s light and features a few tools that make the user experience easier. You can consult the list of OSes available for your board on the manufacturer’s product page. - A computer with an internet connection and a set of programs installed:
- PuTTY and WinSCP to remotely control the SBC and transfer files between it and your PC.
- Angry IP Scanner or Advanced IP Scanner to find the IP address of your SBC.
- BalenaEtcher to flash the operative system to the SD card.
Now, let’s dive into the guide itself!
SBC: Configuring & Installing the OS
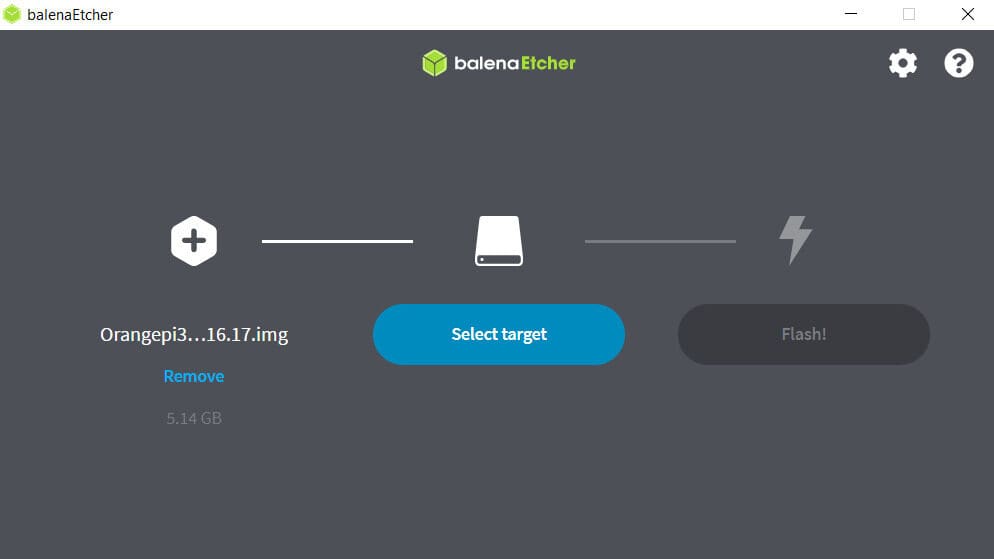
Once you retrieve and unpack the image file for the OS of your choice, you can use BalenaEtcher to flash it onto your SD. With the card plugged into the PC, follow the on-screen instructions to select the image file, the target SD card, and the flash.
Configuring Wi-Fi
Once finished, an additional step is required to tell the SBC to connect to Wi-Fi on startup. You can skip this step if you plan to connect via LAN (recommended) or use a monitor directly.
To do this, open the SD card folder, and update the files using the text editor of your choice. In the case of DietPi:
- Open the file named
dietpi.txt. FindAUTO_SETUP_NET_WIFI_ENABLEDand set to value 1. - Open the file
dietpi-wifi.txtand setaWIFI_SSID[0]to the name of your Wi-Fi network. - In the same file
dietpi-wifi.txt, setaWIFI_KEY[0]to the password of your Wi-Fi network. - Save and close the files.
This procedure and target files vary from one OS to another but are always described in the first-step guides and manuals. Don’t be afraid to check for OS-specific instructions.
Installing the OS
We’re now ready to insert the card into our SBC and power it on. The first boot might take a while. In case you’re using a monitor, you’ll probably see a lot of commands scrolling. Let it finish and do not power it off.
Setting Up Remote Access
If you’re going to remotely access the board from another PC via LAN or Wi-Fi, you’re going to need its IP address.
- After the boot sequence is finished (usually signaled by a pulsing LED), run the IP scanner of your choice from your PC and start scanning (you need to be connected to the same network as the board).
- Look for a device with a name that resembles your OS or board of choice.
- Copy the IP address, dots included.
- Open PuTTY, and paste the IP in the address bar.
- Leave the “Port” to the default value, and select “SSH” for the connection type.
- Click “Open”.
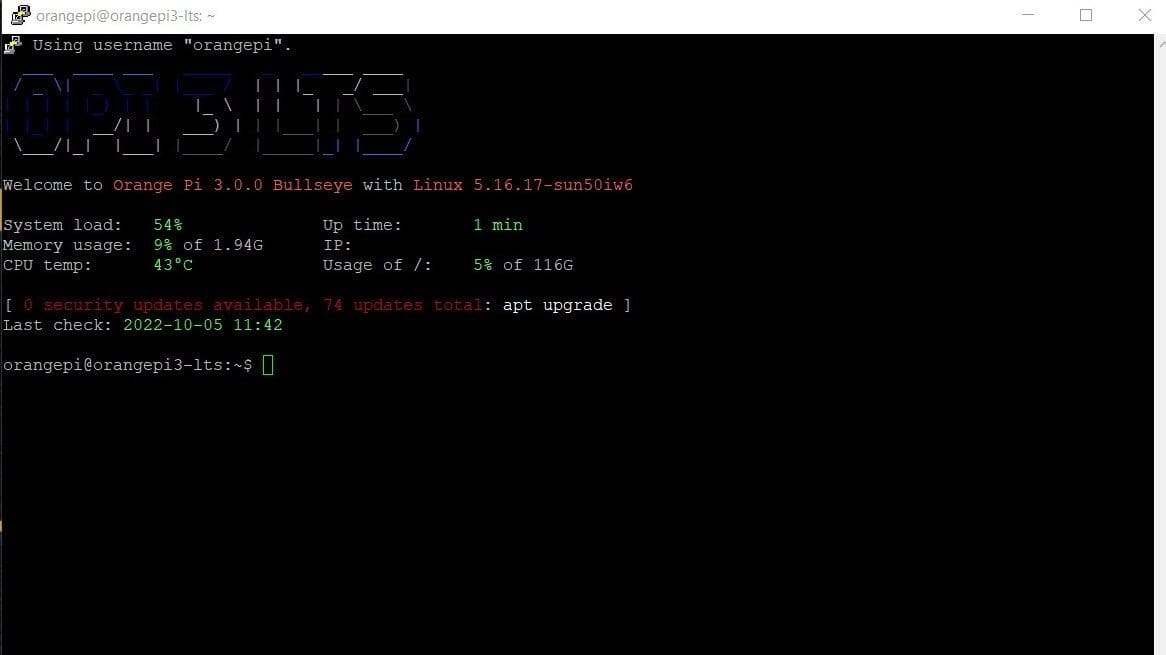
You should now be remoted into your SBC. The window that you see now is a fully-fledged terminal that you can operate remotely. You can copy text simply by highlighting it, paste it with a right-click, and send a command by pressing enter. Remember, if you close PuTTY, you also close the terminal session and the ongoing processes with it. You’ll need to start over with everything you interrupted in a new session.
We can log in with the root username and password (in this case username: root, password: dietpi). These credentials are mentioned in the OS documentation. You can then follow the on-screen instructions to set up a new username and password.
Updating the OS
Once you’re set, you can update your OS and packages to the latest version with the command sudo apt-get dist-upgrade -y. Follow the on-screen instructions to proceed with the update. Once it’s finished (it will reboot itself), you can carry on installing Klipper.
SBC: Installing Klipper & OctoPrint via KIAUH
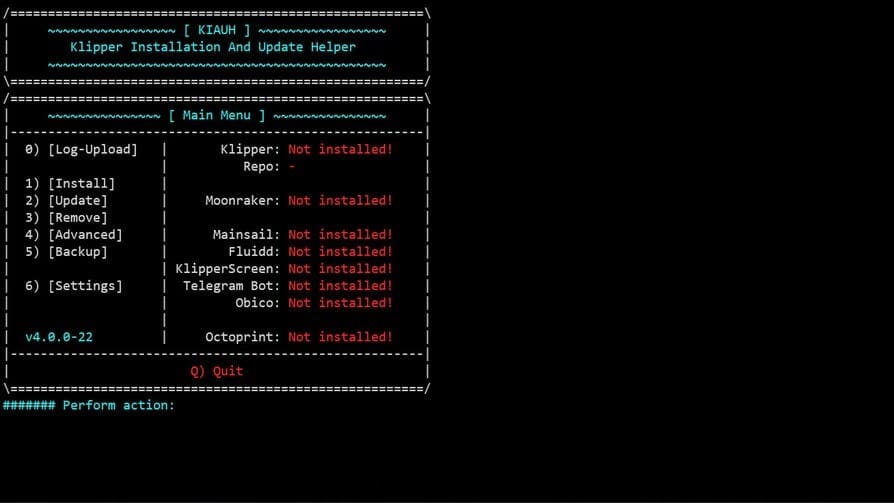
To streamline the installation process, cut down on commands, and save time, we’re going to use KIAUH, the Klipper Installation And Update Helper. This tool is simple yet extremely effective. It incorporates scripts to automatize the installation of each component. From a single user input, it can install everything you’ll need. Let’s follow a simple 3-step process to install all the necessary packages and tools, directly from the command line. Remember, the steps are procedural. Don’t skip anything or execute them in a different order!
Install the GitHub Package
To start, we need to install the Git package. This will allow us to copy the GitHub repositories we need without opening a browser. Run the command sudo apt-get install git -y and authorize with the system password.
Clone KIAUH
Now that we have Git installed, we can copy the GitHub repository where KIAUH is stored:
- We choose the target directory with the command
cd ~. - We clone the repository with
git clone https://github.com/th33xitus/kiauh.git. - We run the script with
./kiauh/kiauh.sh.

Install Klipper & Other Components
A new menu will now pop up. You can navigate it by entering the number corresponding to the submenu or function you want to execute.
- Enter 1 for the [Install] submenu.
- Select 1 again to install [Klipper] with Python 2.7.
- When prompted, specify how many instances you want to install (it’s one for each printer you wish to connect). In this case, we’ll be running only one instance.
- You may also let KIAUH create the default folder to save your .gcode files (virtual SD card) and add a few useful and universal macros.
- Once setup is complete, you can follow the same interface to install Moonraker and Mainsail or Fluidd, and if you wish, OctoPrint.
From KIAUH you can also update, remove, change versions, and install every package, including KlipperScreen, Obico for Klipper (formerly Spaghetti Detective), the Telegram Bot, and the MJPG-Streamer for webcam streaming.
If you’re interested in using only OctoPrint without Klipper, you can skip steps 2-4 and refer to our guide on how to install OctoPrint.
Printer Board: Preparing & Flashing the Firmware
After installing all the needed dependencies (Moonraker and a web interface of your choice), proceed with flashing the 3D printer’s mainboard. You won’t need to compile anything, as KIAUH will do everything for you. You only have to select the correct settings for your board. You can find a list of example configurations (with the recommended flashing settings at the top) in the Klipper repository. This will also come in handy later.
We’ll be using the BTT SKR Mini E3 V3 as an example. The config files recommend compiling for the STM32G0B1 with an “8KiB bootloader” and USB communication.
Preparation
In KIAUH:
- Open menu 4 [Advanced] and select “Build+Flash” to build and flash the new firmware. At this point, the printer should be powered on and connected to the SBC.
- If prompted to add the current user to the dialout group, accept and continue.
- Enable the “extra low-level configuration options”.
- From “Micro-controller Architecture”, scroll to find “STMicroelectronics STM32”.
- Under “Processor Model”, select the “STM32G0B1”.
- Under “Bootloader offset”, select “8KiB Bootloader”.
- For “Communication interface” set “(USB (on PA11/PA12))”. If you wish to connect to the printer via the CAN bus or UART, you may select a different option.
- We save with ‘Q’ and confirm with ‘Y’.
Flashing
Now our firmware is ready to be flashed. We can do so in two ways, depending on what the config files suggest:
- Via the USB connection.
- By saving it to an SD card and plugging it into the printer.
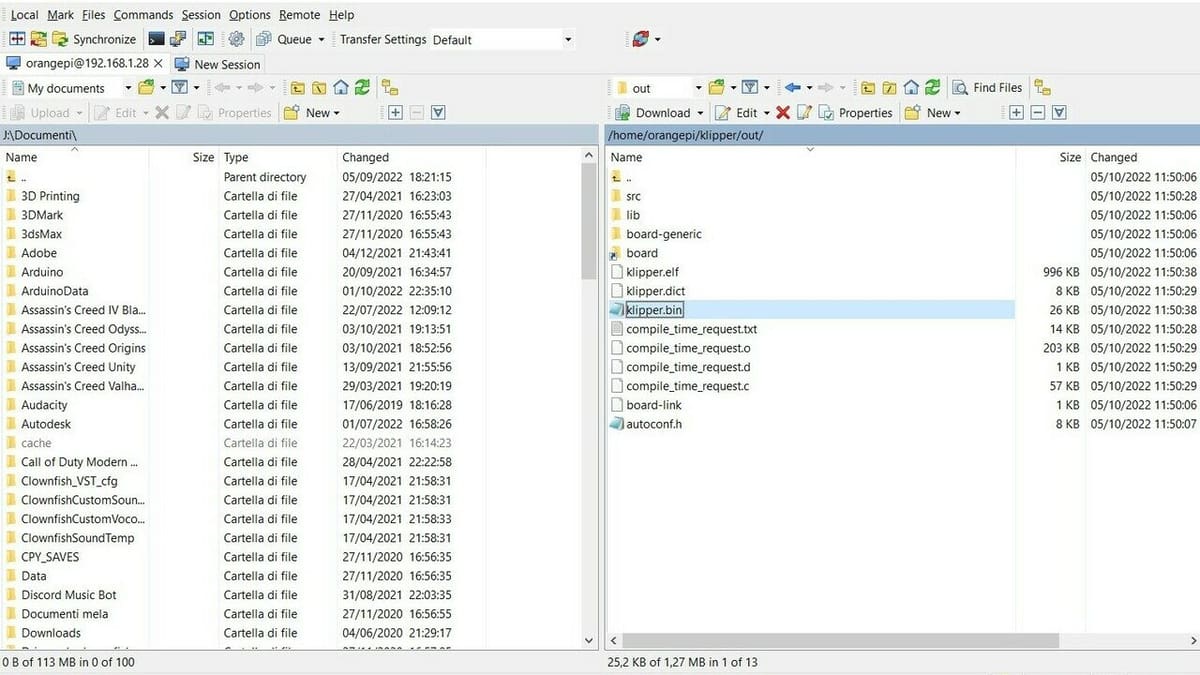
In our case, we’ll have to go with the second option. But first, we have to retrieve the firmware binary file we compiled and named klipper.bin. For this, we’ll need to remotely connect to our SBC via WinSCP:
- On your computer, open the WinSCP application and start a “New Site”.
- Enter your SBC’s IP address for the “Host Name” and change the “File protocol” to “SFTP”.
- Insert username and password, and click “Login”.
- Open the “klipper” folder, then the “out” folder. Locate the firmware file labeled klipper.bin.
- Insert the printer mainboard’s MicroSD card into your device and format it.
- Copy and paste (or drag and drop) the klipper.bin file to your inserted MicroSD card, and change the name if necessary. In our case, we need to change it to firmware.bin, as per the configuration instructions.
- Power off the printer, insert the MicroSD card into your machine, and power it on again.
- Wait a few minutes to be sure the firmware is updated, and then connect your SBC to the newly flashed printer.
Klipper is now up and running, but we’re not ready to print just yet. We still need to retrieve our MCU ID and create the config file.
Let’s check out how to configure it!
Connecting SBC & Printer
The MCU ID is a path that identifies a microcontroller with Klipper flashed on. The host-side application will use it as a reference for where to send the instructions when multiple devices are connected to the SBC. It needs to be included in the config files.
ID Retrieval
To retrieve your printer’s specific ID:
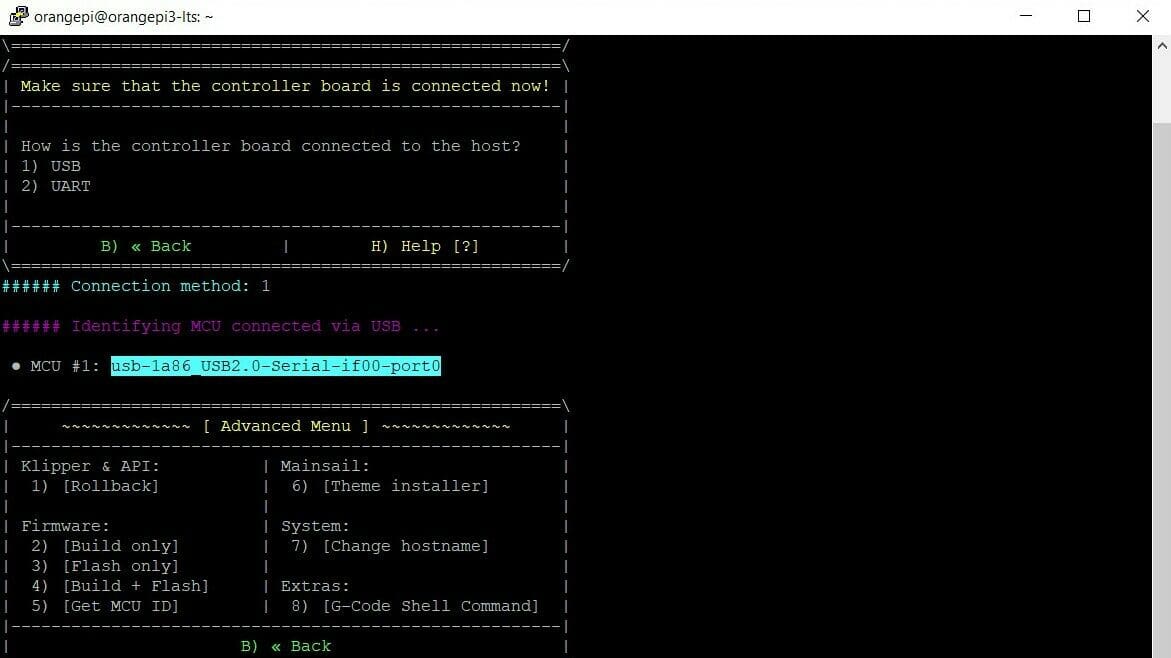
- In KIAUH, navigate to “[Advanced] > [Get MCU ID]”.
- Connect the printer and choose the connection method that you’re using.
- Copy the entire address in the result (e.g. “/dev/serial/by-id/usb-Klipper_stm32g0b1xx_36003F000450415339373620-if00”) and save it for later.
As discussed previously, every printer requires a configuration file that includes pin definitions, configurations, and the Klipper macros. Once you’ve found one that suits your needs, you can copy it entirely.
Adding the Printer to the SBC
You can open the web interface by typing the IP address of your SBC in the browser’s search bar. In the control interface that pops up:
- Add a new printer with the SBC’s IP address and the default port 7125.
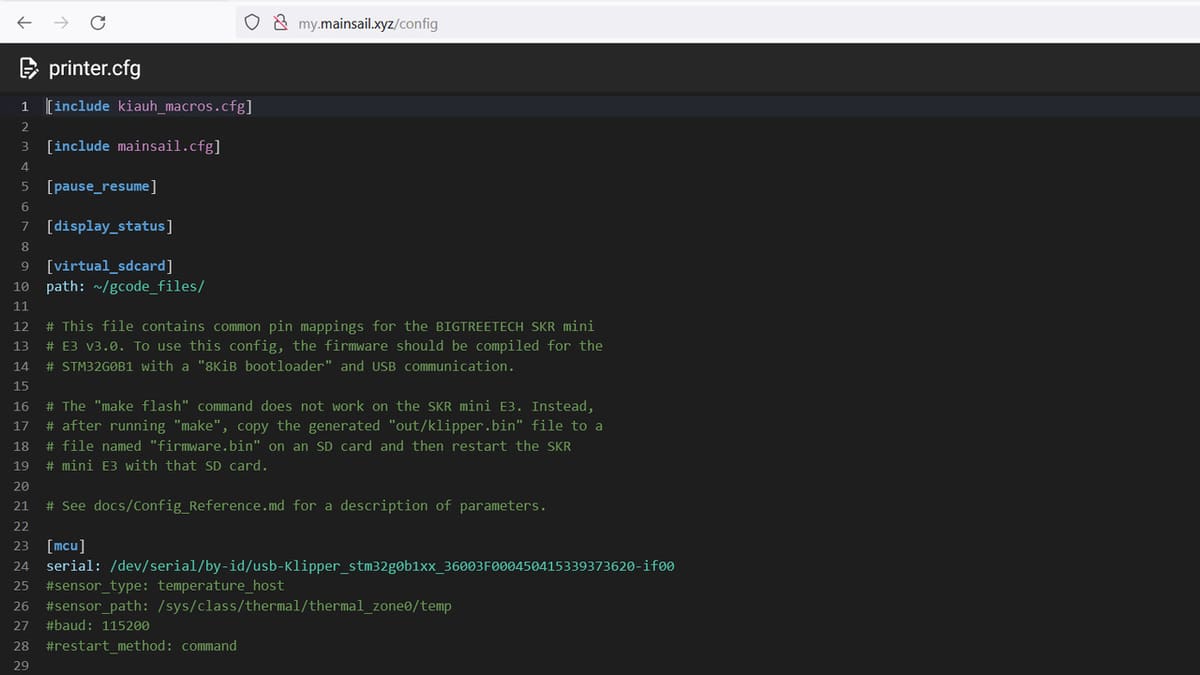
- Navigate to the Machine menu and open the printer.conf file.
- Paste the code here.
- Under “[mcu]”, in the “serial:” line, paste the MCU ID (remove any previous path).
You’re now ready to restart the firmware and connect to your printer. Remember that if you made any modification, upgrade, or pin swap, you need to change the original printer.conf to reflect those changes. Refer to the Klipper Configuration Reference for a more detailed explanation.
- Ensure your “[virtual_sdcard]” path is the same as the folder you’re going to save your .gcode files. You can add/remove/rename folders with WinSCP.
- Include any macro files you want to use with “[include your_macro_file.cfg]”.
- Make sure to run all the necessary safety checks to avoid any unpleasant surprises later on.
Installing OctoKlipper
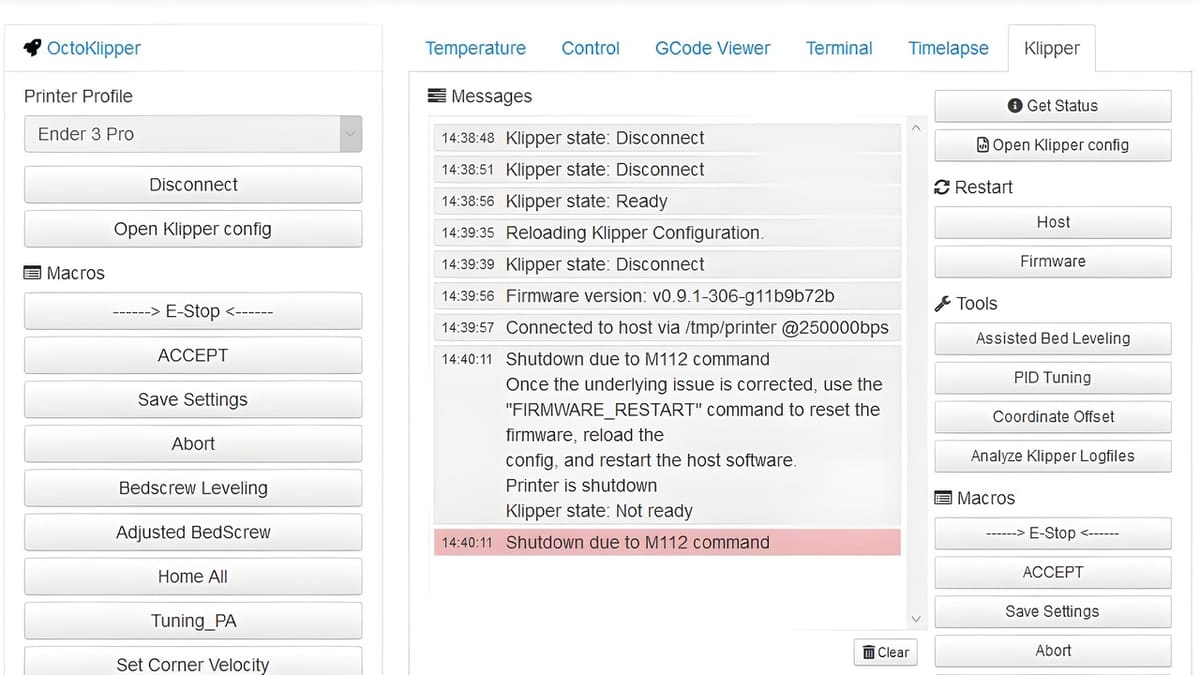
If you like the interface, the plug-ins, or simply the feel, you can control Klipper via OctoPrint with a plug-in extension. You won’t need Mainsail or Fluidd, but you still need Moonraker. Note that this step is optional, as Klipper is designed to work independently from OctoPrint.
- In the OctoPrint settings menu, navigate to the plug-in manager.
- Search for the OctoKlipper plug-in and install it.
- Reboot OctoPrint.
You can now control every aspect of Klipper from OctoPrint’s interface. Enjoy!
License: The text of "How to Install OctoPrint/Klipper on an SBC: Tutorial" by All3DP is licensed under a Creative Commons Attribution 4.0 International License.