Inkscape Laser Cutting: How to Design Your SVG File

Inkscape is a great tool for creating custom laser cutting/engraving designs. Learn how to use Inkscape for laser cutting!
Laser cutters and engravers come in many varieties, from huge industrial machines to small desktop devices. There are many different manufacturers and just as many software options, but something that most have in common is compatibility with the SVG file format.
SVG is a type of vector graphic: an image created by lines and curves that have been defined mathematically, rather than pixel by pixel. This means that they work well for 2D illustrations, logos, animation, and of course, laser cutting and engraving!
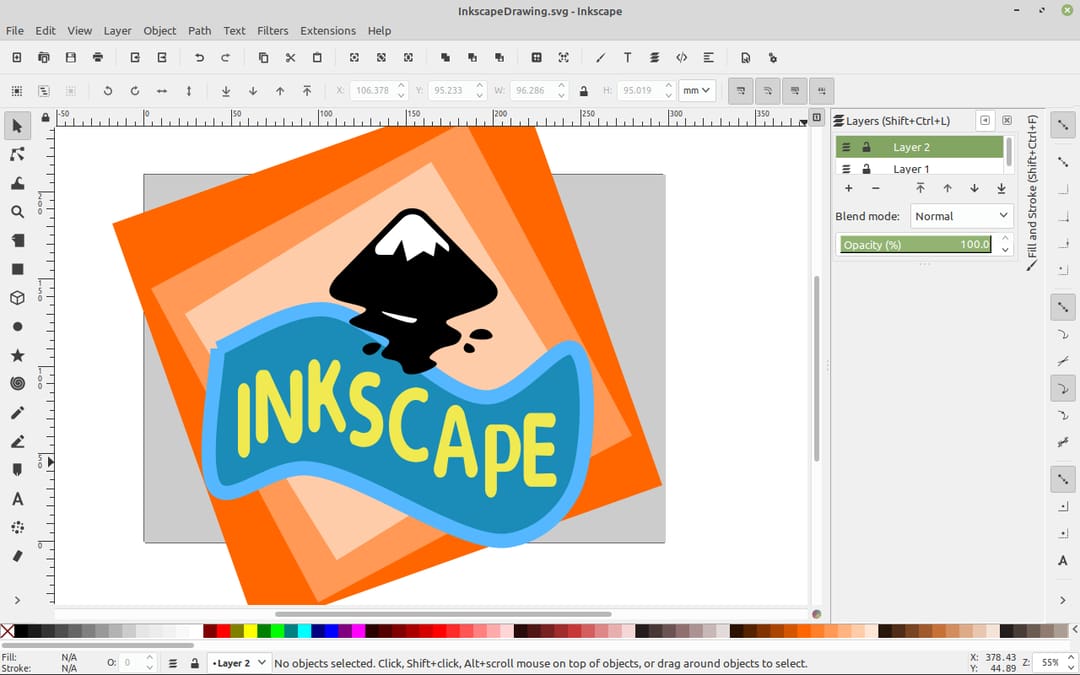
This is where Inkscape comes in. Inkscape is an open-source vector graphics editor. It’s similar in function to Adobe Illustrator, but it’s completely free. While it isn’t made specifically for laser cutting, it’s capable of producing SVG graphics that can be later translated to G-code. G-code is how your laser cutter or engraver knows where to cut and in what order, and that conversion is usually done in a different program.
But before you can think about G-code, you’ll need a drawing to work with. So, let’s look at how to create a design suitable for laser cutting using Inkscape!
The Basics
In this tutorial, we’ll be creating a vector file of a simple engraving and cutout, to be used with a G-code sender. We’ll be making an “I Love Guitar” sign, but of course, feel free to mix it up and make it your own. We’ll be focusing on three common types of objects that can be engraved and cut: text, images, and shapes.
First, we’ll use Inkscape to turn a normal bitmap image into a path that laser cutting software can understand. Then we’ll add some engraved text and a shape cutout (in this case, a heart). And finally, we’ll go over some things you might need to adjust depending on your laser cutting software.
Before we can start to use Inkscape, make sure you have the latest version installed. You can download Inkscape for Windows, MacOS, or Linux. Be aware that, depending on your operating system, certain graphics and functions may vary, such as shortcuts and icons, but the main functionalities are essentially the same.
Before we get into our tutorial, here are some basic controls:
- To pan around the canvas, hold down the scroll wheel button while moving the mouse.
- To zoom in and out, use the “-” and “+” keys, or hold down Ctrl and use the scroll wheel.
- To select multiple objects for editing, hold Shift while selecting them.
The Setup
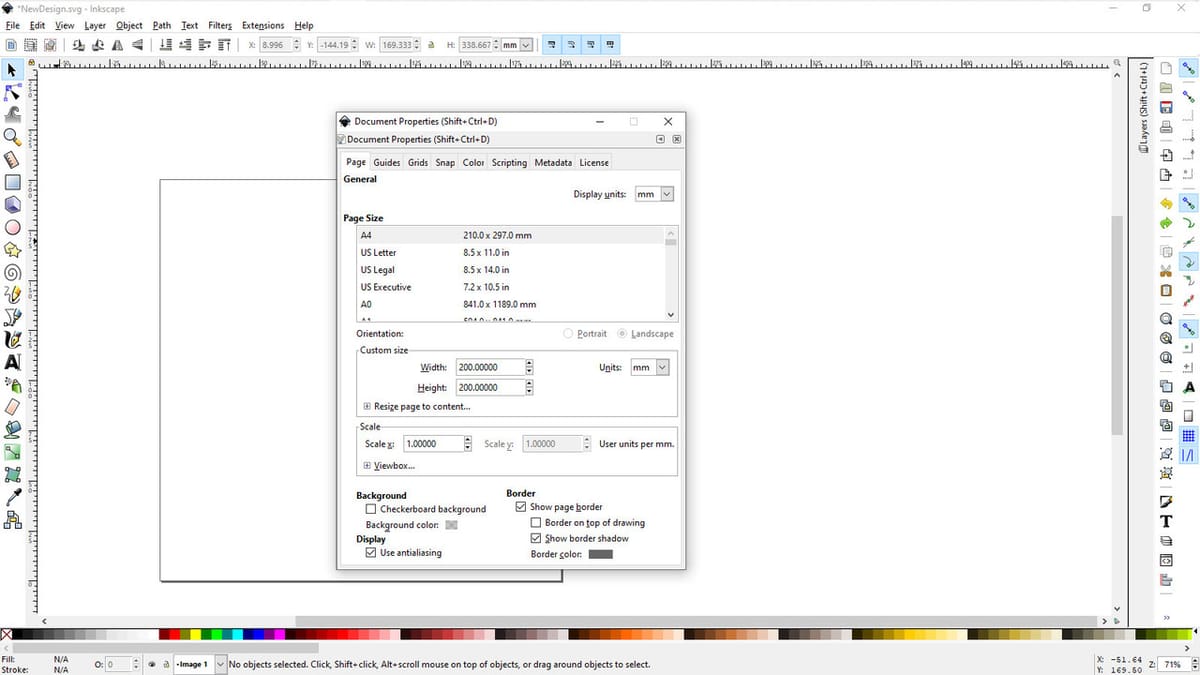
Once you’ve installed Inkscape, open it to find a blank canvas. Before we start drawing anything, we should change the canvas size to the size of our work area. This helps us to avoid trying to laser anything outside of our work area. To set canvas size, click on File > Document Properties and set a custom size.
Now it’s time to choose a starting image, and the image you use needs more careful selection than you might imagine. Vectors are more like drawings than they are pictures, therefore simple images work better. In this case, we used a clip art drawing of a guitar. As we’ll see later, the simpler the image, the easier it will be to “trace”, and the less processing power it will take.
Note that here we’ll be simply engraving this image, not cutting. If you want to cut an image out, be sure to avoid redundant “islands”. These are pieces of a cut that would fall out because they don’t attach to a part of the original cutout. This is also a problem with text, especially letters like “O”.
If you do engrave an image of your own, ensure that there is plenty of contrast and a silhouette-like shape of the thing you want to trace. If your image doesn’t contain a heavy contrast, the tracer will try its best to outline it, but you may get some interesting results. In any case, feel free to experiment with the tracing process.
Image to Vector
Start out by inserting your image onto the canvas. Depending on the file you might have to resize it and rotate it to fit it where you want. Don’t worry too much about the exact position; we’ll have a chance to move it again later.
To import your file:
- Select File > Import and choose your file.
- Scale the image with the handles (hold Ctrl for uniform scaling).
- For more detailed adjustments, select Object > Transform.
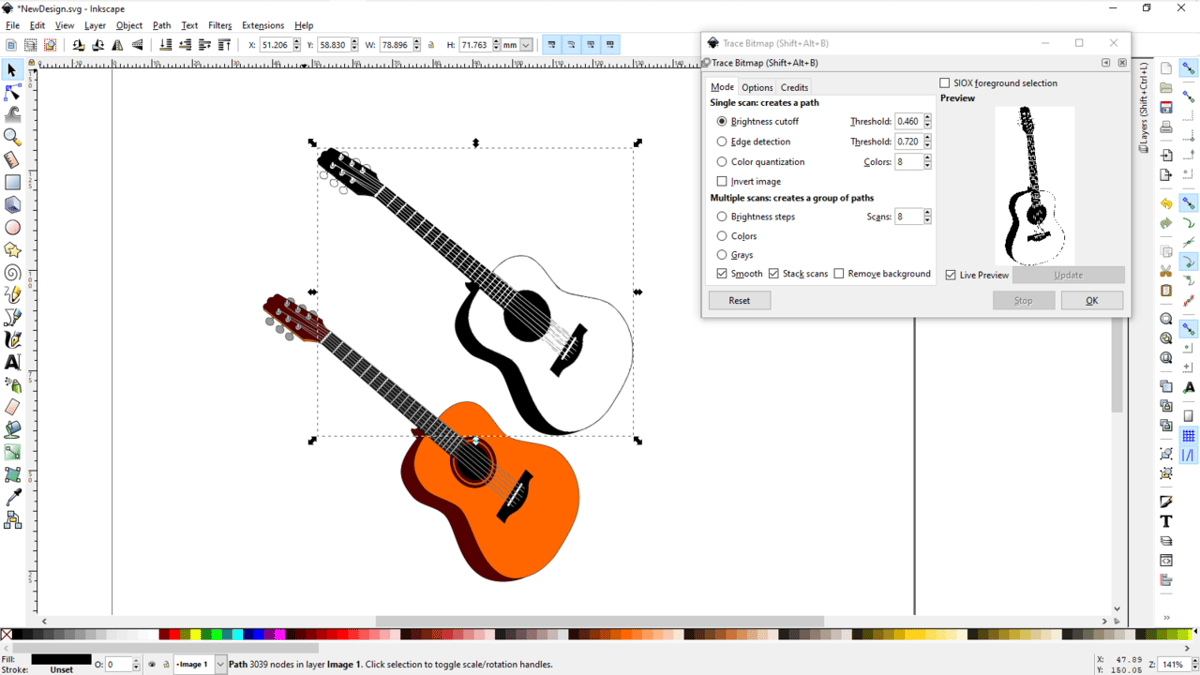
Once you have your image in a decent location, we can start converting it to a path. A path is essentially a set of lines that define the majority of a vector graphic. To do this, we’ll have to trace the image based on a set of rules. There are three ways to do this in Inkscape: brightness cutoff, edge detection, or color quantization. Brightness cutoff is the simplest and the one we’ll be using. To experiment with the other two, you can read more about how they work over at the Inkscape website.
Brightness cutoff traces a picture based on a defined brightness. This number will be between 0 and 1, 0 being the darkest. This is basically the boundary at which the outline will be drawn. Adjust this number until it creates the outline you want, just note that the more complex your image is, the longer it will take to trace and adjust.
To trace your image:
- Select the image with the Selection tool.
- Select Path > Trace Bitmap.
- Check the Live Preview box (you might have to click Update).
- Adjust the Threshold value for Brightness Cutoff to change the trace parameters.
- Select OK once the tracing is to your liking.
Once this is done, you can exit the Trace Bitmap tool and move the newly created output. It will be placed on top of your original image by default. At this point, you can delete the original image. You can move and adjust the vector using the same transform tools mentioned previously.
Additionally, you can use the node editing tool to make fine adjustments to your path. While this can become quite tedious, it’s best understood by experimentation. Simply select the tool (below the Selection tool) and begin dragging around nodes to understand its effect. And remember, you can always undo using “Ctrl+Z”.
Adding Text
Before we start typing in some text, we should introduce Layers. Layers are used for organizing your canvas objects and are convenient for when your drawings become more complex. For now, we’ll be using them to separate each type of graphic.
To create a new layer:
- Select Layer > Add Layer, or click the ‘+’ icon in the Layers and Objects side panel.
- Name the layer and click “Add”.
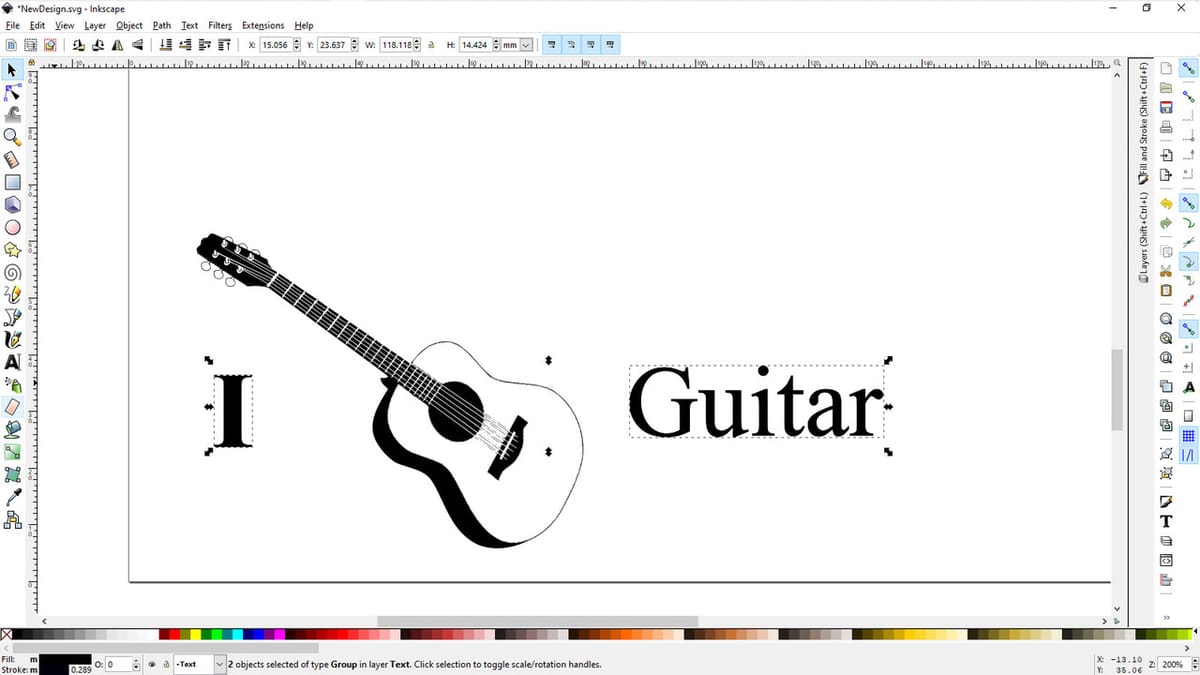
Now that we are in a new layer let’s add some text. You’ll be able to position it, change the font and change the size, and then we’ll convert it into a vector path.
To add text:
- Select the Text Objects Tool (‘A’ symbol in the toolbar)
- Set the position by moving the cursor and clicking on the target location.
- Type in your text.
- Edit the font and size in the Tool Controls bar.
- Keeping the text selected, select Path > Object to Path.
With the text as a path, you can now adjust it with the node tool in the same way as the traced image.
Adding a Shape
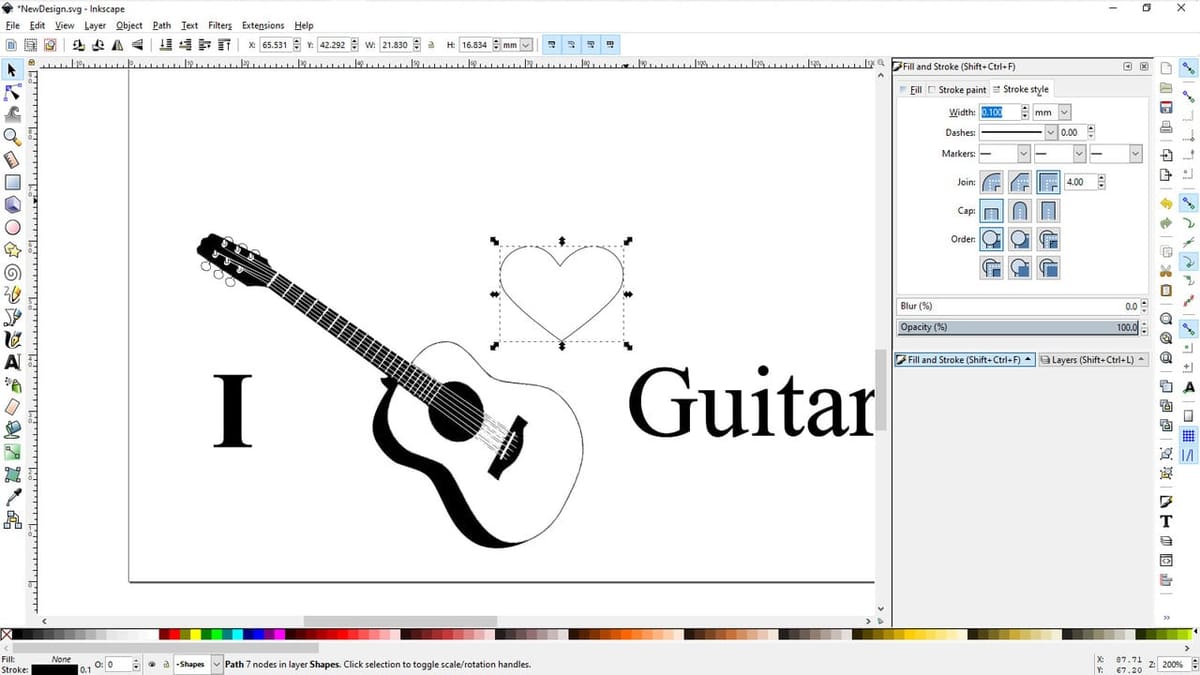
Finally, we’ll be adding a shape cutout. First, create a new layer to add our shape onto. Then, begin by drawing the shape. We can use one of three tools to make a shape: the Bezier Curve tool, the Pencil tool, or the Star/Polygon tool. we will be using the Bezier curve tool, but descriptions of each tool can be found over on Inkscape’s website.
To draw a Bezier shape:
- Select the Bezier Curve tool.
- To draw, click and hold down to define a curve, or simply click in two locations to make a straight line.
- Hit Enter to finalize, or Esc to cancel.
- You can further edit the lines using the node tool.
In this case, we drew half of the heart and then mirrored it to make a symmetrical heart. To mirror a shape:
- Select the path.
- Right-click, select Copy (or Ctrl+C), and then Paste (Ctrl+V).
- You can flip the shape horizontally using the Tool Controls.
- Join the halves together by selecting the edge nodes and then keying Shift+J.
Fine Tuning
We have our drawing, but we’re not quite done. We still need to do some fine-tuning to properly format the image so that it can be saved as an SVG for laser cutting. This includes color-coding, stroke width adjustment, and sizing proportionally. Note that from here on, you’ll need to check the specific requirements of your laser software, as the details may vary.
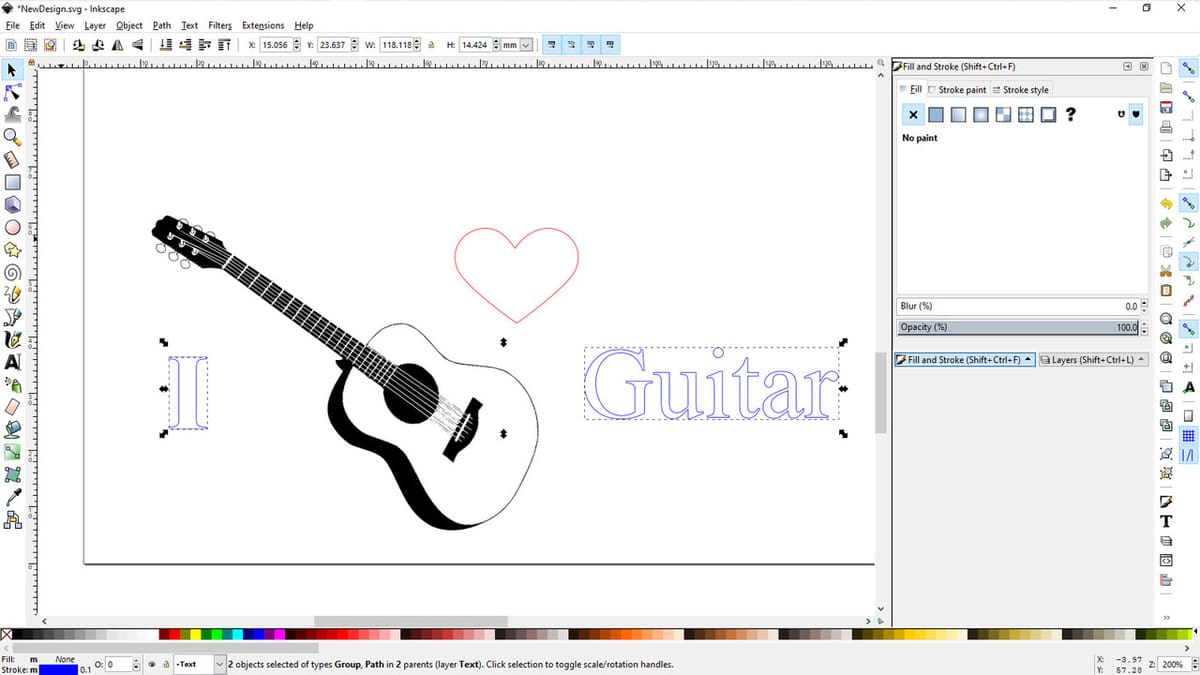
First, we have to decide what will be cut, vector engraved, or raster engraved. These respectively cut through, engrave by tracing, or engrave in rows like a printer.
For the most part, laser cutting software will decide what type of process will be done based on color. This could mean that blue lines are engraved and red lines are cut, or vice versa. For demonstration, we’ve colored the heart red and the rest blue. If your software supports raster engraving, the black areas should be detected as such.
Additionally, some software has stroke width requirements. Check yours to adjust accordingly.
To edit stroke width and color:
- Select the path to be edited.
- Select Object > Fill and Stroke… > Stroke Style.
- Adjust the fill if needed, then adjust Stroke paint to the required color and Stroke style to the required width.
Adjusting the fill and stroke pattern is either done by removing previous settings with the ‘X’ symbol or adding them via the menu. Adjusting the paint color is as simple as adjusting the slider for the color required, and stroke width is adjusted by typing in the size according to your laser software’s requirements.
Finally, we have one last little tweak. Since SVG files don’t carry units of measurement as part of their data, you might have to account for slight differences. This mainly ends up being an issue of scaling. Inkscape defaults the “user units” to 96 pixels per inch (PPI), so to determine the correct scale according to PPI, divide your software’s setting by 96. For example, if your laser cutting software is set to 90 pixels per inch, you have to scale it by a factor of 90 / 96 = 0.9375.
Now, you can export the SVG, ready to be converted to G-code that your machine will understand. This was a very simple example, but now you can use what you’ve learned to add on to your Inkscape designs and create something new. Perhaps add on a border, laser onto a journal, or turn previous Inkscape designs into cuttable files. The possibilities are yours to explore!
License: The text of "Inkscape Laser Cutting: How to Design Your SVG File" by All3DP is licensed under a Creative Commons Attribution 4.0 International License.