A Raspberry Pi 3 B+ running OctoPrint is an upgrade or modification that virtually any 3D printer can benefit from. Unless you just pulled your first 3D printer out of the box yesterday, you’ve probably heard of OctoPrint.
With OctoPrint, you can observe and control your 3D printer remotely. For instance, you can automatically take still shots of every layer and turn them into a video of a model that seems to grow by itself. You can also control lights, and even shut down your 3D printer after the job is done.
So, what are you afraid of? It’s only a Raspberry Pi 3B+ running some software! If you’ve already got a Raspberry Pi 3 B+, it won’t cost you a thing. Even if you don’t, the upgrade could pay for itself the first time you don’t lose a whole role of carbon fiber filament on a failed print.
So let’s find out how to make this upgrade!
What You'll Need

Now that you’ve decided to take the plunge and install OctoPrint on a Raspberry Pi 3 B+, you’ll need a few things:
- Raspberry Pi: We recommend a Raspberry Pi 3 B+, even over the new Raspberry Pi 4. After all, the Raspberry Pi 3 B+ is quite capable and fits more of the currently available 3D printed cases.
- Power supply: Rated at 5 V and 2.5 A and terminating in a micro USB plug.
- Micro SD card: 16 GB or better, and (possibly) an adapter that you can use to plug it into a computer.
- Standard USB cable: To connect your 3D printer’s control board to the Raspberry Pi.
- Raspberry Pi USB camera: Optional, but highly recommended. A convenient USB camera[/product_overlay] will allow you to monitor your prints.
You’re also going to need some software. We like it free and open-source:
- The OctoPrint boot image.
- An app that can create a bootable drive on the micro SD card. We recommend Balena’s Etcher, which is free and works on Windows, Linux, and MacOS.
What you won’t need is a keyboard and mouse, monitor and cable, or even an operating system for the Raspberry Pi!
Setup
First, we’ll put the OctoPrint image on your micro SD card using Etcher.
- Extract OctoPi and run Etcher.
- Click “Select Image”, navigate to the OctoPi image, and select it.
- Click “Select Drive”. Your removable drive should appear.
- Click “Flash”.
- Wait until Etcher reports the job is done.
Next comes network configuration.
- While the drive is still in the adapter in your computer, find “octopi-wpa-supplicant.txt” on the boot partition of the new image.
- Using the text editor of your choice, uncomment and fill in your network information. “SSID” is the name of your network, and “PSK” is your password. Also, uncomment your country near the bottom of the document.
- Eject the micro SD card and insert it into the Raspberry Pi.
A few more simple steps and we’re ready to start it up.
- Connect your video camera if you’re using one.
- Connect the Raspberry Pi 3 B+ to your 3D printer using the standard USB cable.
- Power up the Raspberry Pi and wait a few minutes. Solid red and flickering green lights mean the Raspberry Pi has power and is talking to your network.
- Open a browser on your computer and in the navigation tab type in “octopi.local/”.
- OctoPrint should open up and display the main user interface.
- If you leave the serial port and baud rate alone, it should connect to your printer automatically. Sometimes you might need to change the baud rate. (Try lowering it a step.) Or, select a different port.
- You might have to press “Connect” on occasion, but if your printer is on when OctoPrint starts, it will usually connect right away.
If Something Fails…
Setting up OctoPi truly is a simple procedure. But as with just about anything, from time to time, something goes wrong. If you’re having issues, here are some troubleshooting resources:
- WiFi setup and troubleshooting
- OctoPrint webcam setup
- Angry IP Scanner (helps if your network doesn’t know where “octopi.local/” is)
Basic Operation
Here’s an overview of the OctoPrint user interface:
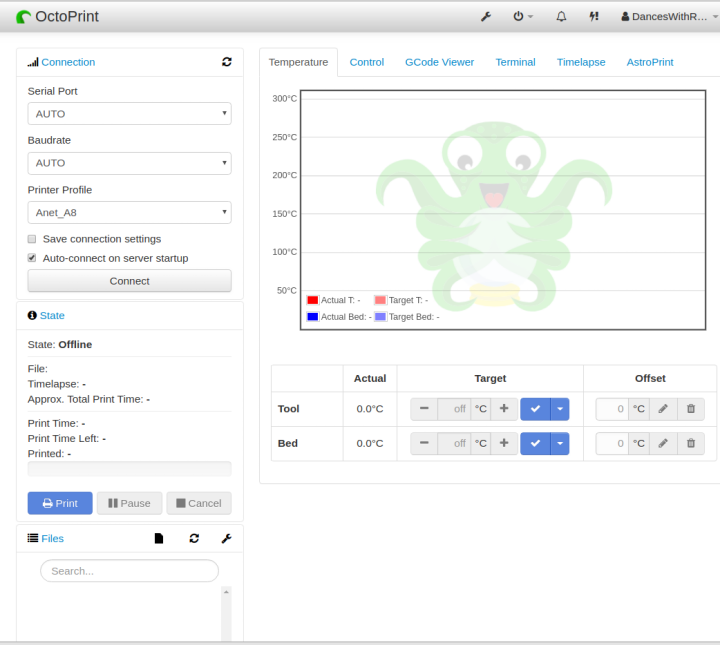
- Across all tabs, information relating to the connection and status of OctoPrint is on the left.
- OctoPrint starts up on the Temperature tab, which will give you important information about the temperature settings and readings. It features a graph that shows the temperature history of your hot end and heated bed.
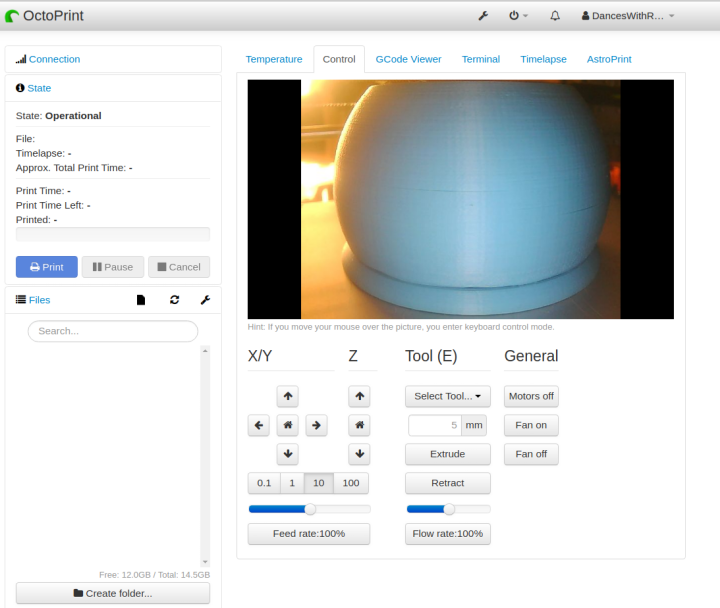
- The next tab to the right is the Control tab. This is where you would see the stream from your camera. You can also control your 3D printer from here.
- G-code Viewer is the next tab. This is where OctoPrint draws the path of each layer.
- The Terminal tab is where you can view reports from your controller, and send G-code commands directly.
- If you have a camera installed, in the Timelapse tab, you can configure OctoPrint to automatically create a time-lapse video. (But there are actually better ways to do that with the use of plug-ins.)
- The wrench (or spanner) icon at the top of the screen is the settings section. We could write a whole article about this, but for all its features, you probably won’t spend much time here unless you need to refer to something.
- One thing of general importance in this section is the Plug-in Manager. OctoPrint comes with a few plug-ins pre-installed, but there are many more that can be downloaded. If you need a minimal interface for a smartphone, special security, photography controls, or other enhancements, this is the place to look.
Note: This article barely scratches the surface of OctoPrint and its installation on a Raspberry Pi 3 B+. Many of the aforementioned plug-ins could each have an article.
The OctoPi image that we’ve installed here is the easiest and most popular way to get OctoPrint up and running. OctoPrint can run wherever Python can, but its real home is an SBC like the Raspberry Pi 3 B+.
Please feel free to add your experiences and comments below.
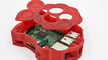
(Lead image source: mcfada / Thingiverse)
License: The text of "How to Set Up OctoPrint on Raspberry Pi 3 B+: 3 Easy Steps" by All3DP is licensed under a Creative Commons Attribution 4.0 International License.