
Home Assistant & Raspberry Pi 4: How to Get Started

Home Assistant is an open-source platform for creating a smart home. Here's how to get started with Home Assistant and Raspberry Pi.
Imagine being able to see whether a light at home is on or off, adjust the heating system to the correct temperature, or receive notifications triggered by some events that you yourself define. Those are just some of what can be achieved with home automation. But how can this be achieved with open-source software and an open-source single-board computer (SBC), and how does it work?
In this article, we explore home automation and guide you on how to install and set up a specific platform, Home Assistant, on a Raspberry Pi 4.
Buckle up!

Home Automation

Home automation – the digital control of home appliances, services, and more – is the dream of many. The idea has been around since 1975 with X10, a radio frequency-based system, which is still around today. From simply controlling lights and appliances, home automation has undergone massive evolution, especially with the advent of the internet of things (IoT) and increasingly capable microcontrollers.
Home automation concerns itself mostly with a local area network of devices, which are often connected via different methods. We have a plethora of smart devices with different connectivity, such as Z-Wave, ZigBee Bluetooth, Wi-Fi, Ethernet, and more.
Typically, a home automation system has one or more hubs, which communicate with and control peripheral devices, which perform sensing (e.g. a thermometer) or actuating (e.g. a light) functions.
Commercial vs. Open Source
A common problem is that a lot of commercially available smart devices aren’t open source, which means that the entire system is subject to restrictive licensing and the underlying computer codes can’t be altered or read. Therefore those systems are less attractive to makers, tinkerers, and designers who want to make various things on their own.
Open source is the opposite. It thrives on community collaboration and development, which offers more possibilities than closed systems do.
So, what happens if you want to acquire many different smart devices? How many hubs does one want in their home and how can we get different devices to play together nicely? Is there a DIY solution? This is where Home Assistant comes in.
Home Assistant
Home Assistant is a home automation platform that allows for several devices from different manufacturers. Additionally, it enables those devices to operate independently from their hubs, and by extension from their “all-knowing” cloud servers, by creating its own central hub accessible via a web browser interface on the home network. It also helps with devices that may no longer be supported otherwise.
Background
Home Assistant started out as a Python program, created by Paulus Schoutsen in 2013. It’s an open-source operating system that can be installed on SBCs like the Raspberry Pi, with the goal of creating a central hub to control smart devices on the home network. In its current version (9.3), Home Assistant comes bundled with the file management system called “Supervisor” and is referred to as “Home Assistant Operating System” or HAOS.
Home Assistant consists of several parts: the core operating system (Core), its file manager (Supervisor), and the browser-based user interface, or the front end. Since 2017, the Supervisor allows one to add integrations of other devices via add-ons. The ongoing development is impressive, and recent improvements include easy integration of IP cameras, for example.
Accessibility & Use
Home Assistant is free, but a small fee is required to access Google APIs for Nest devices. Remote access is intentionally disabled but can be provided via a cloud service for a fee. This also enables easy connection to Amazon’s Alexa.
Home Assistant offers easy integration with a wide range of device ecosystems. Pretty much everything is configurable, and add-ons provide a well-rounded user experience and a large array of options to play with, including the possibility to create your very own custom dashboard design in Python with AppDaemon.
For many, Home Assistant is made attractive for allowing all settings to be stored locally, without exposure to the internet, as well as for offering control of many more things than one usually has with plug-and-play products. It therefore enables users to create a fairly sophisticated home automation system at little expense.
Integration & Hub Compabitility
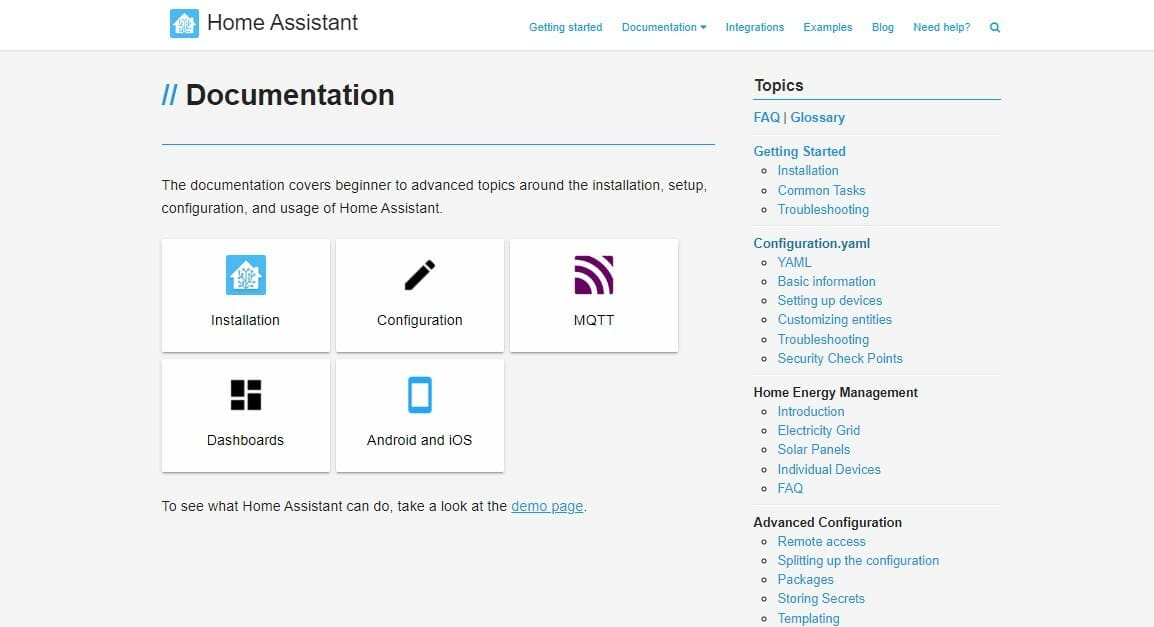
When it comes to setup, Home Assistant offers a lot of easy-to-follow documentation online, and an active user community offers support in case one gets stuck. Nevertheless, in the following, we’ll provide a general overview as well as a tutorial on how to install HAOS.
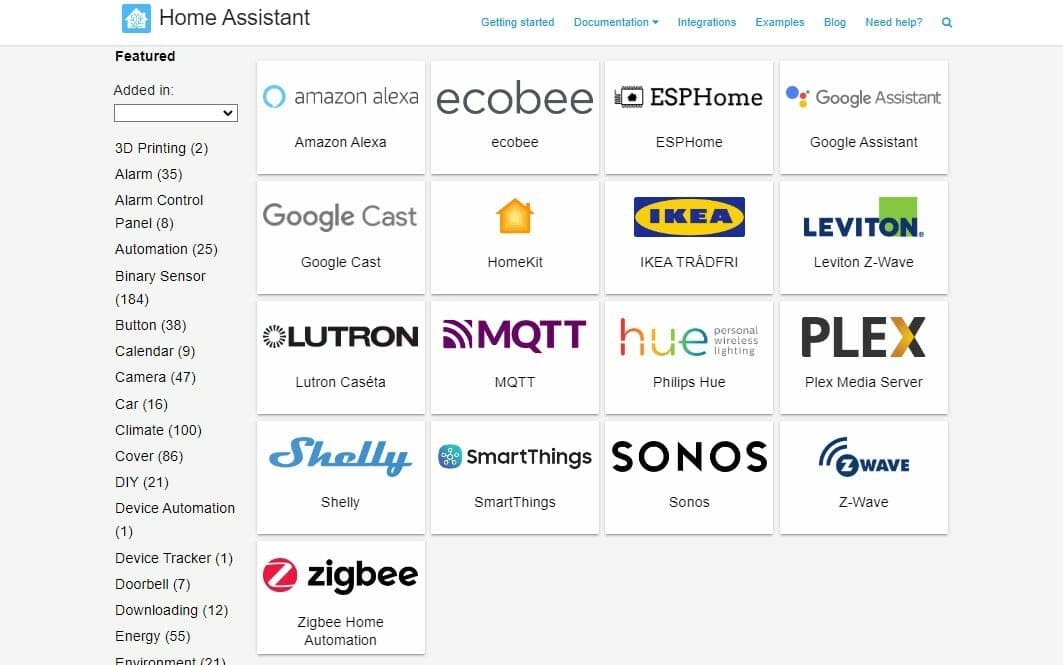
Currently, Home Assistant offers over 2,200 integrations… too many to list here. In a nutshell, there are plenty of choices and most users won’t be disappointed. All the big names are represented, including Amazon, Google Assistant, Ikea, Sonos, and ZigBee, and compatibility in terms of connected devices shouldn’t be an issue. Advice is on hand to unshackle certain devices from their hubs and integrate them into your local HAOS setup.
DIY Peripheral Integration
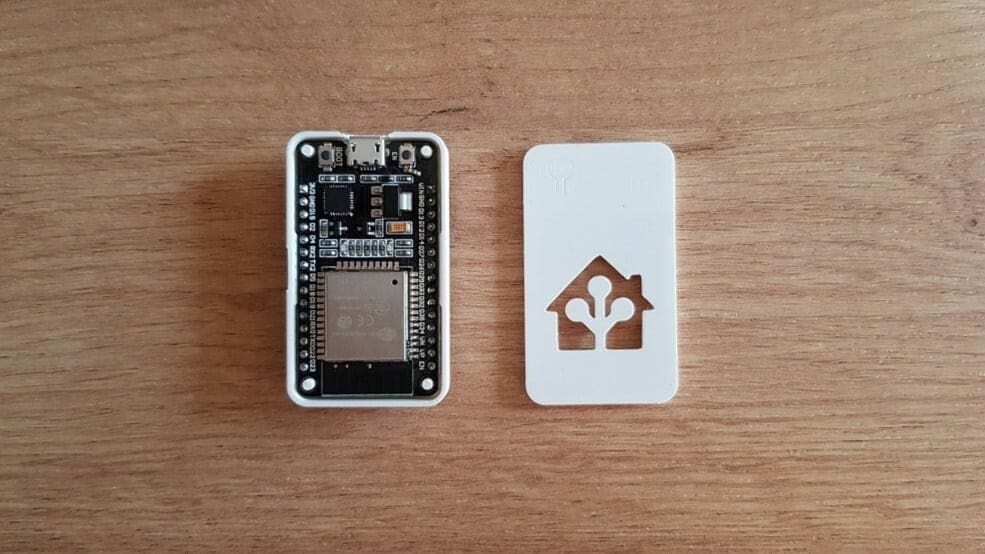
Non-commercial or DIY integration through Esp boards could not have been made easier, thanks to the inclusion of EspHome in Home Assistant. Why Esp boards? First of all, they’re cheap, at around $8 a piece. Additionally, they’re powerful dual-processor boards – in the case of the Esp32 – with integrated Wi-Fi and Bluetooth connectivity as well as other perks depending on the model and of course the number of programmable pins for sensors or other connections. There are plenty to choose from and they’re easy to work with, but one needs to build whatever device one wants.
Even if making them from scratch isn’t desired, there are many readymade devices. For example, the Sonoff basic R2 relay is an Esp-based board that can be flashed with different firmware via EspHome, thus allowing for full Home Assistant integration.
EspHome makes configuration and later over-the-air (OTA) updates a cinch. This is relevant when compared to other boards, like those from Arduino, which are considerably more expensive and not as powerful. Even the newer IoT range of Arduino doesn’t offer the same convenience in the home automation context because OTA updates are only available when one joins an Arduino cloud plan, and there are restrictions on the number of devices depending on the choice of plan.
This comparison isn’t entirely fair, though, because we’re talking about a home network-based service and a secure cloud-based service that was built for a different purpose. But let’s go back to getting started with Home Assistant.
Hub Options
While we’re on the subject of compatibility, there’s the question of what hardware Home Assistant as a program requires to run. Home Assistant images or detailed installation instructions are available for the following options:
- Raspberry Pi 4 or Pi 3+
- Odroid N2+
- Asus Tinker Board
- Any x86 PC
- Windows
- Linux
- MacOS
- A number of specific virtual machines
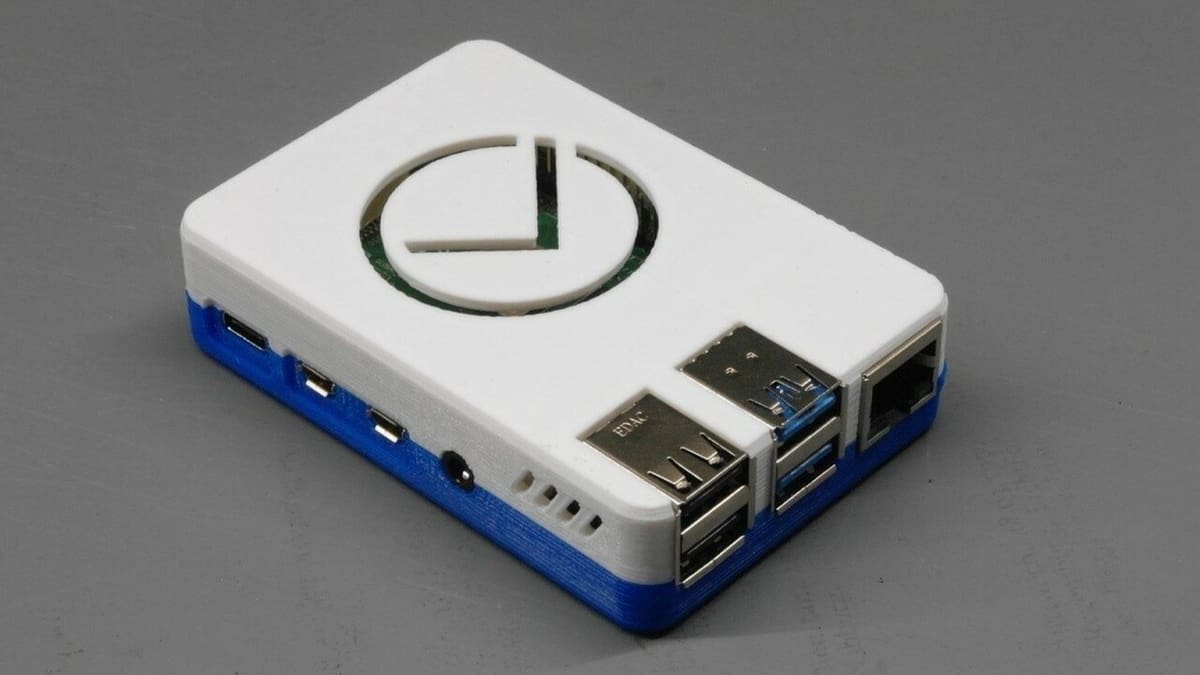
In the following, we’ll focus on the Raspberry Pi 4 because it’s popular in the maker community, open source, not very power hungry, and of a small form factor. All of these attributes make it ideal for a self-contained Home Assistant hub. That doesn’t however disqualify the other options!
Raspberry Pi 4

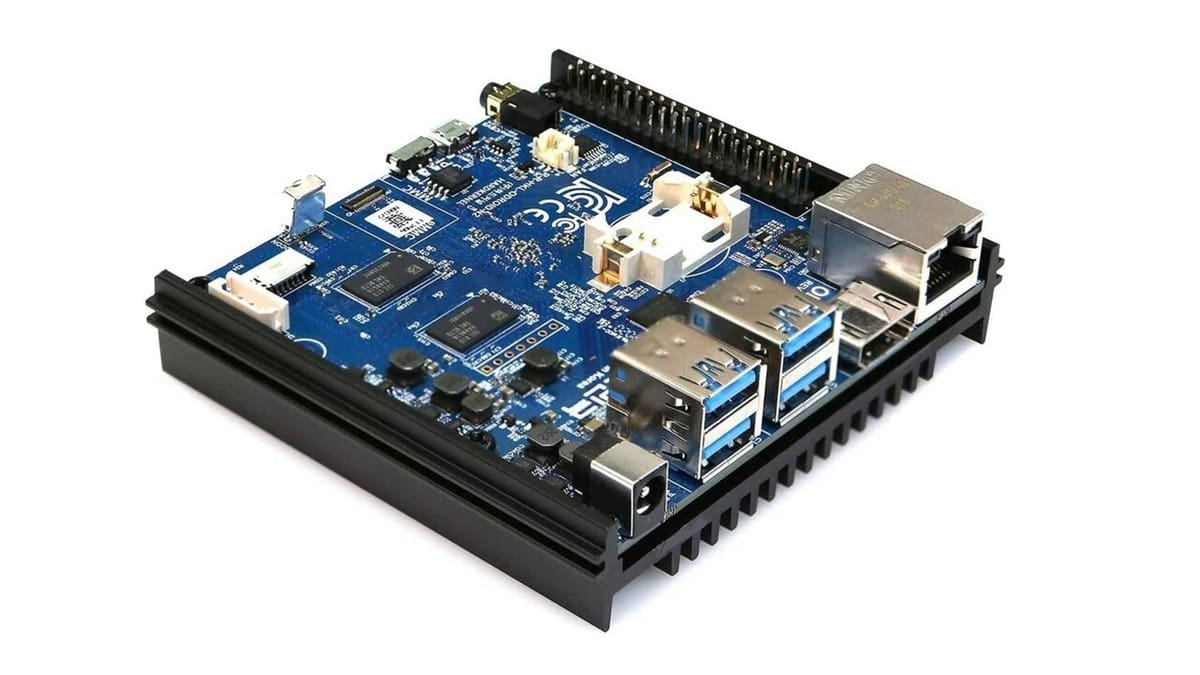
The Raspberry Pi 4 is one of the latest releases in the Raspberry Pi range of SBCs. It’s open source, enjoys loads of community support, and is popular because of its sensible pricing (the current world shortage notwithstanding).
The Pi 4 is much more powerful than its predecessors according to tests carried out by MagPi, with the main difference being the Arm72 64-bit processor replacing the Arm53 64-bit processor on the Raspberry Pi 3+. Also notable is the RAM on the Pi 3+: only 1 GB compared to the 1-8 GB (depending on the model) on the Pi 4.
Connectivity options are fairly similar, but updated and higher speeds for Bluetooth and Ethernet for the Pi 4 make it the better choice for use as a home automation hub. Given that many makers are already using Raspberry Pi SBCs, it’s a bonus that the form factor remained similar and that the 40-pin GPIO header is unchanged, which means that the Pi 4 can use most HATs, such as the PoE HAT.
The Pi 4 offers the complete package, being able to connect a display (via Mini-HDMI), a mouse and keyboard, plus USB storage drives (via USB2.0 and USB3.0). The board is also capable of running a variety of operating systems as a mini-desktop PC.
Such a capable system-on-a-chip (SoC) is perfectly suited for our project of running Home Assistant, as it can be tucked away neatly, doesn’t require much power, and can run headless – that is, without a display.
Interface & Functionality
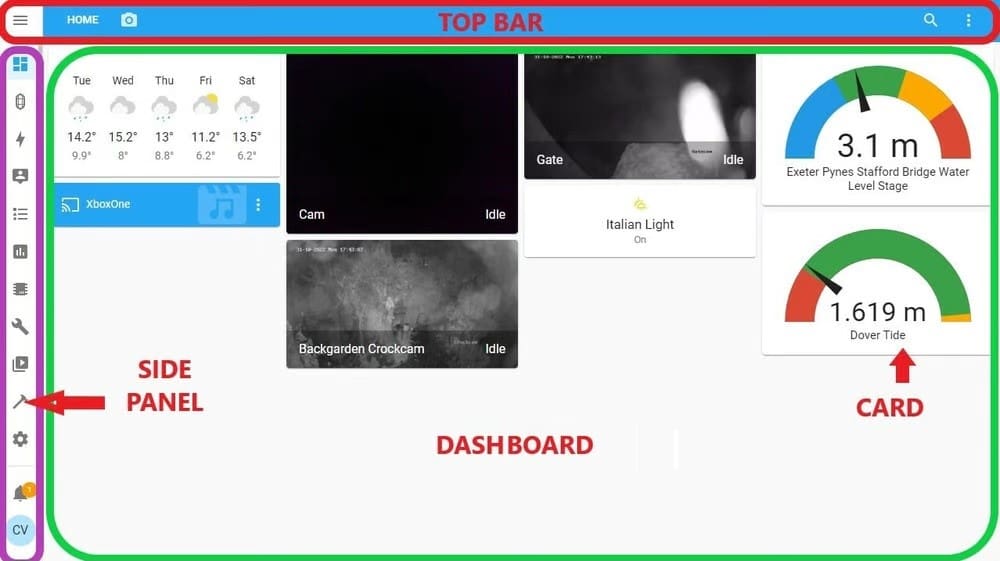
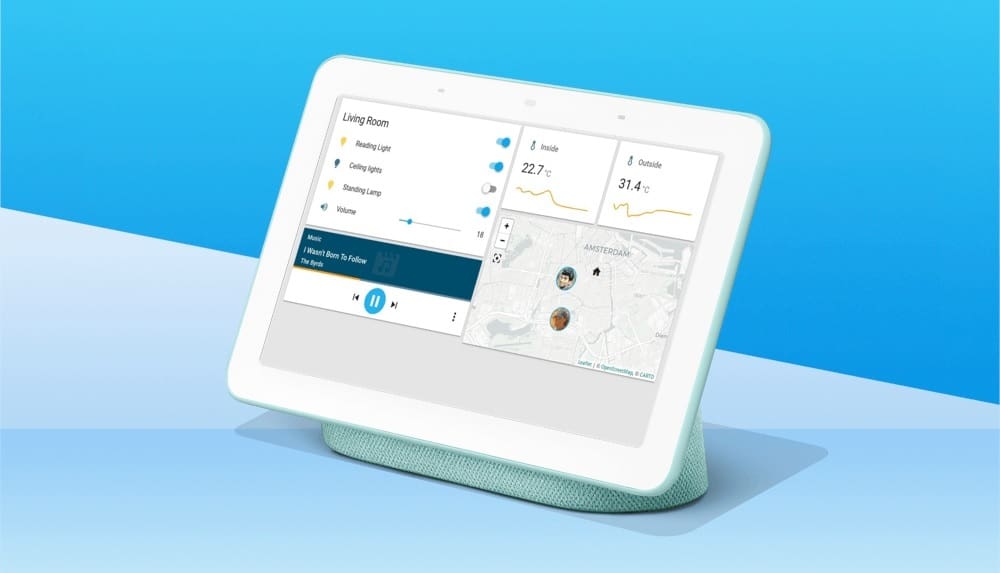
To get a better understanding of Home Assistant, it helps to look at the front end, which is accessible on the home network via any device with a web browser. The front end is divided up into three sections. (See image.)
- The side panel contains all symbols linking to various parts of Home Assistant, such as settings, media, certain integrations like EspHome, developer tools, history, map, and more.
- The dashboard is arguably the part that interests users most because it shows all devices, switches, media, and so on. Every device is represented by a card that in turn can be edited. Cards can be, among other things, switches with state feedback, gauges, statistical graphs, media boxes showing camera feeds, or numeric readouts of temperatures.
- The top bar provides access to editing the dashboard and minimizing the side panel.
The basic principle is that an integrated device (including remote devices like tidal gauges) can create one or more entities, which can be linked to cards in order to carry out particular actions or to provide information.
Entities, in this case, mean measured or switchable instances, such as temperature, water level, switch, or relays. For example, a Sonoff R2 basic relay creates instances of a switch and a relay that in turn can be controlled (i.e. switched on or off) once linked to a card containing a switch symbol.
Several dashboards can be created, and they become available via an icon of one’s choice on the side panel, therefore helping to organize and reduce clutter on the Home Assistant screen. Additionally, several views of the dashboard can be created, which essentially adds pages to the dashboard, all of which are accessible via arrows in the top bar.
User Experience
All of the above can take a little getting used to, but thanks to the existing documentation and the support forum, it’s a manageable task. That said, because of its open-source nature, be prepared. Despite one’s best efforts, things don’t always go smoothly, and reconfiguring some devices may be needed.
Home Assistant has been called its own hobby because it requires the willingness to tinker repeatedly. And while Home Assistant itself should be stable, an integration could fail, for example the IP cam integration. (That said, the new Generic Cam integration is even better and has been moved to the graphic user interface.)
In general, the user experience is good with a manageable learning curve. The Esp32 integration is a great addition, as it doesn’t even require extensive programming language. Configurations are relatively easy to follow and can be adjusted by anyone who reads the documentation and isn’t afraid of tinkering and learning. HAOS isn’t plug-and-play, but it has a lot to offer.
With that in mind, the choice of hardware for running HAOS becomes a little clearer. With open-source development being a great driver of innovation and community involvement, one of the organizations doing a lot in this respect is the Raspberry Pi foundation and that’s why the Raspberry Pi was chosen for this purpose.
Installation
Before diving into the following, you might need want to brush up on how to flash an image to a MicroSD card using Raspberry Imager.
If you’ve got the basics covered, the following covers how to install Home Assistant.
Required Hardware & Software
These are the basic requirements for setting up HAOS on a Raspberry Pi 4:
- Raspberry Pi 4
- Power supply for Raspberry Pi
- Ethernet cable
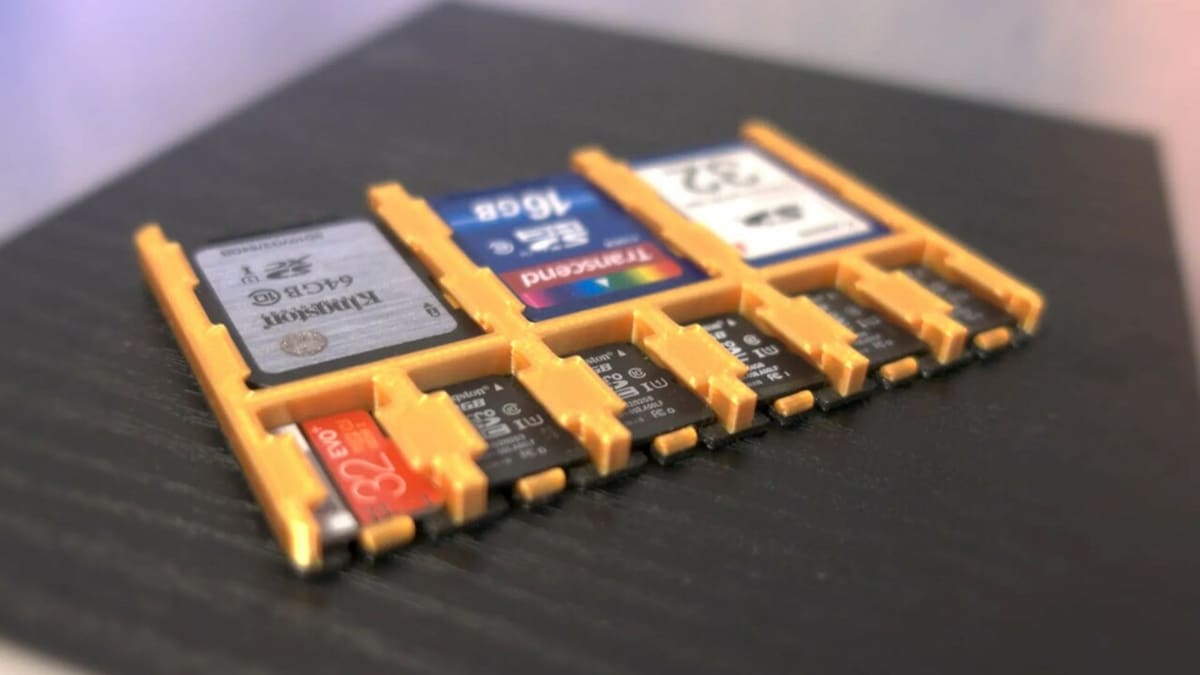
- 32-GB or bigger MicroSD card (application class 2)
- USB SD card adapter or PC with built-in MicroSD adapter
- Access to a PC with an internet connection
- Raspberry Imager installed on the PC
How to Install
The easiest way to install Home Assistant is done in 10 simple steps:
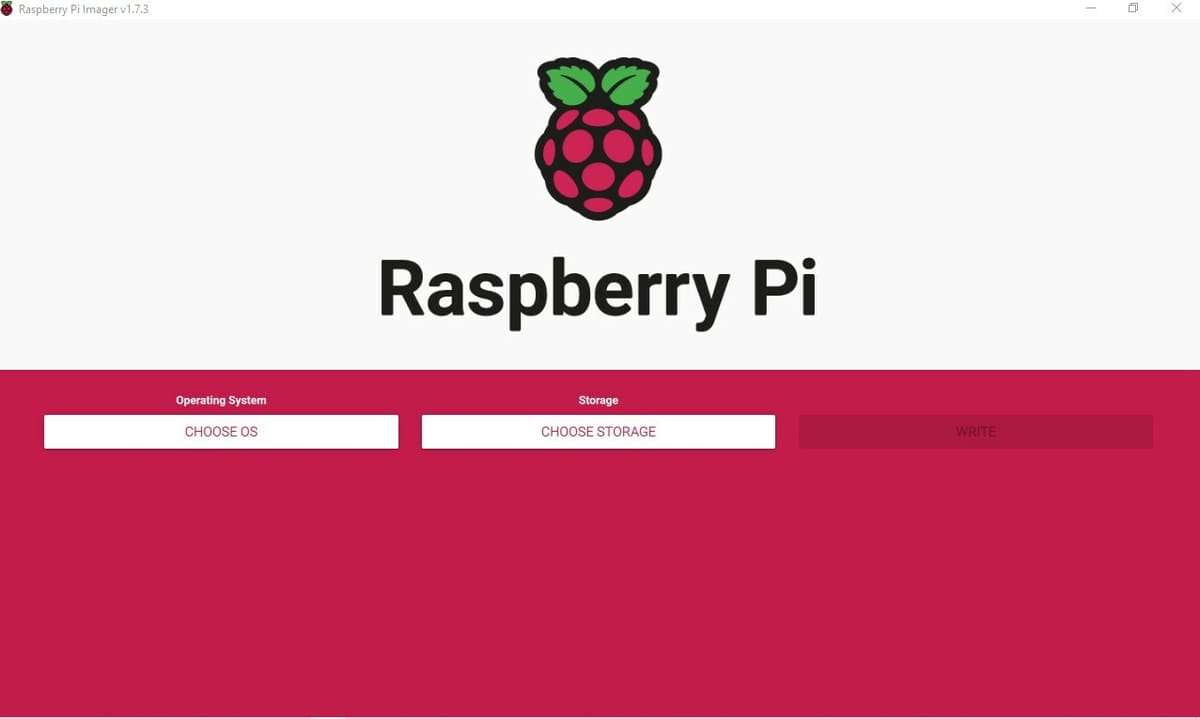
- Insert the MicroSD into the adapter (built-in or via a USB connection to the PC).
- Open Raspberry Pi Imager, select “Choose OS”, and navigate to “Other specific purpose OS”.
- Select “Home assistants and home automation”.
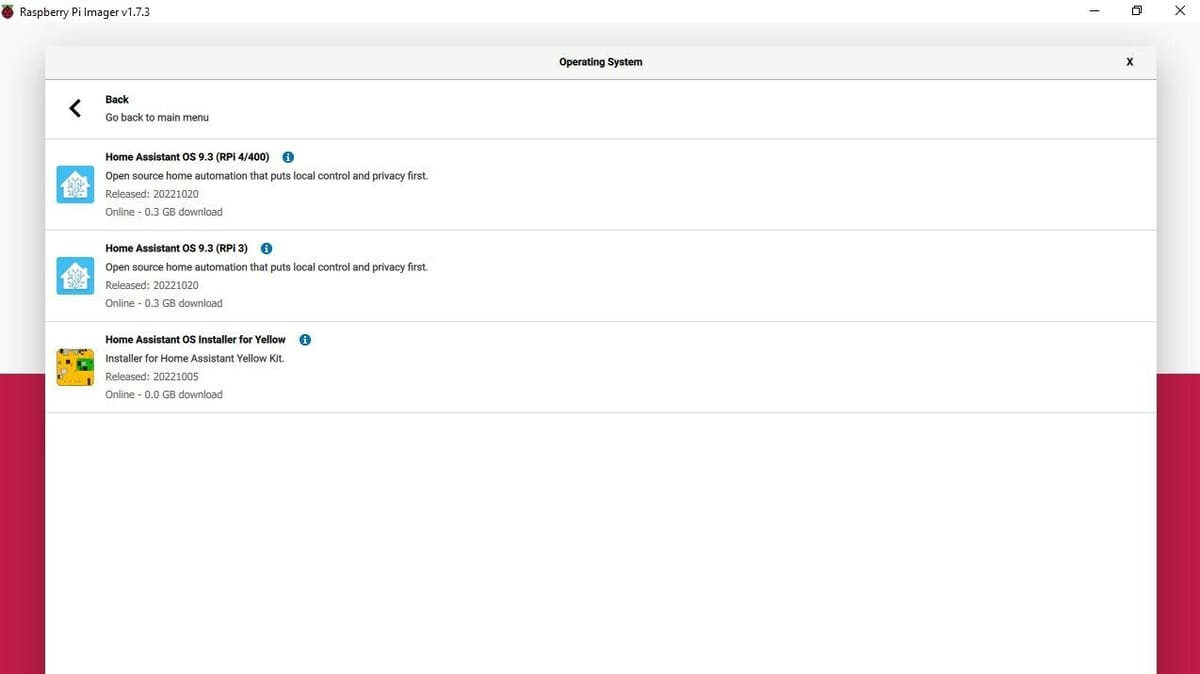
- Scroll down to and select “Home Assistant”.
- Select “Home Assistant OS 9.3 (RPi4/400)”.
- Click on “Choose Storage”, and select the relevant MicroSD card location from the list.
- Click “Write”.
- Insert the MicroSD card into the Raspberry Pi 4.
- Connect the Pi with an Ethernet cable to the network.
- Connect the power source to the Pi.
Wait a few minutes and you should be able to access your Home Assistant by typing homeassistant:8123 into any browser on any device connected to your home network.
In principle that’s it, but for any new users, the onboarding process continues. The Home Assistant website offers excellent documentation that walks you through the steps.
Optional: Booting from a Hard Disk
With the HAOS installed on the Raspberry Pi 4 via MicroSD card, all is well.
Or is it?
Maybe not. Various users have reported SD card failures in conjunction with Home Assistant. While we can’t verify these claims, MicroSD card corruption is always a possibility with a Pi, usually caused by uncontrolled shutdowns or power cuts. Considering how much time users tend to invest in setting up the home automation dashboard of their dreams, it would be a pity to lose it all.
One solution is of course to regularly create a backup, which can easily be achieved via Home Assistant’s own system function, but that alone won’t solve the problem. Logic dictates that, if booting from a MicroSD card could be a problem, it might be worthwhile to boot from a different device. And that’s exactly what we propose.
Testing has shown that even booting from an old 2.5″ HDD (as opposed to a faster and more modern SSD) connected via a USB adapter to the Pi 4’s USB 3.0 port works reliably. Apart from offering much more storage space at a lower price than a quality MicroSD card, it’s also an attractive option for existing HAOS users.
How to Do It
Requirements
For this solution, the requirements are same as before, but you’ll additionally need a USB adapter for your HDD or SDD and, if you’re an existing user, a backup image of HAOS stored on a separate device.
Steps
This time around, the process is slightly different:
- Insert the MicroSD card into the MicroSD card adapter.
- Open Raspberry Imager and click on “Choose OS”.
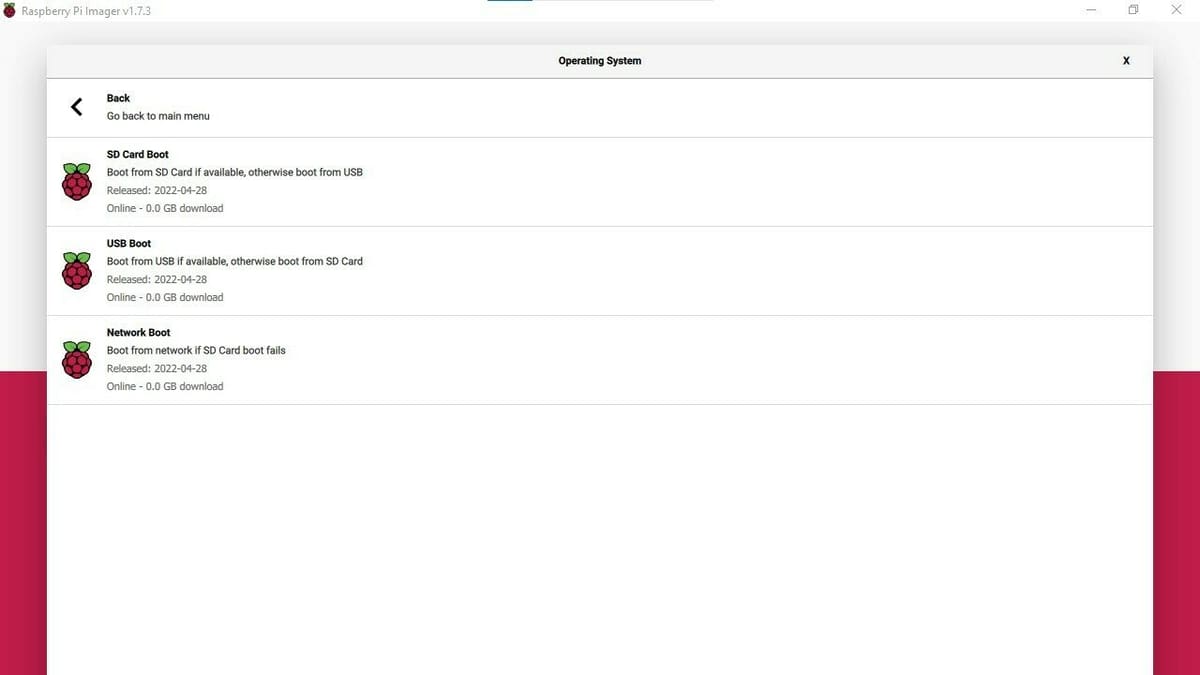
- Scroll down and select “Misc Utility Images”.
- Select the “Bootloader” option.
- Select “USB Boot”.
- Click on “Choose storage” and select the relevant MicroSD card from the list.
- Select “Write”.
- Remove the MicroSD card and insert it into the Raspberry Pi 4 and boot once.
- Plug the USB HDD or SDD adapter with a HDD or SDD connected to it into the PC.
- Follow the instructions for new a installation above and write HAOS to the SDD or HDD instead of a MicroSD.
- Plug the USB HDD or SDD adapter and HDD or SDD into the Raspberry Pi 4 and restart the Raspberry Pi 4.
We can now boot the Raspberry Pi 4 from our HDD or SDD. Existing users should now be able to restore their system from a backup if desired from within the Home Assistant menu.
Support
We mentioned before that Home Assistant offers a lot of documentation, but support is also available from an online forum, a Discord server group, a Facebook community, and a subreddit.
There’s plenty to choose from, and so far we haven’t come across a subject that wasn’t addressed. The community is very active and responsive, with plenty of users having posted videos, so there’s more to look into if you come across any issues.
Alternatives
While Home Assistant is a great option, you may be wondering about alternatives. The most obvious option, when it comes to home automation, is to stick to closed ecosystems, which means to keep buying from the same brand of devices and sticking with them until support runs out. The benefit is the ease of use and the often more easily configured plug-and-play functionality.
That might suit some just fine, but if there’s an interest in adding more devices or opening the scope beyond what a particular brand has to offer, why not tinker and integrate them all under one hat?
If that’s you, below are a few options you can look into. We don’t provide any advice or comparison with HAOS because the choice of a home automation system boils down to personal preference, types of devices, and programming skills. Each system has its quirks, and a review is admittedly difficult, as development is ongoing for most programs. Our advice is to research and, if possible, play with all of them before committing to one. There isn’t one best solution for everyone, but they all have something to offer.
OpenHAB
The biggest free open-source alternative to Home Assistant, with a large userbase, is OpenHAB. It offers a similar concept with similar integrations, albeit on a Java platform. It’s also designed to run on a Raspberry 4 and is therefore very much comparable.
There are a number of other open-source alternatives that do have a smaller community and are older. They’re still active and running, but many differences come down to how the program was initially written.
Domoticz
Domoticz is written in C++, which isn’t a problem per se, but likely because HAOS is written in Python, development has been faster, as Python is more popular in the user community.
Gladys Assistant
Gladys Assistant is another open-source alternative that offers integrations for some popular devices, has a pretty user interface, and runs on a Pi. Unfortunately for most, its community is mostly French, having only recently added an English section.
Iobroker.net
Iobroker.net is a German open-source product that offers a lot of integrations and a subscription-based cloud server service.
License: The text of "Home Assistant & Raspberry Pi 4: How to Get Started" by All3DP is licensed under a Creative Commons Attribution 4.0 International License.