CNC Router Bits: The Basics to Get Started

Without the right bits, even the perfect CNC rig won't be going very far. Check out our beginner's guide to CNC router bits.
CNC routers need bits, and these bits determine the carving type, resolution, and material. While CNC machines have opened all kinds of creative possibilities, the magic lies in the bit. It determines whether you’ll end up with a perfect or okay design. Plus, it also makes the difference between cutting down on waste or increasing material costs significantly.
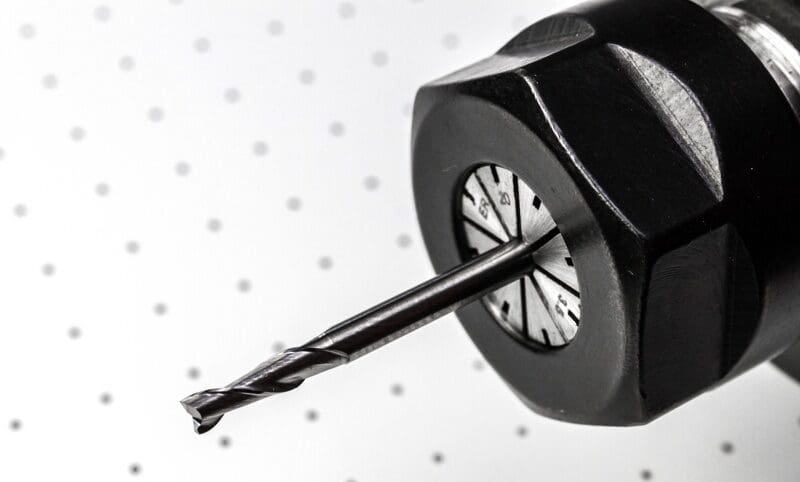
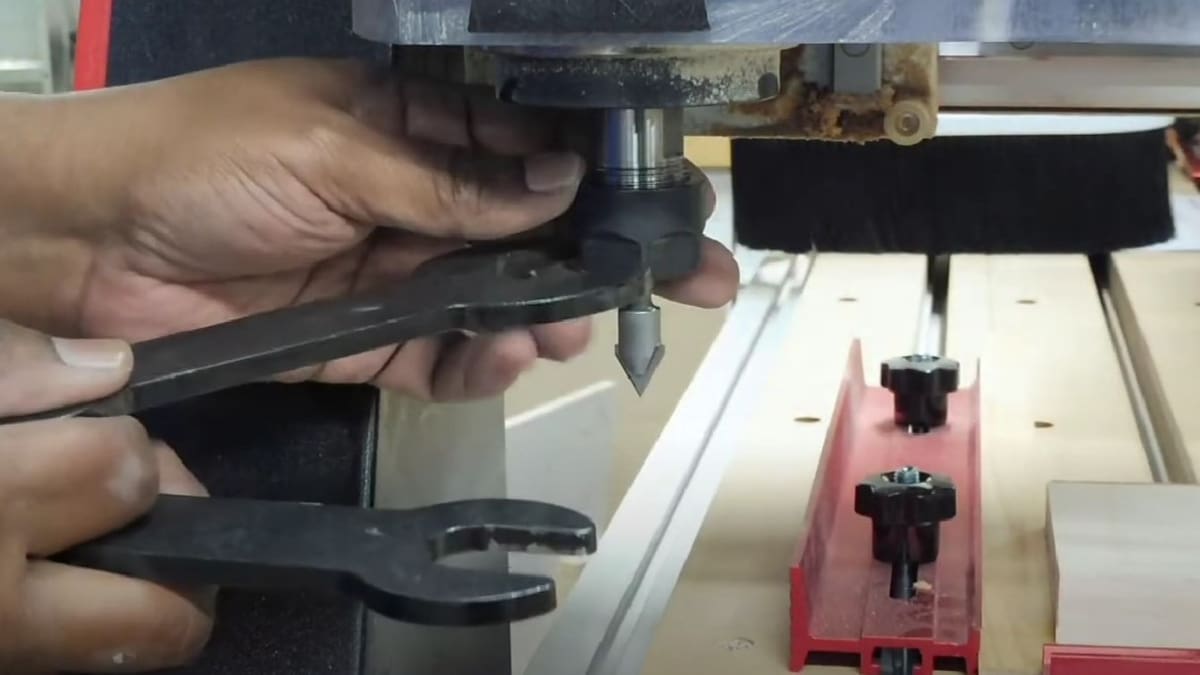
The bit is used to remove material in a specific way. Initially, routers used to be handheld tools that were guided by templates or ball-bearing pilots, and they were moved manually around the workpiece. But today, routers are controlled using computers that precisely determine the toolpath, and these routers require bits to make intricate cuts.
The range of materials and designs cut by router bits has grown significantly in diversity, and so have the types of CNC router bits. Today, the market is flooded with so many kinds of CNC router bits that picking the right bit for a project isn’t always intuitive.
In this article, we’ll go over different aspects to keep in mind before picking the router bits that are right for your setup, as well as some recommendations about general tooling.

CNC Router Terminologies
Before going any further, let’s familiarize ourselves with some CNC routing jargon that’s important to know:
- Feed rate: How fast a bit can move laterally through the material, or vice versa. It’s measured in IPM or feet per minute. Therefore, if your chips are unnecessarily large, reduce the feed rate or you may end up ruining the bit.
- Speed rate: The speed of the spindle. It’s represented in revolutions per minute (RPM).
- Toolpath: This is a coded route that the CNC machine follows to cut. Think of it as a guide for the device.
There are a couple of other terms that require a bit more explanation, namely flute and chip load.
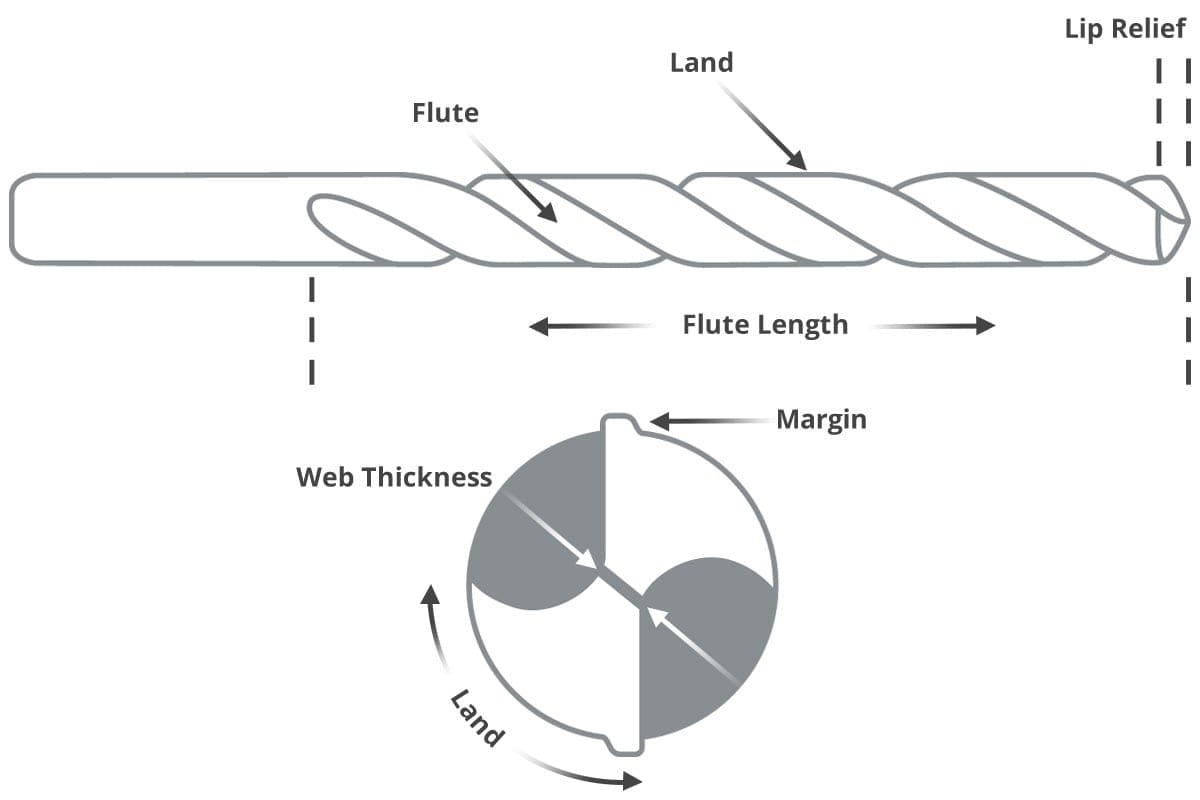
Flute
A flute is a cutting edge of a bit. Having more flutes increases the strength of the tool, and it means you can have a faster feed rate, but it reduces space for chip flow. Thus, bits with more flutes tend to leave a smoother cut surface and require a faster feed rate to avoid burning. CNC router bits are mostly available in 1-, 2-, and sometimes 3-flute configurations. Generally, bits with fewer flutes remove more material per cut and require a slower feed rate.
- Straight flute: A straight flute design means the cutting edge is parallel to the body (or shank) of the bit. With this design, the material won’t be extracted from the cut. A straight flute is cheaper to make and is mostly for wood and plastic materials. A straight flute produces a clean finish.
- Spiral flute: A spiral flute is cut in a helix around the body (or shank) of the bit, making them ideal for wood, aluminum, and plastics. The up-spiral flute, for example, is useful for removing chips. There are three major types of spiral bits that we’ll discuss later: upcut, downcut, and compression.
Chip Load
Chip load refers to the size of the chips or pieces that the CNC bit removes from the material. In other words, it’s the thickness or size of the chip removed per cutting edge (or flute) with every revolution.
This is crucial since smaller chips increase heat generation during the cutting process. The smaller chips aren’t ejected fast enough and are instead re-cut into smaller pieces, which results in heat generation. This can cause premature bit failure when the heat is transferred to the cutting tool. When the chips have the proper size, they will carry away heat and prolong tool life.
Chip load is equal to the feed rate (in inches per minute or IPM) divided by revolutions per minute multiplied by the number of flutes. The chip load value can help you in selecting the right size or diameter of a bit. Some manufacturers give a target chip load.
Features
First, we need to distinguish between drill bits and milling bits:
- Drill bits: These drive into the material. They’re the best choice for tasks that require material to be removed straight down through the workpiece. They’re often used for pre-drilling holes for screws.
- Milling bits (or cutters, carving bits, and end mills): These cut laterally across your material. They’re designed to move across the surface of the workpiece, clearing away chips to achieve 3D designs.
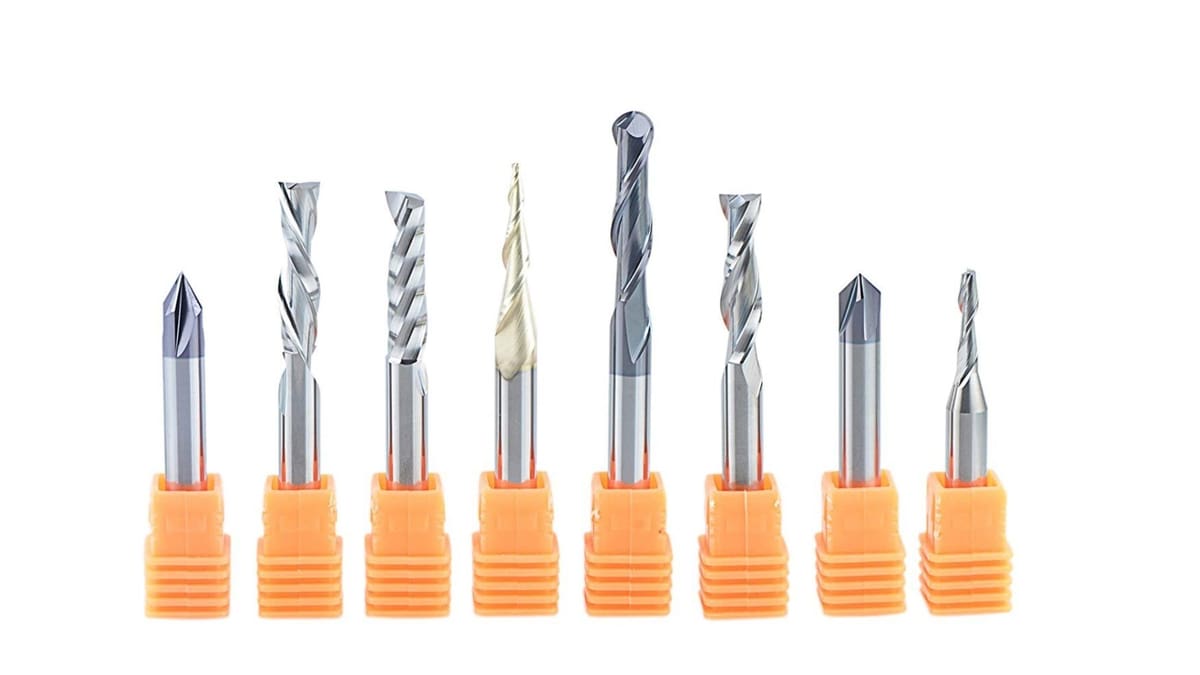
Even though bits fall into these two main categories, other variables are always at play, like bit material (solid carbide, HSS, carbide-tipped), flute type (straight, upcut, downcut, compression), number of flutes (1-2 flutes, 2+ flutes), and bit end (fishtail, engraving, V-bit, ball nose).
There are also specialty bits, which have more sophisticated profiles for all manner of specialized applications. They can be used to drill holes, etch glass, or make dovetails, for example. That means it’s up to you to investigate which bit is best for your needs. Some notable specialty bits include boring bits, miter fold bits, round-over bits, and “veining” bits.
Materials
Some common bit materials include the following:
- High-speed steel (HSS): This is a tool steel bit with high heat resistance, wear resistance, and hardness. It’s much better than carbon steel when used for cutting tools and drill bits and is mainly recommended for cutting foams. HSS is processed from raw ore and is heated to its melting point before several elements and minerals are added to enhance the internal structure. HSS tool life is shorter compared to carbide.
- Solid carbide (SC): This is a sturdy and wear-resistant steel. SC bits come in different types, ranging from cheap ones to high-quality ones that cost top dollar. When shopping for SC bits, you have to be extra careful or you’ll end up with a knock-off. There are many forms of carbide (tungsten carbide, beryllium carbide, silicon carbide, among others). Note that these bits can be brittle and should be handled with care.
- Carbide-tipped: Since carbide is costly, large-diameter CNC router bits have chunks of carbide brazed to a steel body. You then get the longevity of carbide with the lower cost of a steel core.
- Solid tungsten carbide bits: Tungsten carbide bits are made using hard particles of tungsten carbide bound with metallic cobalt. These kinds of bits are super strong and durable, so they remain sharper for a much longer time than HSS bits.
- Polycrystalline diamond (PCD) bits: These bits are made up of diamond particles sintered with a binder. The diamond is blended onto a carbide substrate to make an extremely hard and abrasive-resistant bit.
Major Cut Types
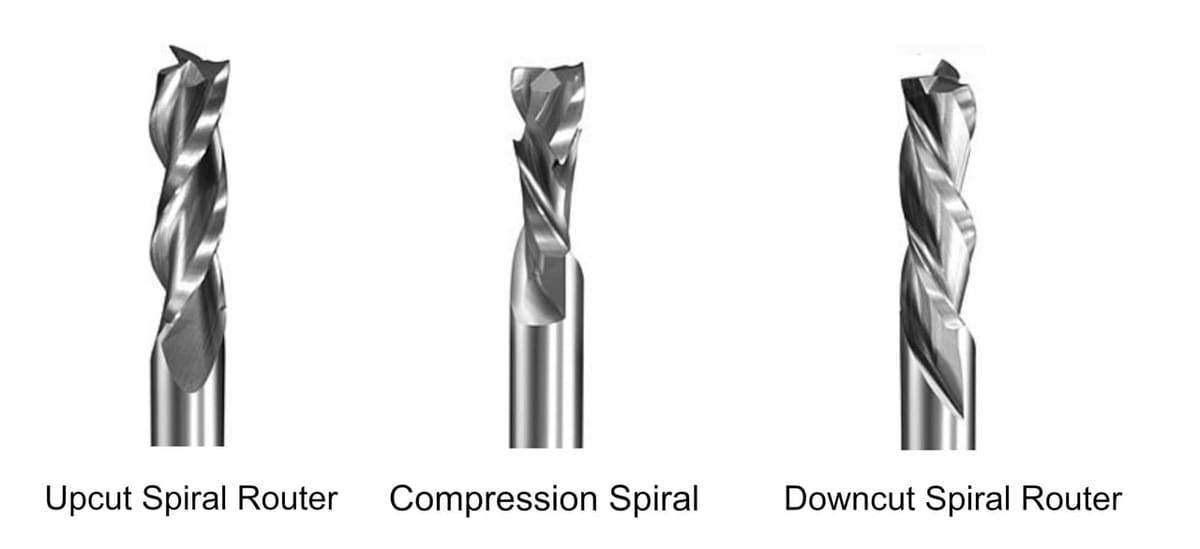
Spiral bits are great all-purpose tools that can be used in several applications, but you need to determine the cut direction, which will be informed by the type of material or other variables.
Upcut
Upcutting bits pull chips (and the material) up. When using them, your material will need to be securely held down. These bits are preferable if you want to clear chips from your cuts to prevent overheating the bits. They’re great for making cuts through the material. An upcut is the most common type of cut.
Downcut
Downcutting bits press the chips and the material back into the cut. Their down shear action is excellent for preserving the top surface of your material. These bits are preferable for cutting thin, flexible material but aren’t the best for drilling holes because the bottom layer of the workpiece will be pushed away from the bit by chips. Downcut bits leave a clean cut at the top of the workpiece but may fray the bottom edge.
Compression Cut
Compression bits (up-down bits) offer the benefits of both upcut and downcut bits. The bit is a standard downcut, but its tip is an upcutter. Therefore, when cutting materials like plywood, you’ll end up with a clean edge on both sides because the top is pushed down while the bottom is pulled up. Combining both geometries eliminates chipping and reduces the risk of damaging the workpiece.
Note that compression bits should never be used to drill holes. Once the bit goes deep enough beyond the direction change, the chips get compressed because they have no way of escaping; this creates friction and heat. These bits are a little costly because of their sophisticated nature, but they’re recommended for laminates, composites, and plywood.
How to Pick
Bit manufacturers go to great lengths when engineering their cutters, but selecting the right bit still requires some due diligence. There are plenty of variables to take into account when picking the right bit, but the type of project and material are two factors that you must always take into consideration.
Project Suitability
What project are you undertaking? The project will drive what type of bit you should use.
For instance, detailed work like lettering requires a V-bit (sometimes called engraving bits, V-groove bits, or V-carving bits). As the name suggests, V-bits have a cutting profile in the shape of a ‘V’. They come with different “included angles”, and this will determine what they’re used for. A 60° V-bit, for example, will give you smaller details compared to a 90° bit, which is well suited for larger or shallower details or letters.
Material Compatibility
What are you cutting? Is it hard or soft wood? Is it stainless steel, fiberglass, MDF, acrylic, or aluminum? The material matters.
It matters so much that you’ll find different grades of carbides used for different materials. Going for the wrong bit could be detrimental to the bit or even to the machine. Plastic will require a specific bit (specifically one that will not melt it) and so will aluminum and plywood.
Go-To Options
In case you’re new to CNC routing and you want a multipurpose bit, go for 2-flute spiral bits. They cut a wide range of materials, including plastics, aluminum, foam, and wood. The 2-flute cutting spiral bit is an excellent all-purpose bit if you’re still in the prototyping stage and don’t want to purchase 20 bits right away. The 60° V-bit is also a wise choice for engraving, making signs, and cutting letters.
Here are some of the other bits that you may consider having right away:
- 1/4″ upcut 2-fluted end mill
- 30° engraving bit
- 1/8″ end mill and ball nose
- 1/2″ end mill and ball nose
Most manufacturers make bits for different materials. For example, hardwood bits are designed to leave a clean edge, while plastic bits are designed to prevent excessive melting. Aluminum bits, on the other hand, are designed to effectively clear chips to avoid re-welding. (Heat is usually generated during the cutting process, and this heat can sometimes cause the heated chips to fuse to the hot cutting tool.)
Balancing Speed & Finish
Ask yourself, do you want to cut fast or cut smooth? You need to determine whether speed or accuracy is the most important at any given stage of processing.
Speed
Speed and thus feed rate will depend on the horsepower of the spindle. While a high RPM will generally result in a higher quality finish, it can also result in higher friction that will, in turn, increase the wear on your bit. Therefore, you’re better off referring to the spindle manufacturer’s speed parameters.
If you have to cut a large amount of material in a short time, go for a bit that can go through your material quickly. On the other hand, if you hate sanding hardwood, go for a bit that will leave a smooth finish.
Higher tool RPM produces smaller chips, while higher feed rates produce larger chips. Overall, if the chips are too large, your bit will be likely to break, but if your chips are too small (like fine powder), you’ll be dulling your bit. It’s all about getting the right balance.
Finish
Bits offer multiple cutting edges for extra flexibility. You have the option of going for 2-, 3-, or 4-flute bits. Having more flutes will give a finer quality of cut, but will go through your material much slower.
General Tooling Recommendations
A CNC router can fabricate complicated designs, but only if you get things right. Here’s a great starting point when selecting CNC router bits:
- Single-edge bits: Use when speed is more important than edge quality.
- Double-edge bits: Use when edge quality is more important than speed.
- Spiral bits: Use when finish is a concern or when horsepower is limited.
- Upcut spiral bits: Use for slotting, grooving, or when chips need to be removed fast. Also suitable for when the material is coated or laminated on one side and is being machined while facing down. (This is the most popular type of spiral-fluted bit.)
- Downcut spiral bits: Best for thinner materials. They’re also great for leaving a nice finish on the top surface. However, chip extraction is less effective.
- Spiral, straight, or shear bits: Use for composites, plywood, natural woods, and particleboard.
Other Considerations
Before cutting, engraving, or pocketing, think about the following:
- Material: Pay attention to its type and thickness.
- Cutting length: Always go for the shortest cutting length because, whenever the cutting length is longer than necessary, you risk deflection, vibration, and an inferior finish. Generally, the recommended cutting length shouldn’t exceed four times the cutting diameter. Otherwise, the bits have a higher risk of breaking.
- Cut diameter: For a quality finish, increased rigidity, and longer tool life, use the largest tool diameter possible.
- Going for the strongest bit: Long bits are more susceptible to bending and vibration, while short bits tend to produce cleaner cuts.
- The sharpness of the bits: Sharp bits will always give you good cuts. They’re “kind” and quiet compared to dull bits, which are often loud and messy. Most manufacturers have a sharpening service for bits, but sometimes it’s much cheaper to buy a new bit rather than having an old one sharpened. Never attempt to sharpen bits by hand.
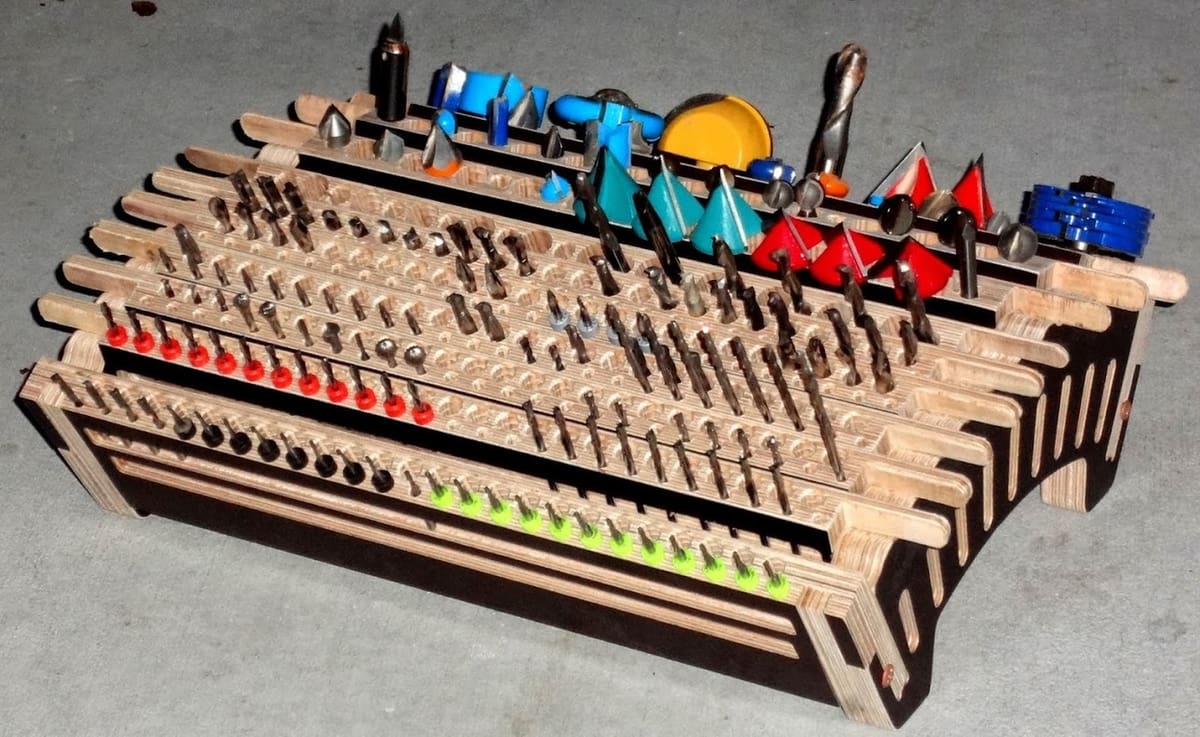
- Storage: Bits need to be stored well to prevent the edges from banging into each other. Carbide, for example, is brittle when it gets knocked on other pieces of carbide. Consider buying a bit holder (or design one that meets your needs). If you move your bits a lot, build a unique bag for the bits.
Lastly, always remember that proper tuning is critical if you want your CNC router bits to perform well and to last a long time.
License: The text of "CNC Router Bits: The Basics to Get Started" by All3DP is licensed under a Creative Commons Attribution 4.0 International License.