GRBL & Arduino: How to Set Up & Get Started

GRBL is free, easy-to-use firmware for your CNC machine. Read on to learn how the GRBL-Arduino combination makes for the best CNC experience.
The use of computer numerical control (CNC) in machining has revolutionized production with respect to both precision and speed. And it’s the control behind CNC that we’ll be focusing on in this article – specifically, how to use GRBL with Arduino.
GRBL (pronounced “gerbil”) is free and open-source firmware that controls the movement of CNC machines and can run on any boards that have an ATmega328-based microcontroller. The firmware was written in 2009 by Simen Svale Skogsrud, and since then, it’s been continuously maintained and updated by the open-source community. On GitHub, the repository is currently maintained by Sonny Jeon.
Arduino microcontroller boards were launched in 2005 and have become the popular choice for many users due to their versatility. The boards include ATmega-series microcontrollers as well as many pins and connectors for I/O purposes. There are various Arduino boards with different configurations and processing power.
One of the most used is the Uno because it’s a powerful board at a low price point. When used in tandem with Arduino shields, you can extend the use cases even more. In this article, we’ll be looking into how you can harness the capabilities of Arduino with a CNC shield and GRBL to develop a control system for your CNC machine of choice. But first, we’ll look at why you might want to use an Arduino with GRBL.
Why Use Them Together
The control system is one of the most crucial parts of a CNC machine. But if you’re going to set up your CNC using an Arduino running GRBL firmware, you should know why it could be great for you. Let’s look at some of the benefits of this combo.
Cheap
The control system of a CNC machine forms the bridge between the input and output commands. Industrial controllers may vary in prices and can easily be upwards of $500-$1,000. Other options like Linux CNC and Mach 3 also exist, but they also require a PC system with a parallel port, which is getting harder and harder to find nowadays. In comparison, an entire CNC controller kit with Arduino- and GRBL-compatbile boards along with stepper motors would cost you just around $50. All you need is a computer with a USB port.
Open Source
GRBL firmware and Arduino microcontroller boards are both open source, and they’ve been supported and grown over the years by the community. Big names in the space like OpenBuilds, Shapeoko, and Inventables all use GRBL in their machines. Support-wise, there are numerous forums and guides where users can get help and find answers to any questions regarding GRBL and Arduino. Additionally, given the continuous development, GRBL firmware is sure to be supported for many years.
Small Form Factor with Versatility
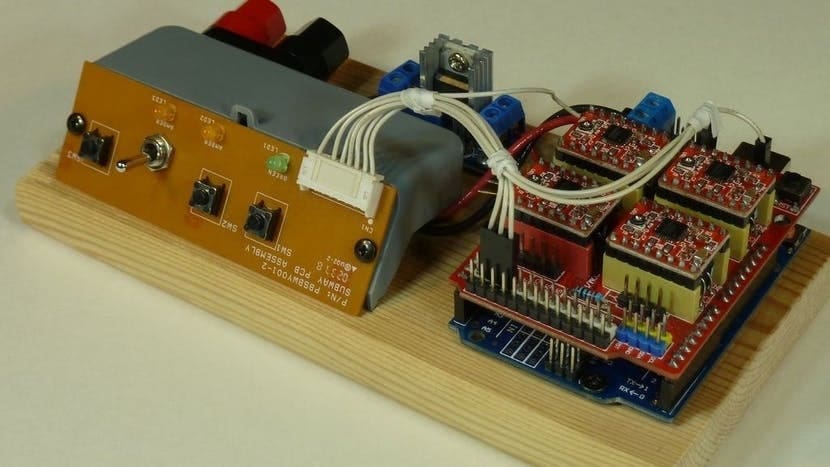
The combination of an Arduino with a CNC shield occupies very little space. The two boards are stacked on top of each other, making for a very compact setup.
Running GRBL on Arduino allows you a wide range of options: You can control stepper motors that are tiny like NEMA 11s or heavy-duty ones like NEMA 23s. It’s easy to start with a small setup and then upgrade to a bigger one once you’ve got the confidence and experience, all without adding any substantial costs to your CNC controller.
Now that we know the why of it, let’s get to the how. In the following sections, we’ll be looking at what you’ll need to set up GRBL on an Arduino.
What You'll Need
There are many ways in which you can set up your control system. But for this article, we’ll be looking at just a barebones setup. It’ll be easier to understand, and you can always scale it up based upon your specific needs. Keeping that in mind, you’ll need the following items:
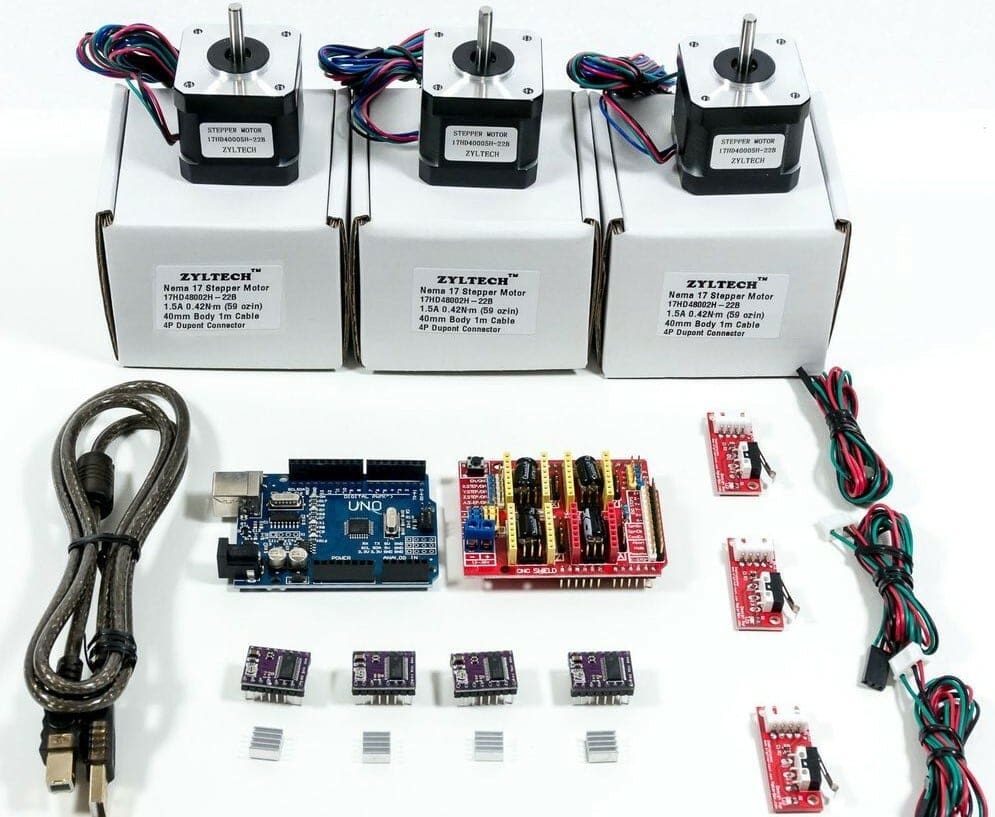
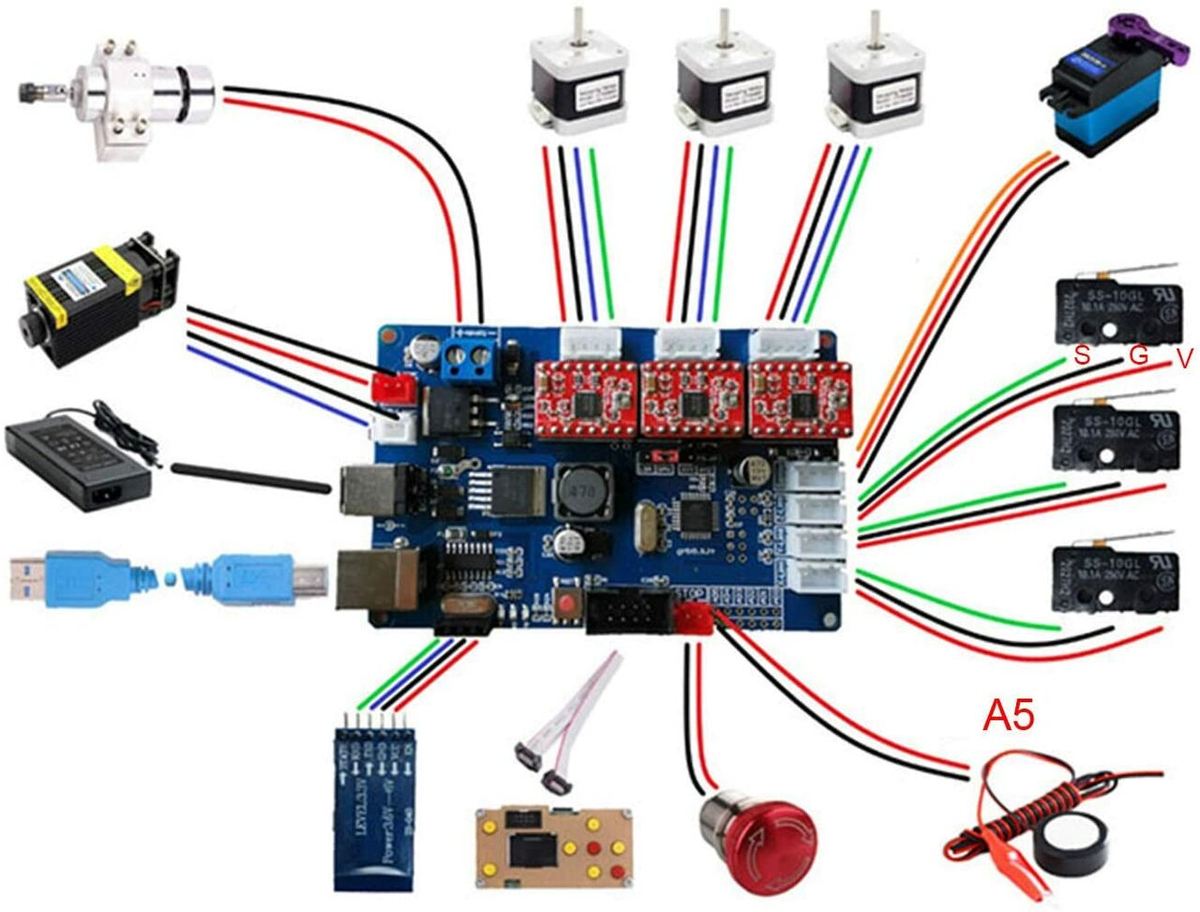
Hardware
- Arduino Uno, Nano, or Mega (note there’s a different version of GRBL for Arduino Mega)
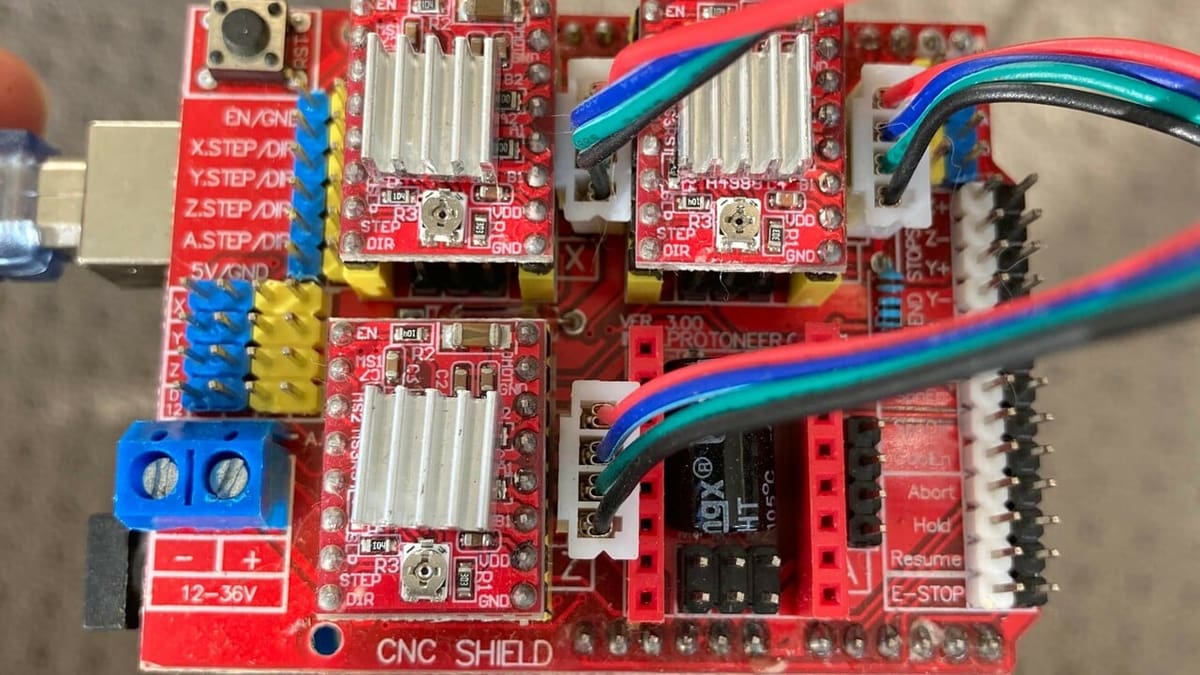
- A CNC shield
- A power supply (minimum 24 V and 15 A)
- NEMA 14 or NEMA 17 stepper motors
- Stepper motor drivers, either A4988 or DRV8825 (both are equally good drivers, with DRV8825 having a slightly higher current rating.)
- A USB-A to USB-B cable for communication between the Arduino and the PC
Software
- GRBL firmware
- Arduino IDE
- Universal Gcode Sender (or other GUI of your choice)
Once you have all of these, you’re all set to begin installing GRBL on Arduino and controlling your stepper motors.
Setting Up
The ways to install GRBL on Arduino vary a little. One uses the HEX file setup another a .zip file installation. For this article, we’ll go with the more straightforward and easier ZIP file method on a Windows 10 operating system.
Software Installation
- Install the latest version of Arduino IDE on your PC.
- Download and extract the ZIP folder containing the GRBL firmware from the GitHub page on your PC.
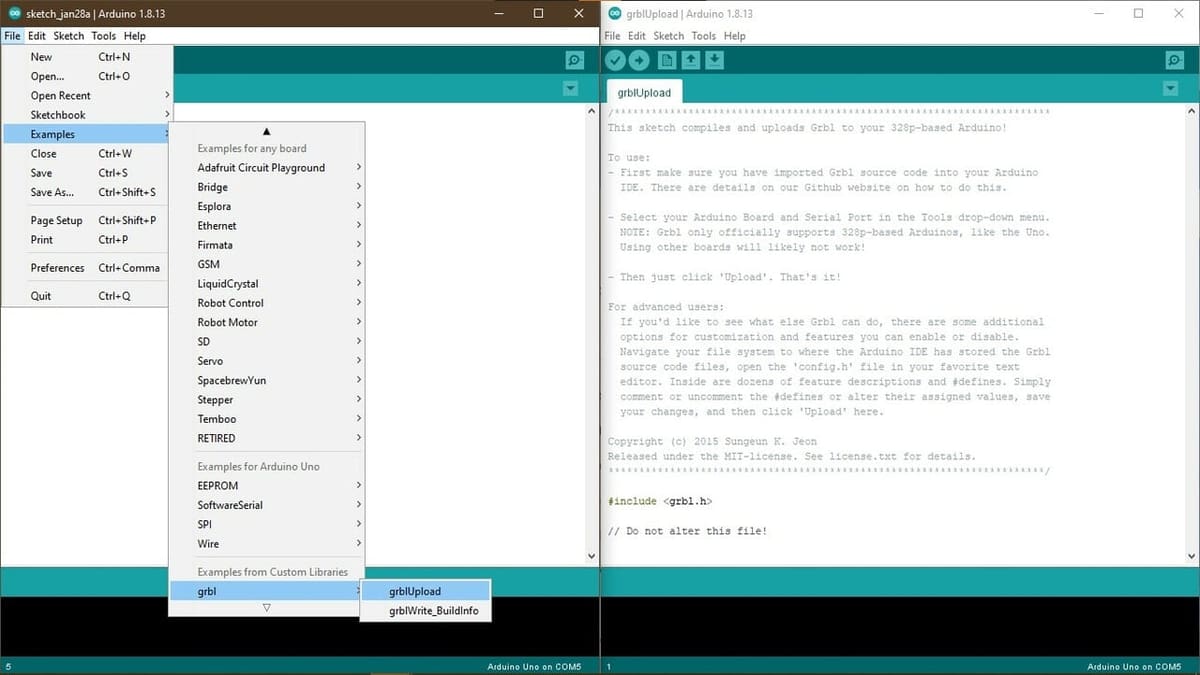
- Open Arduino IDE. Select Sketch > Include Library > Add .zip library.
- When the window opens, go to the extracted folder, there’ll be another “grbl” folder inside. Select it.
- Click the File menu. Then go over to Examples > grbl > grbl upload. A new window of Arduino IDE will pop up.
- Connect your Arduino to the computer.
- Ensure that the board shows up as Arduino Uno (or whichever version you’re using) in the Tools > Boards. Also, make sure that the serial port selected is the correct one.
- Click on Upload, and your Arduino is now flashed with GRBL firmware.
- Download the Universal Gcode Sender .zip file and extract it on your desktop. This isn’t mandatory at this stage, but since we’re discussing software, it’s better to mention it here.
Hardware Installation
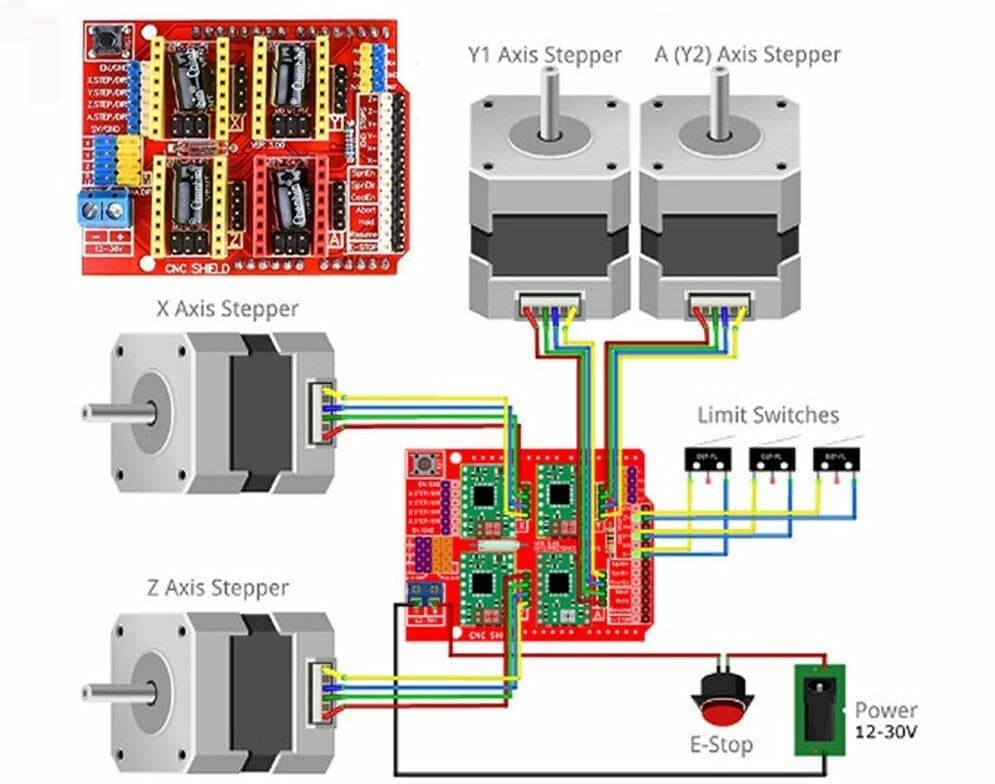
- Plug the CNC shield on the Arduino Uno board.
- Plug the stepper motor drivers in the X, Y, and Z slots on the CNC shield. (We’re not using any limit switches at this stage.)
- Connect the four stepper motor wires to the CNC shield. Connect the phase wires side by side and then connect the power wires. (Don’t worry about the polarity of the stepper at this point. If the direction of rotation is reversed, you can swap it later.)
- Attach the power supply connected to the CNC shield.
If you’re more of a visual learner, NYC CNC has a great video that explains the entire process. Alternatively, there’s an Instructable by HasseB that goes over the steps in detail.
Now you’re done with installing the required software and hardware for the CNC control system. Pretty straightforward, right? Now, let’s configure our setup and verify that our stepper motors work the way we want them to.
Configuring
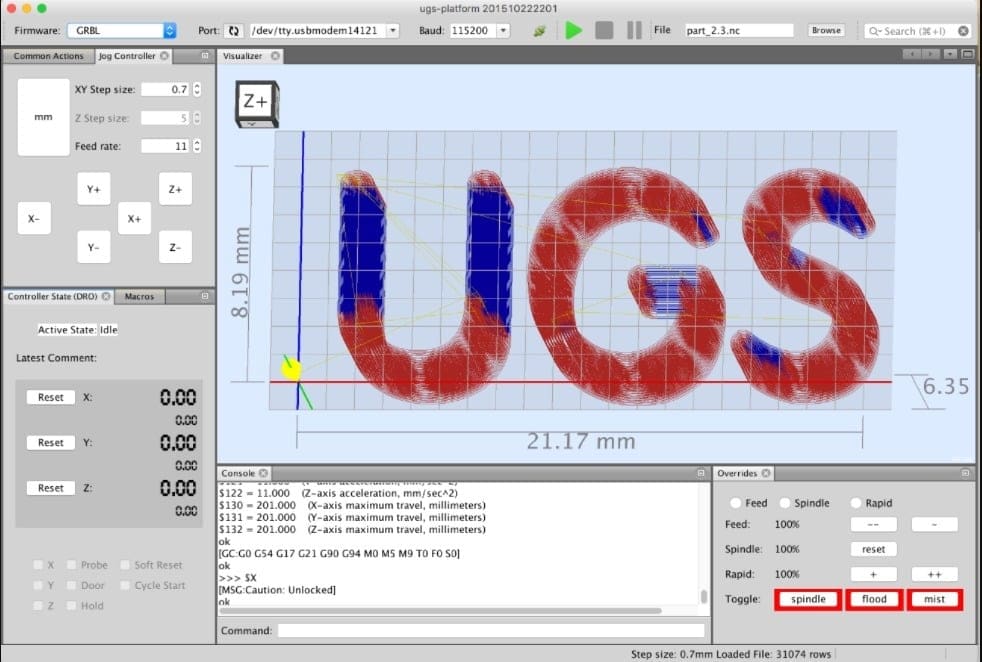
You’ve wired the steppers, and the setup is ready. Now, the next task is to get it all up and running. We’ll see in this section how you can configure the steppers using Universal Gcode Sender (UGS).
UGS is GUI (graphical user interface) software that acts as the console from which you control your machine. You load your designs in it, configure hardware settings, and view your progress in the software. There are many GUIs available that work with GRBL and Arduino.
In our case, we’re using the Universal Gcode Sender. As it’s written in Java, it can even work on a Raspberry Pi. It’s open source, and the GRBL team is continuously developing their firmware to be better compatible with Arduino.
Testing and Configuring Your Stepper Motor Setup
- Ensure that the Arduino Uno is connected to your computer.
- Open UGS that you’ve downloaded. Go to bin > ugsplatform.
- In the menu bar, Select Machine > Setup wizard.
- Verify that the controller is GRBL and the port rate is 115200.
- Once done, there’ll be a series of steps that’ll allow you to configure your setup.
- Check the motor wiring and calibrate the steps/mm of your stepper motor. Since we’re just testing the stepper motors at this stage, you can skip the limit switches and homing section. You can always add that part later.
- After this is done, come back to the main screen, and under the machine menu, there should be different options, including one where you can verify the working of the steppers.
- Now, you’re ready to load your G-code file for machining.
That’s it, you’re all set up with GRBL and Arduino for your CNC, along with the control interface! Remember it’s just a one-time process.
Next Steps
There are numerous things you could do with an Arduino as a CNC controller once you’ve completed the entire setup. To start, you could use it to control engravers, lathes, and milling machines. As mentioned earlier, GRBL with Arduino is a great way to start with your CNC setup without investing in expensive control systems.
In terms of support, there are numerous quite a few forums, guides, and makers out there who can help. Most issues can be solved by doing some smart online searching.
GRBL and Arduino have without a doubt democratized the CNC market, so the question is how are you going to make your mark?
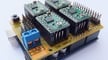
Lead image source: pomrakmaprow via Reddit
License: The text of "GRBL & Arduino: How to Set Up & Get Started" by All3DP is licensed under a Creative Commons Attribution 4.0 International License.