FreeRTOS on Arduino: How to Get Started

Explore how a RTOS (real-time operating system) works and what you need to get started with a FreeRTOS Arduino project!
The Famous Microcontroller
Arduino is open-source educational hardware and software based on the Atmel AVR series of microcontrollers. One of the advantages of Arduino is that the platform contains an easy-to-use integrated development environment (IDE) called Arduino Studio. Additionally, the hardware is cheap and easy to extend with the addition of shields.
Due to Arduino’s being education-focused, excellent documentation and tutorials are abundant, so makers with no prior software or hardware experience can jump right into the ecosystem.
In this article, we’ll be looking at one operating system that you can run your Arduino on. Let’s get started!
FreeRTOS
FreeRTOS is a real-time operating system (OS) designed for microcontrollers and is a great addition to a project that needs to run multiple parallel tasks. Given that it’s a real-time OS, it makes the running of parallel tasks with timing guarantees predictable.
An example of this application could be reading an analog to digital converter periodically, creating some sort of timing waveform on a pin, and also blinking an LED. Adding more simple periodic tasks is trivial, as is sharing information between the tasks via queues.
Drawbacks
There’s of course a limit to what’s achievable with tasks and timing in FreeRTOS. In most cases, the minimum resolution of task timing will be one millisecond, meaning anything that needs to go faster will have to be done via a hardware timer interrupt.
The other limitation with using FreeRTOS is that it might cause things to go slower since it’s adding context switches in (if using pre-emptive scheduling). Depending on what project you’re working on, you might not want to compromise performance.
Another Option
A popular alternative to FreeRTOS is Simba, which has similar features to FreeRTOS, including threads, timers, semaphores, and queues. Simba also has support for internet protocols such as TCP/IP and HTTP as well as logging, file systems, and a device driver abstraction layer.
Most of these features are not in the base version of FreeRTOS but are included in FreeRTOS+. FreeRTOS+ is still free but included separately because each additional library takes up a lot more code space, so it may not be applicable for all projects.
Better Together
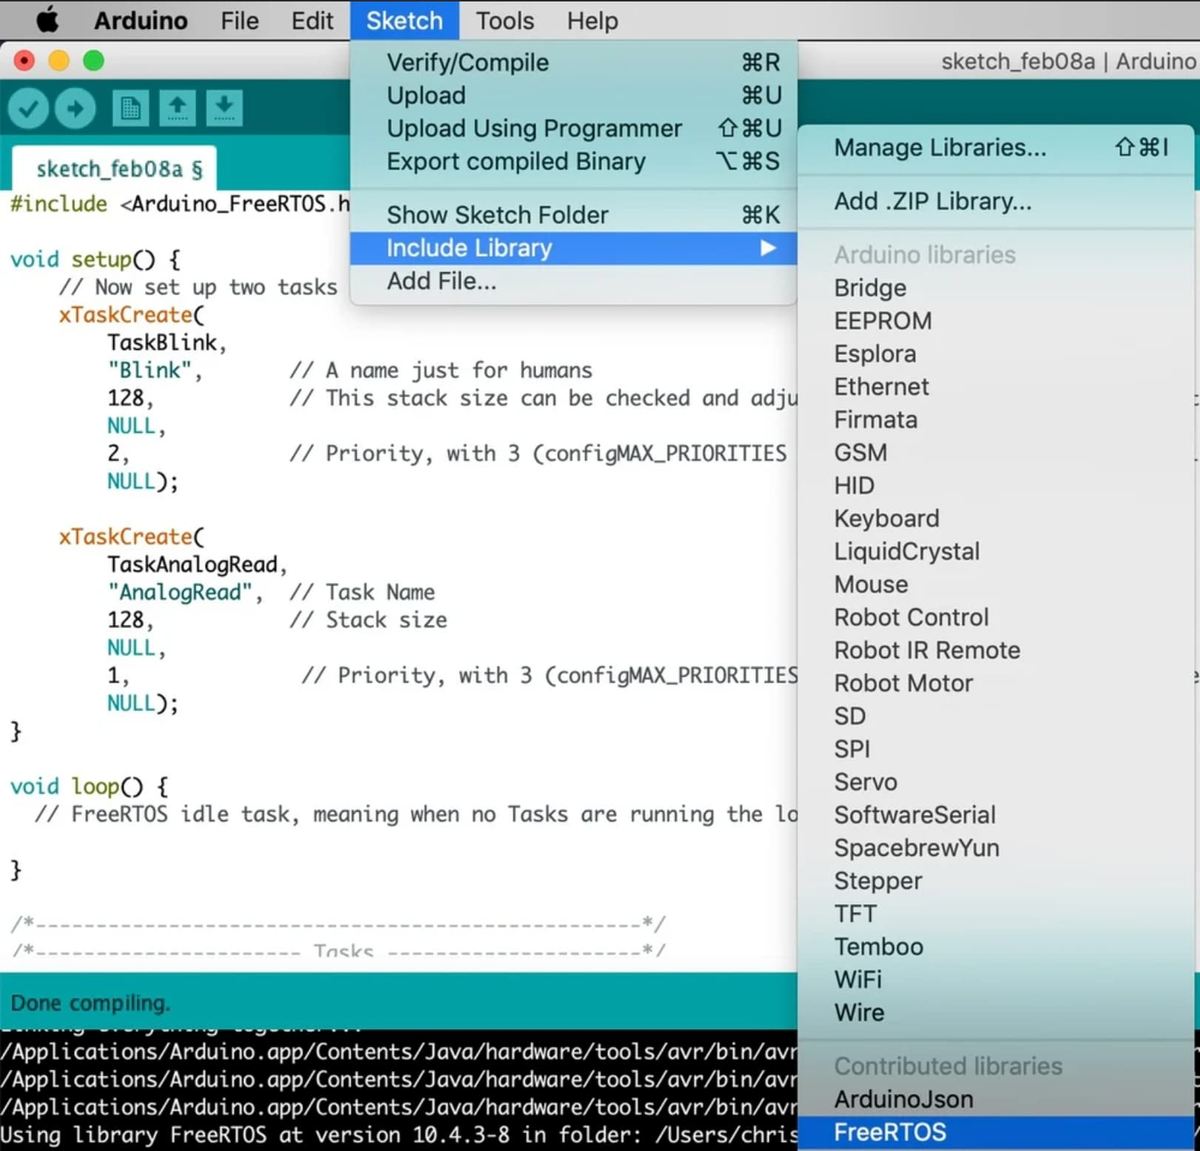
Using FreeRTOS with an AVR-based Arduino is very simple thanks to Arduino Studio’s library manager and the great work by the open-source community for making it available.
Adding it to your project is as simple as one, two, three:
- Select “Manage Libraries” from the Tools menu.
- Searching for FreeRTOS, then click the install button.
- Highlight “Include Library” in the Sketch menu with your mouse, then click “FreeRTOS”.
For V10, a single include file will be added to the top of your sketch.
Blink the RTOS Way
Below is a very basic example of a FreeRTOS based sketch that reads an analog pin, writes the value to a serial port, and toggles a LED on and off at one-second intervals:
#include <Arduino_FreeRTOS.h>
void setup() {
// Now set up two tasks to run independently.
xTaskCreate(
TaskBlink,
"Blink", // A name just for humans
128, // This stack size can be checked and adjusted by reading the Stack Highwater
NULL,
2, // Priority, with 3 (configMAX_PRIORITIES - 1) being the highest, and 0 being the lowest.
NULL);
xTaskCreate(
TaskAnalogRead,
"AnalogRead", // Task Name
128, // Stack size
NULL,
1, // Priority, with 3 (configMAX_PRIORITIES - 1) being the highest, and 0 being the lowest.
NULL);
}
void loop() {
// FreeRTOS idle task, meaning when no Tasks are running the loop() function will run.
}
/*--------------------------------------------------*/
/*---------------------- Tasks ---------------------*/
/*--------------------------------------------------*/
void TaskBlink(void *pvParameters) // This is a task.
{
(void) pvParameters;
// initialize digital pin 13 as an output.
pinMode(13, OUTPUT);
for (;;) // A Task shall never return or exit.
{
digitalWrite(13, HIGH); // turn the LED on (HIGH is the voltage level)
vTaskDelay( 1000 / portTICK_PERIOD_MS ); // wait for one second
digitalWrite(13, LOW); // turn the LED off by making the voltage LOW
vTaskDelay( 1000 / portTICK_PERIOD_MS ); // wait for one second
}
}
void TaskAnalogRead(void *pvParameters) // This is a task.
{
(void) pvParameters;
// initialize serial communication at 9600 bits per second:
Serial.begin(9600);
for (;;)
{
// read the input on analog pin 0:
int sensorValue = analogRead(A0);
// print out the value you read:
Serial.println(sensorValue);
vTaskDelay(1); // one tick delay (15ms) in between reads for stability
}
}
Comparing the above snippet of code to a traditional Arduino sketch highlights that we don’t need to use the loop() function. Instead, we create tasks that run asynchronously and their time sharing is managed by FreeRTOS.
The other interesting difference is the setup() function only has task setup code, and the hardware initialization code gets moved into Tasks as well. Further documentation and examples can be found on FreeRTOS’ API Reference.
Further Reading
So far, we’ve just seen a small snippet of what FreeRTOS is capable of. There are still many more capabilities such as:
- Queues
- Semaphores
- Timers
- Stream buffers
- Message buffers
- FreeRTOS+ (enables TCP, MQTT, JSON, Encryption etc..)
You can check out the FreeRTOS community forum, which is a thriving and incredibly helpful place, with a well-documented API. Additionally, on the FreeRTOS website, an up-to-date list of supported ports is maintained.

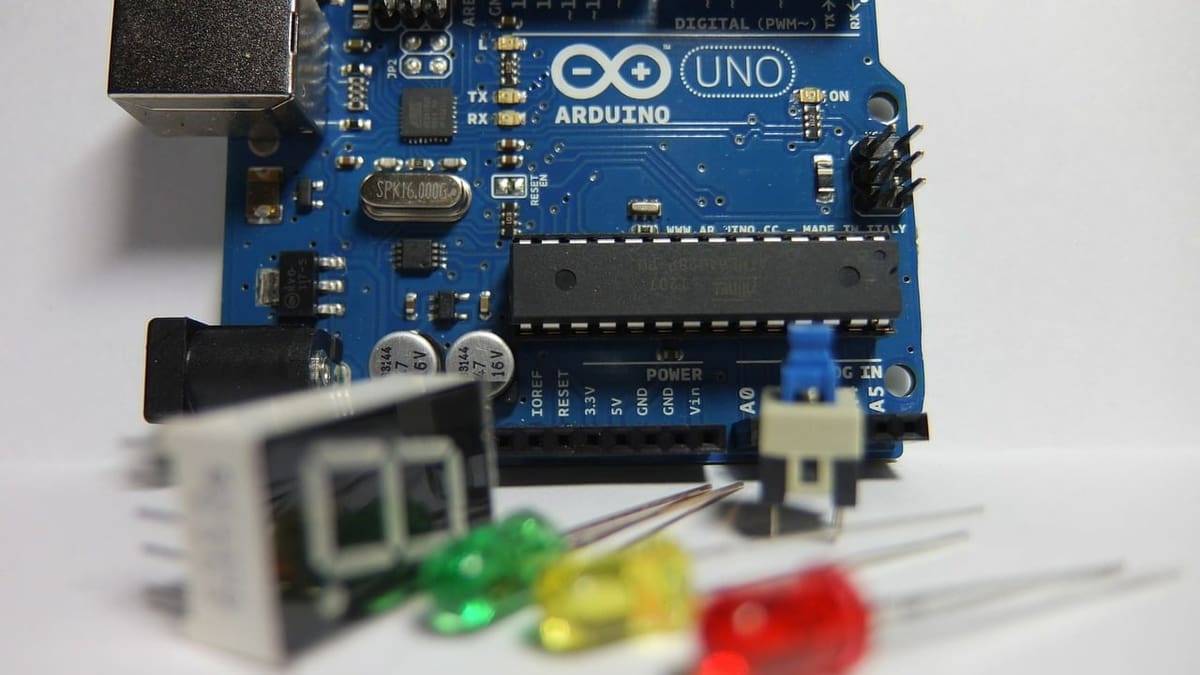
Lead image source: tikishabudin via Pixabay
License: The text of "FreeRTOS on Arduino: How to Get Started" by All3DP is licensed under a Creative Commons Attribution 4.0 International License.