The Best Chitubox Support Settings for Miniatures & More

There are a lot of Chitubox support settings to play with. Learn about them and the best tweaks for specific use cases, like miniatures!
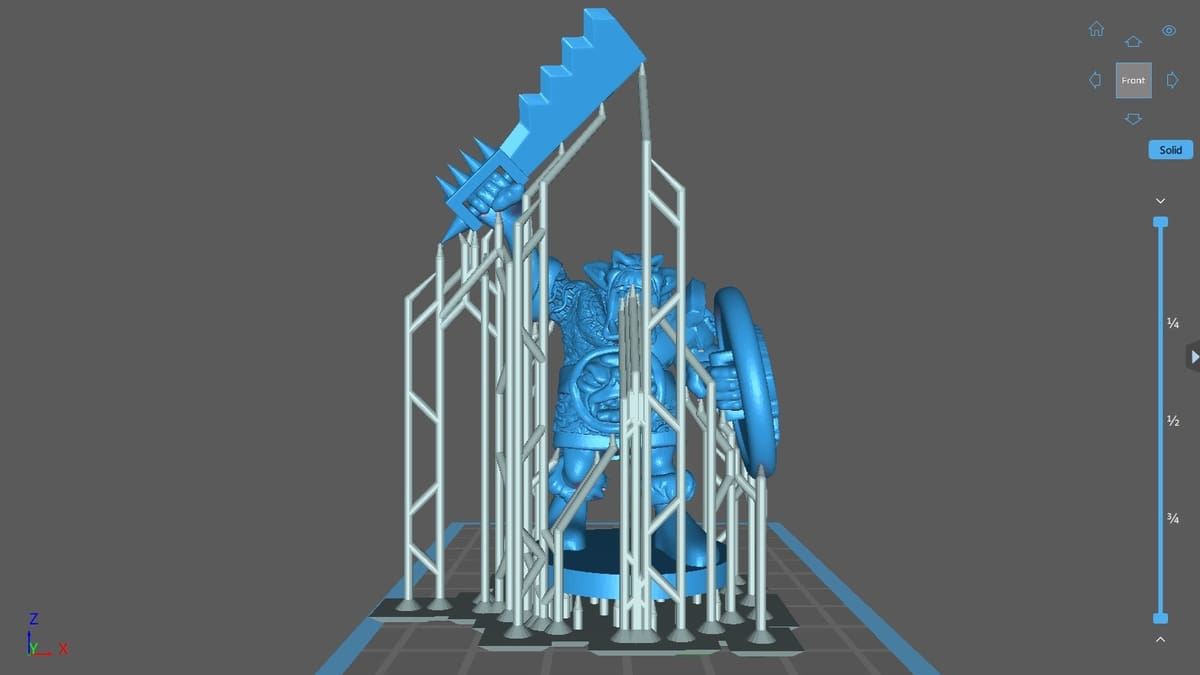
Working with a 3D printing slicer can be quite overwhelming for a newcomer, as most slicing programs offer users a dizzying choice of options to tweak. Like other slicers that support resin printing, Chitubox offers many settings for a model’s support structure, which can minimize waste and ensure a successful print.
Supports are used with almost all resin prints, even those directly attached to the build plate because a majority of models have free-floating parts. While some diehard resin 3D printing enthusiasts may want to create their supports manually, software like Chitubox can automatically generate supports for most resin 3D printers.
In this article, we’ll review the support settings available in Chitubox and provide some recommended settings for three common use cases.
Let’s dive in!
Overview
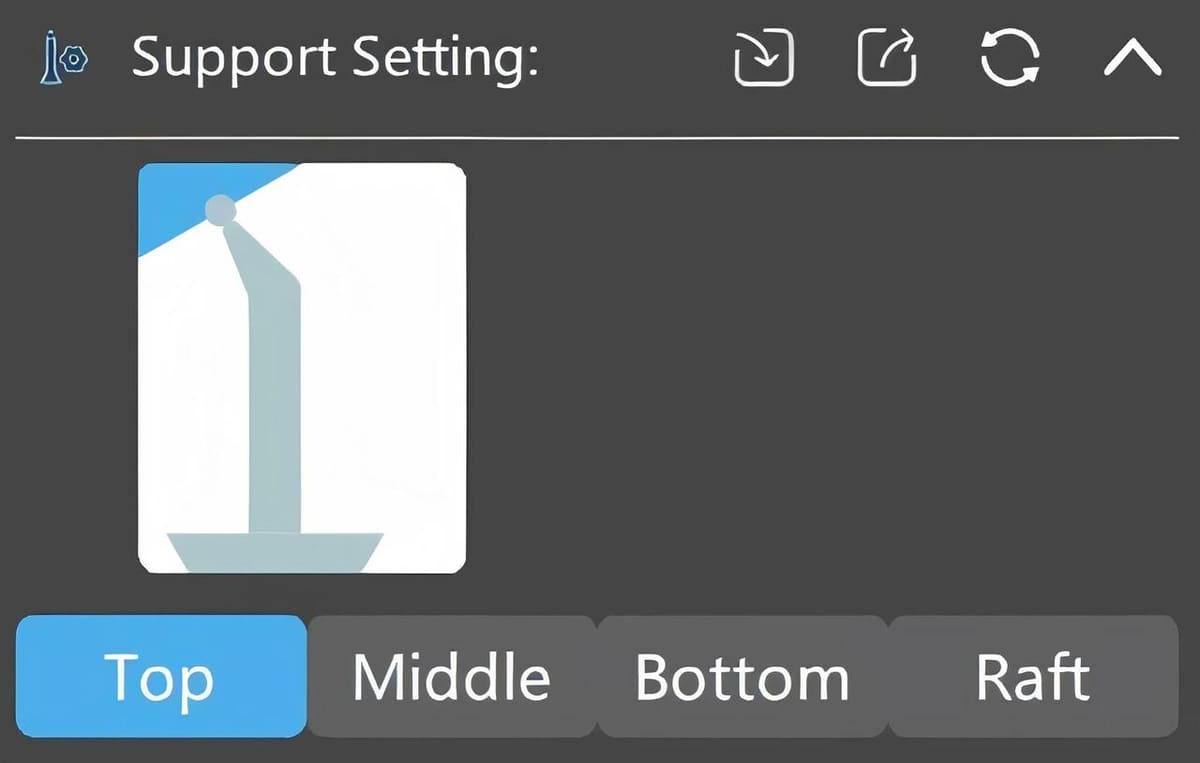
Chitubox organizes its support settings into five distinct categories, each for a specific part or aspect of the support structure:
- Top: The area where the support comes into contact with the model
- Middle: The column structure that’s in between the Top and Bottom support structures
- Bottom: The shape connecting the build plate to the Middle support area
- Raft: An optional support structure beneath the model being printed (these settings overwrite the Bottom contact shape)
- Auto/Manual Support: A group of settings that influence how the auto-generated supports are created
In the following sections, we’ll list and explain all of the settings for each support structure area. Just keep in mind that we’re omitting a few of the settings that Chitubox displays but does not let you edit.
Top
A strong and stable support structure isn’t very helpful if the connection between the support and the model is poorly configured. In Chitubox, the Top support settings are all related to the structures that bridge the gap between the model and the Middle support column.
Contact Shape
The “Contact Shape” setting allows you to add a “Sphere” shape in between your model and the Top support connection. The Sphere shape is meant to help add some separation between your model and the support, ideally enabling a safer removal during post-processing.
Contact Diameter (mm)
Chitubox lets you control the “Contact Diameter” or width of the Top support. Larger diameters will result in a stronger connection to your support structure but will also mean it’s more difficult to remove.
Contact Depth (mm)
“Contact Depth” controls how deeply the Top structure is inserted into your model. For example, if you have a Top support structure that is 10 mm long with a “Contact Depth” of 3 mm, you will see 7 mm of the Top connecting to your model and 3 mm of that Top section invisibly placed inside of your model.
Connection Shape
There are three “Connection Shape” options: “Cone”, “Pyramid”, and “Skate.” Asides from aesthetics, the “Connection Shape” setting will influence what type of cutting tool you use in the removal process.
“Upper Diameter (mm)” and “Lower Diameter (mm)”
The “Upper” and “Lower” diameter settings impact how thick the Top support structure is at its top and bottom points. “Upper” can be defined as the section of the Top that’s in contact with the model, and “Lower” is the section of the Top that comes into contact with the Middle structure.
Connection Length
Increasing the connection length will increase the length of the Top connection object. This can be useful when you want to add some distance between the main Middle support pillar and your model.
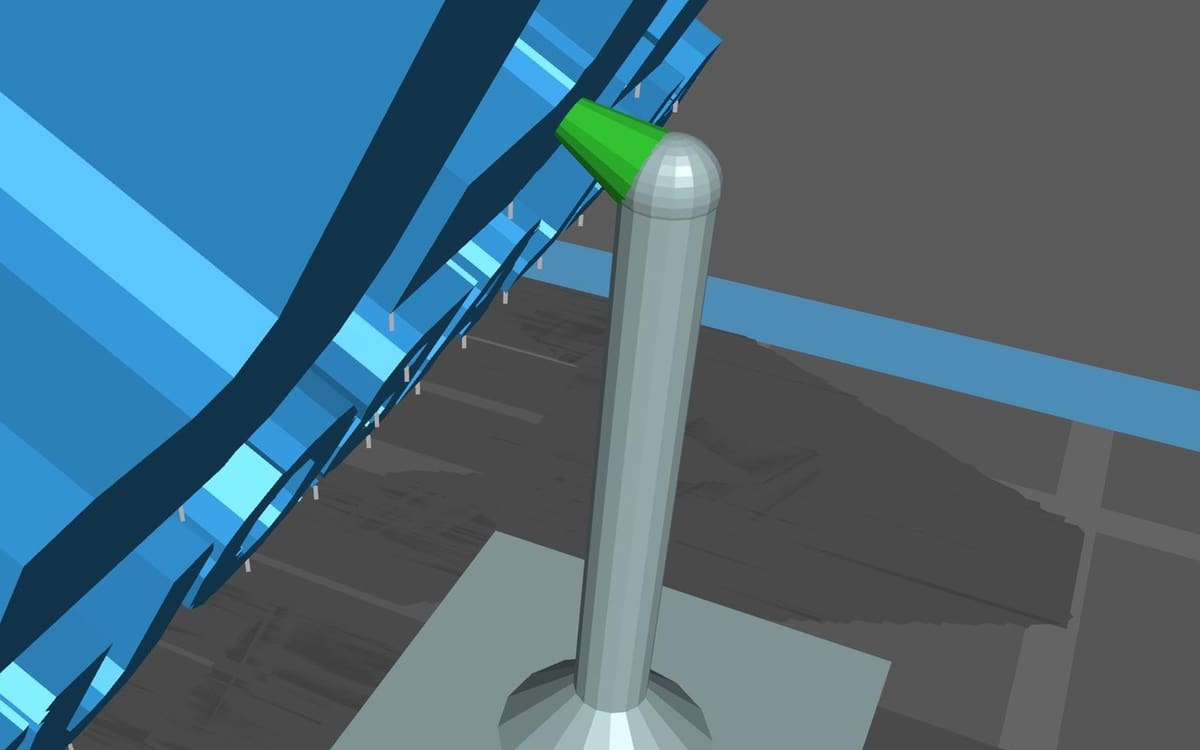
Middle
In Chitubox, the Middle support section is everything in between the Top support interface and the Bottom structure that’s connected to your build plate. These settings influence how stable your support structure remains during the print process.
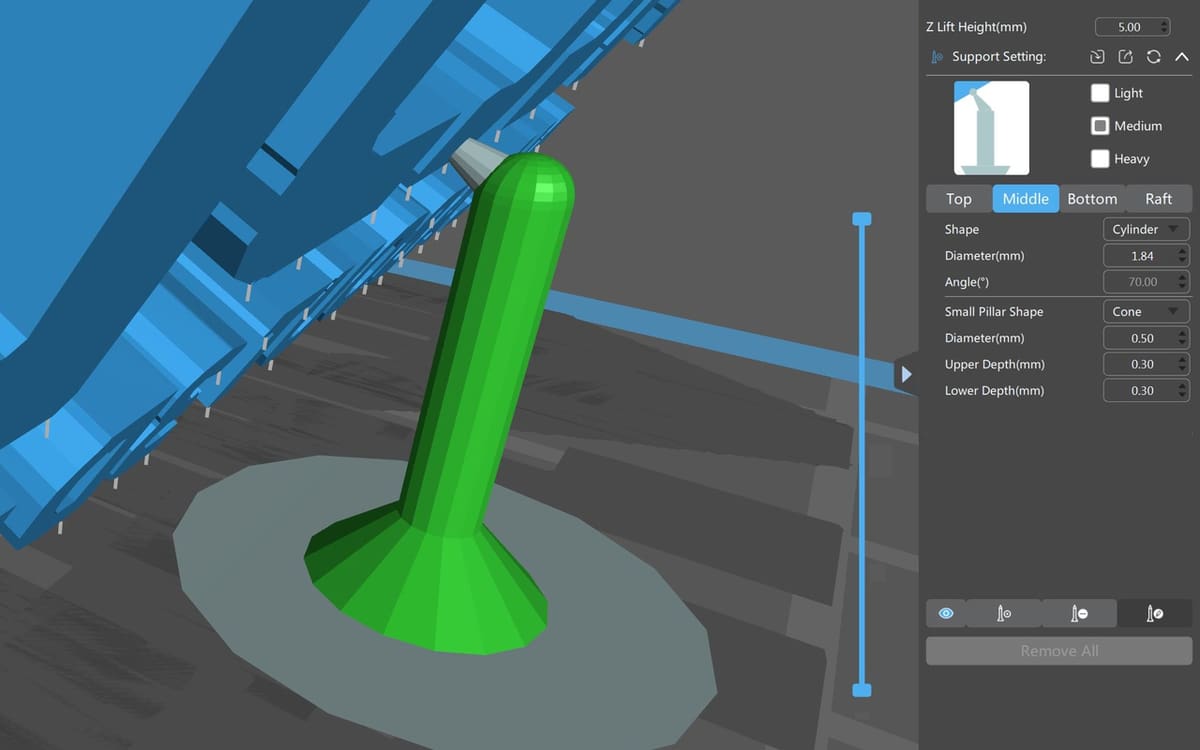
Shape
The “Shape” setting influences the appearance of the central support column. Choosing between “Prism”, “Cube”, and “Cylinder” can help create additional space between supports and avoid collisions when you’re manually placing extra supports.
Diameter (mm)
Altering the “Diameter” option will influence how wide the main Middle support column is. Changing this setting impacts the strength and stability of the entire support, so be careful not to make this too narrow.
Angle (°)
The “Angle” setting determines the position of the Middle support in relation to the Top support. For example, if you choose an angle of 90°, you’re instructing Chitubox to place the Middle support column at a position that makes the Top support parallel to the build plate.
Small Pillar Shape
The “Small Pillar Shape” setting relates to the inner supports that bridge a gap between two points inside your model. You can choose between a “Sphere” or “Cone” shape, either of which may make your life easier during post-processing.
Diameter (mm)
This second “Diameter” setting in the Middle group is for the Small Pillar Shape. Lowering or raising this value will decrease or increase the width of this inner support structure.
Upper Depth (mm) and Lower Depth (mm)
“Upper Depth” and “Lower Depth” settings are also related to the Small Pillar Shape. They’re similar to the “Contact Depth (mm)” from the Top support settings. Basically, these two settings influence how much of the Small Pillar comes into contact with your model.
Bottom
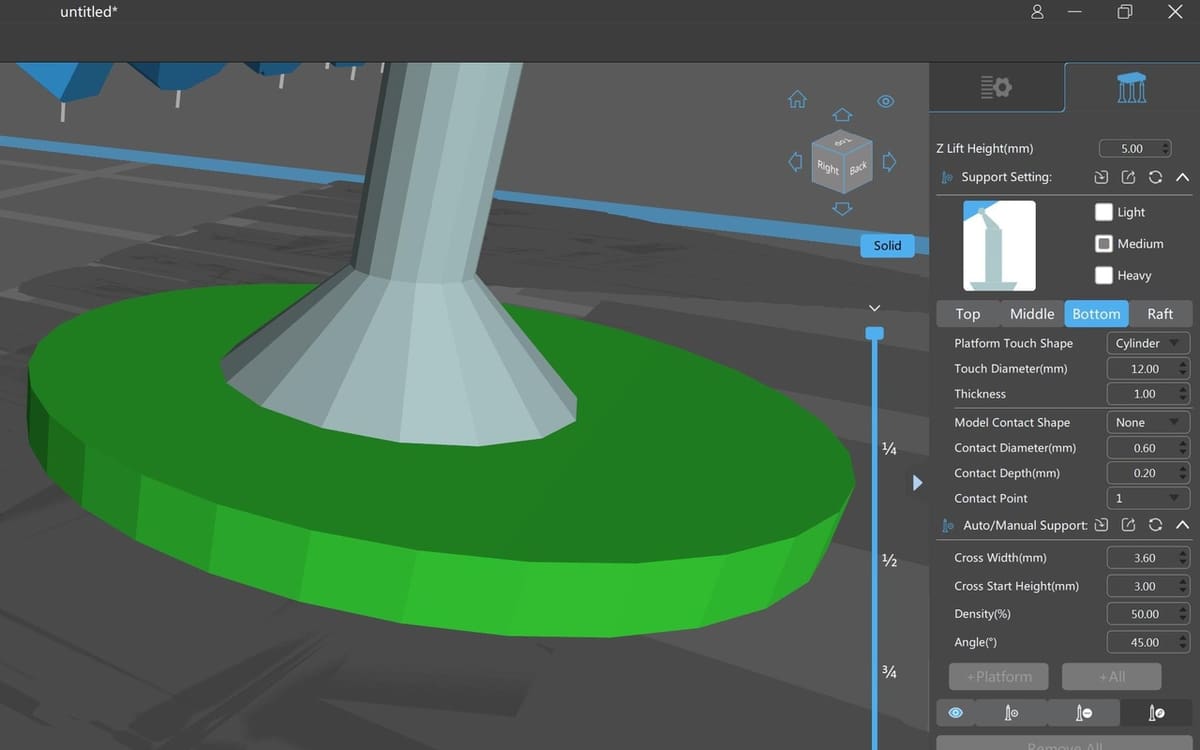
Having a solid base that sticks to the build plate is critical for any 3D printed support structure. This means that you should pay close attention to your base settings in order to avoid a print failure. With that being said, a thick and stable base can wastefully consume your resin. To avoid that, there are a number of options to tweak the base of your support.
Platform Touch Shape
The shape of the object in contact with the build plate can impact how easy it is to get your removal tool under the support. Depending on the use case that best suits your needs, you can choose from “Skate,” “Cone,” “Cube,” “Cylinder”, and “Prism”.
Touch Diameter (mm)
Similar to the Top and Middle diameter settings, the “Touch Diameter” will impact how wide the diameter of the Platform Touch Shape is. A higher number results in larger Bottom support and vice-versa for a lower value.
Thickness
Akin to the “Raft Thickness” setting (to be described below), the “Thickness” of the Platform Touch Shape determines how high the Platform Touch Shape is away from your build plate.
Model Contact Shape
The “Model Contact Shape” setting determines what type of shape your Small Pillar Shape (from the Middle support settings) uses to connect to your model. Choosing “None” will maximize the contact area for the inner support, whereas choosing “Sphere” will ease the removal of the inner support during post-processing.
Contact Depth (mm)
Another setting related to the Small Pillar Shape, the “Contact Depth” controls how deeply Chitubox will place the Model Contact Shape where the Small Pillar Shape touches your model. This is similar to the “Contact Depth” setting in the Top support settings.
Contact Diameter (mm)
The “Contact Diameter” setting controls how wide the Model Contact Shape is for your Small Pillar Shape structure. This is similar to the “Contact Diameter” setting in the Top support settings.
Contact Points
The final Small Pillar Shape setting in the list, you can use the “Contact Points” setting to split a single large Model Contact Shape into two or three smaller contact points. This is meant to distribute the amount of weight and make it easier to remove the inner support structure (i.e. the Small Pillar Shape).
Raft
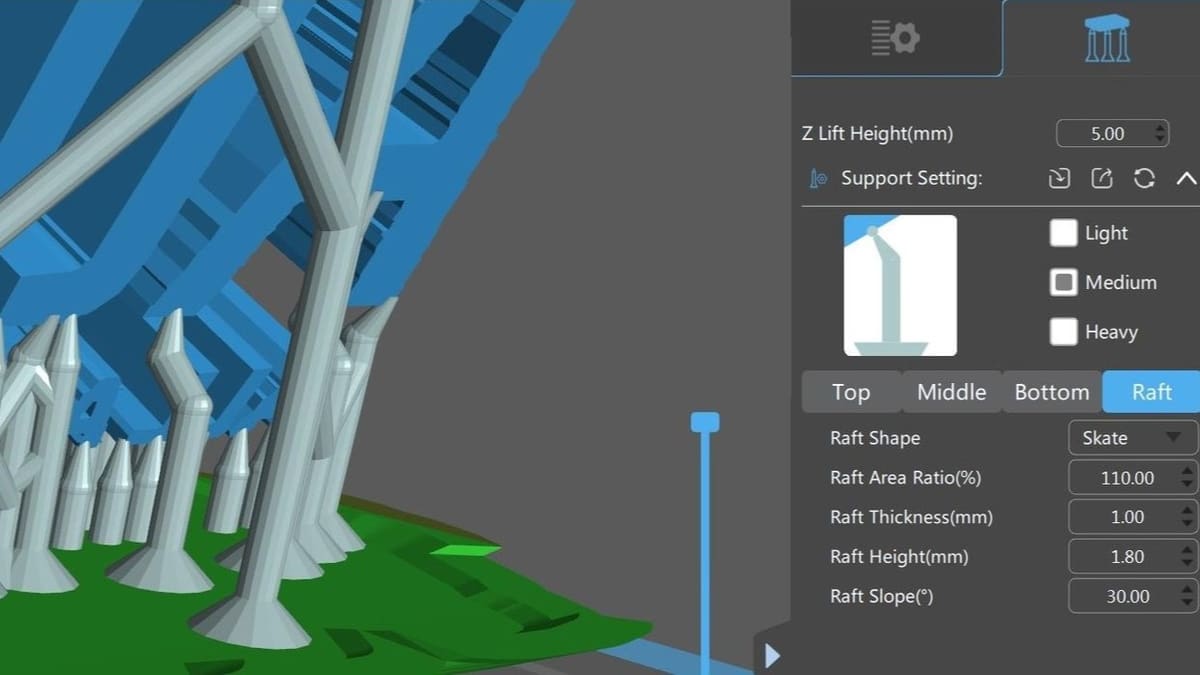
By default, Chitubox will generate a Platform Touch Shape that connects each support to the build plate. This can result in a cluttered, non-uniform shape, which can be potentially unstable or difficult to remove. Fortunately, Chitubox allows you to override the default Bottom structure with a unified raft, shaped to follow the outline of your model’s base.
Raft Area Ratio (%)
The “Raft Area Ratio” setting controls how much of the surface area beneath the model will be used to construct the raft. To describe this setting, imagine that a light positioned directly above your model casts a shadow, which outlines the shape of your model. The outline is then infilled by Chitubox in order to construct the raft.
If you were to change the “Raft Area Ratio” to 130%, it would change the size of your model’s outline to be 30% bigger than what it actually is, resulting in a raft that’s 30% bigger than the base of the model. As a rule of thumb, use a minimum of 100% so that your raft keeps a 1:1 surface area ratio with the model.
Raft Thickness (mm)
The “Raft Thickness” option alters the diameter of the entire raft. For example, a raft setting of 5 mm will mean that the brim of the raft will be 5 mm wide, and the top of the main raft body (excluding the brim) will be 5 mm away from the build plate. Having a thicker raft will ensure it stays intact while you remove it from the build plate.
Raft Height (mm)
The “Raft Height” setting impacts how high the brim of the raft is away from the build plate. Having a 15-mm “Raft Height” will mean that the tallest point of the brim will be 15 mm away from the build plate. Note that “Raft Height” only impacts how tall the brim is and won’t influence or be influenced by the “Raft Thickness” setting.
The benefit of using a higher outer edge is getting your removal tool under the raft should be easier.
Raft Slope (°)
The “Raft Slope” setting impacts the degree to which the edge of the raft will tilt. The goal of having a tilted edge on your raft is that it acts as a guide for your removal tool to get underneath the support structure, helping the raft to disconnect from the build plate more easily.
Auto-generated

The automated support generation in Chitubox can really help speed up your resin printing process. With the click of a single button, you can generate a complete support structure. The settings allow for subtle tweaks that’ll make your print a little bit easier to clean up during post-processing.
Cross Width (mm)
The “Cross Width” setting influences how far apart the cross beams should be for the auto-generated support structure. Having fewer cross beams will make it a bit easier to remove your print but can also make the support system less stable.
Cross Start Height (mm)
“Cross Start Height” sets the minimum distance the support cross beams must be placed away from the build plate. For example, if you have a “Cross Start Height” of 10 mm, it means the first cross beams must be at a minimum of 10 mm away from the print bed.
The goal in raising this setting is to make it easier to access the raft or Bottom support structure while removing the model from the build plate.
Density (%)
The percentage you set for “Density” will determine the proportion of area below your model that’ll be covered by the automatically generated supports. In general, the higher the density, the more stable and difficult the supports will be to remove.
Angle (°)
The “Angle” setting determines the minimum overhang required before the support algorithm will place a support beam underneath the model. Decreasing the “Angle” setting will likely increase the number of supports because you’re basically telling the algorithm that more parts need to be supported.
Use Cases
To give you a better idea of how settings impact certain use cases, here are some recommendations for specific types of projects – namely miniatures, jewelry, and watertight models.
Miniatures
Resin 3D printers excel at capturing the fine details that are present in miniatures. With that being said, you need to be very mindful of the number of supports you choose to include in your miniature. This is because every support added could potentially create an area that’s difficult or even impossible to clean up during post-processing.
As a rule of thumb for miniatures, use the “Sphere” option in the “Contact Shapes” setting (Top support settings). This will make it easier for you to use a cutting tool to safely remove the support contact. Additionally, lower the Top settings for “Contact Diameter” and “Contact Depth” as much as you can. The idea here is that you want to make the contact point between the support and the model as narrow as situationally possible, which should result in a smoother surface once you’ve removed the model.

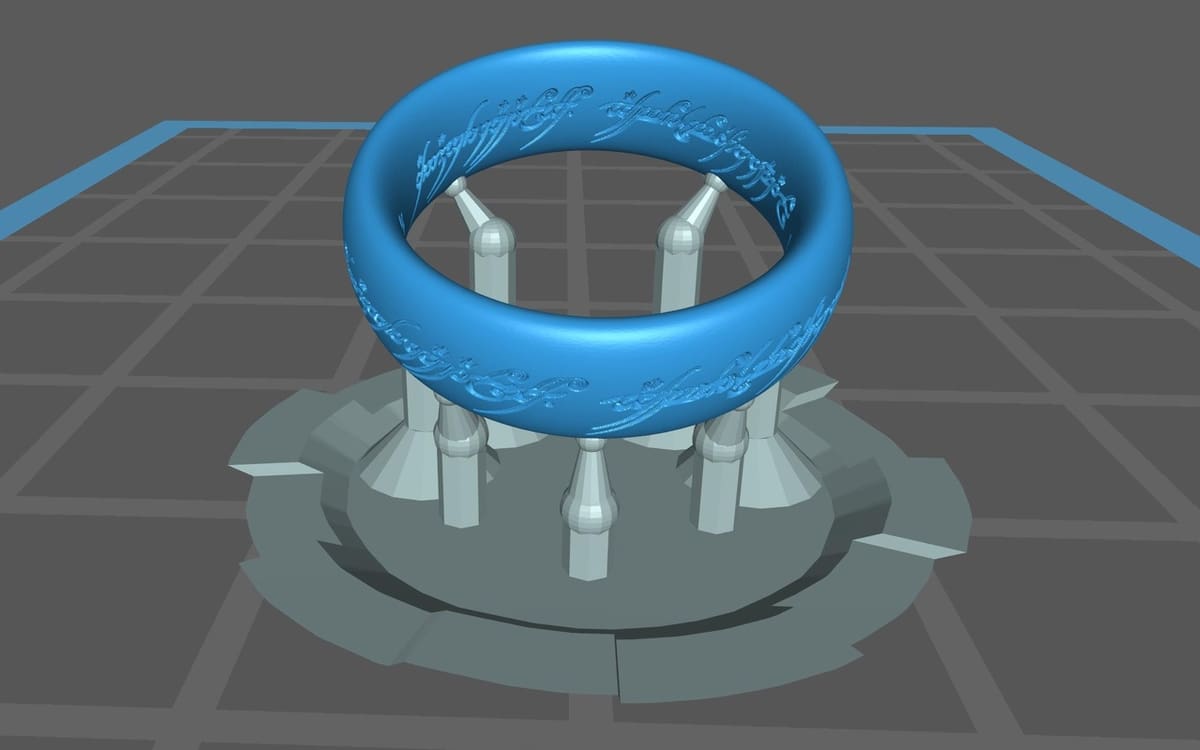
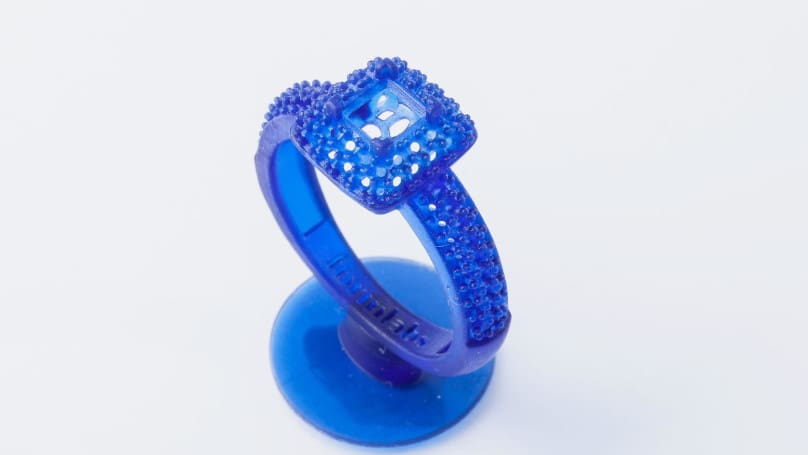
Rings and Jewelry Casting
One of the great things about 3D printing is that it enables you to express your creativity in physically tangible forms, like rings or molds for jewelry. In order to get the best results in Chitubox, you should aim to leave a flat and level overhang for the support structure to come into contact with your model.
First, you should minimize the size of the contact points by lowering the width of the “Upper Diameter” setting and by turning off the “Contact Shape” (Top support settings). You should also consider making the “Diameter” of the Middle section more narrow if your model is close to the build plate. Doing so should give your clipping tool better access for removal during post-processing.
Watertight Models
There are certain scenarios where you need to have a watertight resin 3D print. When that’s the case, it’s best to place the thickest or sturdiest part of the model towards the build plate. In general, this will mitigate the risk that you inadvertently puncture the outer wall of your model.
If you choose to use auto-generated supports, you should increase the “Density(%)” setting so that the support structure is stronger and more rigid. A stronger support structure will prevent you from accidentally yanking out a part of the model as you remove supports. Like with miniatures, you can also decrease the “Contact Depth” setting (Top support settings), weakening the supports slightly but making it safer to remove them without damage.

License: The text of "The Best Chitubox Support Settings for Miniatures & More" by All3DP is licensed under a Creative Commons Attribution 4.0 International License.