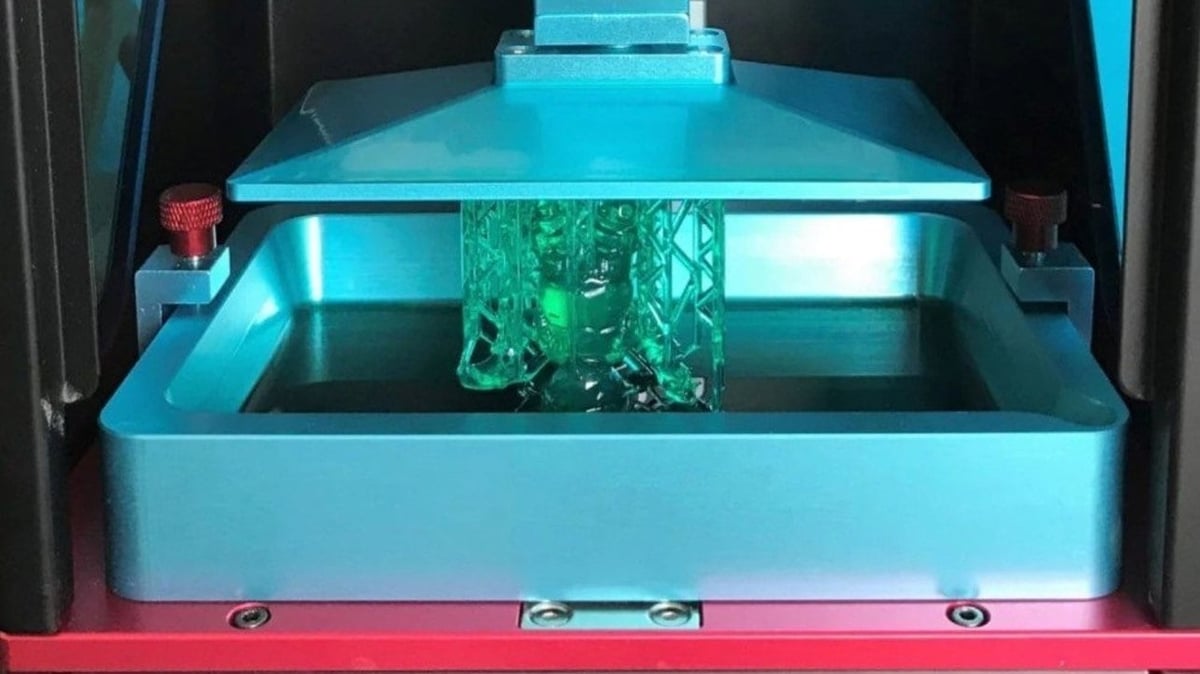
The Anycubic Photon is one of the most popular and affordable resin-based 3D printers on the market, but it’s shipped with very plain and basic slicing software. While it’s more than possible to get quality 3D prints using Anycubic’s proprietary slicer, more complex models demand more control over the printer settings.
This can be achieved using the third-party slicer ChiTuBox, which comes with a whole new set of tools and features to play with. ChiTuBox is maintained by Chinese company CBD-Tech and offers official support for over 20 different resin printers, including the Anycubic Photon.
This slicer comes with a stock profile for the Photon, and while we’ll be covering its configuration step-by-step for the basic, free version of this slicer, it’s very important to understand every printing setting and how it relates to the hardware. In addition to detailing the settings, we’ll also suggest what we believe are the optimal values for each.
It’s worth noting that in comparison to FDM printing, resin printing doesn’t allow that many printing parameters to be defined by the user during slicing. Of these few settings, many relate to the specific resin. The remaining settings are usually hardware-dependent, but they can be tweaked in cases where the default profile doesn’t cover a specific model.
Setting Up the Photon
Setting up the Photon in ChiTuBox is quite simple. This automatic process will configure the physical aspects of the machine, like size and resolution, while also suggesting default printing settings for the 3D printer. It’s sometimes also accompanied by some material (i.e. resin) profiles, but unfortunately, that’s not the case for the Anycubic Photon.
These are the basic steps to get started:
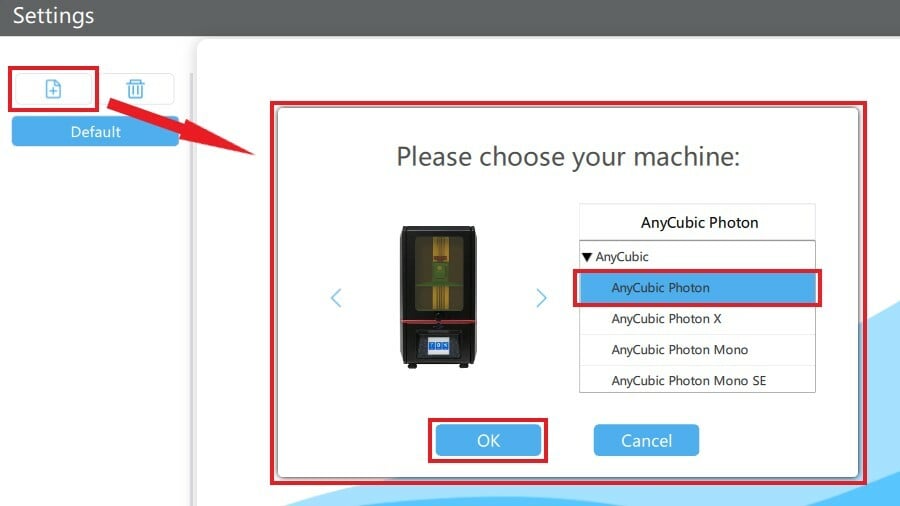
- With ChiTuBox open, go to “Settings” in the right-hand panel.
- In the settings window, click the “+” icon in the top-left corner.
- Select “Anycubic Photon” from the list. (This is usually the first choice.)
- Click “OK”.
That’s it! Pretty straightforward, right? Now, the Photon should be listed in the left-hand panel of the settings window. With all the fixed machine parameters configured, the next step is fine-tuning the print settings, found under the “Print” tab.
Let’s discuss what these settings are all about.
The Perfect Profile
In this section, we’ll be covering all the print settings available in ChiTuBox, commenting on the default values from the stock profile, and what we believe is the best overall combination.
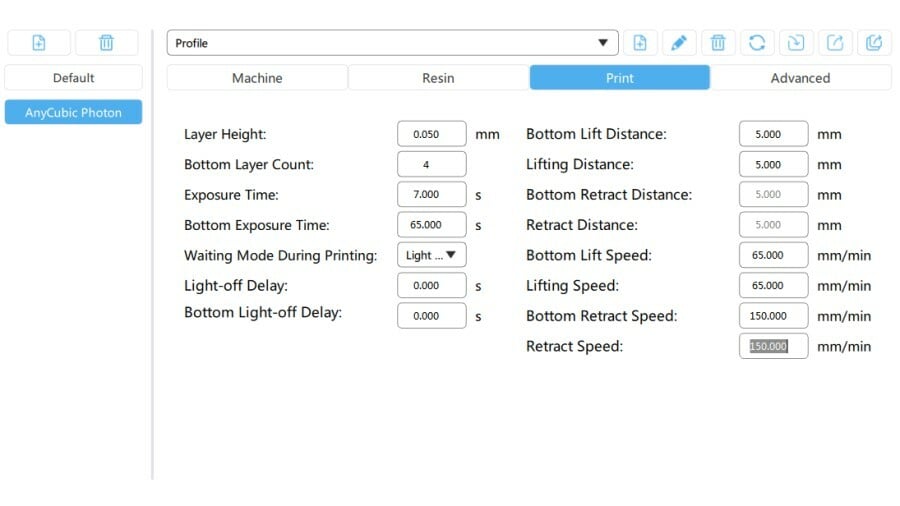
Layer Height
This setting is common to all 3D printing technologies and is pretty well-known to most users. As implied by its name, layer height is the thickness of each 2D slice used to create a 3D object. It affects the total printing time, but more significantly, it impacts the quality of the print. Generally, the range of possible layer heights is dictated by the 3D printer’s capability.
For the Photon, the layer-resolution range is 0.025-0.1 mm. While there isn’t really a “correct” layer height, when we reviewed this printer, we went for 0.05 mm, as it provides a great compromise between quality and printing time, suitable for almost every application.
- Layer height: 0.05 mm
Bottom Layer Count
This is simply the number of layers designated to be overexposed to create a strong adhesion to the build plate, therefore laying a hard foundation for the model to be built up from. The value assigned here corresponds to the first ‘X’ layers of the print, and will ultimately be affected by other settings, like the bottom exposure time, which we’ll talk about next.
While some people choose to use up to seven bottom layers, we found that the standard from the Photon’s stock profile of four layers should be enough to provide a solid base. Too many bottom layers can drastically increase print time, since the exposure time is much higher when compared to normal layers. Still, increase this number if you find that the model isn’t sticking properly to the bed.
- Bottom layer count: 4
Exposure Time & Bottom Exposure Time
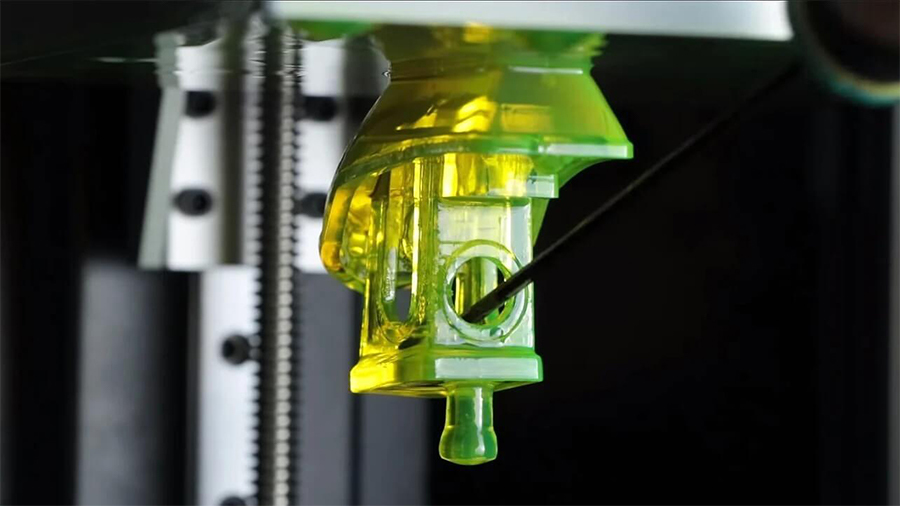
Exposure time is the amount of time each layer will spend absorbing energy from the UV light array to cure and solidify. The longer a single layer is exposed, the more hardened it will become. And while this may sound preferable, that’s not always the case. Overexposure is known to decrease overall print quality as it can suppress the finer details of the model.
Exposure time should be defined according to the layer height values and the resin used, including the color and whether it’s translucent or not. The larger the layer height, the longer it needs to be exposed. For the Photon, this generally ranges from 6 to 14 seconds, and it’s usually a good idea to test out any new resin brands you plan to use. There’s a community-kept spreadsheet with Photon settings for lots of different resins on the market, which can be a good starting point for your own calibration.
The bottom exposure time refers to the same setting, but it’s applied to the bottom layers assigned in the previous setting (bottom layer count). This distinction means that you can set a longer exposure time for just these layers, since they require more curing to properly adhere to the bed. Generally, it’s recommended to set the bottom exposure 8 to 10 times longer than the normal exposure values.
- Exposure time: Resin-dependent
- Bottom exposure time: 8 to 10 times longer than the standard exposure time
Waiting Mode During Printing
During printing, the resin in the vat must have some time to rest and stabilize between each layer curing process. ChiTuBox Basic version 1.9.0 has introduced a new way of controlling this through “Rest Time” settings. This feature, however, is not yet supported by the firmware in Anycubic machines, so for now, stick with the “Light-Off Delay” mode, which should be selected in the drop-down menu.
- Waiting Mode During Printing: Light-off delay
Light-Off Delay & Bottom Light-Off Delay
Once a layer has been properly exposed, the UV light is turned off and the build plate is lifted. This allows both the vat and UV array to cool down, while also providing space for fresh new resin to fill in the layer gap. The light-off delay is the total amount of time that the Photon’s UV light array is switched off between layer exposure cycles.
In the way of firmware, the Photon has a 6.5-second light-off delay set for older models and 4.5 seconds for newer machines. Any value input lower than this will be ignored, as it’s the minimum off-time required for the Photon to function properly. ChiTuBox’s stock profile leaves this at zero, which is fine since it will be overridden by the machine during operation. Setting it to zero won’t affect the estimated print time, contrary to what many people believe. The only way this setting can affect the print time is by making it longer, if a delay of greater than 7 seconds is set.
Longer off-times should give more time for the fresh resin to flow in and settle on the FEP film. This can be useful when working with viscous resins that take longer to flow. For standard resin, the values defined by the firmware should work fine and will keep the total printing time to a minimum.
- Light-off delay: 0
- Bottom light-off delay: 0
Lift Settings (Distance & Speed)
The so-called lift settings are the parameters that govern the up-and-down movement of the build plate between exposure cycles.
The lift distance is the total length in millimeters that the build plate will travel, while the bottom lift distance is the same but applied only to the first layers (as assigned previously). ChiTuBox sets a default 5-mm lift distance for both the normal and bottom layers for many 3D printers, including the Anycubic Photon. In our experience, there’s no need to increase it, as it will just result in longer printing times.
The lift speeds are the rates at which the build plate is raised and lowered, in millimeters per minute. Lift speed and bottom lift speed correspond to the normal and bottom layers respectively. Lifting too fast can lead to supports breaking, as the current layer is mildly adhered to the FEP film after curing. Lifting too slowly will increase print time almost exponentially, since the extra duration adds up for every layer.
Retract speed has absolutely no relation to the retraction of FDM 3D printers. In ChiTuBox, this parameter describes the downwards speed of the build plate, which is usually set much faster than the lift speed. According to the Photon’s stock profile, it’s set to 150 mm/min and should be kept at that value.
- Bottom lift distance: 5 mm
- Lift distance: 5 mm
- Bottom lift speed: 65 mm/min
- Lift speed: 65 mm/min
- Retract speed: 150 mm/min
Calibration Is Crucial
As mentioned earlier, many SLA print settings are either hardware-dependent or strongly relate to the specific resins used. However, for troublesome models, tweaking these settings can be a real lifesaver, and their optimization can deliver faster printing without compromising quality.
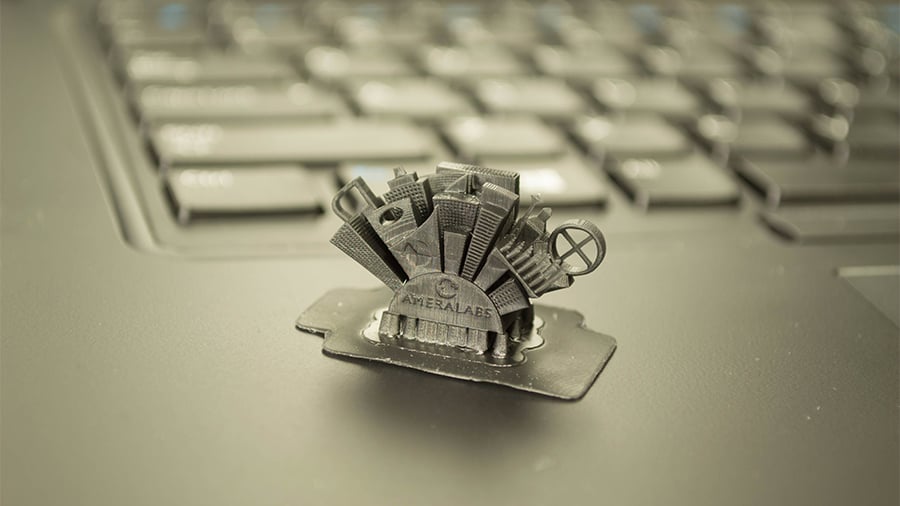
This is where calibration comes into play. Every resin brand is different, sometimes even within the same company. Now that we understand what each parameter affects, feel free to explore and find out what settings work best for what you usually print. For more information, AmeraLabs have some great calibration tips, as well as a great model for SLA calibration.
Lead image source: Dan Baker via Digital Trends
License: The text of "The Best ChiTuBox Anycubic Photon Resin Settings" by All3DP is licensed under a Creative Commons Attribution 4.0 International License.