What's Special?
3DXTech is a filament manufacturing company that specializes in making exotic filament blends. Their lineup includes multiple varieties of CarbonX Carbon Fiber filaments, as well as other materials such as PEEK and glass-fiber-reinforced filament.
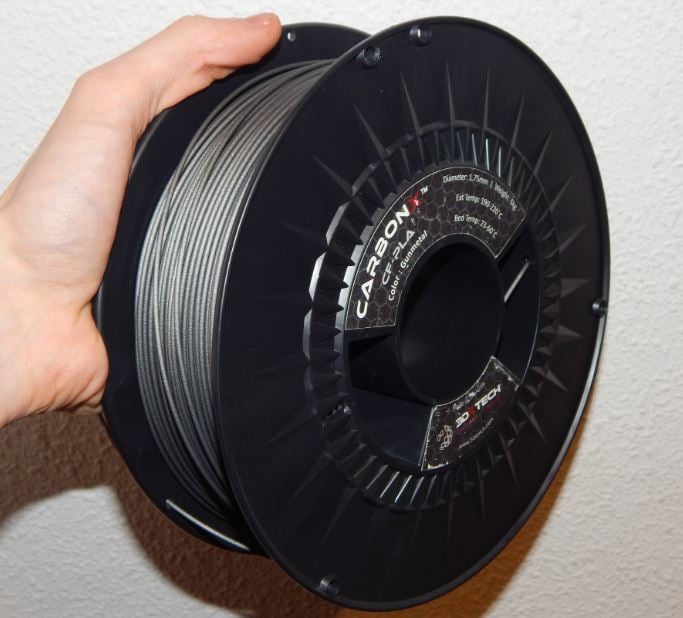
Their Gunmetal Silver Carbon Fiber PLA is a special blend of high-modulous carbon fibers and PLA, engineered to be easy to print and lightweight with good dimensional stability, high stiffness, and a nice surface finish. It comes in spools of a kilogram each, in both 1.75-mm and 2.85-mm diameters.
The appeal of a PLA-based carbon fiber filament is that any printer should be able to use it, even without heated beds. It also shouldn’t have any of the issues with warping or cracking that other filaments tend to have.
The manufacturer recommends that this filament be printed using a hardened steel nozzle with a minimum diameter of 0.4 mm. It is also noted that the filament is best printed at layer heights greater than 0.2 mm.
With higher end carbon fiber filaments such as MatterHackers’ NylonX coming in at around $60 for only half a kilogram, the CarbonX PLA is quite the bargain; the price of a one-kilogram spool is roughly $50.
The Verdict
We tested out the CarbonX PLA on an upgraded Tronxy X5S, outfitted with a 0.4-mm steel nozzle to avoid excess wear from the abrasive fibers. The spool came nicely packaged in a recyclable cardboard box. It was sealed in a plastic bag with a silica dessicant pouch to avoid damage from humidity. Unfortunately, the bag was not resealable, so the filament will need to be kept in a dry box in humid climates.
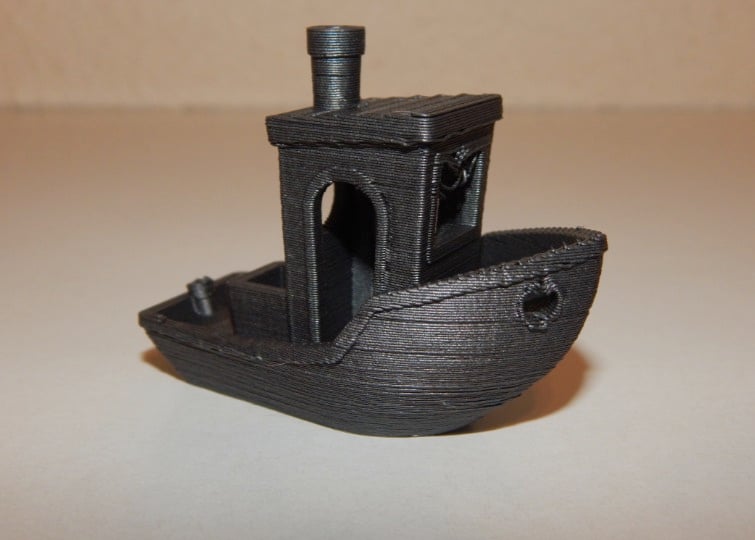
Test #1: Benchy
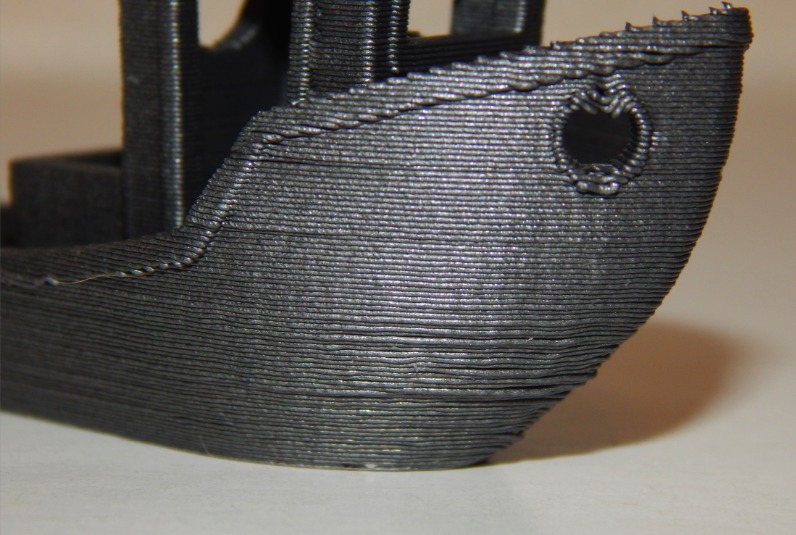
Our sample of CarbonX had a variety of printing problems during testing, and we had some trouble tuning our settings to get it to print nicely. We had three failed attempts at printing a Benchy, and two other failed attempts to print different models as we tried to get this filament working.
The Benchy we’re featuring in this article is the very first one we tried that didn’t fail, and the other two models shown here were printed with the same settings (see “Specs and Settings” for more details).
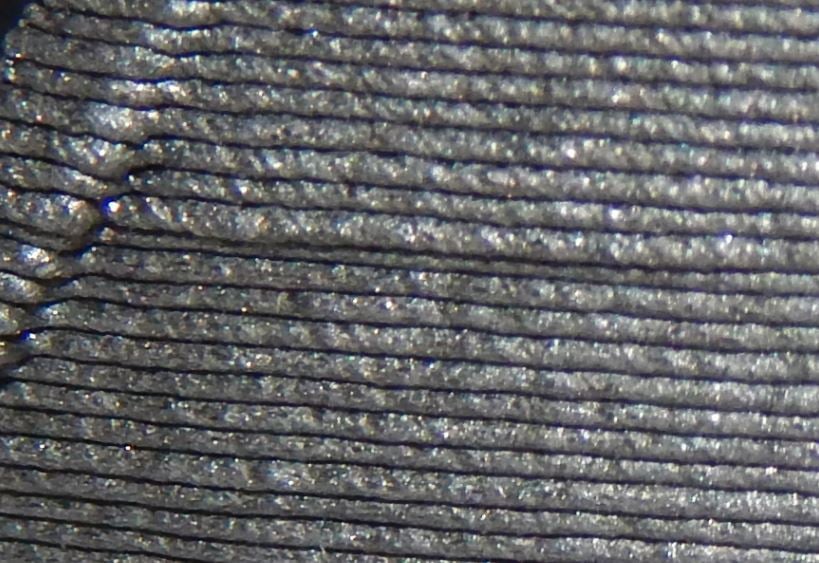
Our main trouble was that the extruded filament didn’t like to stick to itself, causing each layer to adhere poorly to the rest of the print. This ultimately results in weaker parts, and while printing, this can cause all sorts of issues that usually end in a failed print. The solution is, as we found, to print very slowly at a slightly higher temperature, giving the extruded plastic time to melt and adhere to the previous layer.
We found that certain types of overhangs don’t print very well, as seen by the drooping strings in the front of the Benchy’s cabin.
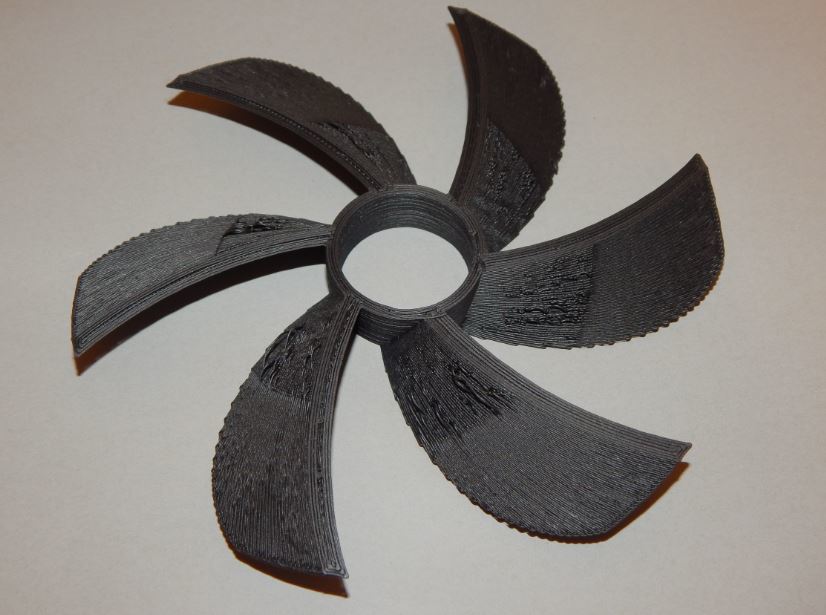
Test #2: Turbine
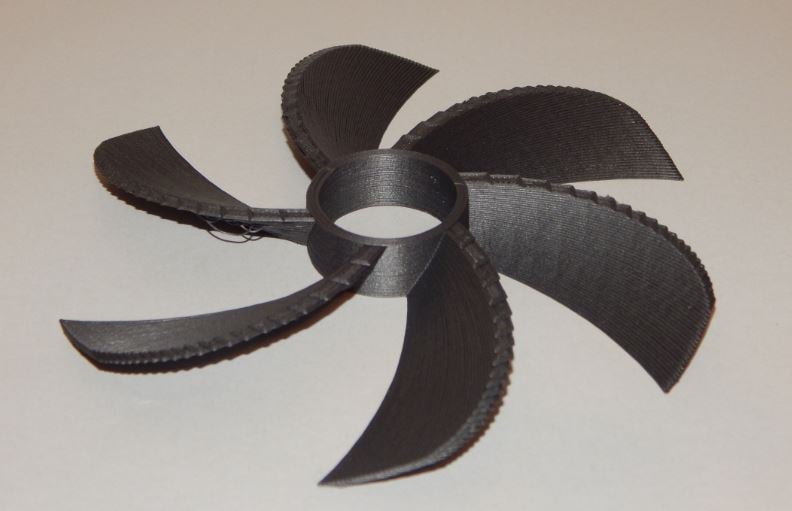
As this filament is intended for use in functional parts, we decided to print a turbine by Thingiverse user CorrugatorSupecilii.
While the upper part of the blades have a pristine, matte finish, we noticed that the undersides had some “turbulence”, where the overhangs didn’t quite turn out. This can probably be fixed with more tuning in the slicer, but for most users this would just mean they need to spend more time sanding and post-processing.
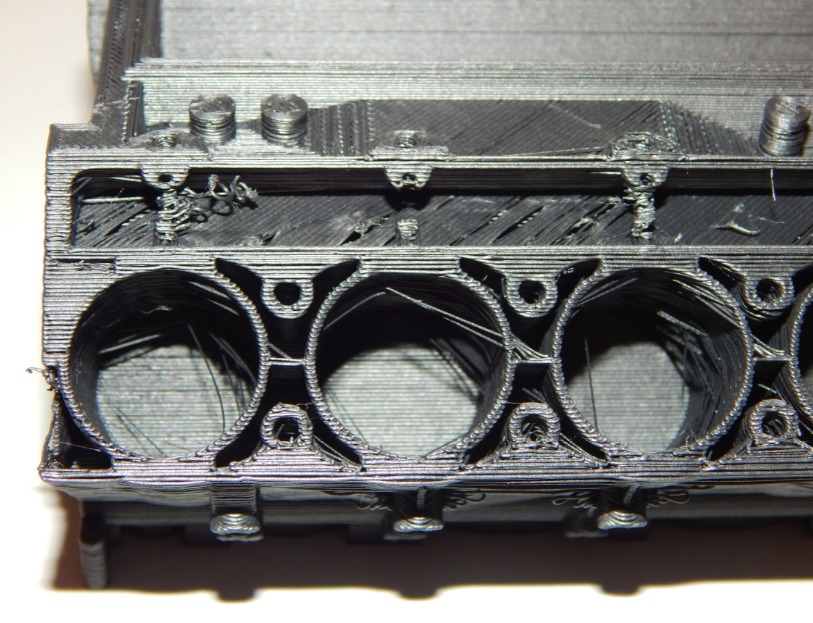
Test #3: Engine Block
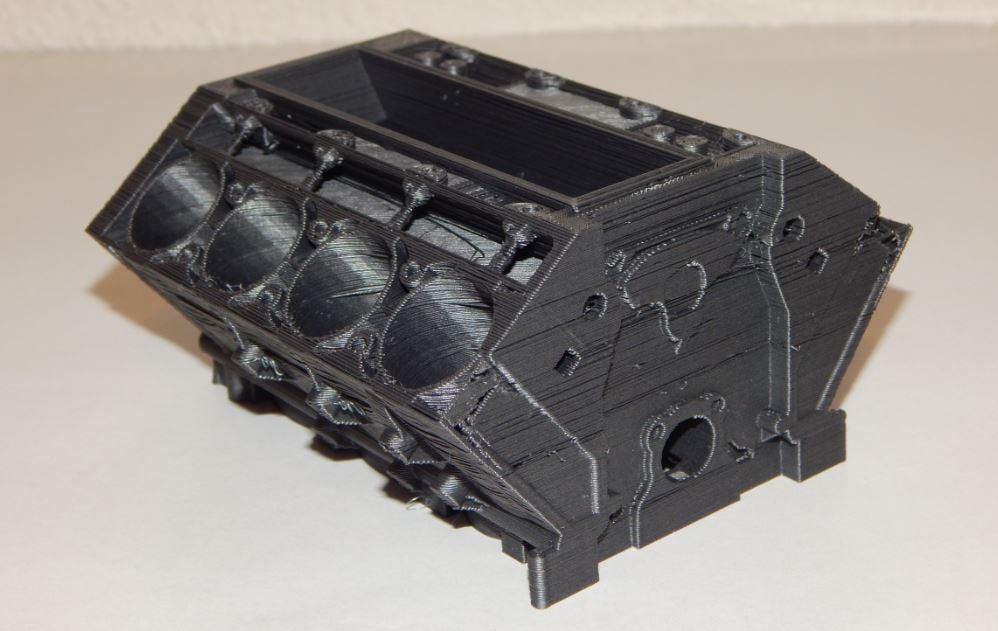
For our last print, we tried out a Corvette ZR-1 engine block business card holder, because it highlights the industrial aspect of the CarbonX filament.
Overall, it wasn’t that great. With our slower printing speeds, it took about 24 hours to print, and it still isn’t very impressive for a filament advertised as “easy to print”. While it may seem okay to an inexperienced onlooker, we couldn’t help but notice all the perimeters that didn’t stick to each other and smaller details that failed entirely.
We noted from this print that the stiff quality of the solid filament also manifests itself while printing, as smaller details did not turn out very well.
Final Thoughts
Surface imperfections aside, the finished parts are quite strong and stiff, and have a particularly nice matte texture to them. If we were to sand and finish the parts, perhaps with an epoxy resin, we’re quite sure they would perform very well in an industrial setting, and stand up to far more wear and tear than your standard PLA.
We found that simple shapes, like the hull of the Benchy, turned out very well, so for very basic parts, like mounting plates, this filament would be perfect. However, straight from the printer, more complex parts aren’t very suitable for end-use or prototyping purposes.
Would we call this filament a success? Sort of. If we were willing to put a lot of effort into it, we could probably find the “perfect settings” that have every print looking amazing, but let’s face it, not many people have that kind of time. However, for printing simple parts like printer gantries without complex shapes and small detail, this filament would perform very well.
For professional users and hobbyists, this filament is probably okay for limited prototyping, but if it’s anything like ours, more complex parts will require a lot of post-processing to become acceptable for use in the majority of assemblies and mechanisms.
So, if you’re okay with putting some effort into getting prints looking nice, this carbon fiber PLA is certainly a bargain, but otherwise, we’d suggest you look into other options first.
Specs & Settings
We initially had a bit of trouble getting our CarbonX to print properly. We started out with basic PLA settings: 205 °C on the nozzle (the arithmetic mean of the recommended temperature), around 50 mm/s printing speeds, 0.3-mm layer height, and default infill percentages. Our first Benchy failed, as did the next few as we attempted to find the optimum settings for printing with this filament.
Eventually, we discovered that the filament works best when printed very slowly. We found that our best prints came off while using Slic3r Prusa Edition, with the following settings:
- Nozzle temperature: 215 °C
- Bed temperature: 45 ºC (not required)
- Layer height: 0.3 mm
- Printing speed: 10–20 mm/s for perimeters, 30 mm/s for infill, and 60 mm/s for bridges/overhangs
- Extrusion multiplier: 1.05
- Part cooling fan: minimum 80%
- Infill: between 10% and 20%
The manufacturer’s specs and settings are as follows:
- Nozzle temperature: 190–220 °C
- Bed temperature: 23–60 °C (not required)
- Layer height: greater than 0.2 mm
- Nozzle: greater than 0.4 mm, preferably hardened steel
- Filament diameter: 1.75 or 2.85 mm
How We Review
We review filaments using the following guidelines:
Each and every spool is brand-new and unopened.
Our first print is always a Benchy, which we use to check for inconsistencies in quality, color, and finish. After that, we print one or two other models, the results of which we present to you. We do our slicing using the latest version of Cura, unless noted otherwise (in this review we ended up using the latest Slic3r Prusa Edition). We do not post process the prints in any manner, we simply remove them from the bed and cut off any support materials.
While printing, we start with the manufacturer’s recommended settings for temperatures and speeds (where available). When the manufacturer offers a range of values, we go for the arithmetic mean. Therefore, if we are given a printing temperature range of 200–220 ºC, we would print at 210 ºC (unless noted otherwise).
For this review, we used an upgraded Tronxy X5S that has been specifically outfitted to print abrasive materials. Statements regarding print quality are based on the printer’s ability to successfully print a wide variety of other filaments.
We would like to mention that every spool of filament is different, and filaments can vary greatly even within a small range. Simply fiddling with a small setting like retraction can have huge effects in print quality and can make the difference between a disastrous fail and a wondrous success. Therefore, if you own a spool of this filament, we invite you to contribute in the comments below! Did you manage to get your prints to turn out? Did you have an interesting or strange experience? Let us know — we’d love to hear from you!