Blender to Unity: How to Export/Import Models

Learn how to move files from Blender to Unity, and see why these two awesome programs complement each other so well!
Unity is a cross-platform game engine. Since its release in 2005, the software has focused on making it possible for everyone to create video games, regardless of technical know-how or budget. Some even say that the last decade’s boom of independent artistic games is partially due to Unity.
It can be used to create 2D, 3D, virtual reality (VR), and augmented reality (AR) games as well as simulations and other experiences. It’s a powerful engine that’s been adopted by many professional fields outside the gaming industry, such as architecture, engineering, and the film industry.
An extremely popular open-source tool, Blender is used for 3D modeling, animation, rendering, sculpting, visual effects, and more. Being so popular, Blender files are commonly used for game creation, and this is why some find it useful to exchange files from this platform into Unity.
Although it can be quite painless to import Blender files to Unity, there are a few very important details that can make life much easier when doing so.
Note that users have reported issues importing native Blender files from the 3.0 version of Blender, and while some installed earlier versions, since the 3.1 release, no such issues have been reported. That said, if you encounter other problems, going directly for the FBX option may be the way to go.
In this article, we’ll walk you through importing both file formats. Let’s get started!
Two File Formats
Importing a Blender file to Unity can be as simple as drag and drop. There are two formats that Unity can deal with in regards to Blender: native Blender files (.blend) and FBX. While both options would work just fine, they have their own pros and cons. There’s no definitive right choice here; it all comes down to the user’s workflow and their preferences.
When a Blender file is imported into Unity, it will call Blender’s export scripts to automatically create an FBX file before actually being imported. This action obviously requires Blender to be installed on the machine, and that might not be the case for some users.
Multiple Objects
For multiple models in a single Blender file, it’s probably easier to export each one as an FBX file and then import them one at a time. With one model per file, importing the Blender file directly should be just fine. Just keep in mind that, once imported, a native Blender file will change whenever the original is modified in Blender.
This can be very time-saving but requires extra attention in order to prevent any unintentional changes to the model in Unity. If you don’t want to risk it, perhaps importing an FBX file is the better choice, as the changes to the original Blender file won’t spread into Unity.
In the following, we’ll describe how to import these two file formats to Unity. First, however, we’ll want to prepare the model in Blender for an effortless file exchange later.
Preparing the Model
In order to make the file exchange as painless as possible, we should first address some compatibility issues between these two software programs.
There are some inconsistencies between the coordinate systems of Blender and Unity. The X-, Y-, and Z-axes don’t match (right-handed vs. left-handed coordinate systems), and the origins aren’t accurately imported. The model’s scale is also changed by default during importation.
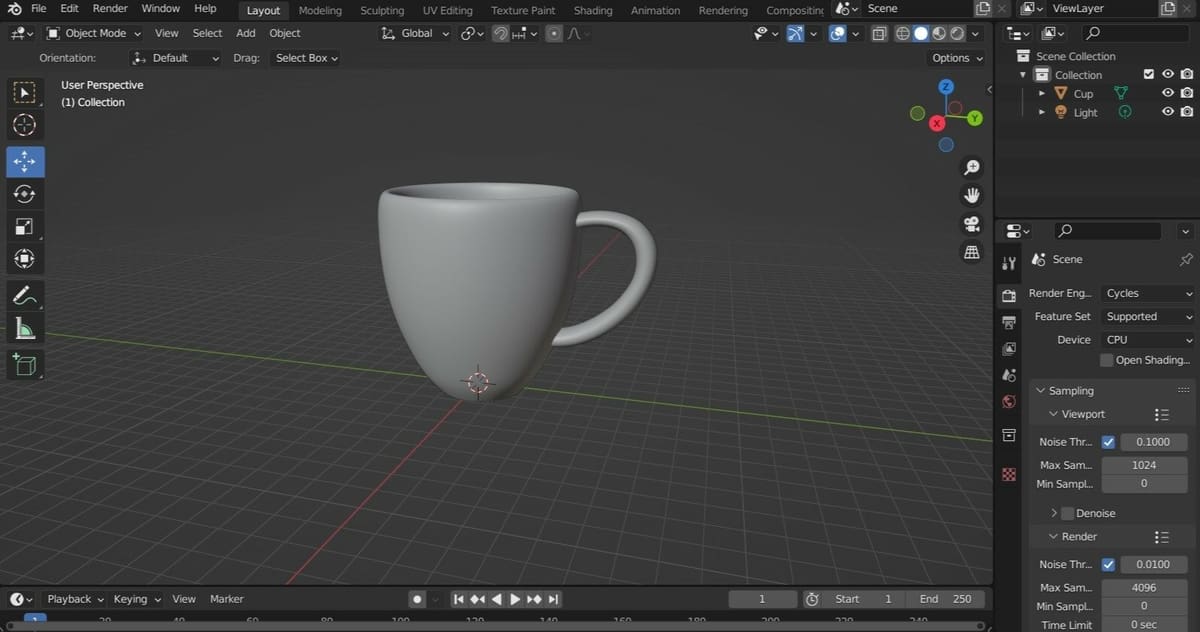
Follow these steps to properly prepare the model for Unity:
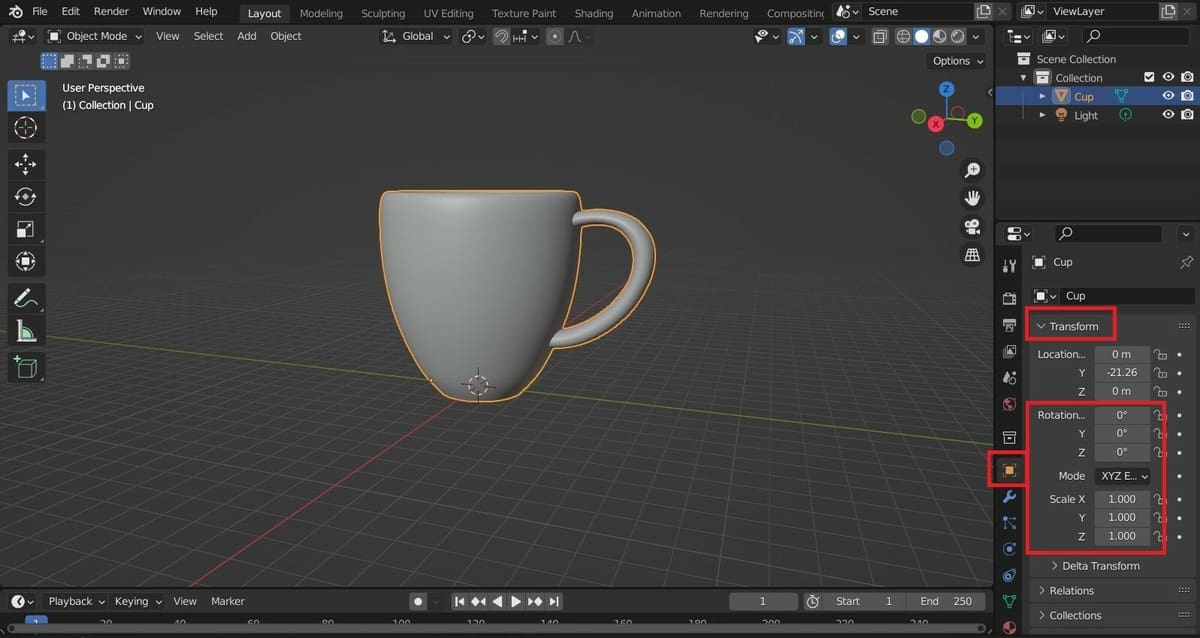
- With the model opened, in the right side-bar region, go to the “Transform” tab.
- Set all the rotation axes (X, Y, Z) to 0°.
- Set all the axis scales (X, Y, Z) to 1.000.
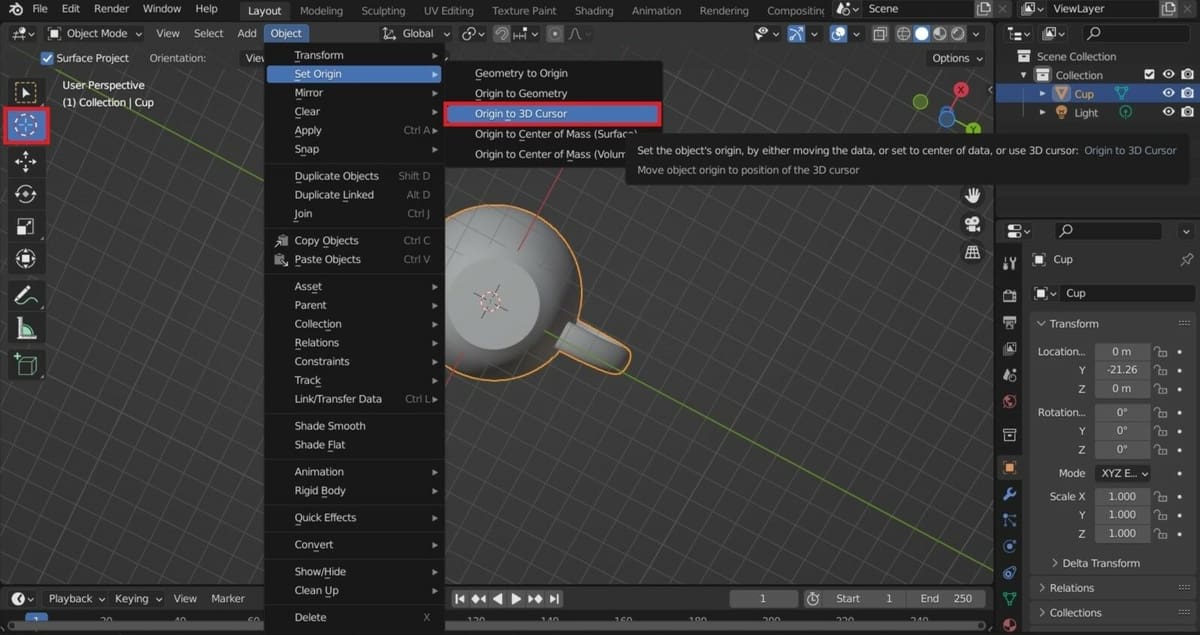
Once that’s done, let’s make sure the origin is in a useful position. The following steps aren’t mandatory, but they can really save time once the model is imported to Unity, especially when importing multiple times:
- Select the Cursor Tool in the toolbar.
- Select the new origin on the model by clicking where you want to place it.
- Go to “Object > Set Origin > Origin to 3D Cursor”.
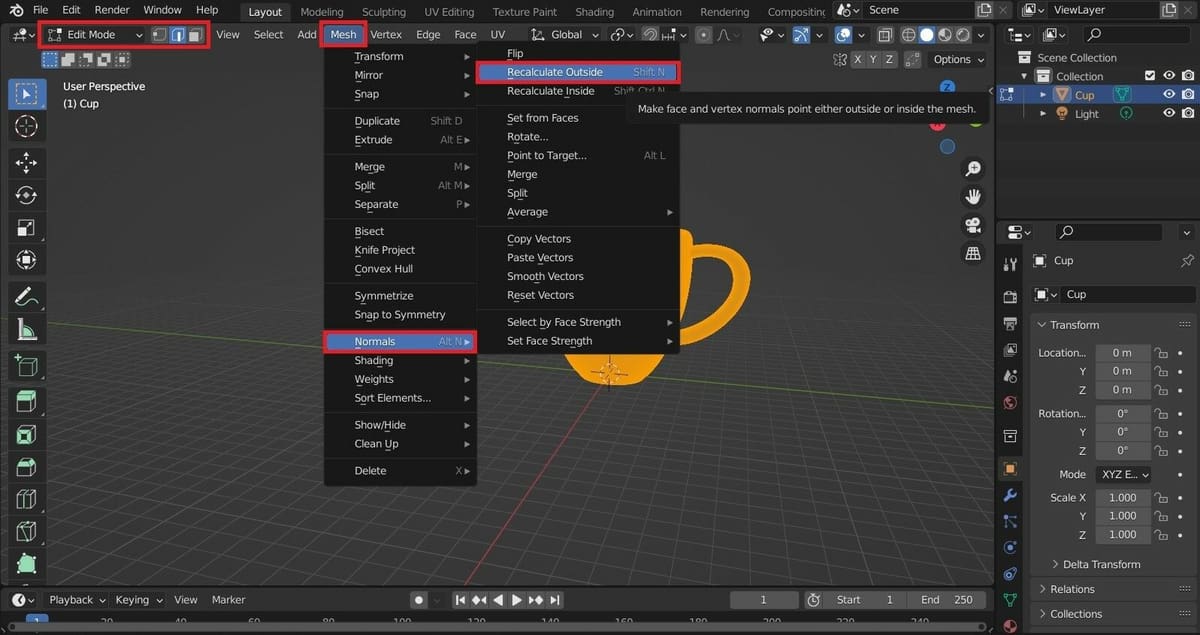
Next, we’ll make sure all the model’s normals are pointing outwards, as some surfaces might be invisible in Unity if they aren’t oriented accordingly:
- Go to “Edit Mode” and select all faces.
- Go to “Mesh > Normals > Recalculate Outside”.
- Save your file.
Now, we should be all set to import the files to Unity. We’ll start by importing the native Blender file.
Importing a Blender File to Unity
This is a very straightforward process. For a Blender file, there’s no need to export since it will already be in this format.
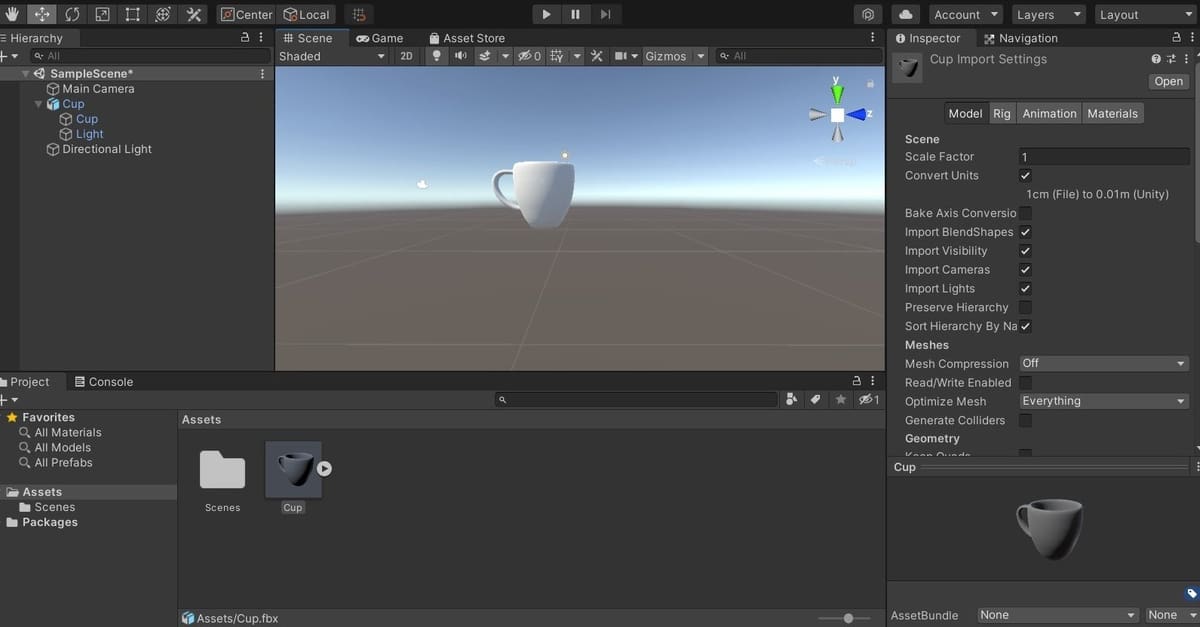
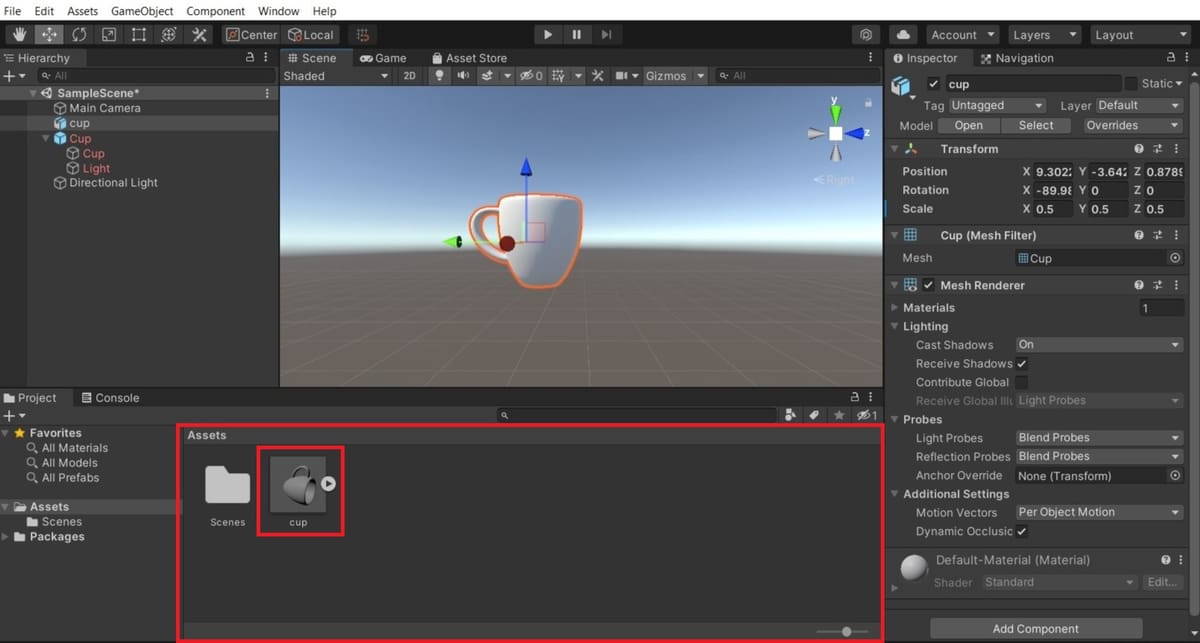
To import the model to the Assets folder, drag and drop the Blender file to the Assets panel in the mid-lower section. Alternatively, move and save the Blender file to the Assets folder of the Unity project. Another option is going to “Assets > Import New Asset”, and selecting the file.
To place the model in the Unity scene, simply drag and drop the model from the Assets panel to the scene.
That’s it. All done! Since the model was prepared beforehand, everything should be in order. Pretty simple, right?
Importing an FBX File to Unity
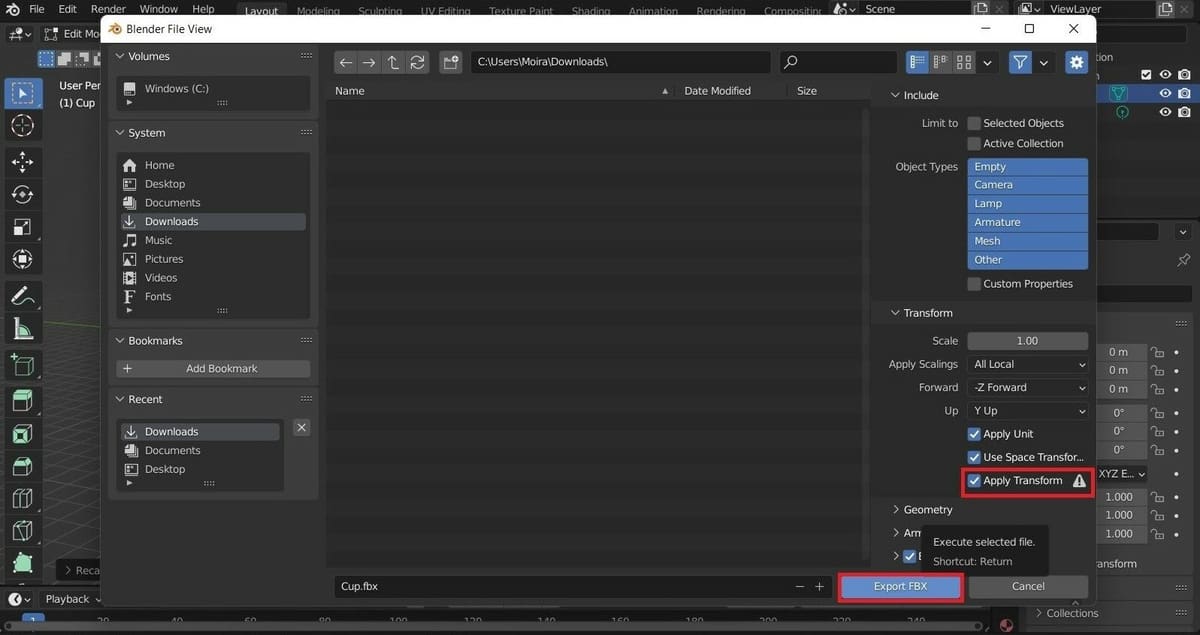
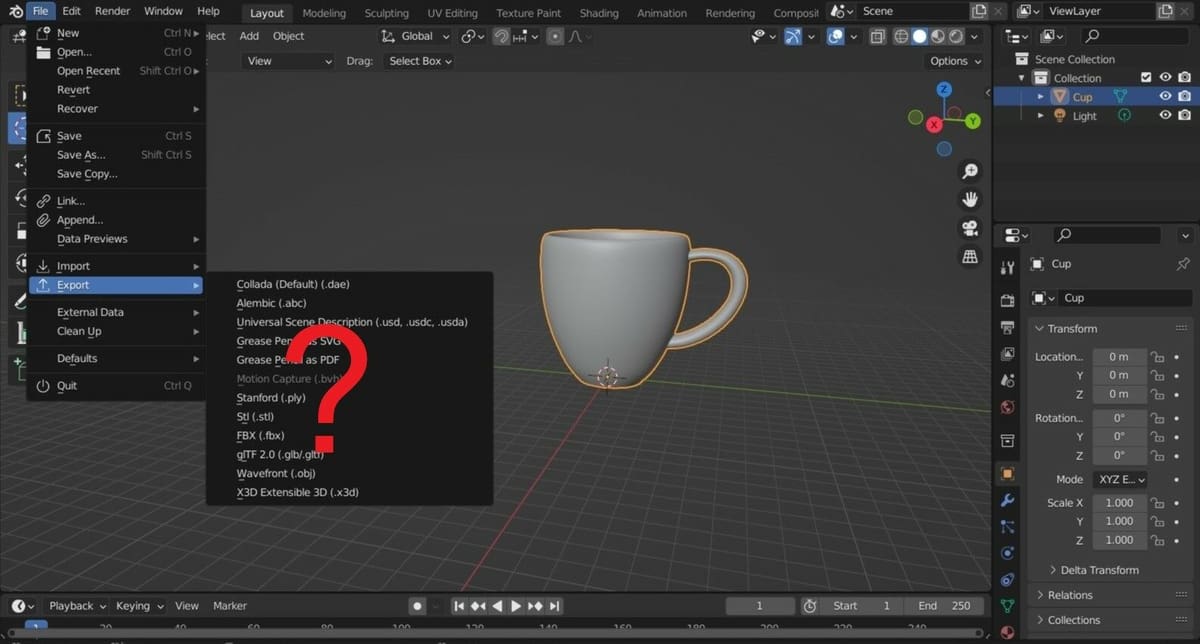
For this, we first need to export the model to an FBX format from Blender:
- Go to “File > Export > FBX (.fbx)”.
- In the export window, enable “Apply Transform” by clicking on the checkbox. This will make the coordinate system from the model work with Unity’s system.
- Click on “Export FBX” in the bottom right.
The process to import the FBX file in Unity is identical to what we did with the native Blender file. Drag and drop the FBX file to the Assets panel in the mid-lower section, move the FBX file to the Assets folder of the Unity project, or add it by following “Assets > Import New Asset”.
That’s it! The model should now be in Unity with the corresponding scale from Blender.
License: The text of "Blender to Unity: How to Export/Import Models" by All3DP is licensed under a Creative Commons Attribution 4.0 International License.