Blender: Smooth Modifier & Other Techniques – Simply Explained

It's easy for mesh irregularities to form when modeling objects in Blender. Smooth edges and more with these nifty smoothing methods!
Smooth Away

In general, smoothing is the process of making a rough and irregular surface more regular and even. Building CAD models from scratch can result in uneven and rough surfaces, so smoothening is really useful for creating more realistic-looking renders.
In Blender, smoothing is a very broad term, as the software offers numerous ways to smoothen objects. The various techniques can be broken into two categories: smooth shading and geometry smoothing. Smooth shading makes the objects look smooth without changing the geometry, whereas geometry smoothing, as the name suggests, alters the geometry of the mesh to make objects look smooth.
These two approaches to smoothing include an array of techniques in Blender, mostly in the form of tools and modifiers. While modifiers can be useful in automatically applying the smoothening effect on the object, tools can be used to focus on the specific areas that require smoothening.
Keep reading to learn more about these smoothing techniques!
Smooth Shading
Smooth shading makes the objects appear to be smooth without affecting the object’s mesh at all. It recalculates how the shading of the object’s different faces look, which also requires the normals of the faces to be altered. Since the smooth shading techniques don’t change the original mesh’s vertices and edges, these techniques are relatively faster than geometry smoothing techniques.
So, if you just want the objects to look smooth without actually being smooth, smooth shading is a perfect choice. The techniques that fall into this category include the following:
- Shade Smooth
- Auto Smooth
Let’s take a closer look.
Shade Smooth
Switching over from Shade Flat to Shade Smooth allows us to change the individual model faces from flat to smooth, giving the object a softer, smoother look. A flat shade basically means that the normals of the object’s faces will be perpendicular to the faces and will be displayed evenly, giving the object a hard, flat surface appearance. With a smooth shade, the normals are interpolated, causing the edges of the object’s faces to be blurred.
For example, if we were to apply Shade Flat to a cube model, it’ll be displayed with properly defined edges and hard, flat surfaces as we would expect of a cube. On the other hand, if we apply Shade Smooth, the lighting on the cube will turn softer, the edges will not be accurately defined, and the faces will appear more blurred. This, however, is an illusion of smoothness because we haven’t changed the mesh geometry of the cube at all.
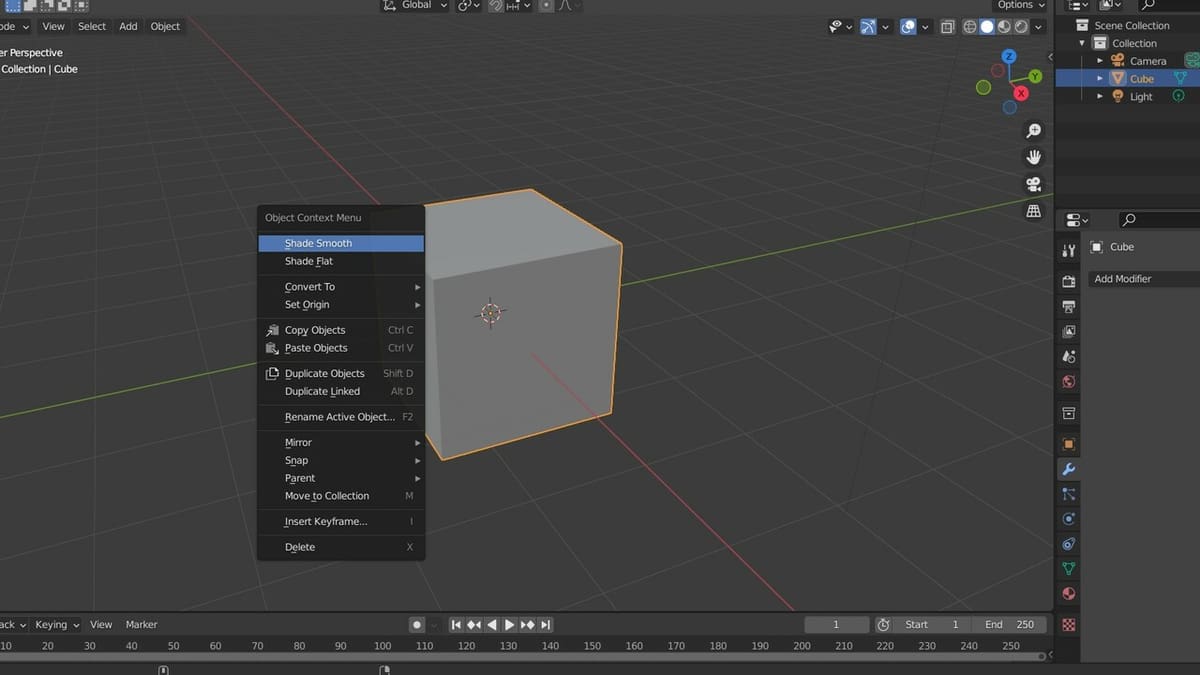
How to Do It
- Ensure the mode is set to Object Mode. If not, click on the drop-down list at the top left corner of your screen and select “Object Mode”. Alternatively, you could simply press “Tab” on your keyboard.
- Open the “Object Context Menu” by clicking the right mouse button on the object.
- Select “Shade Smooth”.
Auto Smooth
Auto Smooth is a quick one-step way to create a smooth appearance of the object. It basically smoothens the surfaces of the object but also allows you to preserve defined edges and corners. This is achieved by defining an angle threshold, which smoothens the angles between faces that are below the set threshold. Angles above the threshold will appear sharp.
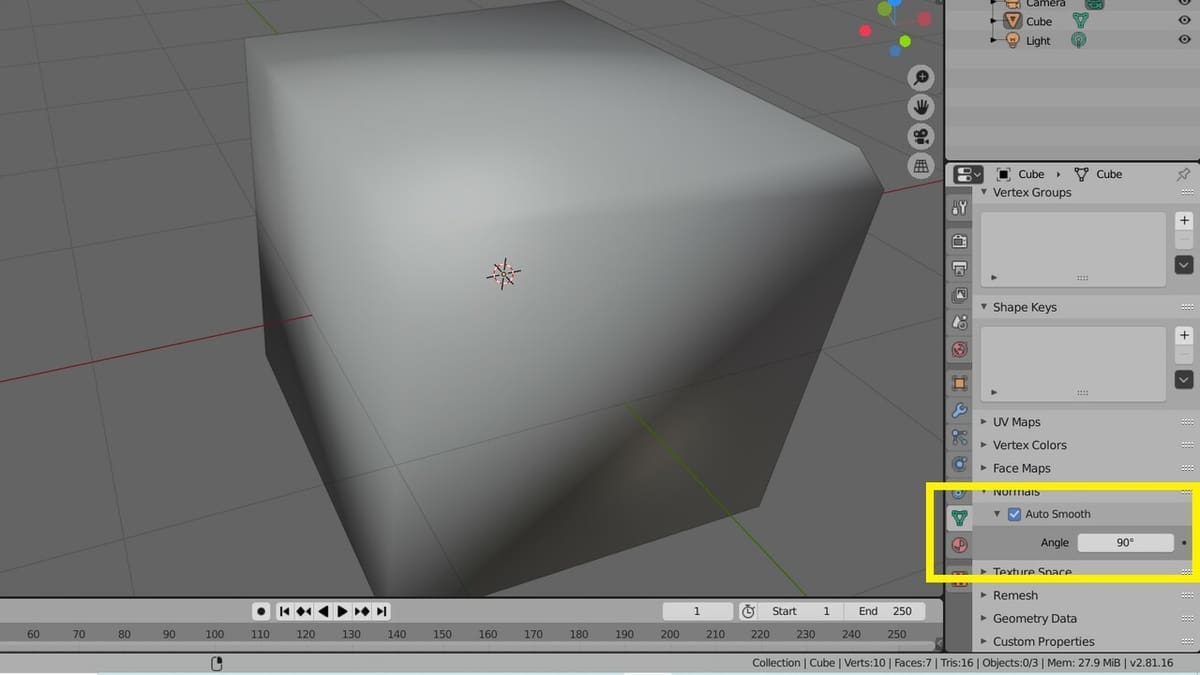
How to Do It
- Ensure the mode is set to Object Mode.
- Click the “Object Data Properties” tab on the Properties Editor.
- Expand the “Normals” section.
- Click on the “Auto Smooth” checkbox, as shown in the image above.
Geometry Smoothing
Geometry smoothing techniques smoothen the objects by directly changing the mesh of the objects. If an object’s mesh has sharp edges, for instance, geometry smoothing techniques will smoothen the mesh, thereby eliminating the sharp edges.
As the mesh itself is being edited, these techniques may take relatively more time since each and every vertex and edge needs to be smoothened, especially for complex models. The geometry smoothing techniques include the following:
- Smooth tool
- Bevel Edges tool
- Smooth modifier
- Smooth Corrective modifier
- Smooth Laplacian modifier
- Subdivision Surface modifier
- Edge Split modifier
Let’s learn how they all work!
Smooth Tool
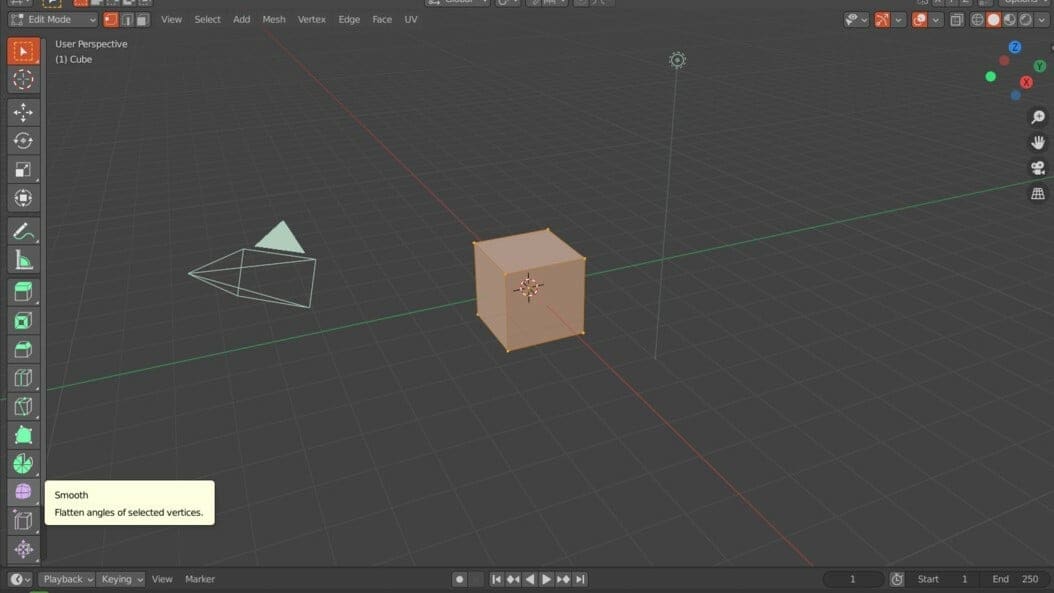
The Smooth tool smoothens by eliminating irregularities in areas of the mesh. The tool, however, functions differently depending on the mode in which you’re working. In Sculpt Mode, the positions of the vertices are smoothened, whereas in Edit Mode, the mesh is smoothened by averaging the angles between the faces. We’ll focus on the latter.
A few tool settings allow you more control over the smoothening process. You can change the value in the Smoothing setting to change the intensity of the smoothing. Repeat allows you to set the number of times the smoothing action is repeated. Lastly, you can also limit the axes where smoothing occurs when you apply the tool.
How to Do It
- Set the mode to Edit Mode by clicking on the dropdown list in the top left corner of the screen and selecting “Edit Mode”. Alternatively, you could simply press “Tab” on your keyboard.
- Select “Smooth” from the toolbar on the left side of the screen.
- Select the area you want to smooth by holding down “Shift” and selecting the vertices or faces.
- Click the left mouse button and drag it to smooth the selected area.
- If desired, adjust the “Smoothing”, “Repeat”, and “Axes” settings in the Smooth Vertices panel, which pops up after you click the Smooth tool.
Alternative
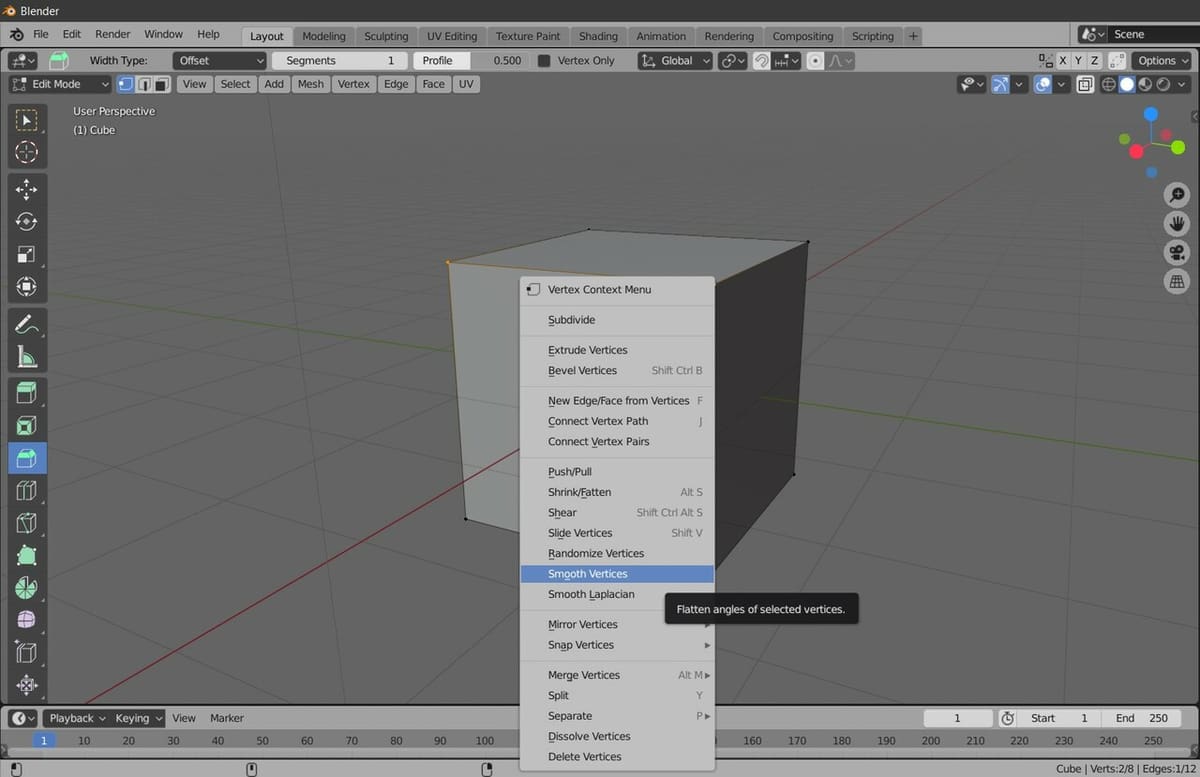
- Ensure the mode is set to Edit Mode.
- Right-click on the object, then select “Smooth Vertices”.
Bevel Edges

The word “bevel” is used to refer to the slope of a chamfer applied to an otherwise square edge. In Blender, the Bevel Edges tool allows you to create chamfered or rounded edges in the mesh, thus giving a smoother appearance.
How to Do It
- Make sure the mode is set to Edit Mode.
- Select “Bevel” from the toolbar on the left-hand side of the screen.
There are quite a few settings that allow you to refine the Bevel Edges tool. Check out Blender’s official manual for a detailed list.
Smooth Modifier
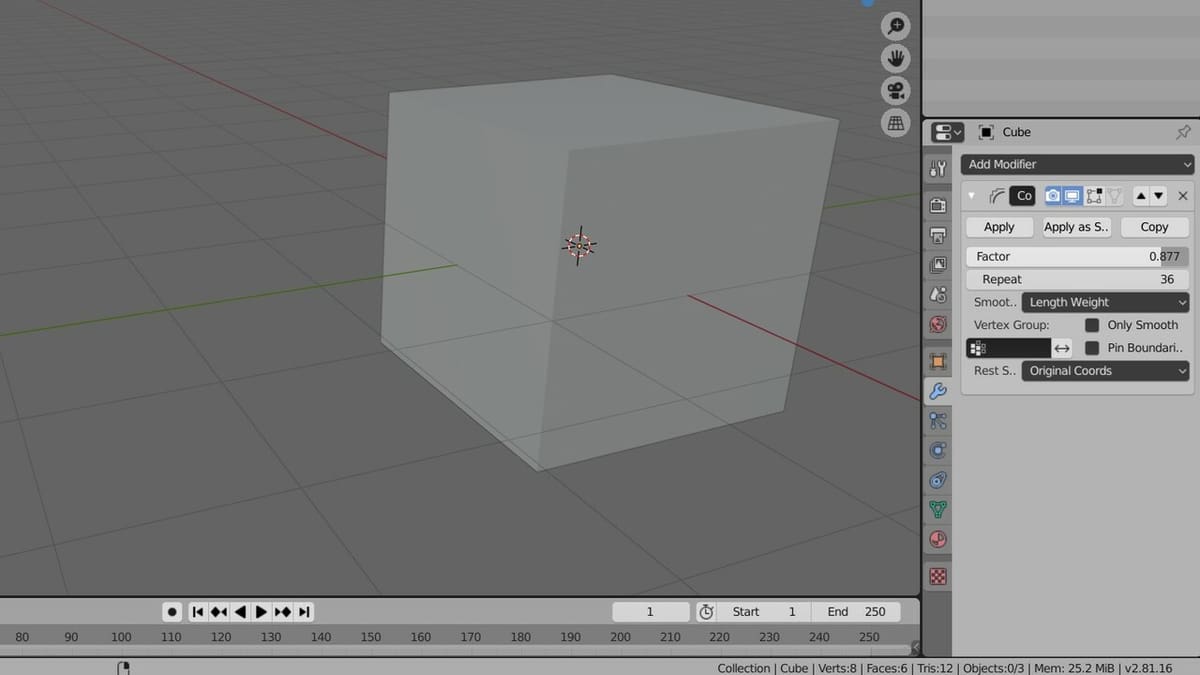
The Smooth modifier flattens the angles between adjacent faces without changing the number of vertices. Similar to the Smooth tool, the smoothing action can be refined with a few settings that determine the intensity of the smoothing action (Factor), the number of times the smoothing action occurs (Repeat), and the axes where smoothing happens (Axes).
Regarding Factor setting, values between 0 and 1.0 will increase the smoothing effect on the object. Values outside of this range, however, will deform the mesh.
How to Do It
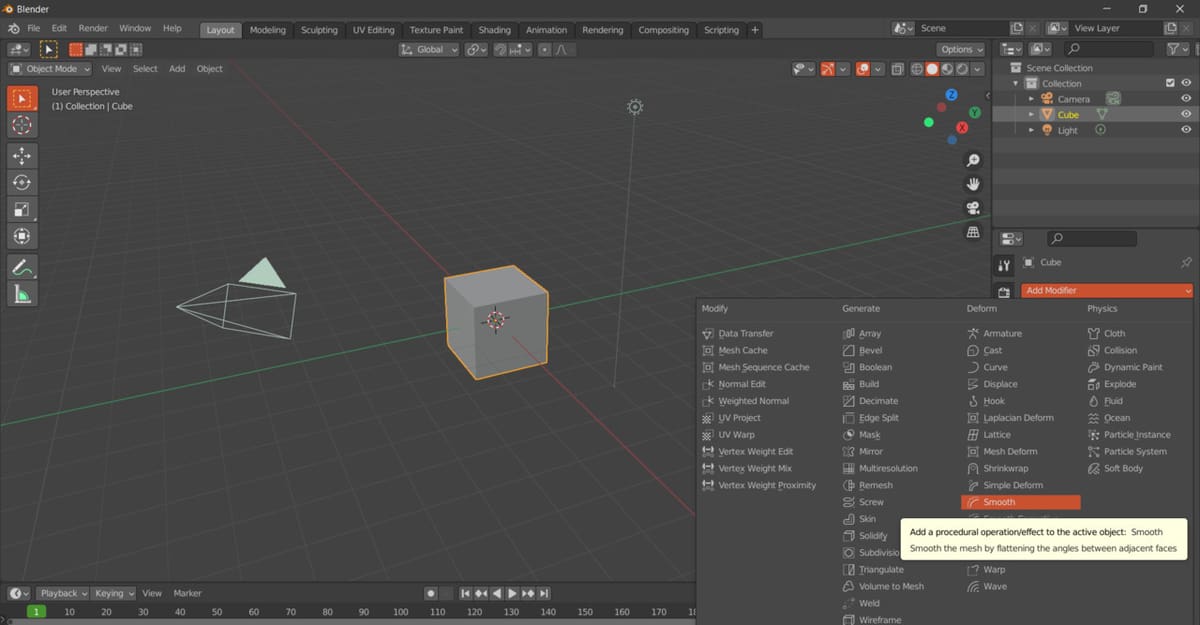
- Make sure the mode is set to Object Mode.
- Go to Modifier Properties by clicking the tab with the wrench icon on the Properties Editor. Then click “Add Modifier”.
- Select “Smooth” under the Deform column.
Check out Blender’s manual to learn more about all of the settings for the Smooth modifier.
Smooth Corrective Modifier
Distortions can form while manually modeling and editing objects in Blender. The Smooth Corrective modifier reduces these distortions, making the mesh’s appearance smoother. It allows users to specify reference vertex locations, and the modifier compares other areas of the mesh to the reference in order to identify distortions.
In addition, there are a couple of different options for the type of smoothing that can be done on the object. The first one, Simple, eases up the vertices of the mesh to the edges, making it look smoother. The second one, Length Weight, eases the distances of the vertices relative to how far apart the vertices are from each other.
How to Do It
- Make sure the mode is set to Object Mode.
- Go to Modifier Properties by clicking the tab with the wrench icon on the Properties Editor. Then click “Add Modifier”.
- Select “Smooth Corrective” under the Deform column.
Check out Blender’s manual for more details on various settings for the Smooth Corrective modifier.
Smooth Laplacian Modifier

Sometimes, modeling complex objects in Blender might result in higher noise on the mesh. If this isn’t the look you’re going for, the Smooth Laplacian modifier allows you to reduce the noise without affecting the original shape of the mesh and without disturbing the geometry of the object.
How to Do It
- Make sure the mode is set to Object Mode.
- Go to Modifier Properties by clicking the tab with the wrench icon on the Properties Editor. Then click “Add Modifier”.
- Select “Smooth Laplacian” under the Deform column.
There are a few settings that allow you to refine this modifier’s smoothing. You can read all about them in Blender’s manual.
Subdivision Surface Modifier
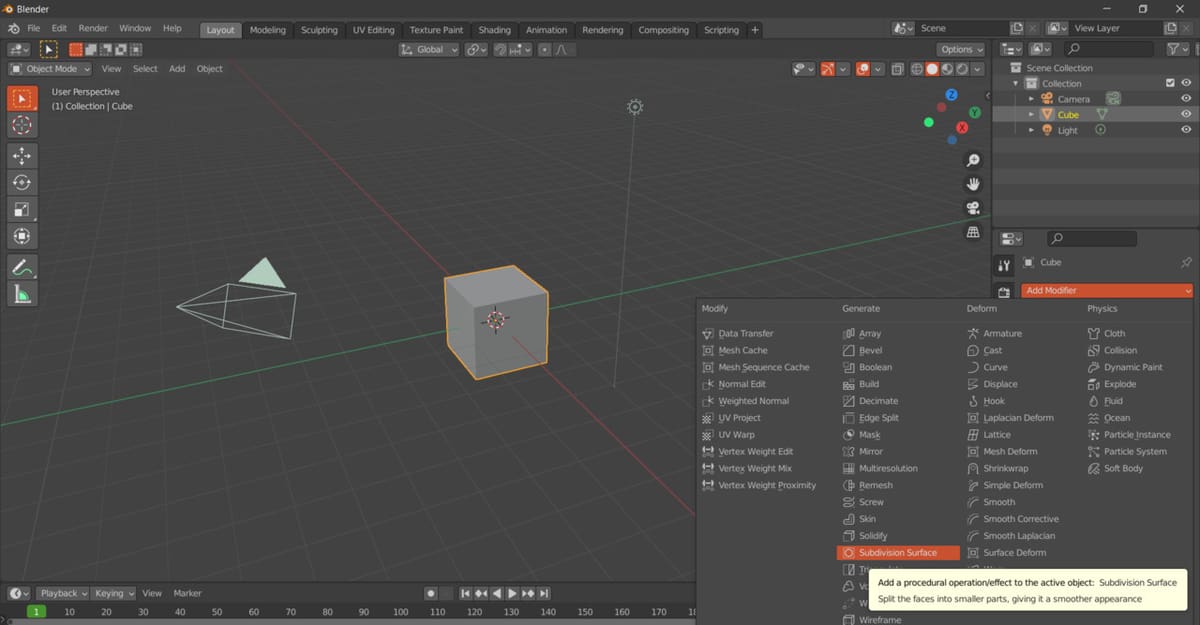
The Subdivision Surface modifier divides the faces of the mesh into smaller faces, thus giving a smoother appearance to the object. Users can define the type of subdivision surface to be applied to the model by selecting one of two methods: Catmull-Clark or Simple. The former subdivides and smooths, while the latter only subdivides.
How to Do It
- Make sure the mode is set to Object Mode.
- Go to Modifier Properties by clicking the tab with the wrench icon on the Properties Editor. Then click “Add Modifier”.
- Select “Subdivision Surface” under the Generate column.
There are several settings for this modifier. Read more about them in Blender’s manual.
Edge Split Modifier
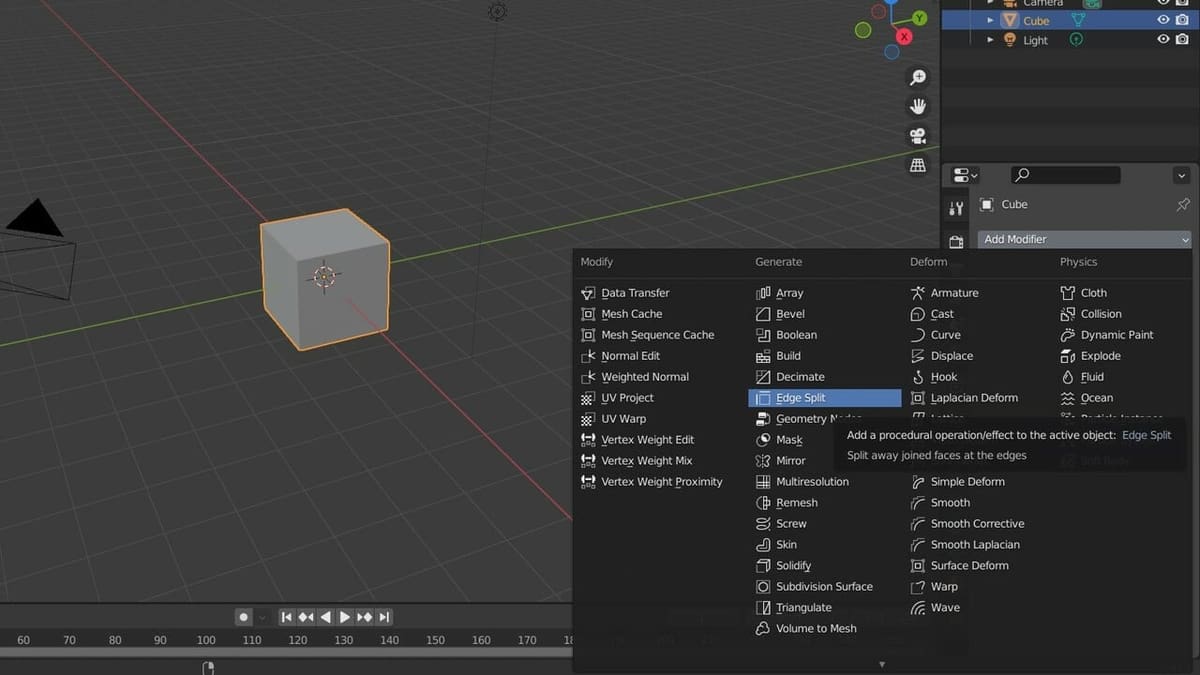
Used together with smooth shading, the Edge Split modifier allows users to define the edges of adjacent faces that should appear sharp and those that should appear smooth. Although splitting an edge makes it appear sharp, users have the ability to set an angle threshold (the Split Angle), and any edges below it will continue to appear smooth with smooth shading. Edges above the threshold will appear sharp.
Take note that a Split angle of 180° will result in no edges splitting, creating a completely smooth appearance.
How to Do It
- Ensure that you’re in Object Mode.
- In the Properties Editor, go to Modifier Properties by clicking the tab with the wrench icon. Then click “Add Modifier”.
- Select “Edge Split” under the Generate column.
A few additional settings allow you to fine-tune the edge splitting. Check out Blender’s manual for more details.
Lead image source: Imvu
License: The text of "Blender: Smooth Modifier & Other Techniques – Simply Explained" by All3DP is licensed under a Creative Commons Attribution 4.0 International License.