Blender: Shape Keys – Simply Explained

Blender's shape keys allow you to deform a single object into many new shapes. Since they're integral to animation and prototyping, let's see how they work.
What Are They?
Once you’ve created a 3D model or character, you’ll want to bring it to life with animation or change its structure for multiple prototypes. 3D artists implement these changes by “deforming” the mesh, or temporarily changing the mesh to achieve a certain visual effect. To deform a mesh in Blender, you can use two primary methods:
- Bones are objects typically used by animators to move and rotate a group of vertices, much like the way a skeleton interacts with muscles. As the bones beneath the mesh move, accompanying vertices are deformed.
- A shape key works differently to a bone, in that a shape key is not an object in itself, but a saved modification to the object. Shape keys can be activated by bones and drivers to achieve precise mesh deformation.
The best way to illustrate the function of shape keys is to work through an example, so we’re going to take a look at setting up shape keys to create multiple facial expressions with the help of proportional editing.
Step 1: Separating Objects
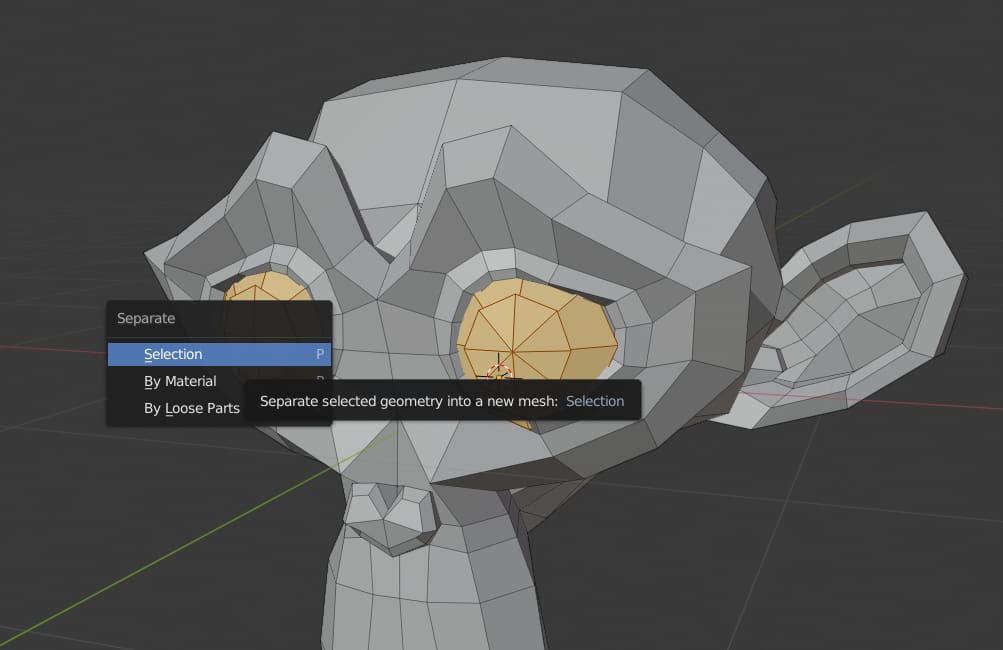
We’ll be working on a character’s face, but don’t want our shape keys to affect his hat or eyes. So we’ll press Tab to enter edit mode, select a vertex on our character’s eye, hit L to select all linked vertices, P to bring up the separation menu, and finally select “Selection”.
That has made our eye a seperate object from the face, which can now be seen in our outliner. We’ll do the same for the other eye, and then in object mode, hold Shift and right-click both eyes. Press Ctrl + J to join the eyes as a single object.
Do the same for the hat and separate the mesh. Now we’re free to work on our character’s face without fear of messing up our other objects.
Step 2: Appling Modifiers
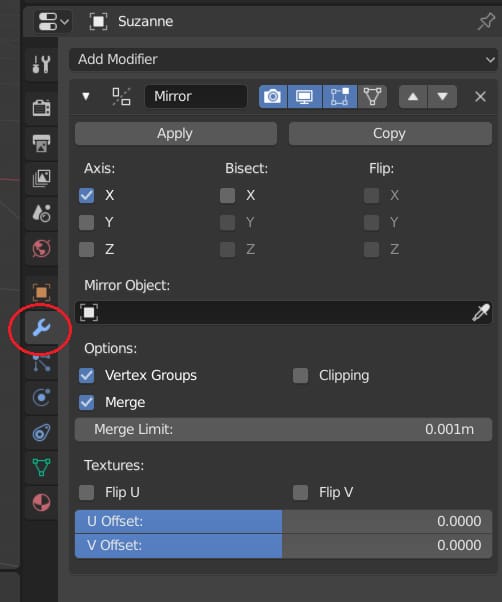
Make sure you apply any modifiers before adding shape keys to your mesh. Once shape keys have been added, Blender can no longer apply modifiers. The last thing you want to do is spend multiple hours on creating the perfect shape keys, only to find you needed to apply a modifier beforehand.
To apply modifiers, simply go to the modifiers tab in the “Properties” panel and hit “Apply”.
Step 3: Creating Vertex Groups
The final step before we go ahead and create some shape keys: In this case, we want to quickly separate our shape keys into left and right shape keys so that our face can be deformed asymmetrically. This is integral to accurate facial expressions.
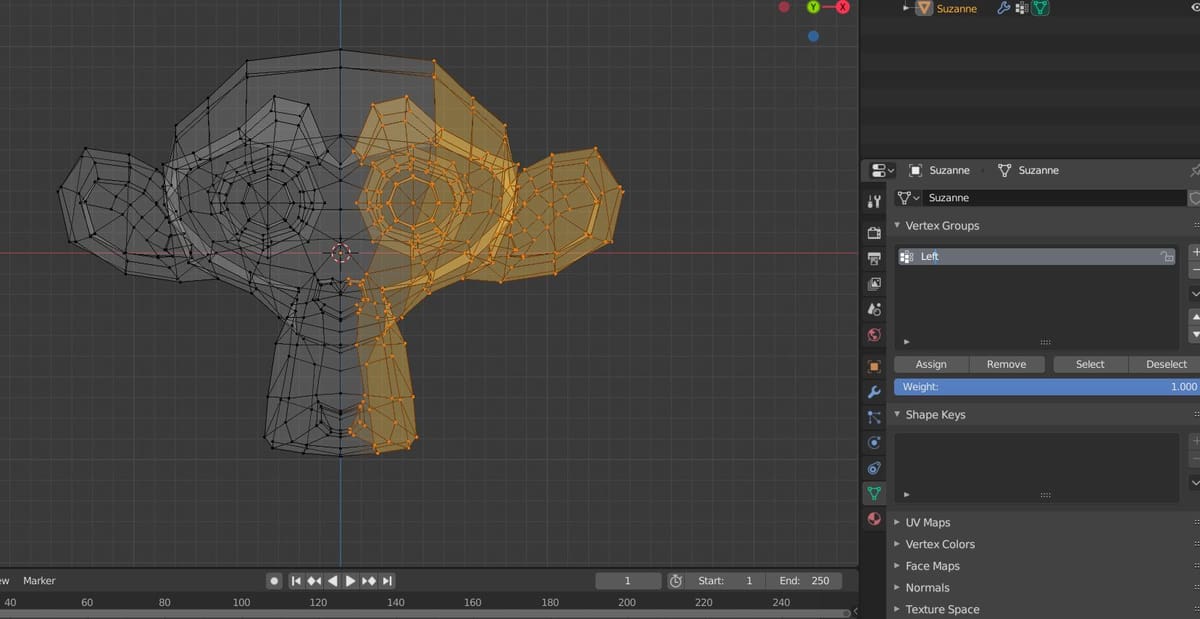
In edit mode, ensure you have vertex select mode activated and hit 1 on your keypad to go into orthographic front view, then hit Z to enter wireframe mode. Use border select (B) and draw a border around all the vertices on the left side of the face. Make sure you avoid getting the vertices that run down the exact center of your mesh.
On the “Properties” panel, hit the mesh data icon (it looks like an upside down triangle) and under “Vertex Groups”, hit the + symbol to add a new vertex group. Name this group “Left” and assign the weight as 1.00 for the selected vertices.
Do the same for the right side.
Finally, select the middle edge loop. Click on your left vertex group, set the weight to 0.500, and hit “Assign”. Then do the same for the right vertex group.
Step 4: Creating Shape Keys
Back in object mode, we’ll select the head object and create our first shape key. Directly below the vertex group section, you’ll see the shape keys panel. Hit ‘+’ to create a shape key called “Basis”.
Warning: Do not edit the shape key “Basis”. As your first shape key, this is the default mesh and should remain your master. Editing this shape key will affect all shape keys you create after.
Now that the master shape key is created, we’ll begin adding shape keys to deform our mesh in various ways. First, lets add a new shape key by pressing the ‘+’ button under the shape keys panel. Now, rename this shape key “Eyebrows Inside Down.l” (the “.l” tells us that this shape key will correspond to the left vertex group).
Press Tab to enter edit mode. With the shape key selected in object mode, we’re now modifying our shape key. Use circle select (C) to select the vertices between the eyebrows, and a little bit of the eyebrows themselves. Then, with proportional editing selected, move the eyebrows down.
Step 5: Splitting Shape Keys by Vertex Group
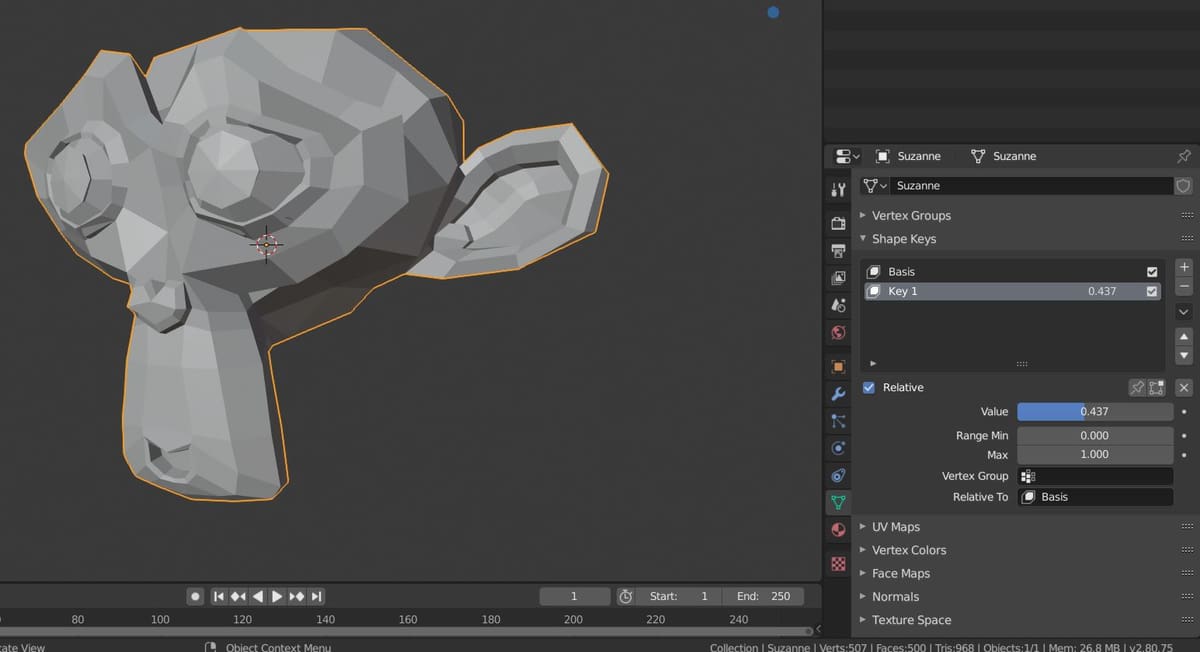
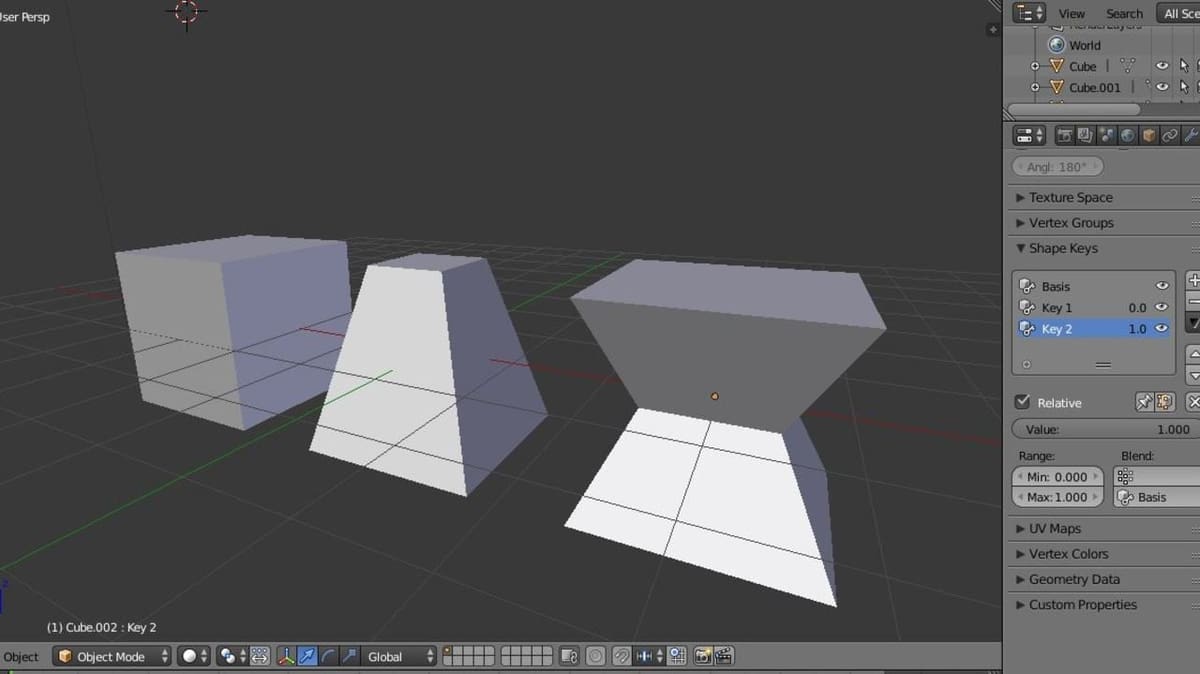
If you go back into object mode, you should see your two shape keys. “Basis”, which is your master object, and “Eyebrows Inside Down.l”, your own shape key with deformed eyebrows. By sliding the “Value” range in the shape keys menu, you should see your character’s eyebrows curl inwards. This is fundamentally how shape keys work.
Now we’ll split this shape key into two, one for the left vertex group and one for the right.
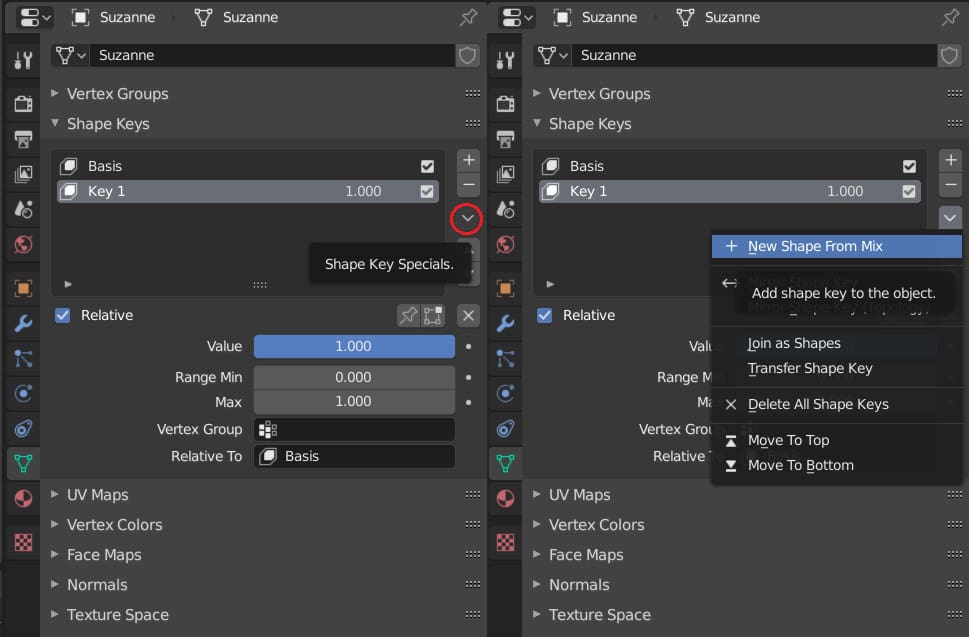
Set the value slider to 1.00, so your shape key is fully engaged. Then, click the darker, downward-facing arrow beneath the ‘+’ and ‘-‘ signs. (See image above.)
Select “New Shape” from “Mix”, which will create a new shape key, exactly the same as all current active shape keys (in this case, only Eyebrows Inside Down.l) and rename your new key in the same way as the previous one, but with a .r suffix.
You should now have two shape keys, exactly the same, but with different names. Click on your first shape key, and under the “Blend” section, select the left vertex group. Now this shape key will only affect the vertices on the left side.
Do the same as above but for the right vertex group. You should now have independent eyebrows that can curl inwards, giving your character an angry expression.
Repeat these steps for raised inside eyebrows, the corners of the eyebrows, lips, jaw, nose, or anything you like. Once you have a grip on shape keys, the only limit is your imagination.
(Lead image source: Niall Mobsby via All3DP)
License: The text of "Blender: Shape Keys – Simply Explained" by All3DP is licensed under a Creative Commons Attribution 4.0 International License.