Blender: Remove Doubles – Simply Explained

Duplicate vertices in Blender can pose some real problems. Learn how to remove doubles in Blender with this simple guide.
Blender is a popular modeling program due to its vast set of features and attractive price tag – that is, it’s free. While it’s got a significant learning curve, a lot can be done (from modeling to animating, including low-poly design and creating movies) and luckily there are a lot of tutorials to follow.
But many beginners don’t expect to encounter the problem of double vertices as they’re learning the ropes, especially since it’s an issue that’s hiding in plain sight.
Follow us through this quick guide as we demystify the error of double vertices and teach you how to fix it.
Double Trouble
The problem is simple: You’ve got overlapping vertices that may visually appear to be singular.
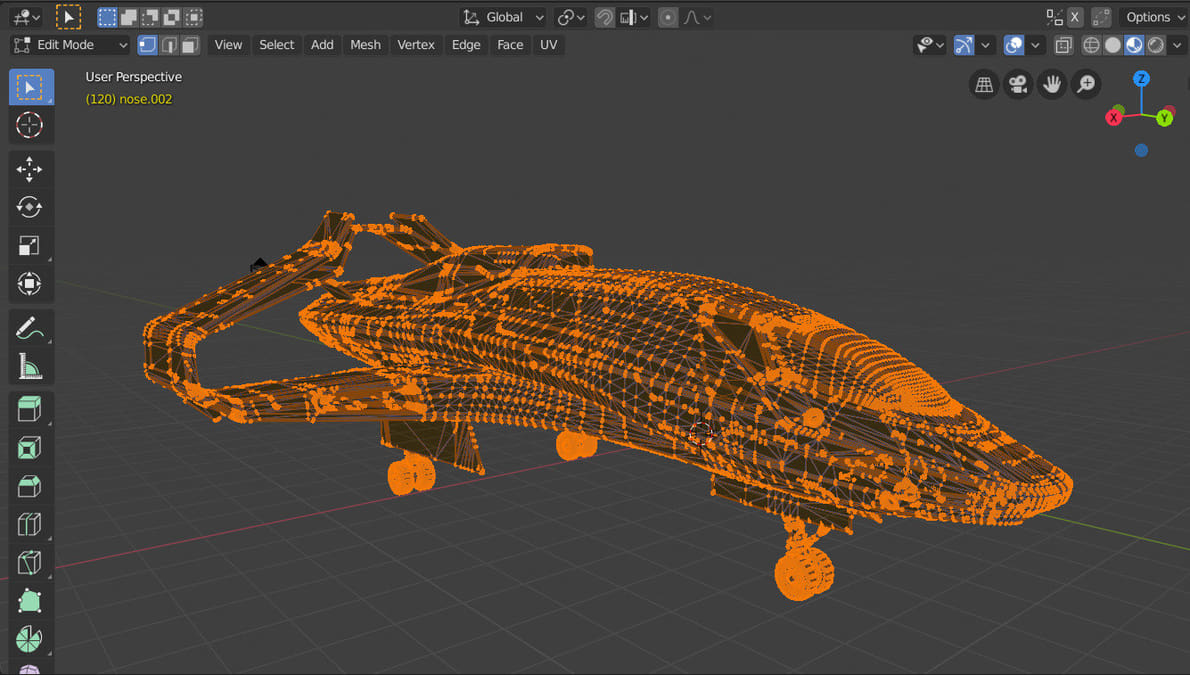
The fastest way that an issue with duplicate vertices can come up is when using the Boolean tool; sometimes it can backfire and create vertices very close together or even in the same spot! This can cause a variety of issues, such as undesired deformations or unexpected difficulties with features like the knife tool or modifiers that affect the mesh.
It may be hard to notice this issue, but it usually becomes evident when another tool doesn’t work properly. For example, trying to subdivide an edge may not work if either end has multiple vertices.
Checking for Double Vertices
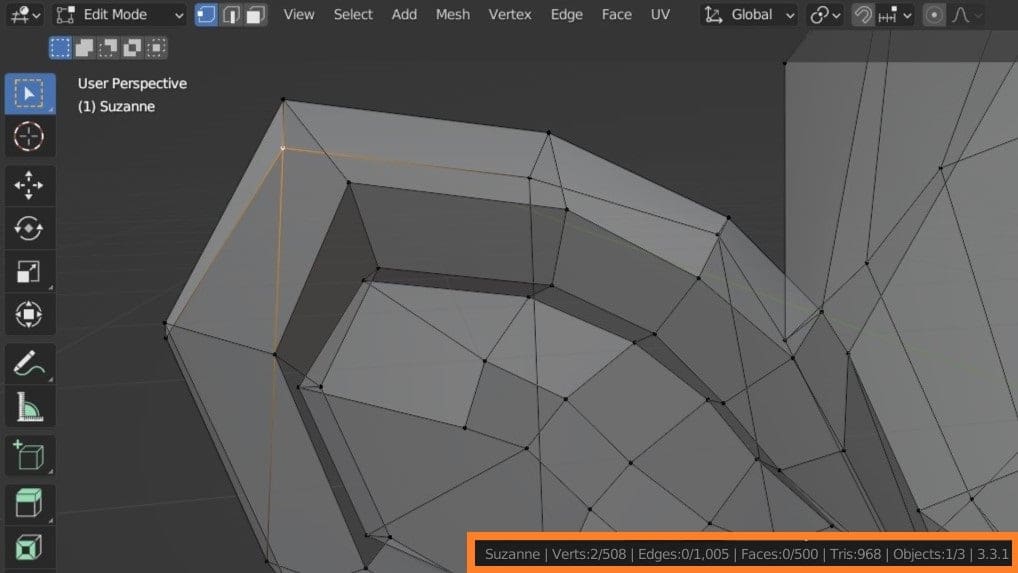
One way to check is to look at the status bar in the lower right corner where it shows the number of vertices, edges, and faces in the scene. If you don’t see these values, you will need enable Scene Statistics by right clicking on the status bar. In this case, we’re looking at vertices (labeled as “Verts”).
First, enable the X-Ray vision by clicking on the X-Ray checkbox located in the top right of the 3D viewport. You can then hold ‘B’ and right-click to drag and draw a selection box around the vertex you suspect is duplicated. This allows you to see through the mesh and select vertices on the back-faces. In the picture above, you can see how two vertices can appear as one.
How to Fix It
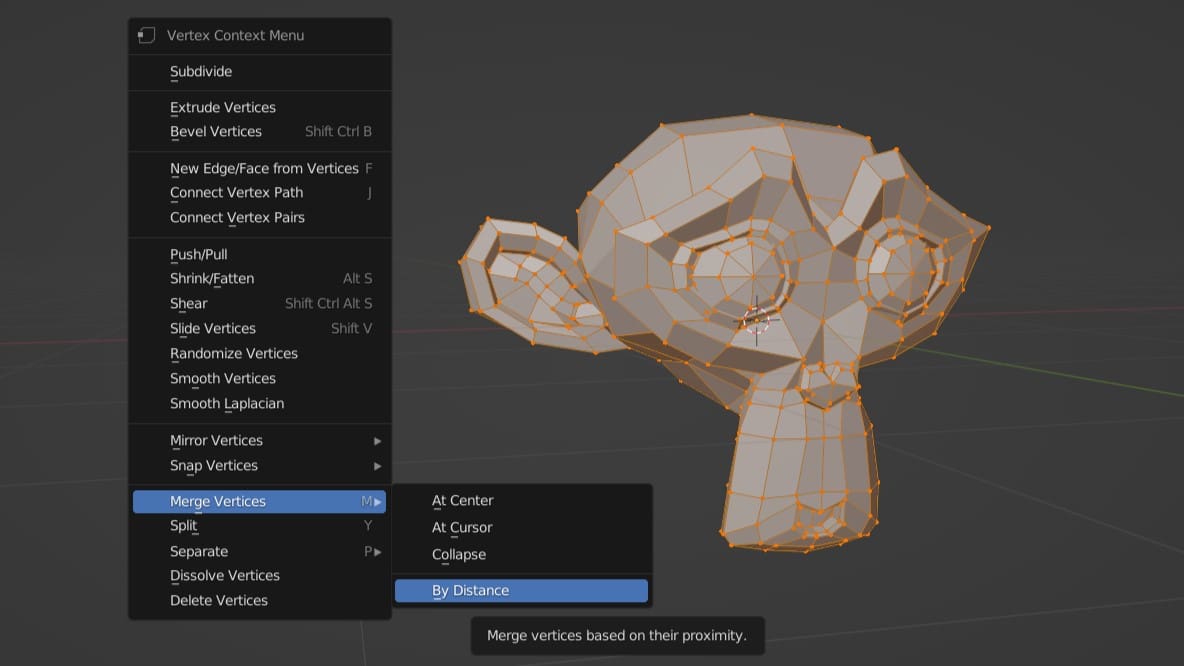
The solution is fairly simple: Using the “Remove Doubles” tool, you can easily collapse the duplicate vertices into singles. This is done in three steps:
- Select the duplicate vertices.
- Right-click and select “Merge Vertices”. From the new options displayed, click “by distance”.
- In the bottom left, a small box should appear. Click to expand it and adjust the “Merge distance” value. Note that if you increase this too much, the results can be undesirable and surprising, so it’s best to keep this value lower, just to be safe.
The doubles are now removed, and you can go about your day!
Note: This is also an important final step when creating an STL for 3D printing.
License: The text of "Blender: Remove Doubles – Simply Explained" by All3DP is licensed under a Creative Commons Attribution 4.0 International License.