Blender: Recalculate Normals – Simply Explained

Normals are an important part of your objects, but they can get flipped. Learn all about Blender's recalculate normals options.
Blender is a pretty popular program because it’s free, open source, and can be used for modeling, 3D animations, rendering, and many other things.
Despite the complexity of the program and the significant learning curve, there are plenty of reasons why users opt for Blender, but just like it’s got a lot to offer, it’s inevitable that things may sometimes not go according to plan.
As with any other program that performs complex calculations and renderings, things may go wrong with a file every so often. One thing that can happen when creating 3D objects is to have the normals get flipped. But what are “normals” and what does “flipped” really mean? And how can this be fixed?
In this article, we’ll go over what these terms mean, how you can check if the normals on an object are flipped, and how to correct them.
What Are Normals
In Blender, a normal is the direction a particular piece of geometry is facing. Every Blender object has two faces: the inside and the outside. Much like an article of clothing you mistakenly put on inside out, you take it off and turn it around so the inside faces your body and the outside is just that: outside.
If the normals are inside out or showing incorrectly, Blender refers to these as “flipped” normals, and there can be problems with shading, modifiers, and other tools or features you might want to apply to an object.
For Blender to calculate the coordinates of the object’s geometry in space properly and determine which side of the geometry to render, the object must have two sides: one inward-facing and the other outward-facing. Flipped normals can also affect any material applied to an object.
An example of flipped normals would be that you’re working on an object and the shading seems to be wrong. For instance, your light source is coming from the right of the object, yet the shaded or dark side of the object is on the right – then your normals are probably flipped.
As you can see, having normals flipped in the wrong direction can cause major problems when it comes to rendering objects.
How Normals Can Be Flipped
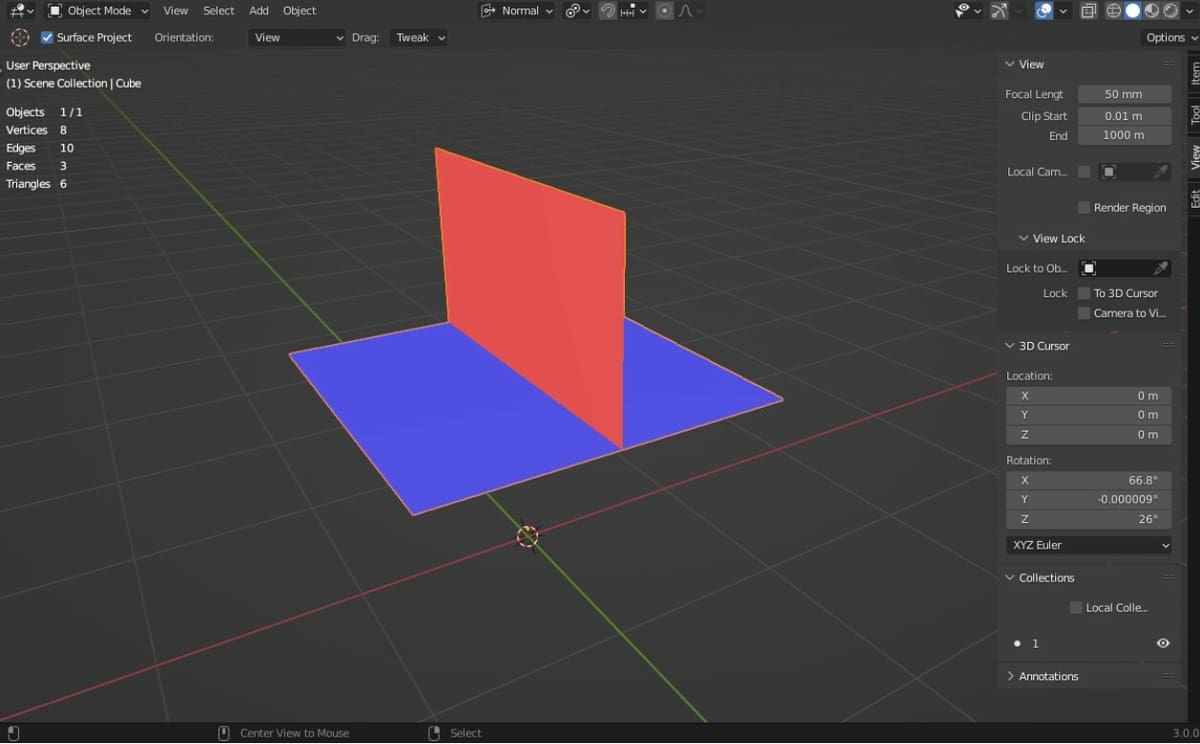
Normals can get flipped inadvertently when you’re making changes to either faces or edges. It can also happen when an edge is shared by more than two faces, which is referred to as non-manifold geometry.
For example, in the screenshot above, the object has three different faces connecting. The result is that Blender can’t find a set of consistent normals belonging to all three faces. Whichever way it calculates them, the normals for one set of faces will get flipped as a result.
Merging is another Blender process that can cause normals to flip. If too many edges or vertices are involved in the “Merge” operation, the non-manifold geometry mentioned above can be created and normals can get flipped.
How can you check to see if the normals are flipped and what can you do to get normals back to the way they should be? Let’s find out.
How to Check Normals
There are many ways to check the normals on an object. The easiest way can be done in both Object and Edit Modes.
Face Orientation
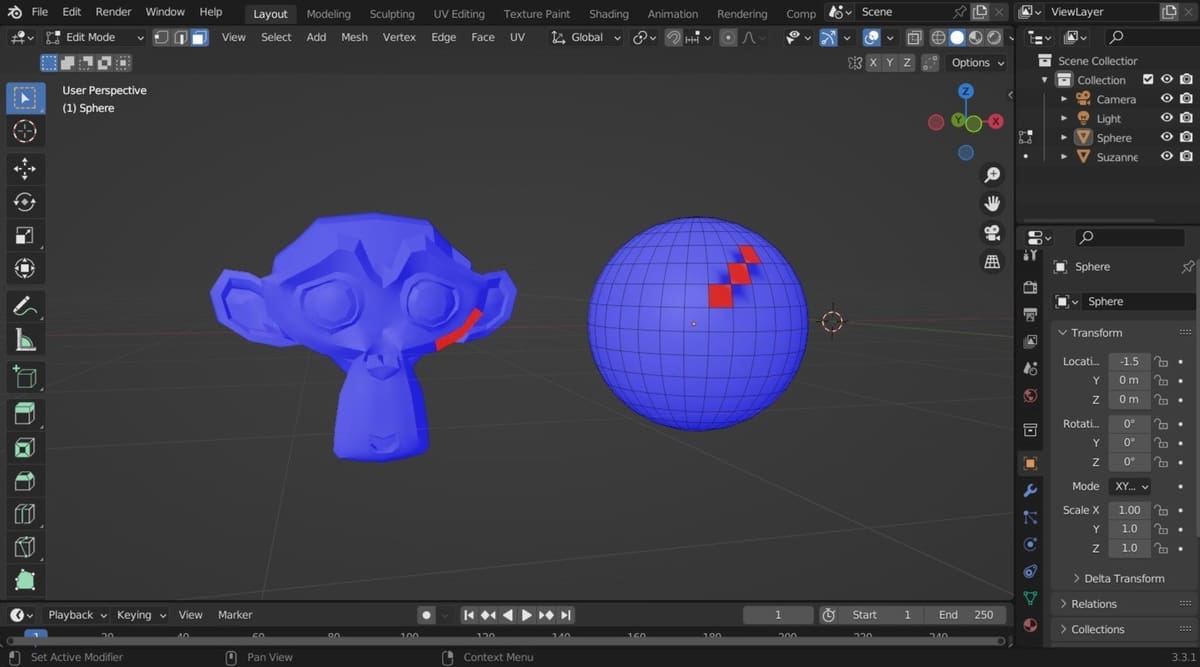
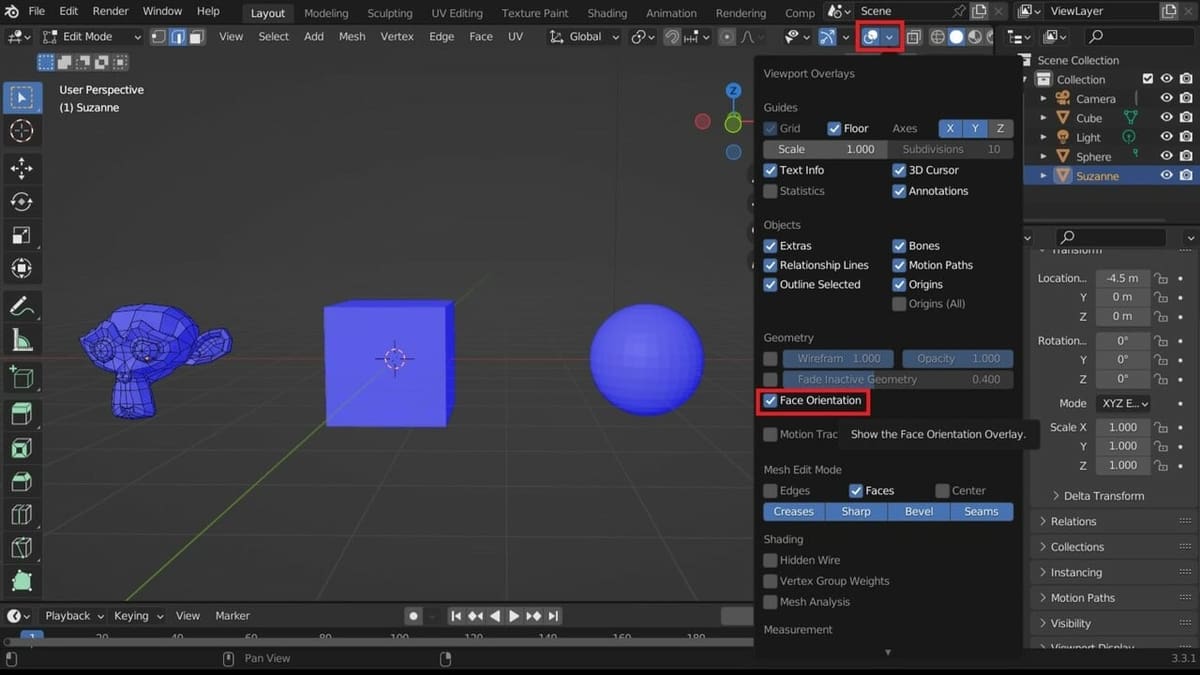
From the top right options of the Viewport, open the drop-down menu for “Overlays”, and under Geometry, check the box for “Face Orientation”. The object(s) will change color, and you’ll be able to see whether the normals are correctly oriented or if they’re flipped.
Exterior normals are colored blue and the interior normals, red. Any normals on the outside that are red are normals that have been flipped.

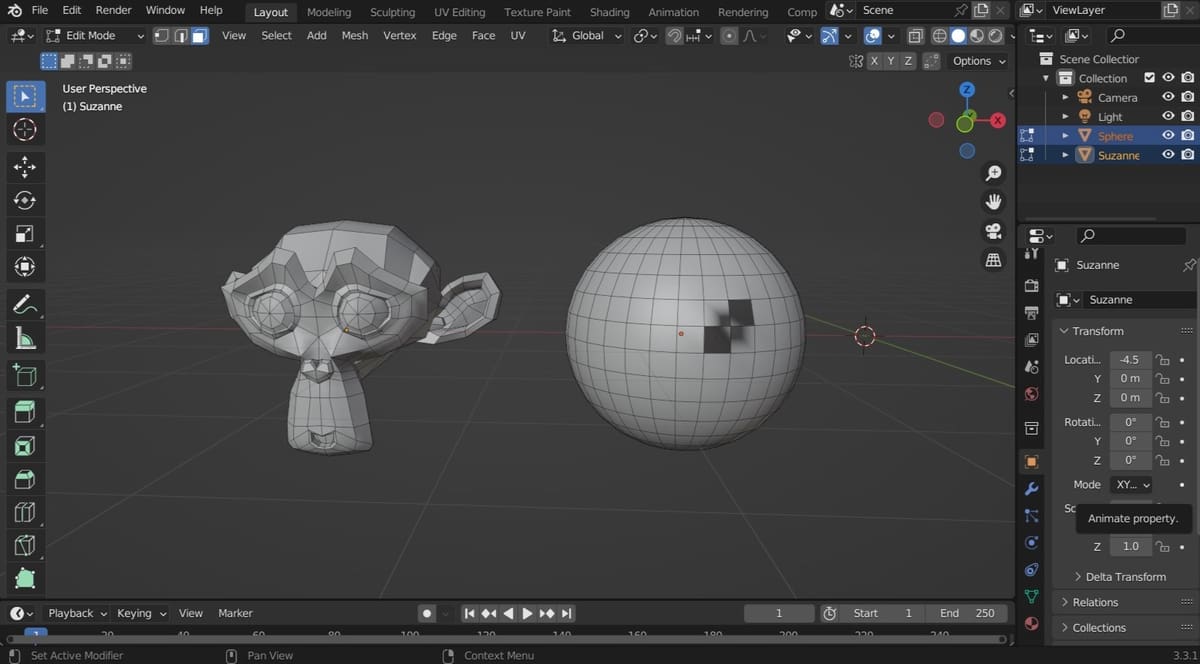
After clicking on Face Orientation and all of the exterior normals are showing blue, you can use the scroll wheel on your mouse to zoom into the object past blue normals, then inspect the interior normals. They should all be red, meaning they are facing in the right direction.
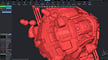
In the video above, normals can be seen to be flipped – some inside are blue.
Display Normals
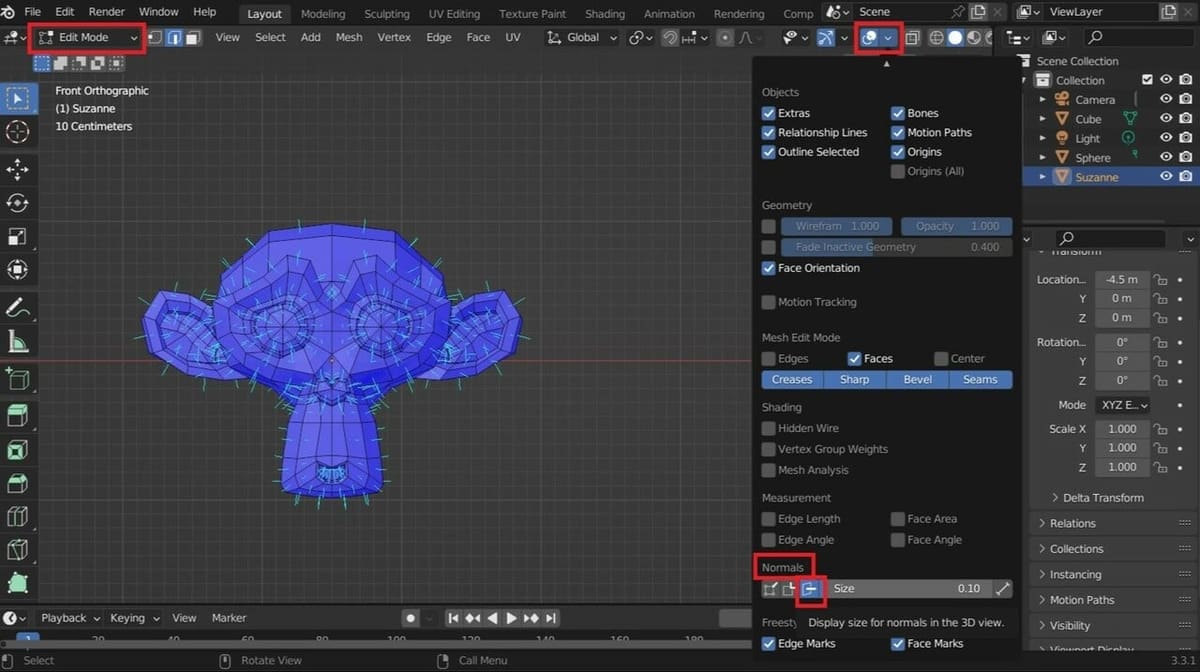
There are other ways to check normals, one of which offers more options on what to show. In Edit Mode (top left), go to the bottom of the same drop-down menu (Overlays) and scroll down until you reach the section “Normals”. Beneath that are three icons you can click.
All display normals, but in different variations. From left to right, the icons are “Display Vertex Normals”, “Display Split Normals”, and “Display Normals”.
Display Vertex Normals will show the normals of each vertex as a line. Display Split Normals will show separate normals for each face connected to a vertex. For example, if three faces connect at a vertex, you’ll see three normals pointing out from the vertex in the direction of each face.
Depending on what you’re working on, the easiest to use may be the last, Display Normals. This option will show a normal for each face and the direction it’s pointing in.
On any of these, you may need to use the scroll wheel of the mouse to zoom in a bit to be able to see the normals as displayed. You can also click on all three (or a combination of them) together to show the specific normals displayed together.
Copy & Move Face
Another way of checking for flipped normals has to do with checking a specific face you may be doubtful about. It may be a slightly more involved path, but once you’ve figured it out, it can offer a different way of confirming your suspicions.
If, after using Display Normals, you’re still not sure in which direction the normals are pointing, you can do the following steps:
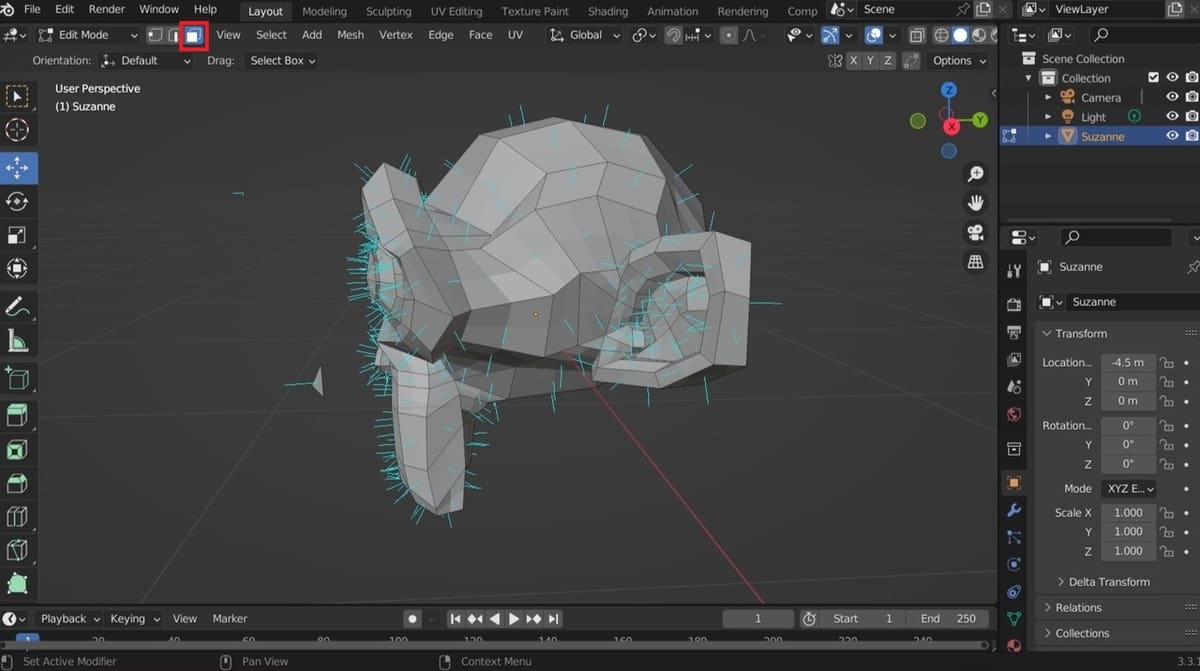
- Click on Face Select on the left side of the 3D Viewport’s header.
- Select a face on your object.
- Press “Shift + D” to duplicate the face.
- Click the Move tool and move the face away from the object a bit.
- Zoom in, then you’ll see clearly which way the direction lines are pointing from the face.
Shading
As mentioned before, you can check the shading of an object to see if the normals are facing in the right direction. For this method, you’ll want to be in Object Mode.
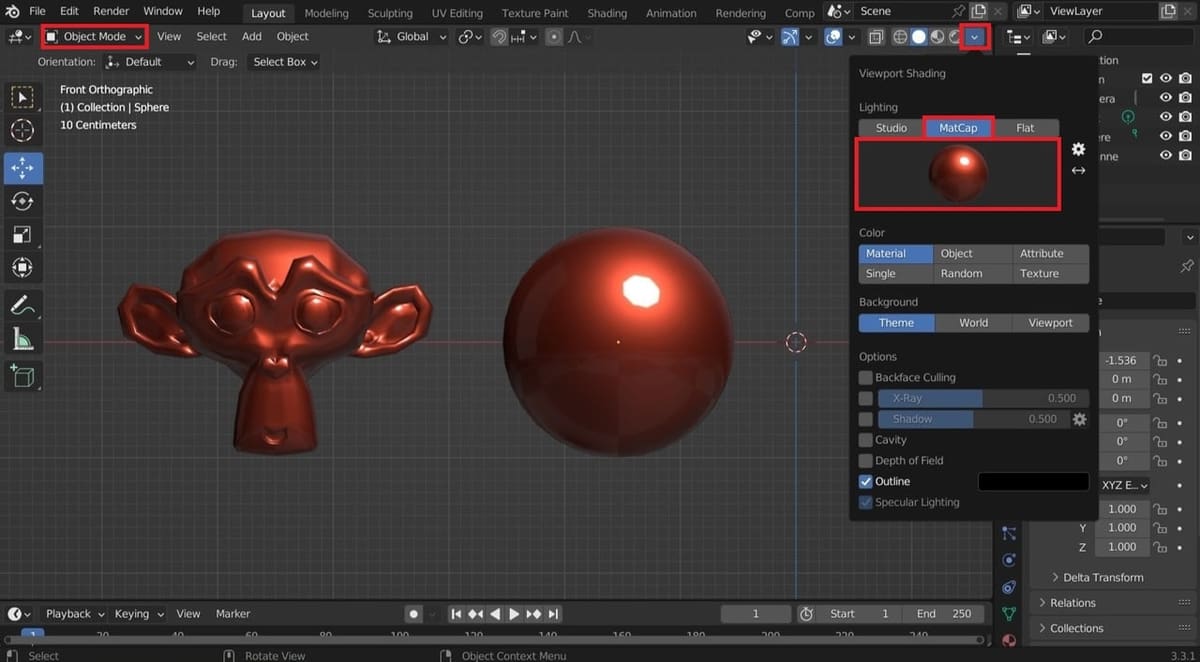
- Hit ‘A’ to select all objects, then click on the drop-down arrow to show the “Shading” menu.
- Underneath the Lighting panel, click the MatCap tab.
- Click on the sphere that appears in the panel, select any one of the Studio Lighting Setups, then left-click in the Viewport to execute the change.
- With the object selected, right-click on it and select “Shade Smooth”.
You’ll now be able to see how the light is being reflected off of the object(s).
This works best with multiple objects so you can compare the shading. If the object you suspect of having flipped normals is showing shading on the opposite of all the other pieces – for example, all the other objects have shadows on the left, but the dubious one has shadows on the right – then the normals need correction.
How to Correct Normals
The way to fix flipped normals is pretty easy. In Edit Mode, select the face that’s incorrect, then go to “Mesh > Normals > Flip”.
This method is useful when there’s only one or a handful of faces that you want to invert, but what about a large complex object? With many faces, edges, and vertices, complex objects can be quite tricky. Rather than flipping them one by one, there’s a way to do the process automatically.
In Edit Mode, select the object, then hit “Shift + N”, which will recalculate the normals and fix them.
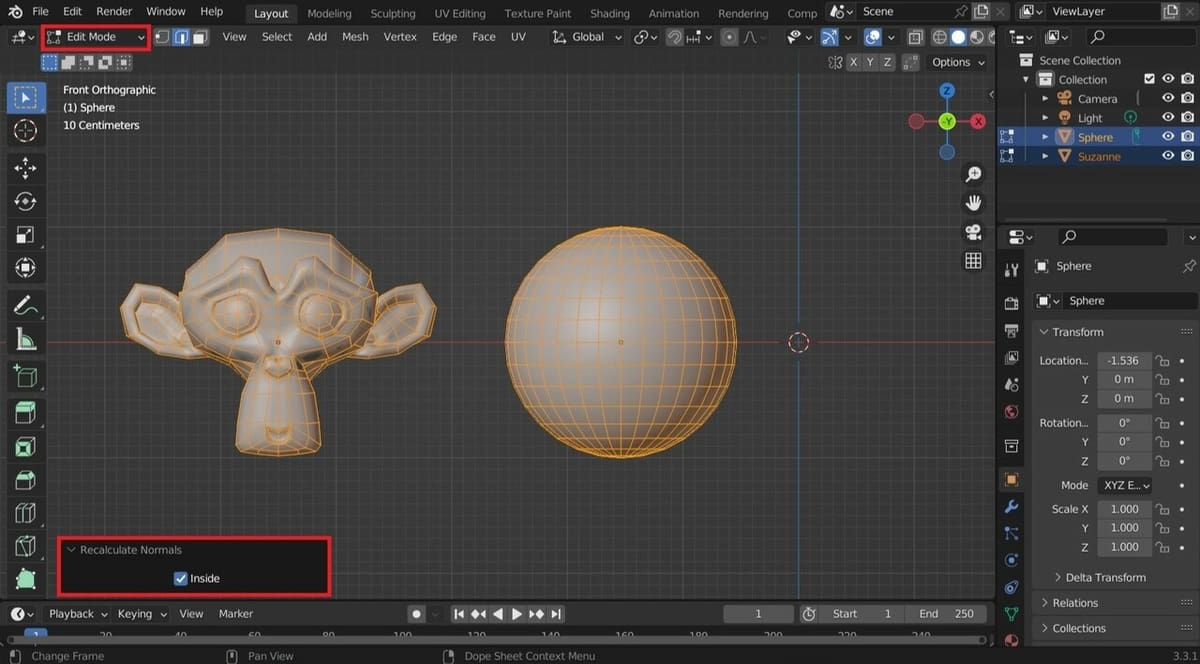
Alternatively, you can use the menu: While in Edit Mode, select the object, then go to “Mesh > Normals > Recalculate Outside”. A box labeled “Recalculate Normals” will appear in the lower left of the Viewport. You can click the checkbox for “Inside”, and that will do further recalculations of the normals.
If you think that there are flipped normals after this recalculation, you can check to see if you can find any extra edges or vertices that may be on top of other edges or vertices. This also applies to faces or edges not extruded as you originally intended.
Tip
It’s good to get into the habit of periodically checking that all the normals are facing correctly. It would be miserable to put in many hours of work on modeling a complex object or a complete scene only to find at the rendering stage that the shading or the modifiers you applied aren’t looking the way you expected.
So, periodically do a quick check to make sure all the object’s normals are facing the right way. It’s quick, easy to do, and could save you immense amounts of time and stress the later on.
License: The text of "Blender: Recalculate Normals – Simply Explained" by All3DP is licensed under a Creative Commons Attribution 4.0 International License.