
Blender & MMD: How to Import an MMD Model into Blender

Blender doesn't natively support MMD files, but read on to learn how to import MMD files to Blender and get the best from both programs.
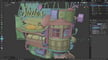
Dancing With Yourself

MikuMikuDance (MMD) is a popular 3D animating program where users can easily create 3D movies. Originating from Japan, this freeware is available in a few languages, including English and Japanese.
The software was originally released in 2008 but has received many major updates since then (the latest being released nine months ago), adding new features that have turned MMD into a tool capable of animating an entire movie.
MMD is popular for a host of reasons. The main reasons it’s used is because it’s free, light, and has simplified animating models and managing cameras. Just search YouTube for “MMD” and you’ll find hundreds of videos made in MMD. As an example of what this software can do, check out this video:
MMD is a great tool for posing and animating, but when it comes to rendering, MMD can fall short. While it still does a good job with rendering, physics bugs, layer mismatches, and transparent objects not looking transparent can be common.
Blender is another popular free 3D modeling program. Unlike MMD, Blender has an entire arsenal of 3D tools, and it does a fabulous job with renders.
To achieve great results, you might want to use these two programs together. If an artist wanted to start from scratch, the usual process would be to design the model, texture it in Blender, pose and animate it in MMD, and lastly, move it back to Blender for the final render.
In this article, we’ll go over exactly how to import MMD files into Blender as the MMD file format can only be imported with a bit of extra work. Let’s get started!
Step 1: Getting the Add-On
Files associated with MMD can’t be imported directly in Blender. Thankfully, a Blender add-on called “mmd_tools” makes this possible.
In fact, mmd_tools facilitates more than just importing models; it can translate the bone constraints and physics into formats usable by Blender.
Installation
Installing mmd_tools is like installing any other Blender add-on.
First, download the files from this GitHub repository. To install the add-on:
- Extract the zip file, then copy the “mmd_tools” folder.
- Go to the Blender installation directory (which is usually your Program Files folder).
- Navigate to “Blender2.80scriptsaddons”. This is where the Blender add-ons are located.
- Paste the “mmd_tools” folder in the “addons” directory.
Next, we’ll activate the add-on in Blender:
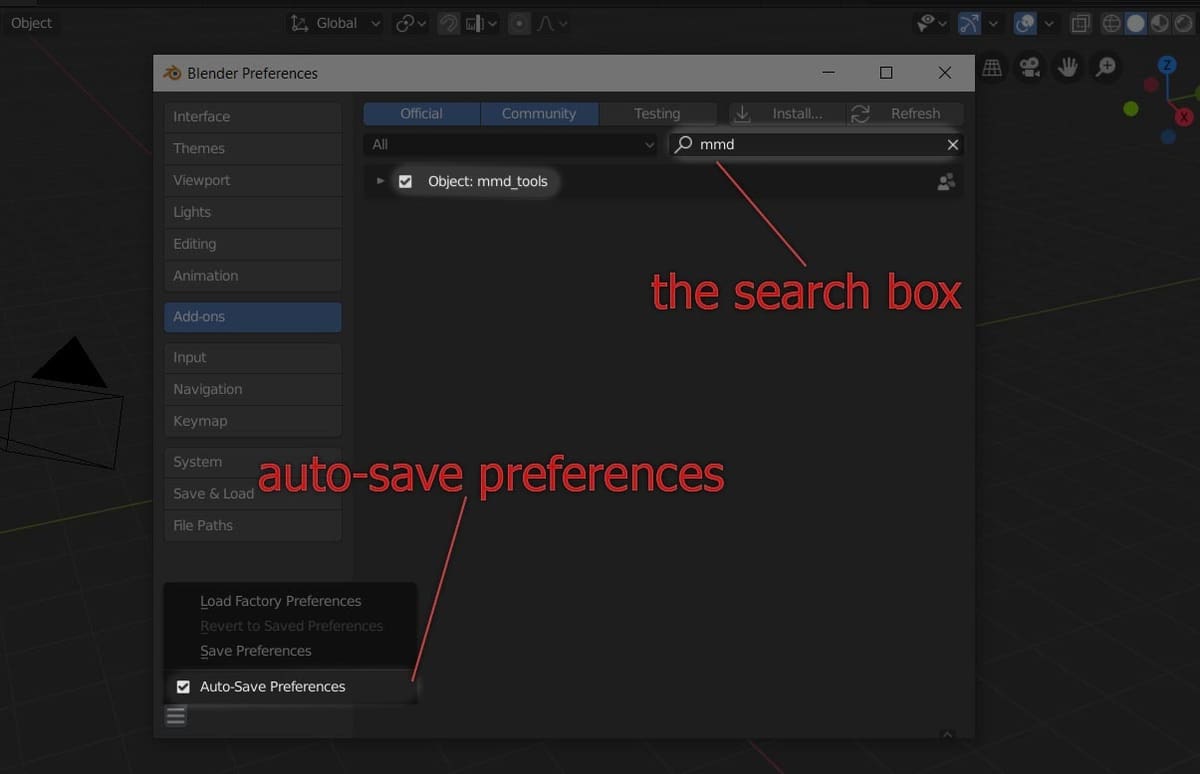
- Launch Blender, then go to “Edit > Preferences”.
- In the Preferences window, go to “Add-ons”.
- In the search box located in the top right, search for “mmd”. This will bring up “Object: mmd_tools”.
- Check the box next to it.
That’s it! You’ve successfully installed mmd_tools in Blender!
Note that the changes in preferences are automatically saved in Blender by default. However, to make sure you’re auto-save is on, click on the icon with three lines at the bottom left and see if the box checked.
Step 2: Importing
Once you’ve installed mmd_tools, importing models is a cinch:
- If you’ve started with the default scene, delete the cube mesh.
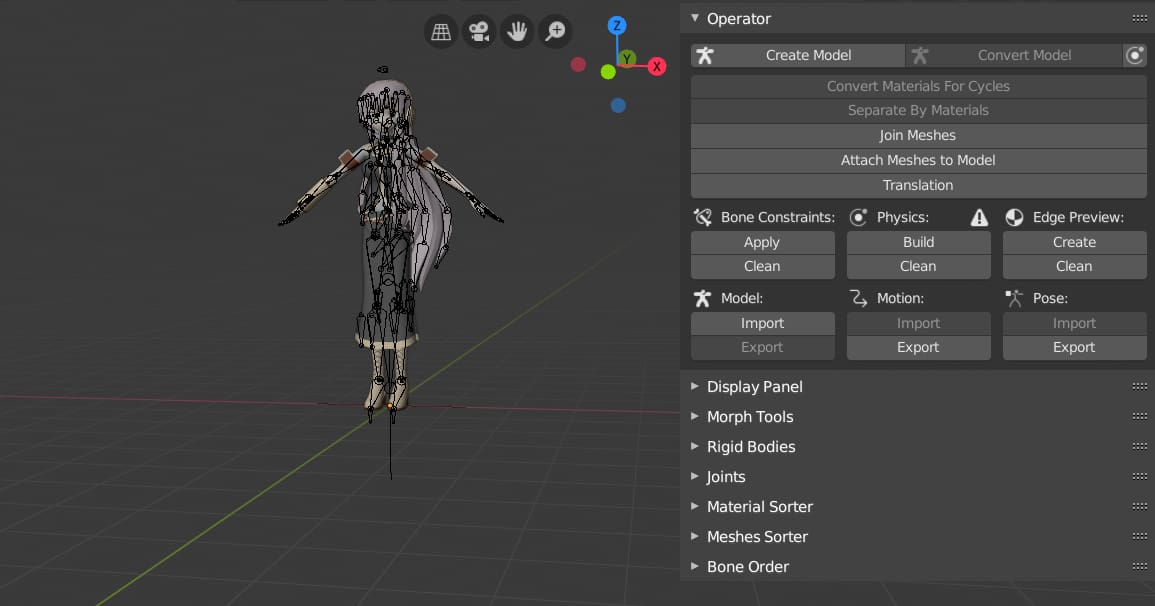
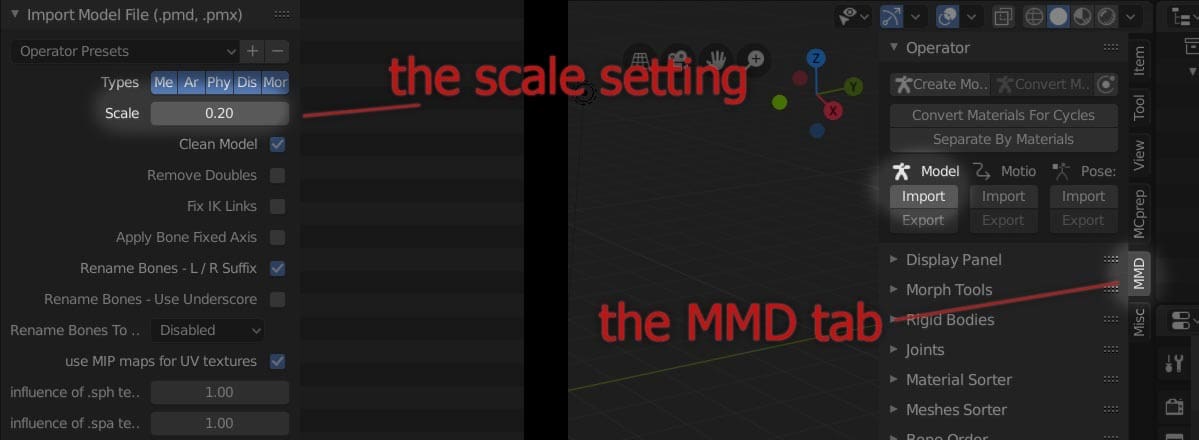
- Press N on your keyboard to open the Viewport Properties panel. From the visible tabs, click on “MMD”.
- In the panel, under “Model”, select “Import”.
- In the browsing window, locate the PMD or PMX file that you want to import.
- Before you import, take a look at the settings on the left. Here, you can select the data from the file Blender that should load and change various settings. One setting that’s good to alter is the scale. The default scale will cause the model to load in gigantic dimensions, so it’s best if you set it to something like 0.2.
- Finally, click on “Import Model File”. You should see your model!
Alternatively, you can import a model by going to “File > Import > MikuMikuDance Model”.
Since “cycles” is the main final frame render engine in Blender, in order to see and render the object properly, it’s best to convert materials for cycles. To do this, select the model and then click on “Convert Materials For Cycles” in the MDD tab. This will prepare the materials and also let you see the textures.
Settings & Adjustments
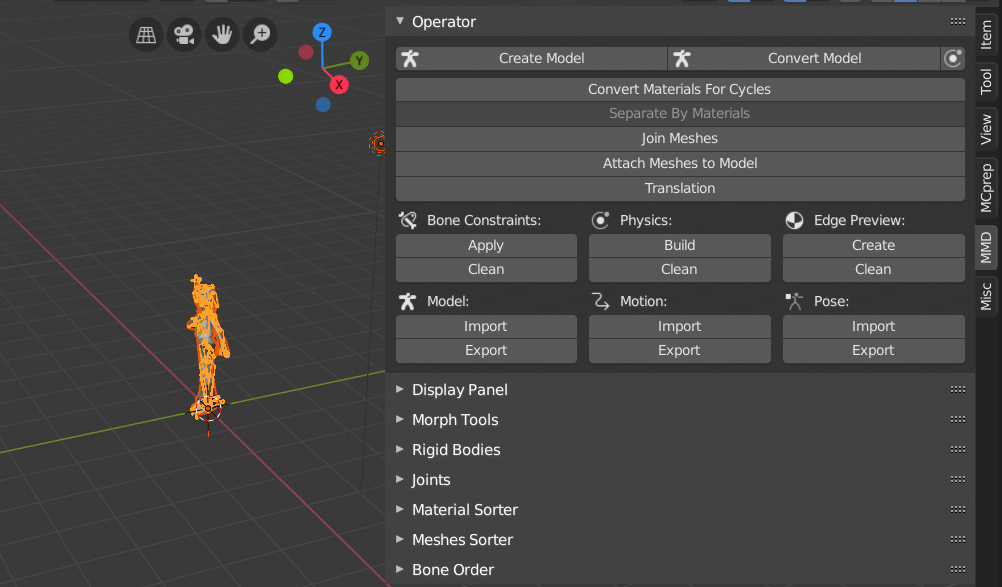
As mentioned before, mmd_tools can do more than just import models. In fact, the most prominent functions are importing pose and motion data and translating the MDD info into a coherent form for Blender.
Once you import and select a model, new options will be available in the MMD tab:
- “Bone Constraint” and “Physics” will convert into Blender or clear the settings.
- “Motion” and “Pose” allow you to import these functions on the selected model and to export the altered ones from Blender.
- Below the “Operator” tab, there are other tabs that allow you to sort the different parts of the model (like bones, meshes, and materials).
- Since MMD is a Japanese program and most of the artists who design models for this platform are also Japanese, mmd_tools has a convenient tool labeled “Translation”, which translates the names of joints, bones, and so on from Japanese to English.
When you’re done importing and adjusting everything, you can preview the animation and then render your movie!
If you want to know more, GitHub’s official documentation can give you a thorough description of every function in mmd_tools.
Lead image source: The Soda Wave via YouTube
License: The text of "Blender & MMD: How to Import an MMD Model into Blender" by All3DP is licensed under a Creative Commons Attribution 4.0 International License.