MakeHuman & Blender: How to Make Them Work Together

When it comes to designing virtual human models, MakeHuman and Blender go hand-in-hand. Read on to know all about the two platforms!
Render artists and character model designers will likely know that designing a virtual human model from scratch is no simple task. Creating a single hand can take forever, so it’s not unusual for someone to completely give up.
That’s where MakeHuman comes to the rescue. MakeHuman is free and open-source middleware used to make digital humanoids. It’s a very successful tool focused on character bases, which can further be used in the creation of cartoons, animations, art renders, and more.
Yet, you can’t talk about MakeHuman without talking about Blender.
If you don’t already know it, Blender is free and open-source graphics software that’s used to create animations, visual effects scenes, 3D models for CAD and 3D printing, motion graphics, virtual reality, and video games.
Even in Blender, making realistic human models is complicated and requires a lot of time, and this is why MakeHuman and Blender walk roads together. Using the two programs can save a lot of time, especially for large-scale projects like animated movies or video games, as it takes literally just minutes to create a basic human model using MakeHuman and Blender.
Hungry for more? Then read on for a quick bit of background followed by an extensive guide, which you can follow along like a tutorial!

A Bit of History
MakeHuman was originally created as a python script for Blender using the Blender API. However, once it grew large enough, the API was no longer sufficient to write lengthy and complicated code for MakeHuman, which led to it moving out of Blender and its script being written in C and C++. Owing to the complexities of these languages, MakeHuman was then written again and released in Python.
For beginners, digital human models can seem a little creepy, but a little practice can go a long way. Before you can get to that, however, you’ll need to know the basics of MakeHuman, including how to install and interact with the program.
Installation & Setup
To use MakeHuman with Blender, you’ll of course already need to have Blender installed. For detailed instructions on how to download and install it, check out the online Blender Manual. It also has a lot of other useful information on the software’s various features.
Moving forward, here’s how to install MakeHuman on your device:
- Download the .zip file.
- Extract the file, allowing MakeHuman to be directly used by double-clicking on the executable file “makehuman.exe”.
- Open Blender.
- Via the “Edit” menu, navigate to “Preferences > Addons”.
- Scroll down to find the “MakeHuman” add-on and enable it.
You should now be able to see the “mhx2” file type when importing in Blender. That said, for the following guide, we’ll be discussing the STL file type.
UI: Toolbar
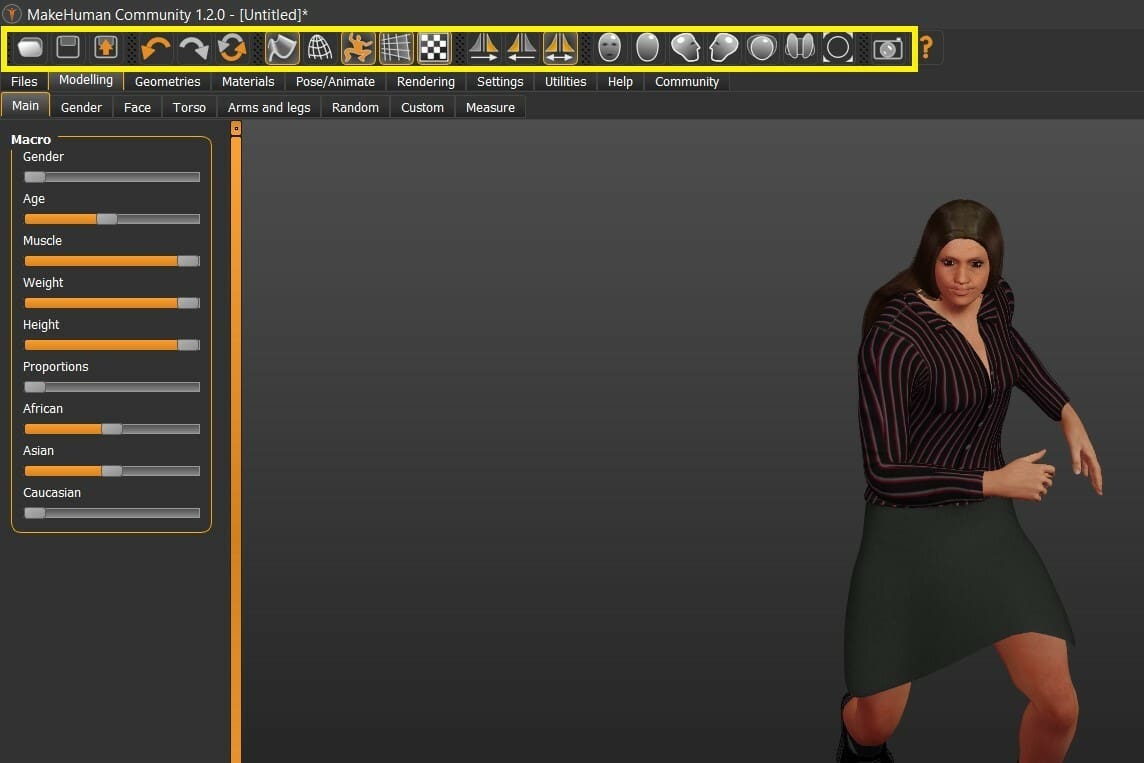
The first user major interface component of MakeHuman is the Main Toolbar, which displays a variety of options, including the viewing angles, the model wireframe, the saving options, and more.
Note that, below the Main Toolbar, MakeHuman organizes its tools, features, and functions under two rows of Main Tabs (on top) and Sub Tabs (underneath).
Here are some of the most important options in the Toolbar, along with descriptions:
- Reset: Resets the whole model to the default settings, meaning all of the options in the main tab (mentioned in the next section) are set to 50%.
- Smooth: Smoothens the edges and the texture of the model. The difference here can be seen in the wireframe of the model; after applying this setting, the wireframe is subdivided, thus becoming more “detailed”, which gives a smoother appearance. It has the same effect as the Subdivision Surface modifier in Blender.
- Wireframe: Displays or hides the wireframe of the model.
- Pose: Sets the model to the selected pose or to the default pose. The default pose is the model standing straight with widespread legs and arms, but a different pose can be set using the Pose/Animate Main Tab (which will be explained in the coming sections).
- Grid: Displays or hides the floor grid.
- Background: Sets a background image for the model. The image to be set must be located in “…/Documents/makehuman/v1py3/backgrounds”. After that, go to the Settings Main Tab and select the Background Sub Tab. All images at that file location will be displayed on the right side of the screen.
- Viewing angles: Allows the user to view the model from the front, side, back, top, and bottom.
- Reset camera: Resets the user’s view to be from the front.
- Grab screen: Takes a screenshot, which will be saved as a PNG file in the location “…/Documents/makehuman/v1py3/grab”.
UI: Modeling
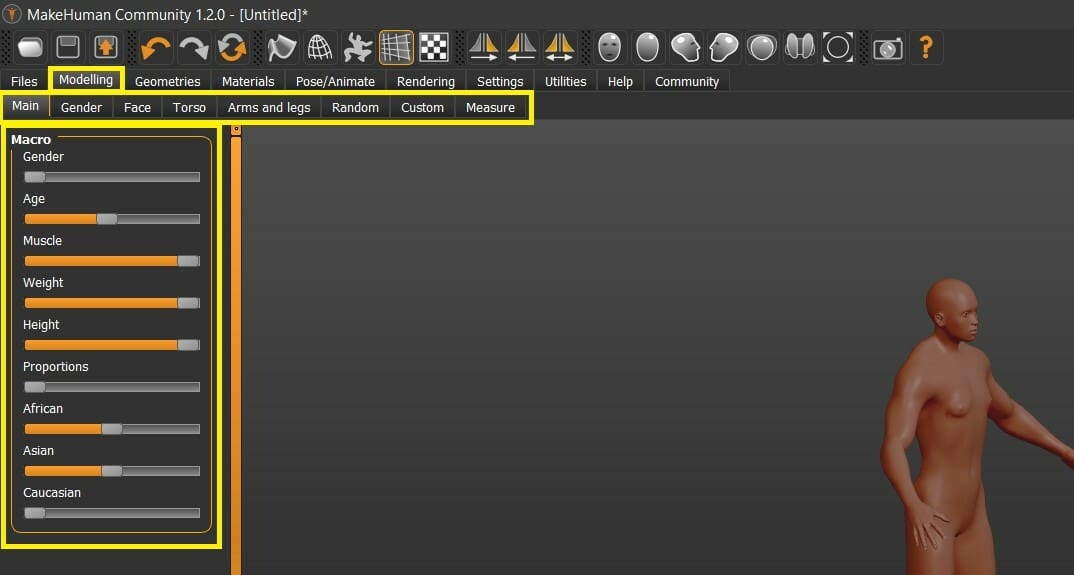
Next up, we’ll discuss the Modeling Main Tab, which among other characteristics, offers options to set a model’s gender, age, and body proportions. Let’s go through all but one (Custom) of the Sub Tabs:
- Main: Through the use of sliders, allows the user to set gender, age, muscle density, weight, height, body proportions, and geographical origins (African, Asian, and Caucasian). Note that the latter setting affects a number of other characteristics, such as facial features, skin tone, and physique.
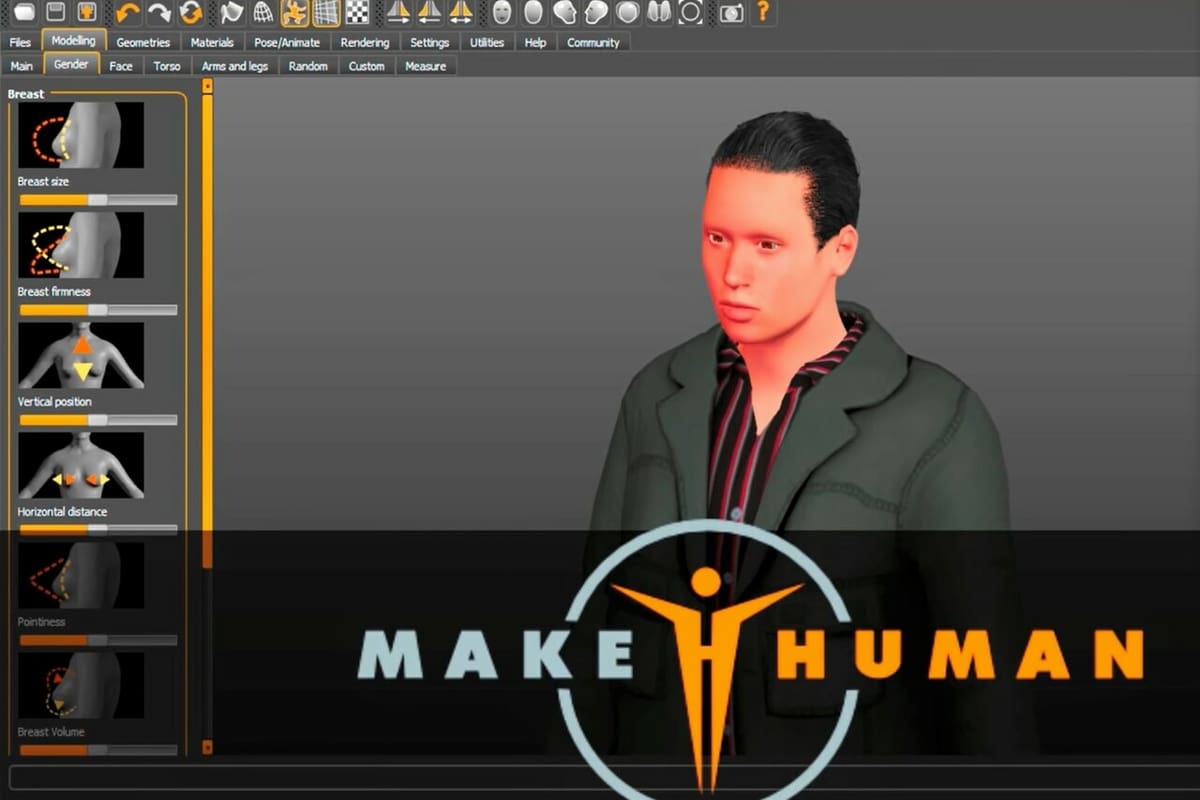
- Gender: Defines gender-specific characteristics, like breast size and position as well as nipple details.
- Face: Used to define physical attributes of the face, including age, weight, and shape.
- Torso: Defines the torso through horizontal and vertical measurements, torso shape, torso depth, and dorsi and pectoral muscle shapes.
- Arms and Legs: Defines the fingers’ thickness, lengths, and distance as well as hand size and position.
- Random: Defines the body’s symmetry and allows the user to randomize the character’s physical measurements, like height, body, and face.
- Measure: Sets the physical measurements of the neck, arms, torso, legs, hips, knees, and ankles in centimeters.
UI: Geometries
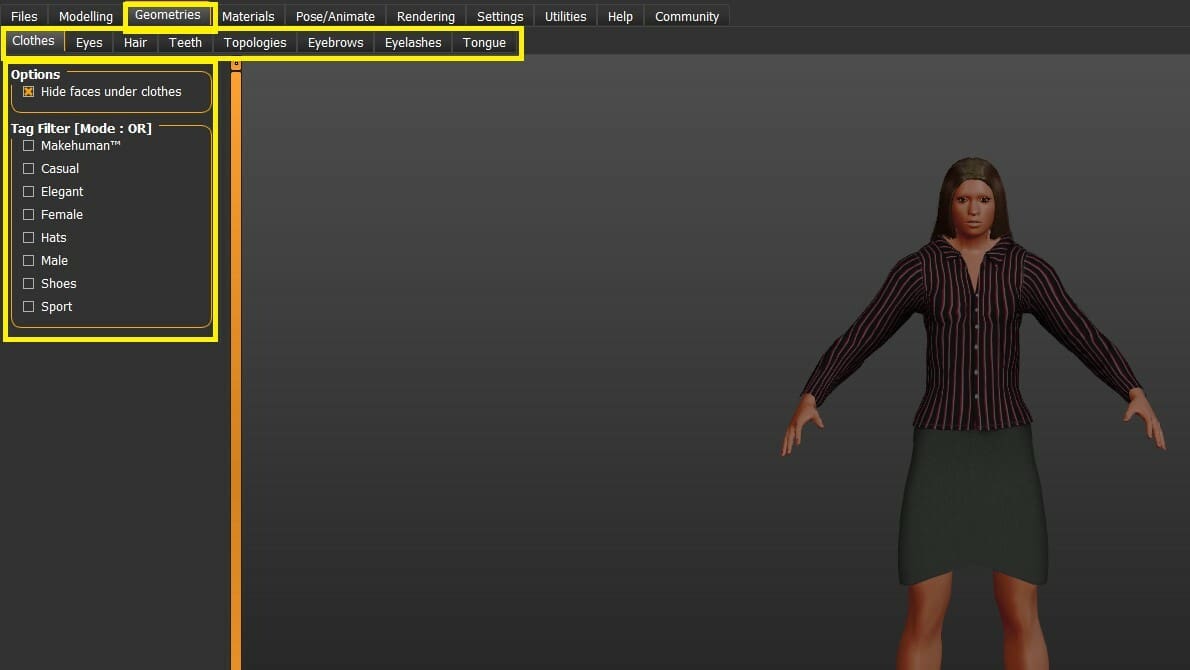
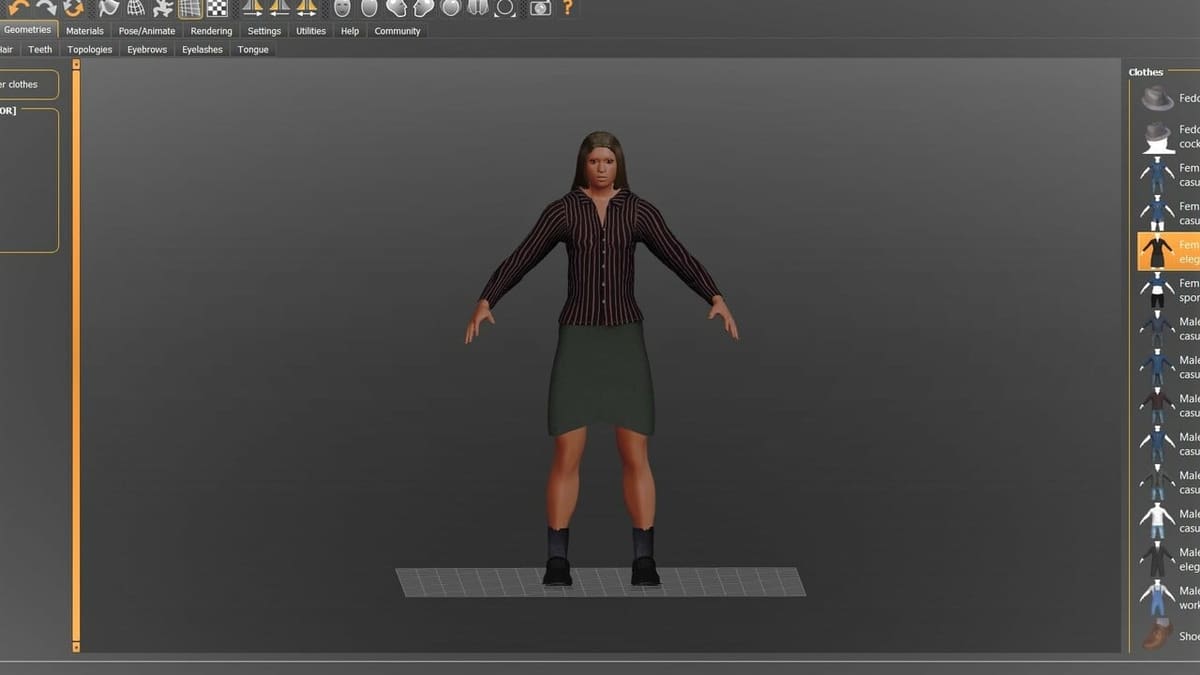
The Geometries Main Tab is used to set external features, like hair, teeth, and clothing. This section has the following Sub Tabs:
- Clothes: Offers a number of outfits, ranging from hats, clothes, and shoes. On the left side of the screen, the user can filter clothes according to the character’s requirements.
- Eyes: Offers high-poly eyes, low-poly eyes, or no eyes.
- Hair: Offers a number of hairstyles, including short length, long length, bob cuts, and ponytails. No hair is also possible.
- Teeth: Offers six sets of teeth or the option for no teeth at all. Teeth shapes differ in the sizes of the incisors, canines, premolars, and molars as well as placement relative to the gums.
- Topologies: Sets a more detailed body type according to neck details, biceps, and quadriceps, with low- and high-poly options available.
- Eyebrows: Offers a set of 12 different eyebrows or no eyebrows at all. Eyebrows differ in thickness, shape, and length.
- Eyelashes: Offers a set of four different eyelashes or no eyelashes at all. Eyelashes differ in lash length only, so the character can have short or long lashes.
- Tongue: Offers options for a tongue or no tongue.
UI: Materials
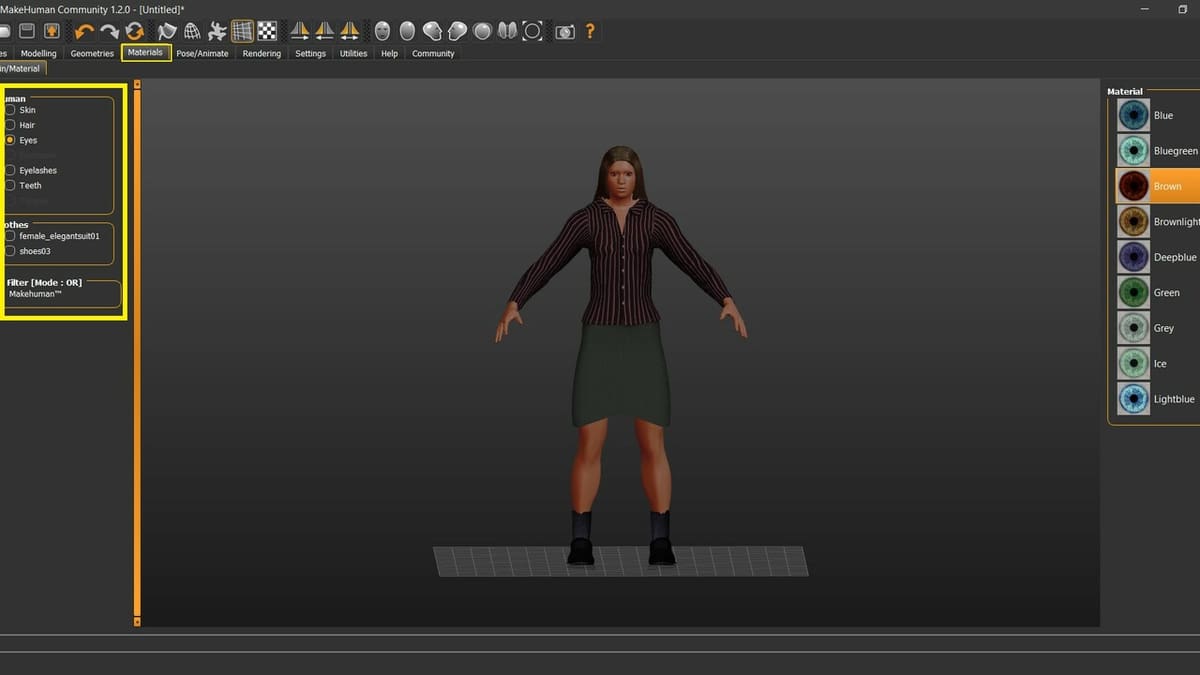
The Materials Main Tab is used to set the skin type and the eye color of the character. For reference, it also reiterates what the user has selected for eyelashes, eyebrows, teeth, and hair in the Geometries Main Tab.
There are two main decisions to make here:
- Skin: Offers a variety of skin types differing in age, color, and origin of the character. Note that the skin type isn’t affected by the geographical origin chosen in the Modeling Main Tab.
- Eyes: Offers a number of eye colors, with blues, browns, greens, and grays available.
UI: Pose/Animate
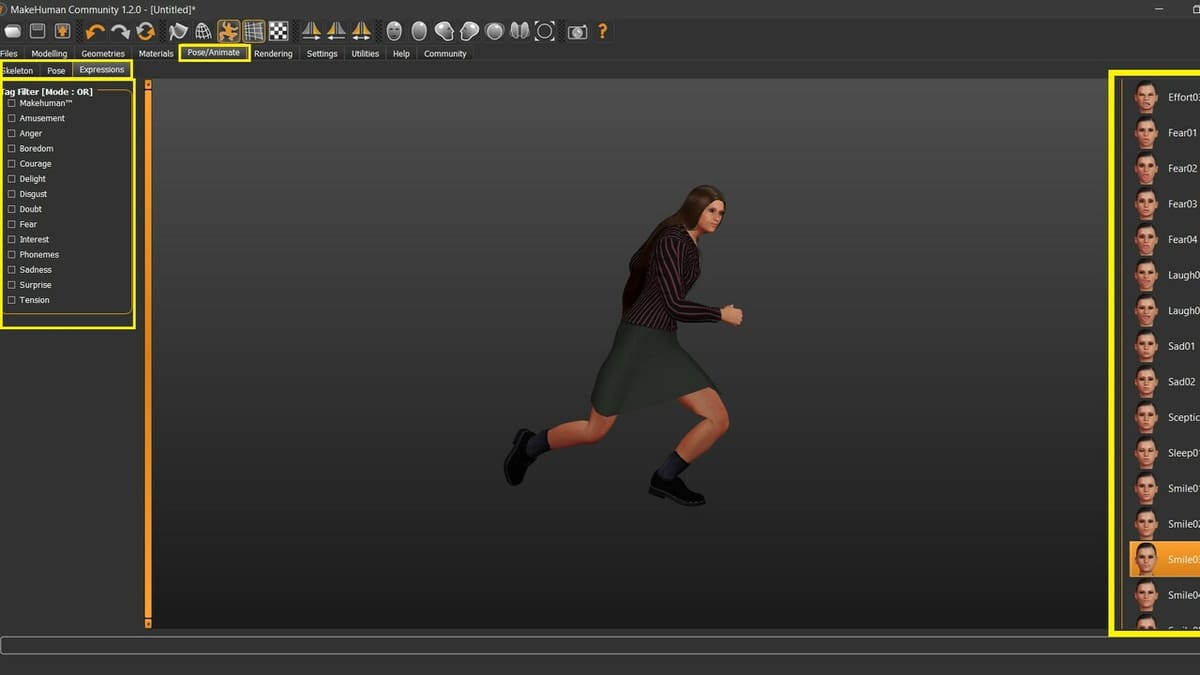
The Pose/Animate Main Tab can be used to rig the character’s skeleton according to what the character will be used for, the pose of the character, and the facial expression of the character. It features three Sub Tabs:
- Skeleton: Offers four skeleton rigs to choose from, suitable for motion capturing, animation, and game engines. The bone count and rig description can be seen on the left side of the screen.
- CMU MB rig: Suitable for motion capture, which is why it has the least number of bones – 31. They become more detailed in the areas where motion capture sensors are usually placed.
- Default rig: Includes detailed fingers, toes, and facial bones which are useful for 3D animation. Contains 163 bones.
- Default rig with no toes: Doesn’t provide detailed toes, which is useful when the character’s foot needn’t be rigged. Contains 167 bones.
- Game engine rig: Specifically for game engines. Before using this rig, consider which game engine and gaming platform will be used. (Gaming consoles and PCs handle rigs differently.) Contains 53 bones.
- Pose: Offers a total of 17 poses to choose from, which can be filtered into standing poses, sitting poses, sport poses, and more.
- Expressions: Offers a total of 32 facial expressions to choose from, which can be filtered into amusement, anger, boredom, courage, delighted, disgusted, doubtful, fearful, interested, sad, and more. Animating the model will require changing the poses and expressions of the character, but MakeHuman provides some basic poses and expressions which can be useful for animation.
UI: Rendering
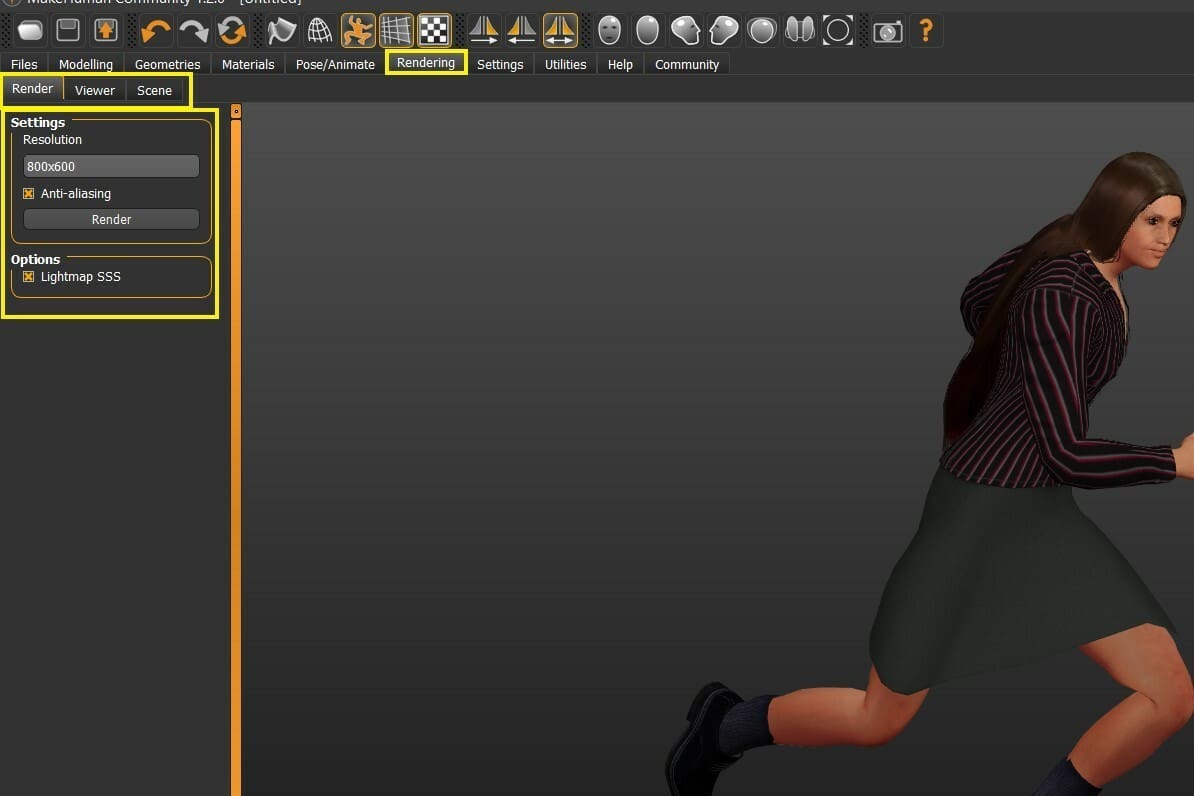
The Rendering Main Tab is used to set the resolution of the to-be-rendered model. If the resolution is set too low, the anti-aliasing checkbox can be checked to make the render look cleaner and smoother. The following options can be seen in the render section:
- Quick render: This option is used to set the resolution of the rendered model.
- Advanced render: Along with the render resolution and the anti-aliasing option, this option also offers the Lightmap SSS option, which can be used to control the “Subsurface Scattering” of the final render.
Exporting from MakeHuman
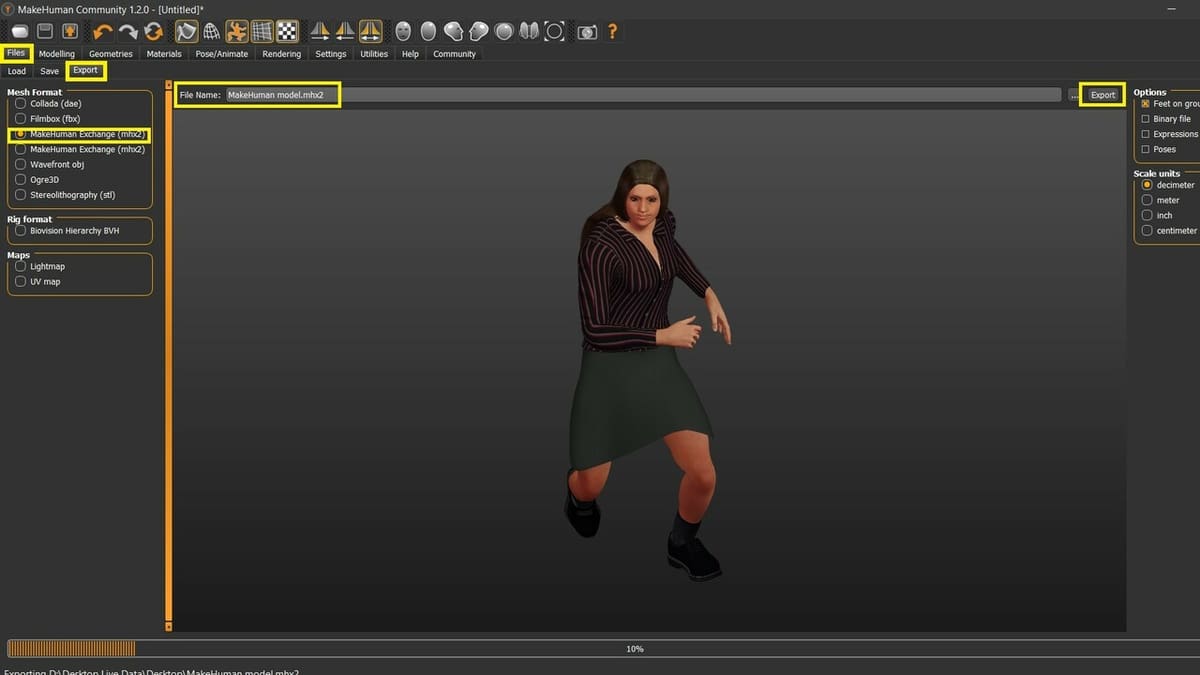
If you’ve successfully used the above software features to model a character, it’s time to port it to Blender. The first step is exporting:
- Navigate to the Files Main Tab and then the Export Sub Tab.
- Click on “Stereolithography (stl)”. (You can choose any file type you like, but the STL file type is supported by most software and is easier to work with.)
- Select the export path by clicking on the empty bar beside the Export button and selecting the folder you want the model to be saved in.
- Click on the Export button.
- Close the software.
Importing in Blender
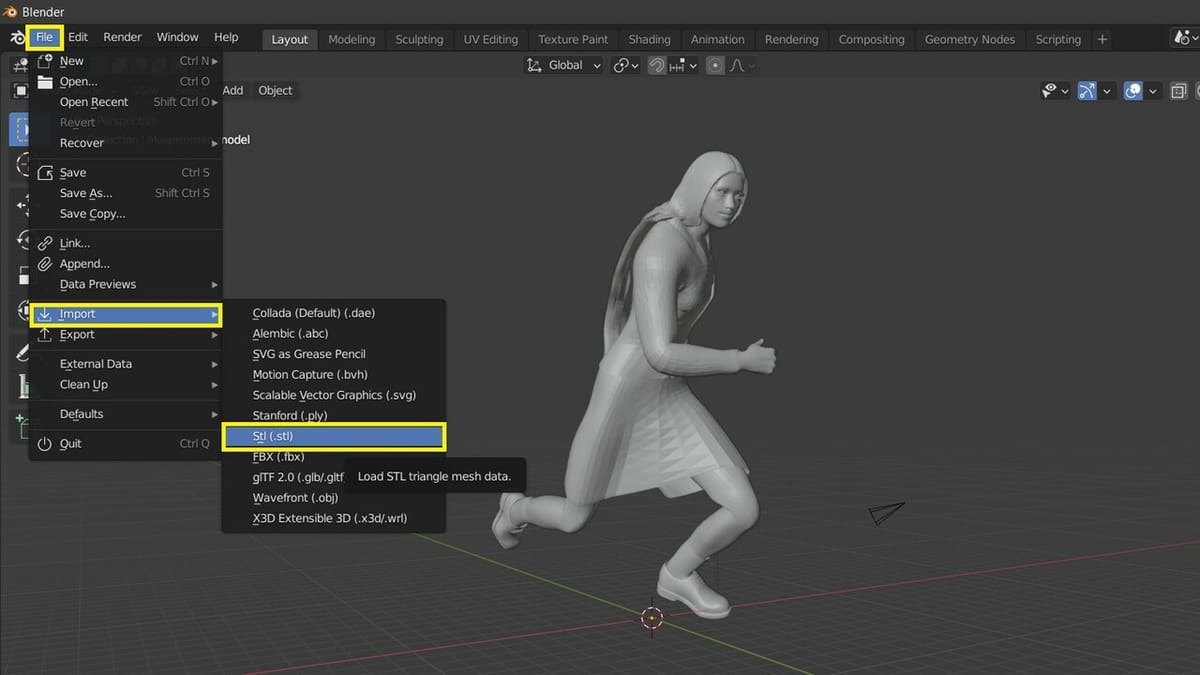
After exporting a MakeHuman model to the desired location, here’s how to open it in Blender:
- Open Blender.
- Navigate to “File > Import > STL”.
- Find the folder with the saved MakeHuman file and select it.
Final Steps
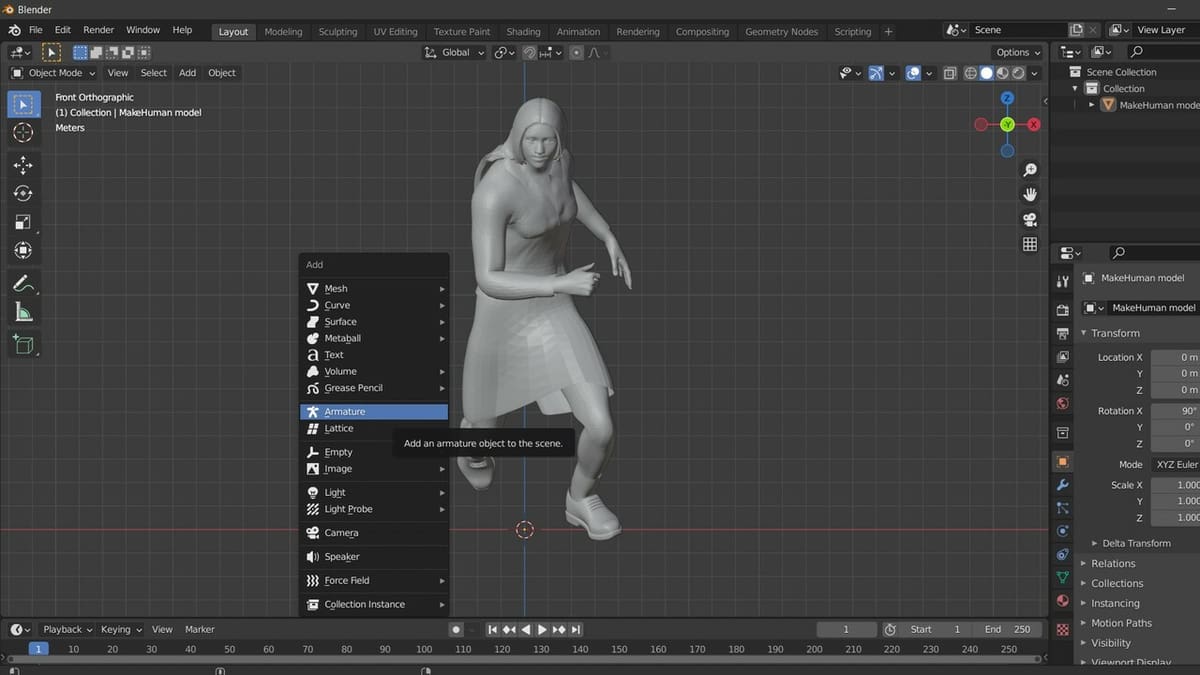
With the above information, you should have no trouble making a human model and bringing it over to Blender. If you don’t need the model to move (e.g. for basic character design), you can directly work on the imported model in Blender.
If you want to rig the model (e.g. for animation) and bones weren’t already added to the model in MakeHuman, you’ll need to add and align them in Blender. To learn more about this, take a look at our article on rigging in Blender.
There are many reference articles and materials on the internet for working with MakeHuman and Blender. Among them are the MakeHuman forum and official documentation, the latter of which consists of active software-related topics, issues, and FAQs. Blender also has an official documentation website, which covers most aspects of the software. Naturally, there are a number of tutorials available on YouTube, with Blender having its own YouTube channel.
Lead image source: Archee Verma via All3DP
License: The text of "MakeHuman & Blender: How to Make Them Work Together" by All3DP is licensed under a Creative Commons Attribution 4.0 International License.