Blender 3.5: Freestyle – Simply Explained

Blender Freestyle is a rendering tool that applies edge effects for cartoon style or wireframe drawings. Read all about using Freestyle!
If you’ve ever used Blender for 3D modeling, you were likely impressed with its selection of tools and vast capabilities, especially given it’s a free program! From creating 3D printable models to generating realistic object textures to producing animations, Blender is an essential tool for many digital artists. If you’re not already familiar with Blender, check out our beginner’s guide to get started.
As with other 3D modeling programs that are chock-full of functions, like 3ds Max from Autodesk, there is so much to discover in Blender. We’re going to give a quick rundown of Freestyle, a rendering feature that applies lines to the edges of objects as commonly used in cartoons and animations. The effect can help with distinguishing various faces and subtle edges. You can also generate wireframe effects with this feature.
Using several possible line styles and modifier options, you can customize just about anything about the lines that you can imagine, all the way down to the line caps. Freestyle can save you mountains of time compared to trying to draw the lines on an object’s edges using Grease Pencil. In this article, we’ll give you a rundown on how to use the Freestyle function in Blender and some insight into the customizable parameters available.
Using Freestyle
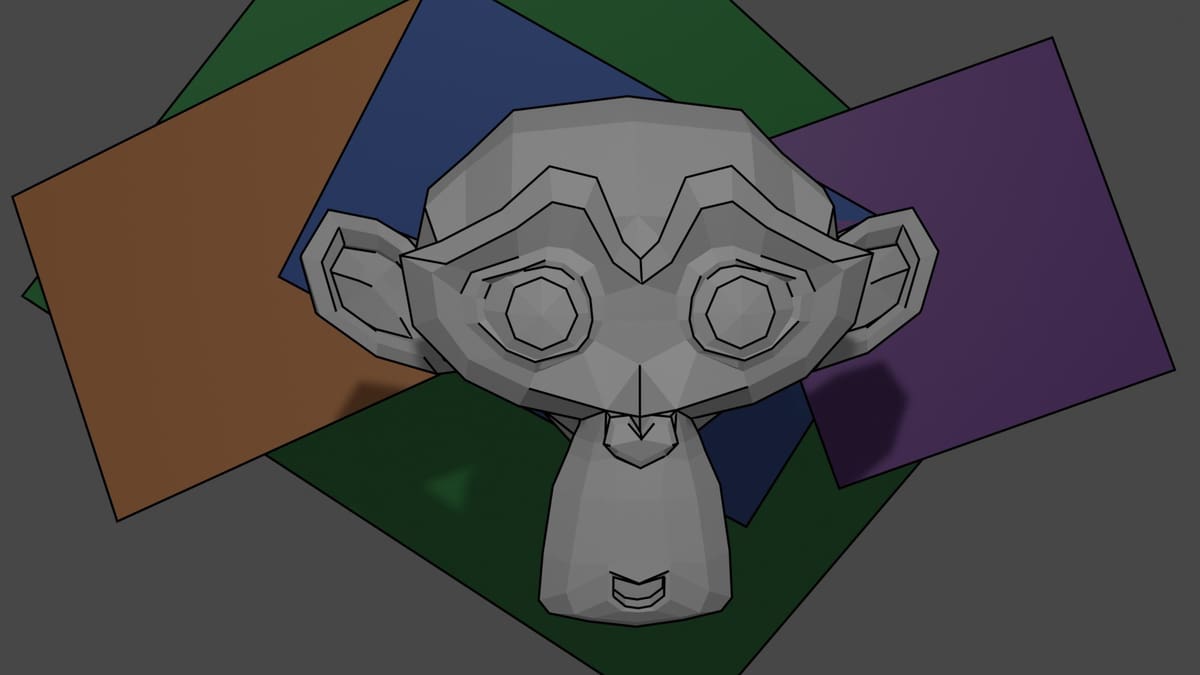
Using the Freestyle function in Blender is pretty easy! To get set up, open Blender and select the default cube, then hit the Delete key to remove it. You can open one of your own models or follow along with us using the “Monkey” mesh. With its numerous edges, it’s a perfect model to practice on. You can find it under the “Add > Mesh” menu.
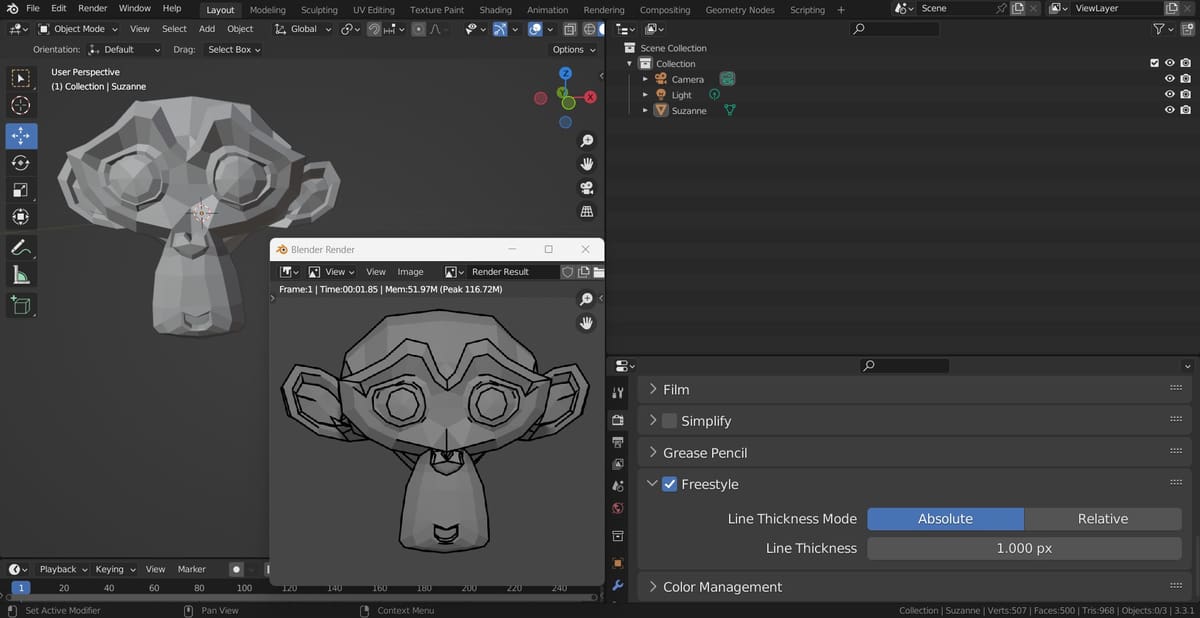
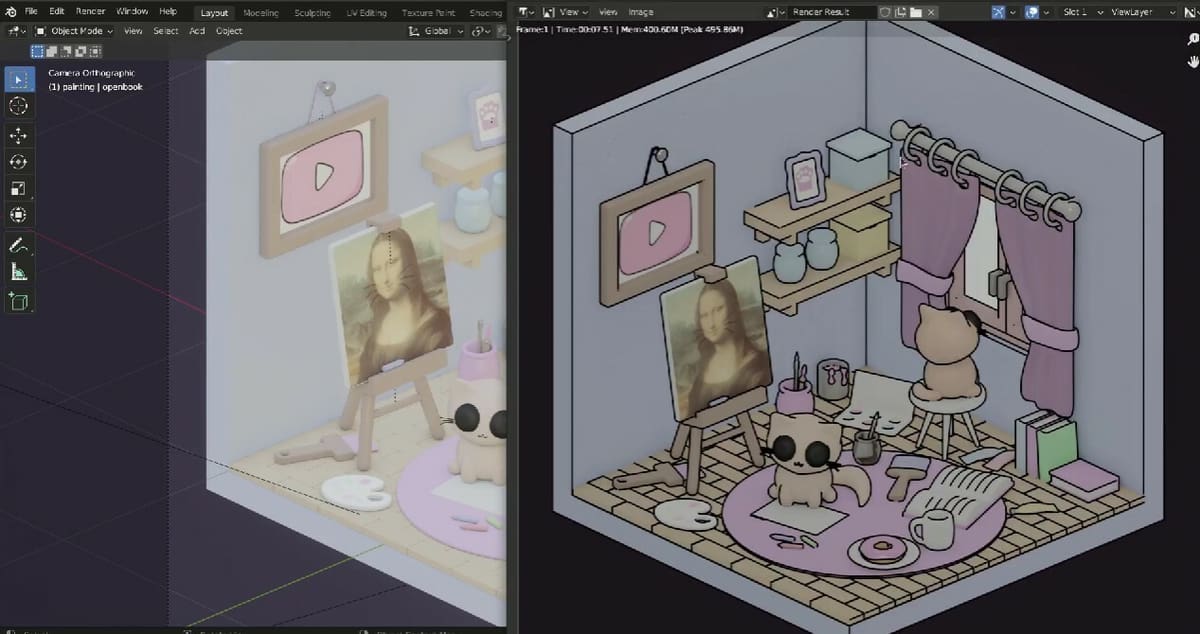
In the left-side Properties menu, click on the “Render Properties” tab, which is the second option from the top. Toward the bottom, you will see “Freestyle” along with a checkbox. Click on the checkbox to activate Freestyle.
If you click on the arrow to open the Freestyle dropdown menu, you’ll notice that you can toggle the “Line Thickness” parameter between Absolute and Relative. The latter will scale the line thickness relative to the size of the verticle image, with a 480 px image yielding a 1 px line.
Absolute is selected by default and will allow you to define the number of pixels that the line should be. The default Line Thickness value is 1.0. You can increase or decrease this setting by either clicking in the box itself and typing in a number or you can move the mouse over the box and drag right or left to adjust.
Now render the image (just hit the F12 key on your keyboard for a quick render) and check out how your lines are looking! It’s a good start, but where are all of those line customization options we were going on about?
Line Properties
To view the additional Freestyle settings, you’ll have to head over to the “View Layer Properties” tab under the same left-side Properties menu (it’s the fourth from the top). There, you’ll find several Freestyle dropdown menus such as “Freestyle”, “Freestyle Color”, and “Freestyle Geometry”.
Under four of these property menus, namely Freestyle Color, Freestyle Alpha, Freestyle Thickness, and Freestyle Geometry, several modifiers are available, making the possibilities of some simple lines nearly endless.
For the sake of brevity, we won’t cover all of these property menus and modifier combinations, but we will take a look at what the most important ones have to offer.
Edge Detection
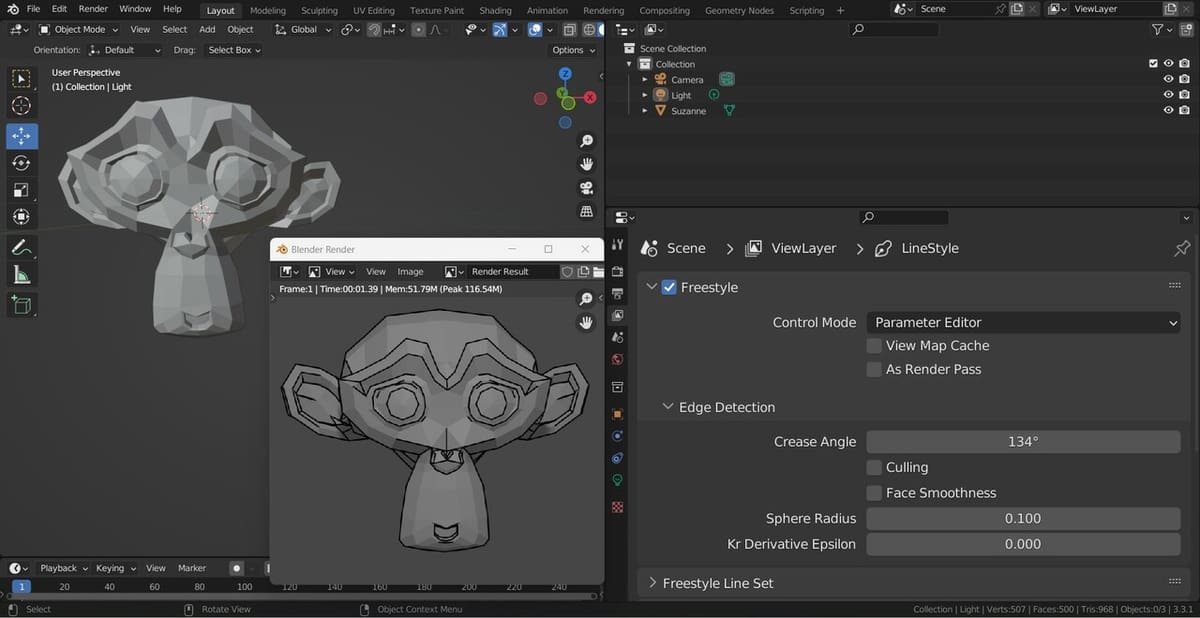
Under the first menu, simply named “Freestyle”, you’ll see a sub-dropdown menu, “Edge Detection”. The most interesting parameter there is the “Crease Angle”. This allows you to set the angle between two edges above which a line will not be rendered. The default setting for Crease Angle is 134°, so intersecting edges at 78° will have a Freestyle line applied, although if the same edges were intersecting at 154°, no line would appear in the render.
The highest you can set the Crease Angle is 180°. That will give you a render where all of the edges have lines applied to them. Conversely, you could lower the value for Crease Angle all the way down to zero, which will render with no lines at all.
Strokes
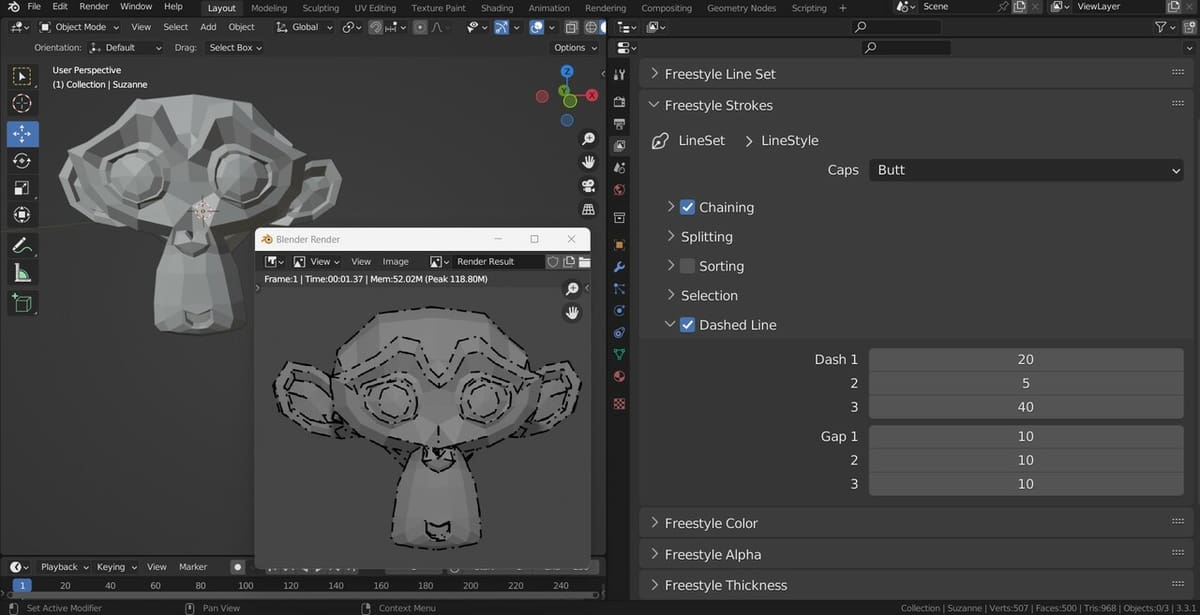
Freestyle Strokes is a Properties menu full of property menus. Here, you can get really nitpicky about all kinds of details of your line. To get started, under the “Caps” menu, you can select the end shape of the line: butt (flat), round, or square.
Next, you’ll run into “Chaining” settings, which, if selected, will render lines continuously. The default “Plain” means lines are connected together like a chain, end to end, and should suit most purposes. You would need discontinuous lines primarily to change line settings within an object. The following “Splitting” menu would help with defining where line discontinuities occur.
Other interesting settings in this menu can be found under the “Selection” menu, where you can opt to only apply lines of a certain length. Also, under the “Dashed Line” menu, you can set both the Dash and Gap lengths if you are looking for a change-up from the boring solid.
Color
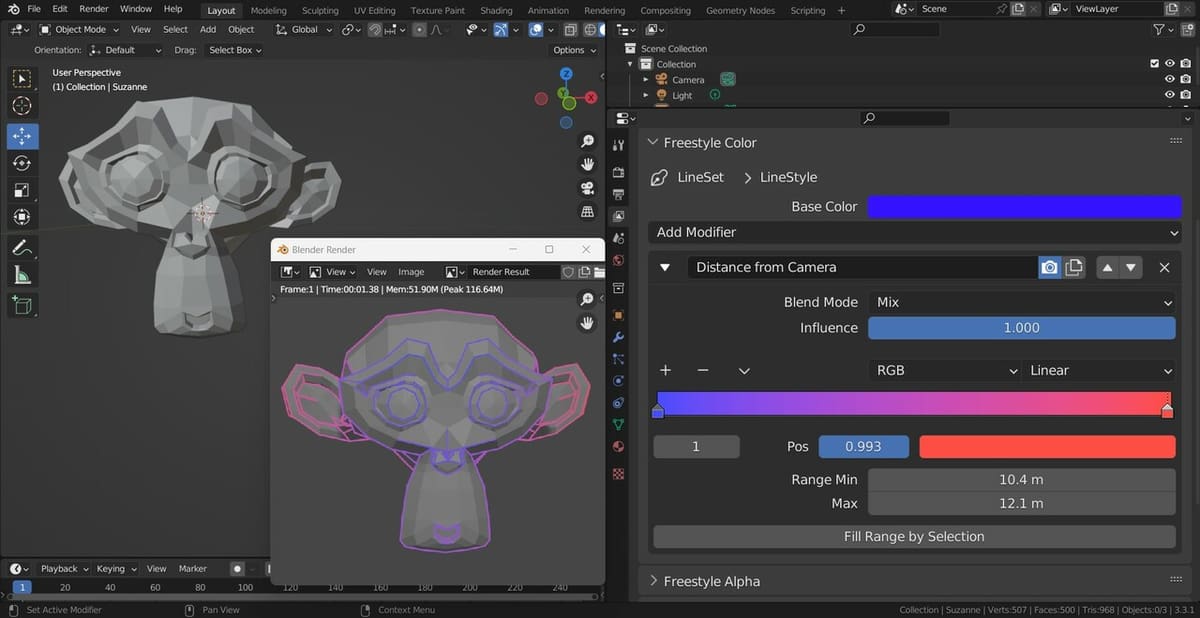
If you are creating characters or animations in Blender, you may not necessarily want all of the edge lines to be black. Luckily, there’s a “Freestyle Color” dropdown menu.
Selecting your “Base Color” is as easy as clicking on the default black color to open up the color wheel. Drag the slider at the right of the box all the way to the top of the scale to reveal the full rainbow. Then, take your pick!
You can even choose from several modifiers that will allow you to get a bit funky with the colors. For example, “Distance from Camera” will allow you to create a color gradient as a function of, well, distance. The “Fill Range by Selection” button under “Distance from Object” is helpful in finding the distance from the camera to the start and end of your object (just make sure you have your object selected).
Thickness
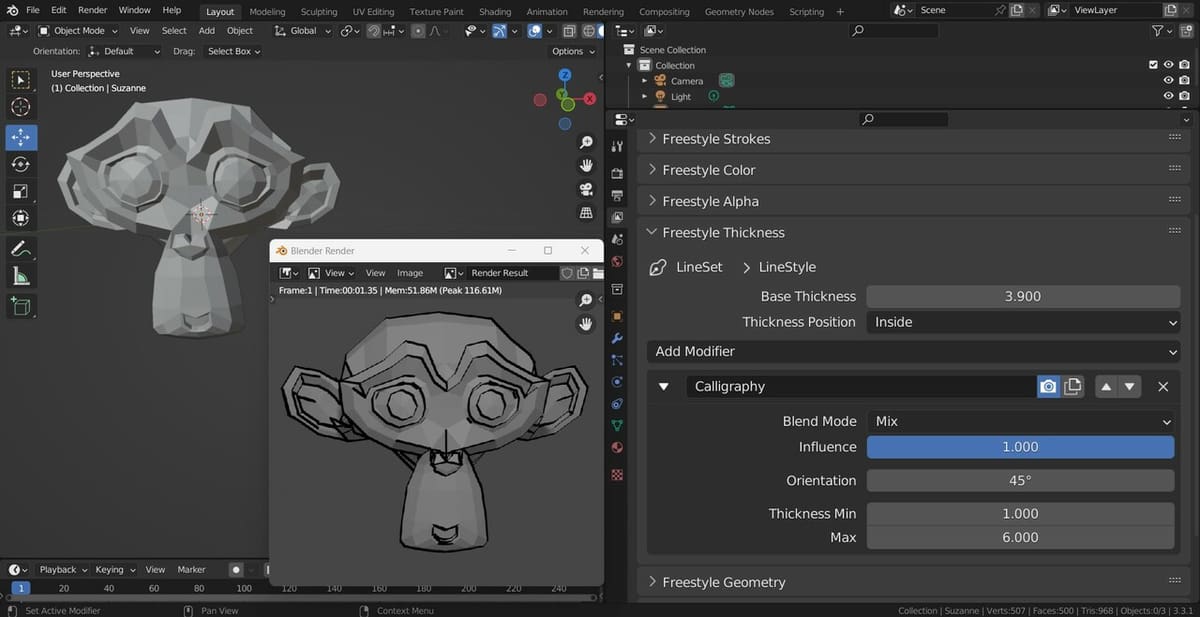
Line thickness can be adjusted under the “Freestyle Thickness” dropdown menu. You’ll find two options there, as well as modifiers. The “Base Thickness” value allows you to directly adjust the line thickness. With the “Thickness Position”, you can adjust if the lines should be centered or to either side of the geometric edge.
There are plenty of modifiers to choose from that can also provide interesting effects, like “Calligraphy” or “Noise”. You can select the same modifier that we used to create a color gradient, “Distance from Camera”, to produce thicker lines toward the back of the object and thinner lines toward the front, or vice versa. Each modifier has its own set of parameters that you can tune to your liking, so take some time and play around with each of them!
Alpha
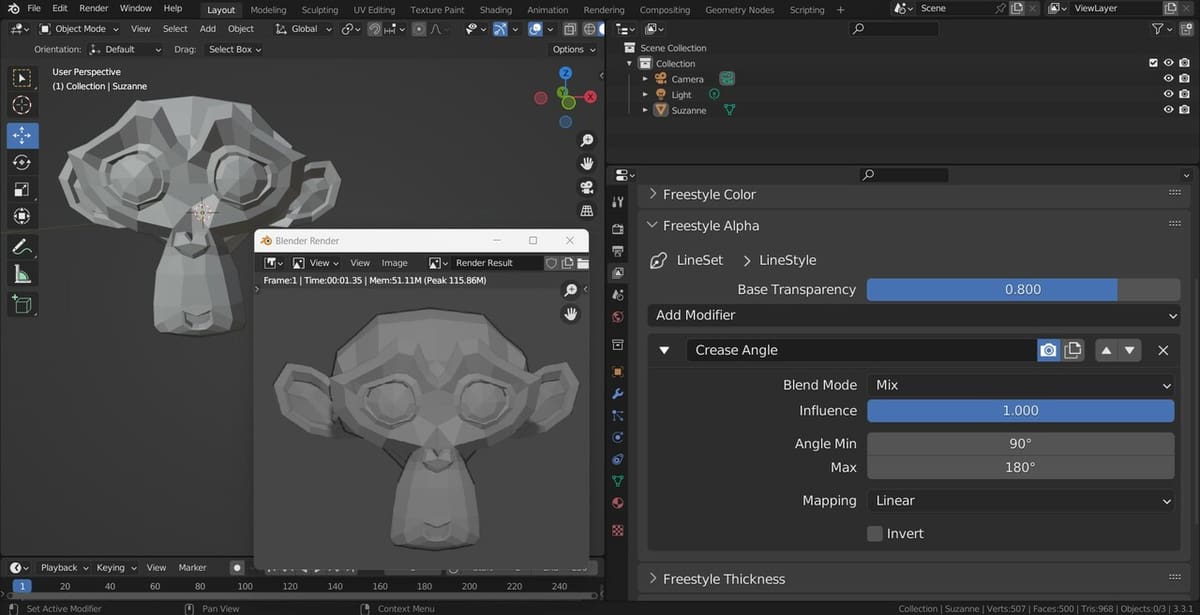
In the “Alpha” property menu, you can set the transparency of the lines. The default value is 1.0, which is completely opaque.
In addition to this straightforward setting, you have a similar set of modifiers to choose from to really nail down the exact line effect that you are going for. Like the previous menus, “Distance from Camera” and “Noise” are included in the modifier options. A particularly interesting one for setting transparency is “Crease Angle”.
Similar to how the Crease Angle parameter established whether or not a line will be drawn depending on the angle of two intersecting planes, the Crease Angle modifier can be used to set line transparency of the lines according to the intersection angle. This is a nice feature to distinguish between two surfaces intersecting at wide angles without causing smaller angles to appear crowded.
Next Steps
Keep in mind that Blender themselves have stated the Freestyle tool can be very demanding on your computer’s memory. If you’re looking to use Freestyle in one of your projects, it’s not a bad idea to get familiar with the tool using a simple geometry like the Monkey before moving on to heavier renders.
You also have an abundance of resources on YouTube to help you master Blender Freestyle. If you’re planning to use this tool to create anime-style 2D figures, Activemotionpictures created an in-depth video that covers many of the possible properties and modifiers. For a shorter tutorial on cartoon-style lines, Blendera‘s quick tips video on cartoon edges is a worthwhile watch.
If you’re going for something closer to a line art style, then check out the video from chippwalters for a technical example or Head Prism Animation for hand-drawn line stylings.
License: The text of "Blender 3.5: Freestyle – Simply Explained" by All3DP is licensed under a Creative Commons Attribution 4.0 International License.