Blender: Character Modeling – Simply Explained

Blender character modeling can seem intimidating, but don't fret! Follow these simple steps to learn how to make a character in Blender!
Blender is a popular 3D computer graphics software used by hobbyists and professionals alike. It’s a free open-source, feature-rich program that boasts a multitude of applications (e.g. 3D modeling, animation, VFX, among others). Although it’s only one of its many applications, the number of tools available for 3D modeling alone makes it one of Blender’s best features.
3D modeling in Blender can be overwhelming for beginners. With a little guidance, though, you can learn it easily. In this guide, we’ll show you how to create a character from 2D references to a workable model in Blender 3.0, touching up texture painting, rigging, posing, and rendering your character as well. But first, let’s discuss Blender’s user interface (UI) and the most useful 3D modeling tools and operations for character modeling.
User Interface
The number of tools and operations available can be intimidating to people who are new to Blender. Becoming familiar with the Blender 3.0 UI will make creating your character less overwhelming. When you start Blender, you’re faced with the splash screen. You’ll see a number of options available under the featured artwork.
The options under “New File” are the different application templates available in Blender. An application template is a custom Blender configuration that best suits a workflow for one or more of its applications. Each template can be modified, so choosing the right one from the splash screen isn’t important.
That said, the “General” configuration is the best option for this tutorial, as it’s suitable for all the applications we’ll be taking a look at. If you click on anywhere other than the presented options on the splash screen, you will use the “General” configuration by default.
Layout Workspace
A key difference among the application templates is which tabs are visible in the workspaces part of the Topbar (shaded light gray in the image above). Workspaces are window UI layouts for Blender’s different applications.
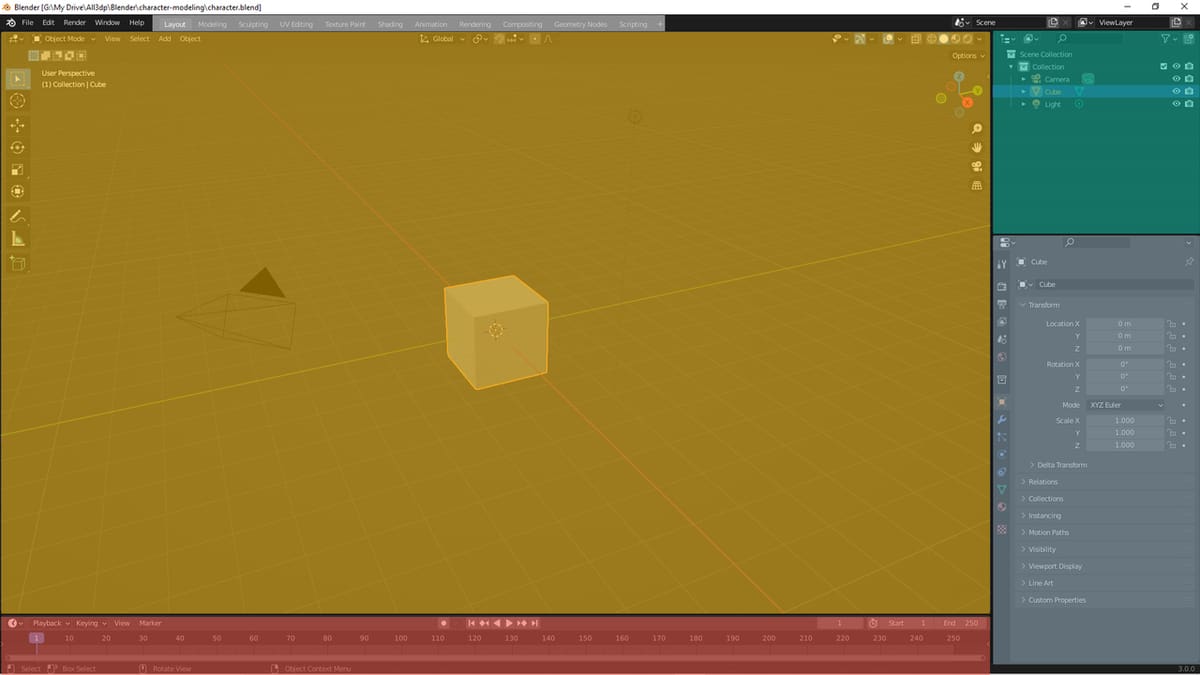
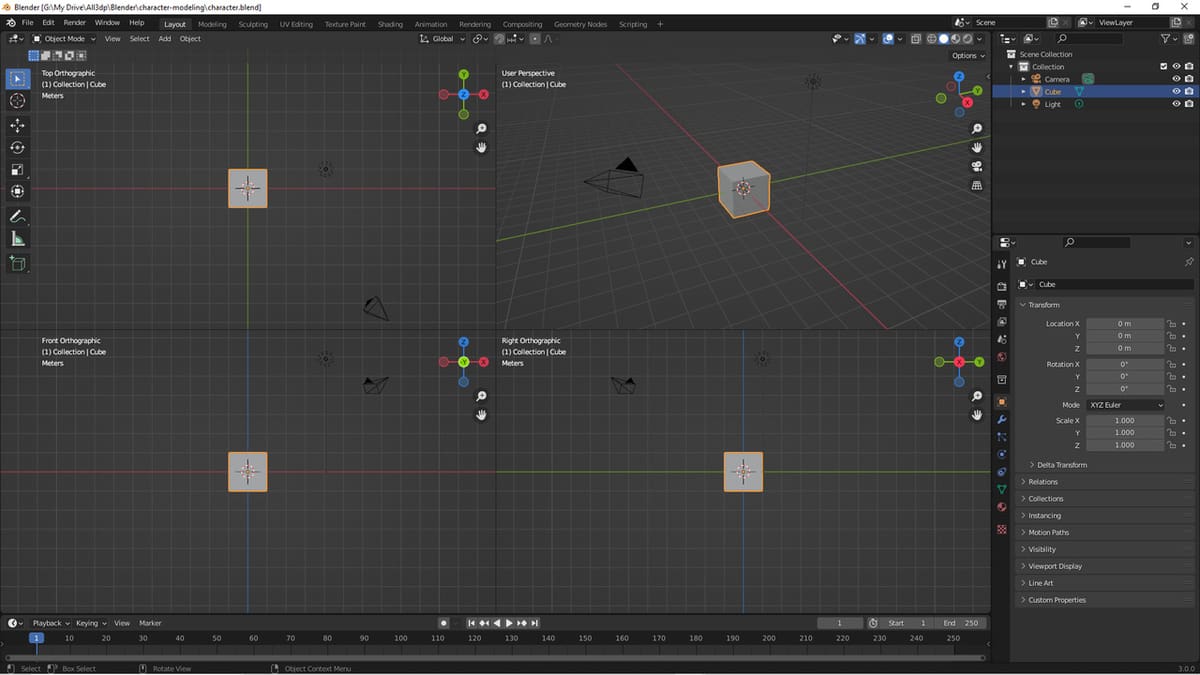
The General configuration displays the Layout workspace, and this is where we’ll be doing our 3D modeling. It’s a non-specific workspace that contains four editors:
- 3D Viewport, shaded yellow in the image above, is where 3D modeling occurs. We can also see the scene in a real-time render preview here.
- Outliner, shaded green in the image above, shows all of the objects in our scene. You have the ability to adjust settings in this editor to control what you see as well as how everything in the scene is organized. We’ll discuss that in more detail a little later.
- Properties, shaded dark gray in the image above, is where we can see and edit a variety of properties related to the active object, the world, or the scene.
- Timeline, shaded red in the image above, displays the keyframes of your scene’s animation. You can scrub through the Timeline to see how the animation will play out.
Each editor contains various regions. For example, many of them have distinctive headers that appear in the 3D Viewport just below the Topbar. Later on, we’ll do a deeper dive into the regions associated with the 3D viewport.
Other Workspaces
Workspaces are good for an intuitive workflow based on the task you want to focus on. Although we’ll be working mostly in the Layout workspace for our 3D modeling, rigging, and posing, we’ll also be working in other workspaces:
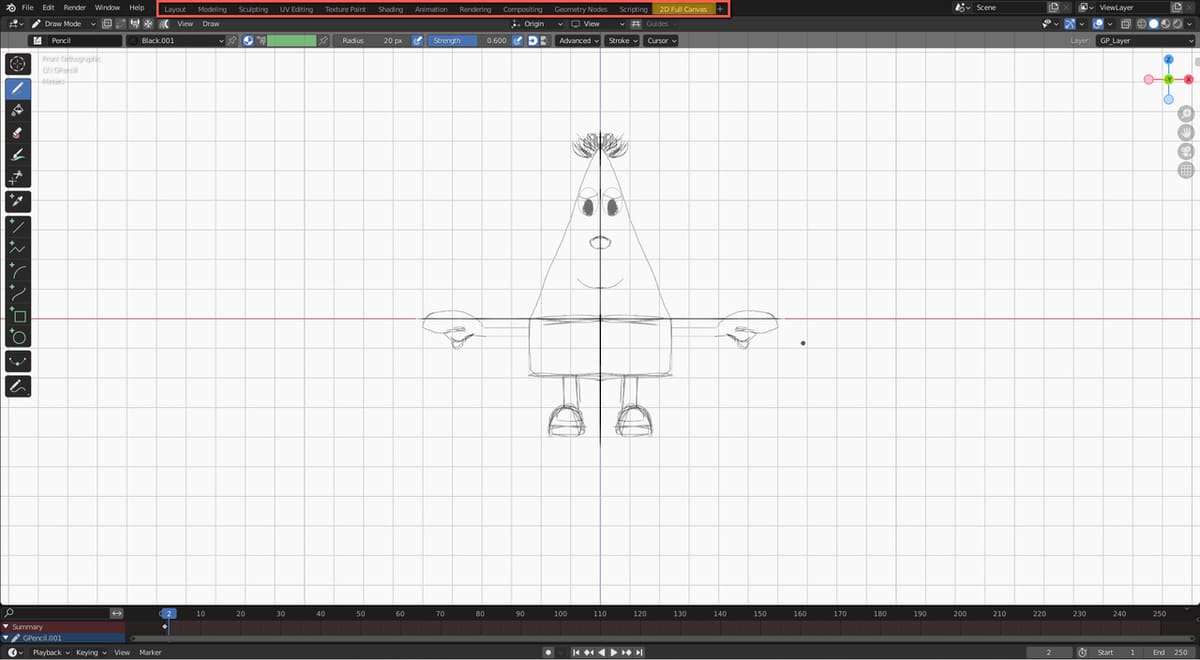
- 2D Full Canvas is where we will be drawing our reference images if they don’t exist already.
- Texture Paint is where we will be adding colors to our character.
3D Viewport Editor

Every workspace that has a 3D Viewport editor will have the same regions, but the contents of the regions change based on what type of object is selected and which mode you’re in (more on this later). Knowing these regions is essential to working with objects in Blender, especially if you’re not familiar with the keyboard shortcuts.
Let’s take a quick look at four important regions of the 3D viewport:
- Header, shaded green in the image above, contains menus and common tools.
- Toolbar, shaded dark gray in the image above, contains buttons for different tools. To toggle its visibility, press the ‘T’ key.
- To activate the Toolbar where your cursor is, press “Shift + space bar”.
- To create a menu with your favorite tools, right-click on the tools you want to add and select “Add to Quick Favorites”. You can activate your favorite tools menu by pressing ‘Q’.
- Sidebar, shaded purple in the image above, contains panels related to the manipulation and transformation of an object, settings of an active tool, properties of the 3D Viewport, and any additional settings for Blender operations or add-ons. To toggle its visibility, press the ‘N’ key.
- Footer, shaded light gray in the image above, shows hints about what actions are available based on what key you press or what you do with your mouse (e.g. click, right-click, double-click).
Blender Views
To get your character exactly how you want it, you’ll need to learn how to navigate the 3D Viewport. Familiarizing yourself with the 3D Viewport editor is essential to learning how to use Blender efficiently.
These are the common ways you can move around your viewport:
- Orbit (middle mouse button – MMB) rotates the view around a point. The default point is the active object’s origin.
- Pan (“Shift + MMB”) moves the view up, down, left, or right.
- Zoom In or Zoom Out (“Ctrl + MMB or Wheel”) zooms in or out from the current view.
Orthographic views let you edit your character with finer control. The three commonly used orthographic views are front (‘1’ on the number pad), right (‘3’ on the number pad), and top (‘7’ on the number pad).
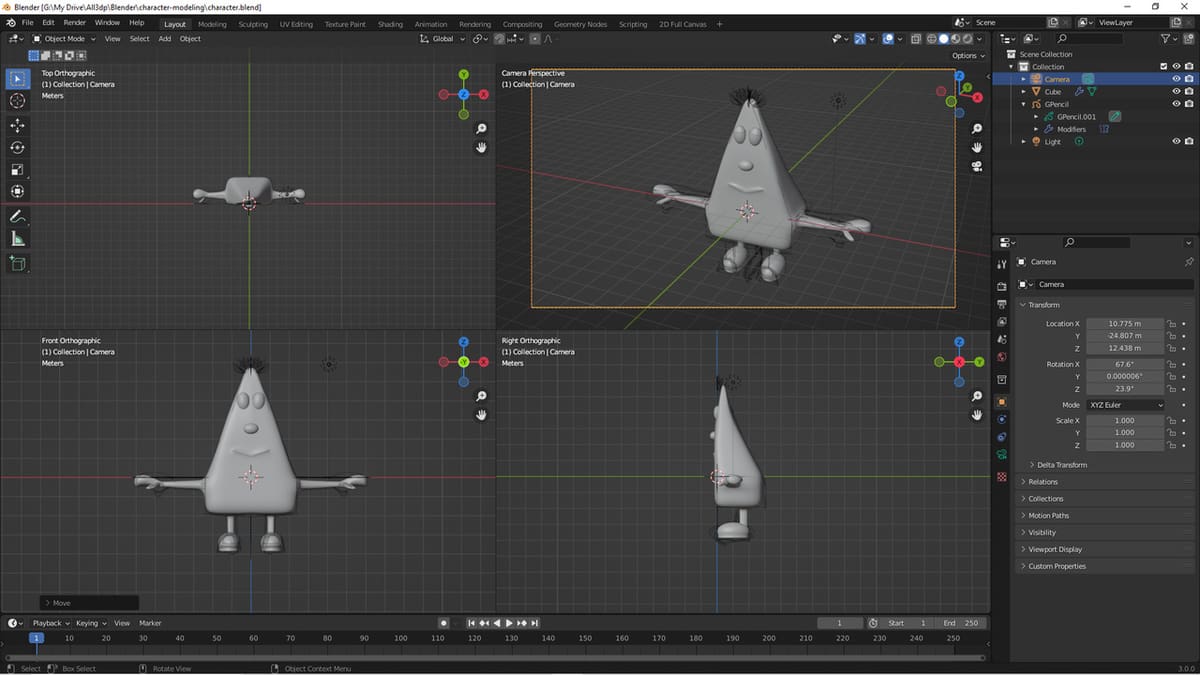
The Quad View shows a user perspective view in which you can move around alongside the front, right, and top orthographic views, letting you edit your character precisely. To toggle the Quad View, press “Ctrl + Alt + Q” or follow these steps:
- In the header menu, click on “View”.
- Click on “Area”.
- Click on “Toggle Quad View”.
The user perspective view lets you look around the viewport while you’re modeling. This is helpful for situations in which you need to edit different parts of your character at an angle. You can use your left, middle, and right mouse buttons (LMB, MMB, and RMB) combined with a key to change the user perspective view.
Outliner Editor
Although we briefly discussed the Outliner editor in the workspaces section, it’s important that we look at it in greater detail. You can toggle the ability to see or render every object of the Blender scene in the Outliner. At the top of the editor, there’s a “Filter” menu on the right side of the search bar. Click to expand this menu, and you’ll see a group of options called “Restriction Toggles”.
If you click on the “Selectable” button (the cursor icon) under Restriction Toggles, you can also restrict which objects can be selected. This is helpful when you know you don’t want any changes made to an object, but you still want to see it in the viewport.
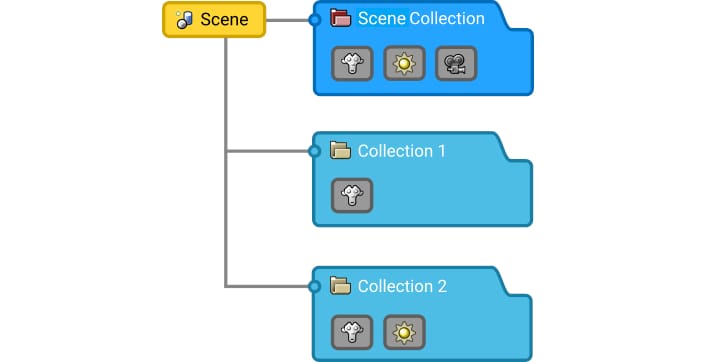
Collections are another element of this editor, and they make it easier to logically organize the components of a scene. You can also toggle the ability to see, render, or select all the objects in a collection by clicking on the buttons on the right side of the collection name.
We recommend that you use descriptive names for your collections as well as the objects you add. To rename items, you can simply hover over the item in the Outliner, double-click, then type the new name. Press the Enter key once you’re all done.
Areas
Each one of the editors represents an area of the Blender window. At certain points, you might find that you need more areas than the four editors on the screen. Having multiple areas is especially useful when you need to see one editor alongside another editor (e.g. the UV editor and the 3D viewport while working on textures).
For this tutorial, we’ll often open the Properties editor as a new area in order to access various modifiers. Splitting the screen is pretty simple:
- Hover over the gap between the editors. You should see a double arrow replace your cursor.
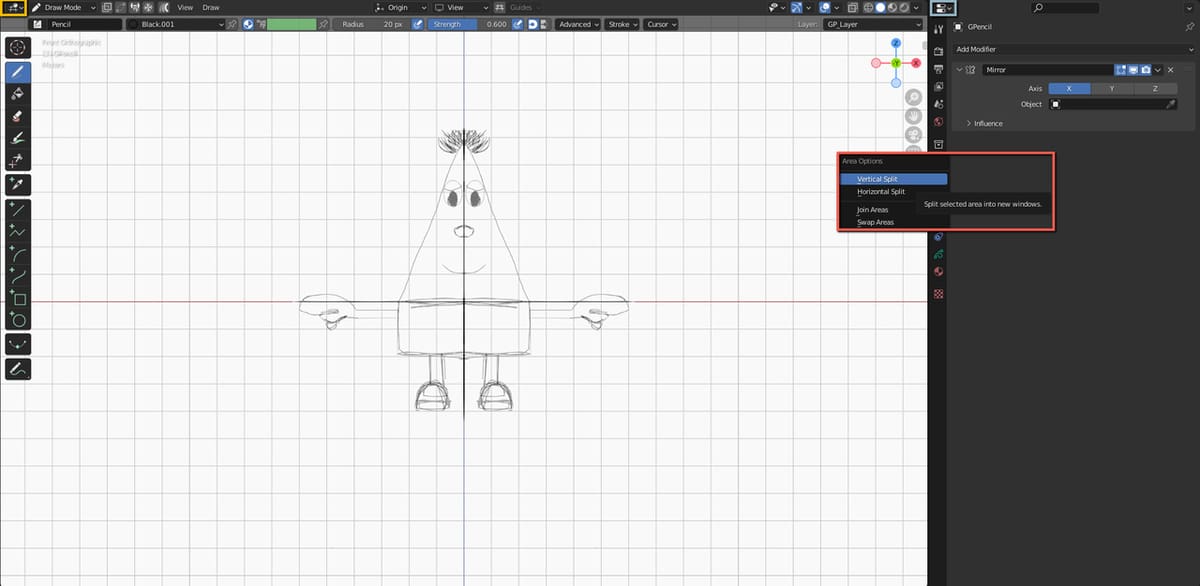
- Right-click and select “Vertical Split” or “Horizontal Split”, and you’ll see an indicator that shows where the split will occur.
- Hover your mouse over the area where you want the split to happen, then either left-click to accept or right-click to dismiss the split.
Alternatively, you can hover over any corner until you see a crosshair replace your cursor. Left-click and drag towards the direction you want the split to occur.
To join areas, hover over the gap between the editors, right-click and select “Join Areas”. One area will become darker than the other one. The darker area will disappear. You can change which area will disappear by hovering over it, then left-clicking to accept or right-clicking to dismiss.
Essential Tools & Operations
Now that you have a better understanding of Blender’s UI, it’s time to learn the essential tools and operations we’ll need to create our character. In the next few sections, we’ll give an overview of a few fundamental concepts.
Modes
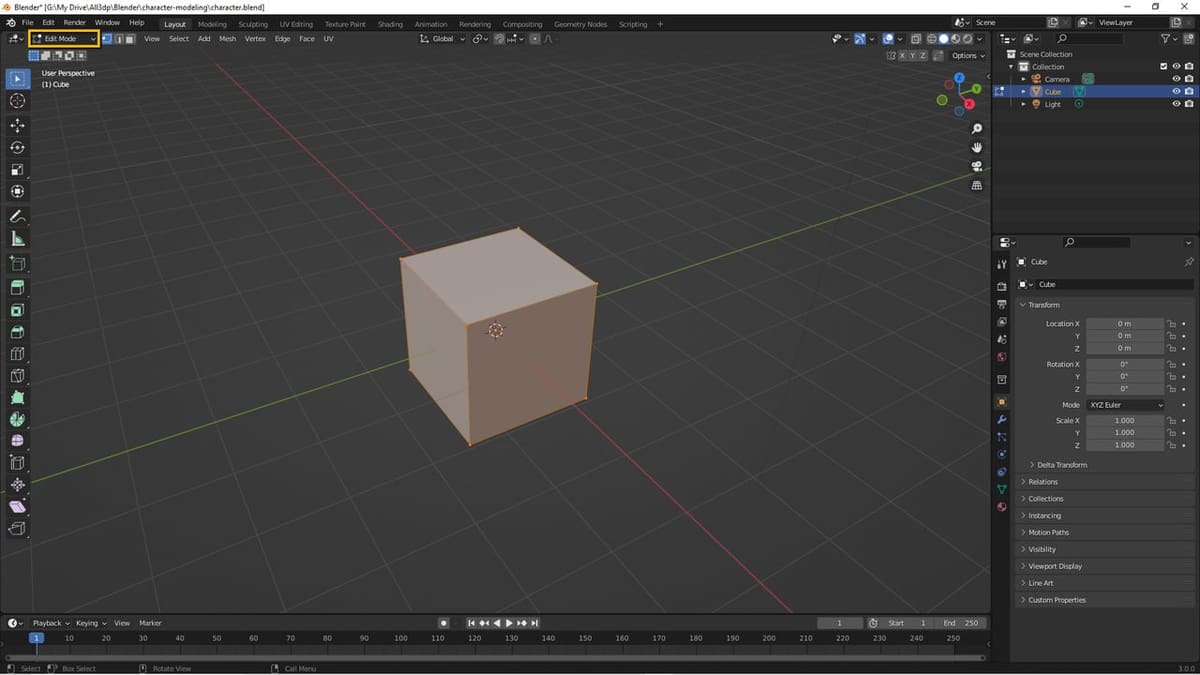
According to Blender, a mode is “designed to edit an aspect of the selected object.” You can see which mode you’re in by looking at the second dropdown in the 3D Viewport’s header (outlined in yellow in the screenshot above). We’ll be using five different modes in this tutorial:
- Object Mode is where you can move (‘G’ on the keyboard), rotate (‘R’), or scale (‘S’) your whole object.
- Edit Mode is where you can use different control points to shape your object. When you edit the shape of your object, you’re actually changing the mesh. The mesh is simply the collection of vertices, lines, and faces that make up an object. You can switch between this mode and the others by pressing the Tab key.
- Particle Edit is where you can edit the particle system so that the model looks how you want it to look. You can comb, smooth, add, lengthen, puff, or cut the particles. You can also adjust the weight of influence the object has on the particles.
- Texture Paint is where you can paint your character to make it stand out.
- Pose Mode is where you can pose your character after you rig it.
Vertices, Edges, & Faces

In Edit Mode, the vertices, edges, and faces are the control points you can manipulate to change the shape of your object, and there are three selection modes corresponding to each, giving you different levels of control. Face selection (‘3’ on the keyboard) is broad, but it allows you to select bigger areas at once. Edge selection (‘2’) allows you to select edges for when you don’t want a face to be flat. Vertex selection (‘1’) gives the most control and allows you to move a vertex anywhere.
You can select all by pressing ‘A’ and deselect everything by pressing “Alt + A”. X-ray mode (“Alt + Z”), indicated with a square with a solid border in front of a square with a dotted border, lets you select all the vertices instead of just the visible vertices that the selection tool hovers over.
Subdivision
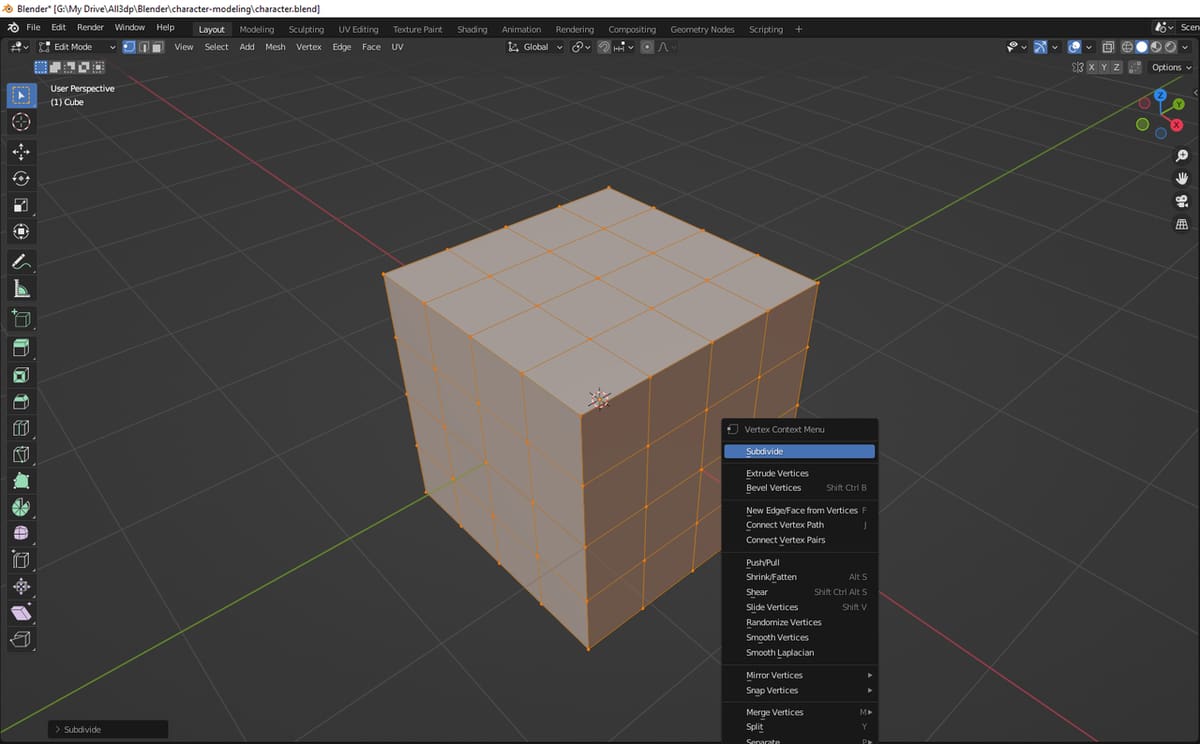
Subdividing your mesh gives it a higher resolution, as it increases the vertex count. More vertices mean you can shape edges with fewer sharp angles. The quality of the model goes up with more subdivisions, but you need to be careful about how many vertices your computer or Blender itself can handle.
You can follow these steps to subdivide your mesh:
- Make sure you’re in Object Mode, then select the object you want to shape.
- Switch to Edit Mode. If your mesh is orange, the vertices are selected. If the mesh is not orange, press ‘A’ to select all the mesh’s vertices.
- Right-click and select “Subdivide”.
Your mesh should now have more vertices than before.
Modifiers
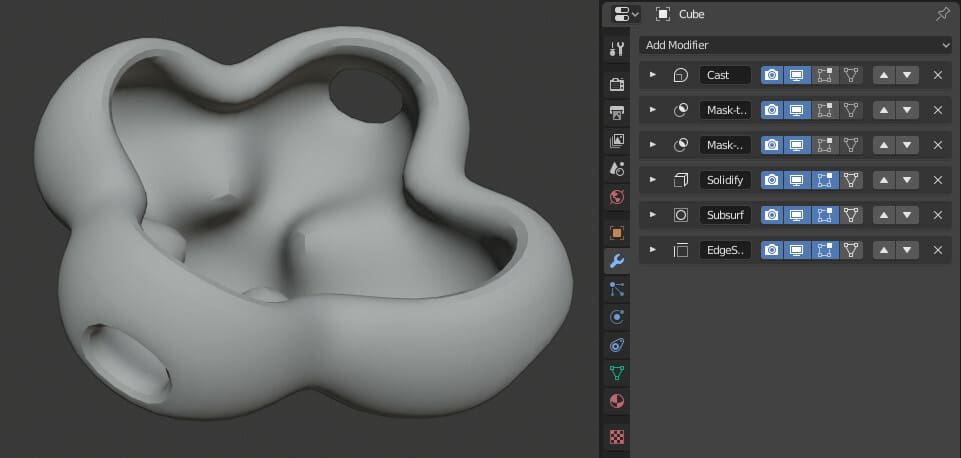
Modifiers are operators that make changing the appearance of geometry much easier than having to manually edit the mesh. They’re non-destructive, meaning that they don’t change the base mesh and can be removed easily if they don’t work as we expected.
The Modifier Properties tab is indicated with a wrench in the Properties editor, and it’s possible to add specific modifiers from the “Add Modifier” dropdown menu. Some helpful modifiers for character modeling that we’ll be using in this tutorial include the following:
- Mirror allows you to symmetrically edit your mesh, 2D drawing, or armature (bones) along any direction. Checking “Clipping” in the Mirror modifier panel prevents vertices from overlapping.
- Subdivision Surface allows you to subdivide a mesh non-destructively, smoothing the shape. You can easily adjust how many subdivisions are displayed in the viewport and how many are actually applied in the render.
- Shrinkwrap makes the shape of one object follow another object’s shape.
- Solidify gives thickness to an object’s surface.
Another non-destructive technique that we’ll use is Shade Smooth. It’s not one of the options that can be added on the Modifier Properties tab but rather from the header in Edit Mode. You can apply Shade Smooth to a model by clicking “Face” in the 3D Viewport header, then selecting “Shade Smooth”.
Transformations
Transformations in Blender happen in Object Mode and Edit Mode. In Object Mode, you move, rotate, or scale whole objects. In Edit Mode, you move, rotate, or scale the mesh or parts of the mesh.
It’s important to note that the object origin doesn’t move with the mesh when the mesh is translated. When an object is translated (moved), rotated, or scaled, the object origin is the reference point by default. Per Blender, the “location of this point determines where the object is located in 3D space.” A yellow dot in the 3D viewport represents the active object’s origin.
To edit even more precisely while in Edit Mode, you can press ‘X’, ‘Y’, or ‘Z’ to transform along those axes respectively. You can also press a number after choosing a direction to transform by that many units in the chosen direction.
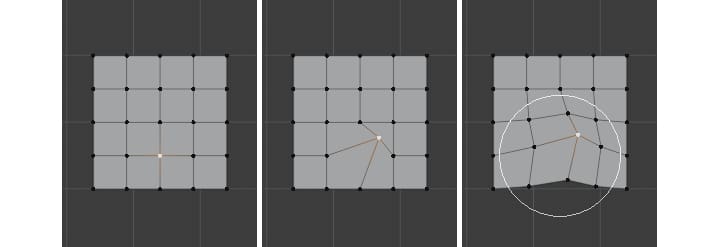
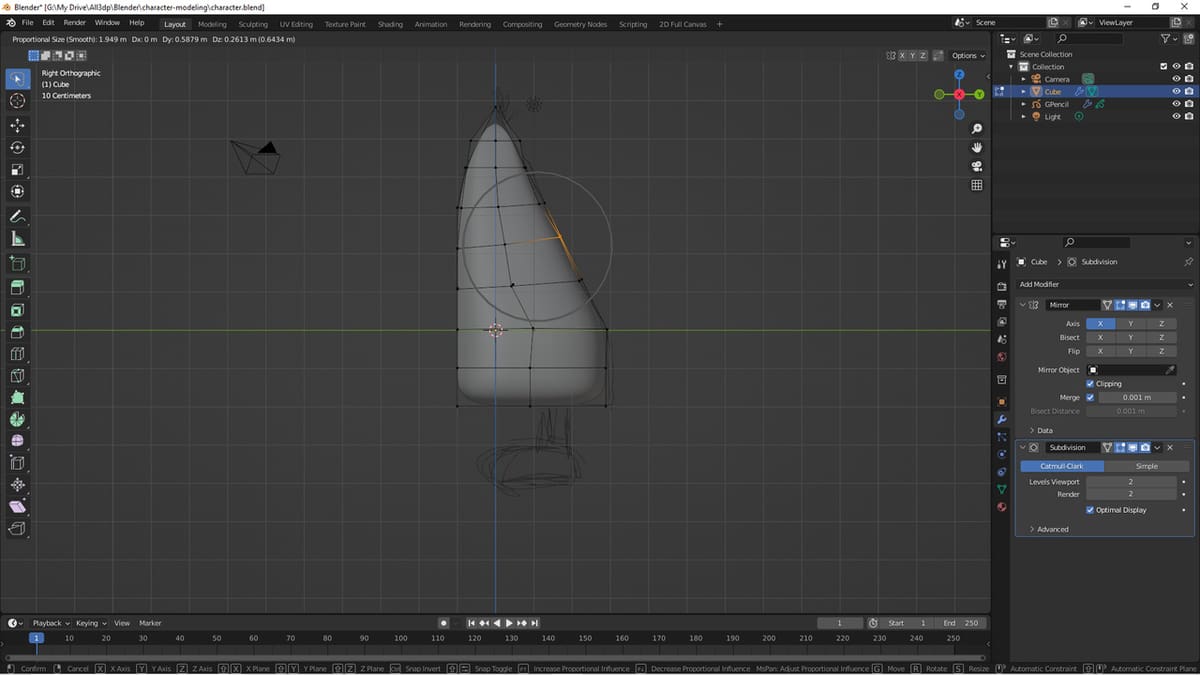
Proportional Editing
Proportional Editing is useful for quickly shaping objects without having to individually select the surrounding vertices, edges, or faces. You can toggle Proportional Editing by pressing ‘O’ while hovering anywhere in the 3D Viewport. Alternatively, you can click the Proportional Editing button (the circle with a dot in the center) on the header.
Proportional Editing affects which parts of an object (when used in Edit Mode) or objects (in Object Mode) are changed when using a transformation (i.e. move, rotate, scale, and so on). When you use a transformation, you’ll see a circle. The circle shows what area the transformation will affect.
You can change the influence by using your mouse wheel or by pressing the “PgUp” or “PgDn” keys. You can then left-click to apply the change or right-click to dismiss it. You can also change the shape of the transformation by selecting the Falloff type in the dropdown next to the Proportional Editing button on the header.
Other Useful Tools
Grease Pencil
Grease Pencil is a tool that allows you to draw in 3D space. It was introduced as a tool that combines 2D and 3D art, but we’ll only be using it to create our reference image. We recommend using a drawing tablet to make drawing easier.
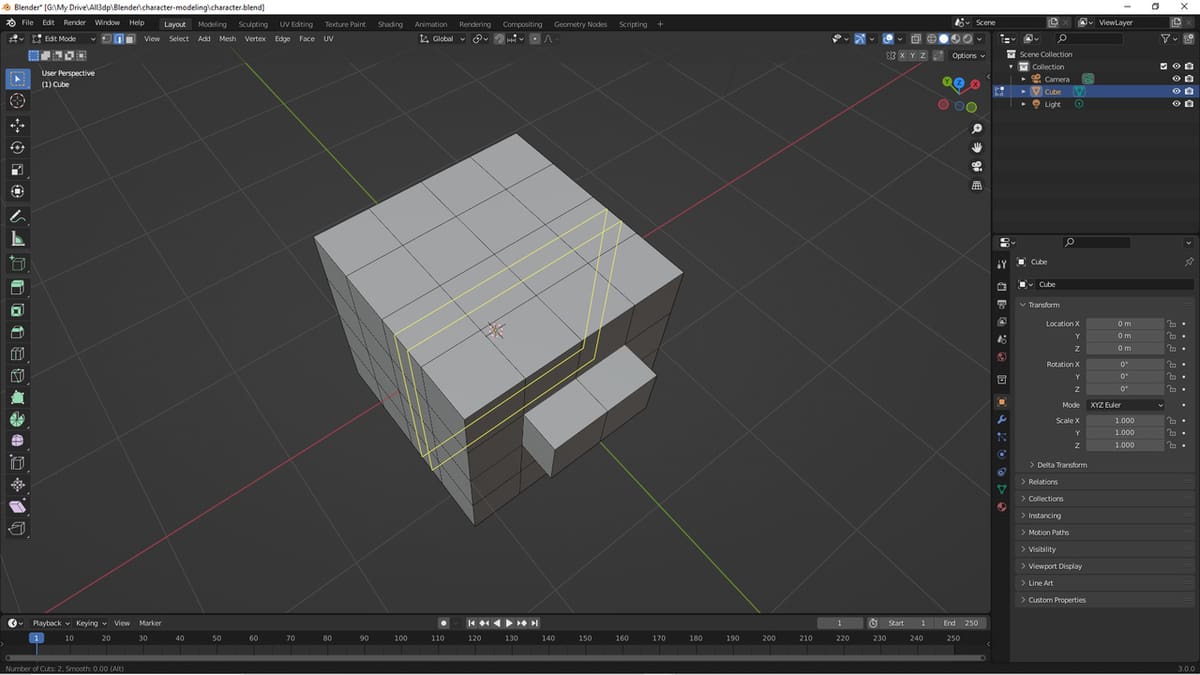
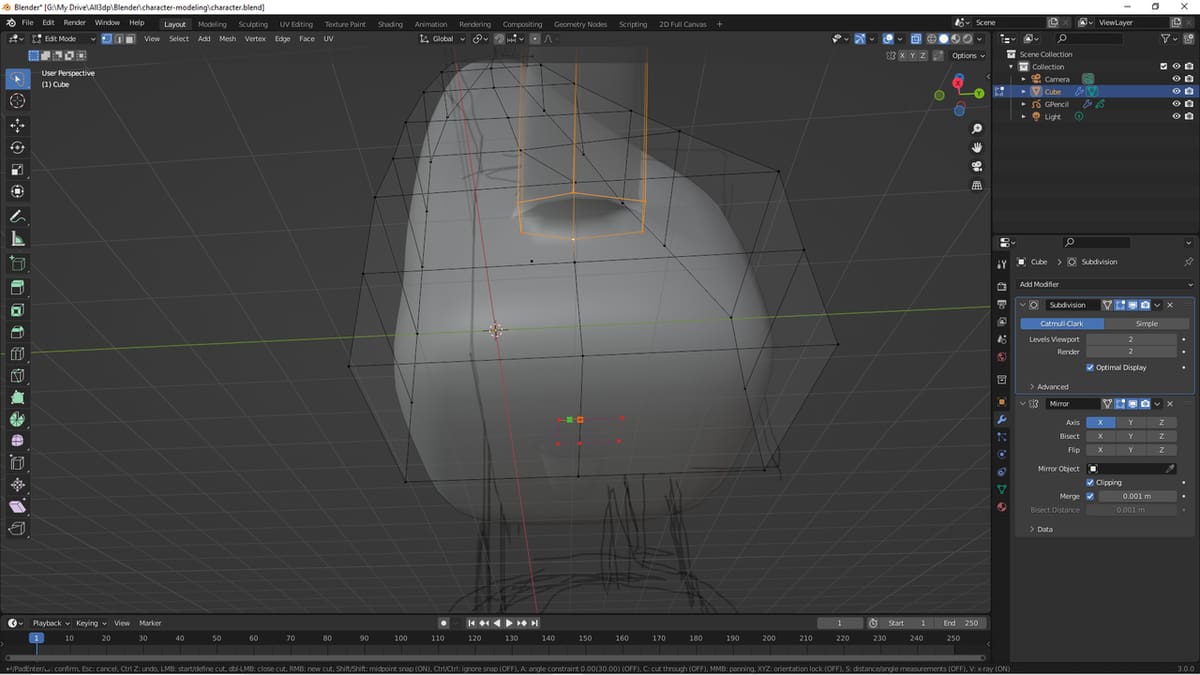
Loop Cut & Knife Tools
The Loop Cut tool adds new edge loops, which increases how detailed part of the mesh will be. For this tutorial, we’ll be using the tool to create clean geometry where the object changes shape. The Knife tool subdivides the faces it’s used on, which also increases how detailed those sections of the mesh will be. We’ll be using the tool to cut out the shape of the character’s limbs.
Using the tools is a bit involved, so we’ll describe the steps here. Feel free to refer back to this section as you’re following along in the tutorial below.
Here are the steps to create loop cuts:
- Make sure you’re in Edit Mode.
- Click the “Edge select” icon on the header.
- Right-click and select “Loop Cut and Slide” (or “Ctrl + R” ).
- Hover over the mesh, and you’ll see the visualized loop cuts.
- Move your MMB wheel up to increase the number of loop cuts or wheel down to decrease them.
- Left-click to create the number of loop cuts or right-click to dismiss.
- Slide the cuts where you want them and left-click to accept the position.
Follow these steps to use the Knife tool:
- Make sure you’re in Edit Mode.
- Click the “Edge select” icon on the header.
- Right-click and select “Knife Topology Tool” (or press ‘K’).
- Draw where you want to make new edges.
- Press the Enter key to create the edges or the Esc key to dismiss the visualized cuts.
Extrusion
Extruding is the process of pressing something in or pushing something out. We’ll use extrusions to pull out the shapes of our character’s limbs. In Edit Mode, you can select vertices, edges, or faces (as seen in the screenshot above) to extrude them by pressing ‘E’. You can quickly block out your character by extruding faces.
Joining Geometry
Joining geometry in Blender is useful for combining objects that were edited separately (the eyes and head, for example). It’s as simple as selecting two or more objects while in Object Mode, right-clicking while hovering anywhere in the 3D Viewport, and selecting “Join” (or “Ctrl + J”).
Tutorial
Now that we’ve looked at the essential tools and operations we’ll need to create our character, it’s time to get our ideas into Blender. We’ve broken this tutorial into the following parts:
- Part A: Preparing Your Drawing
- Part B: Shaping Geometry
- Part C: Creating Clothing
- Part D: Creating Hair
- Part E: Texturing Your Model
- Part F: Rigging Your Model for Animation
- Part G: Rendering or 3D Printing Your Model
Throughout the tutorial, we’ll reference the elements of the UI, tools, and operations we discussed in the preceding sections. Please refer back to those sections as needed.
Let’s dive in!
Part A: Preparing Your Drawing
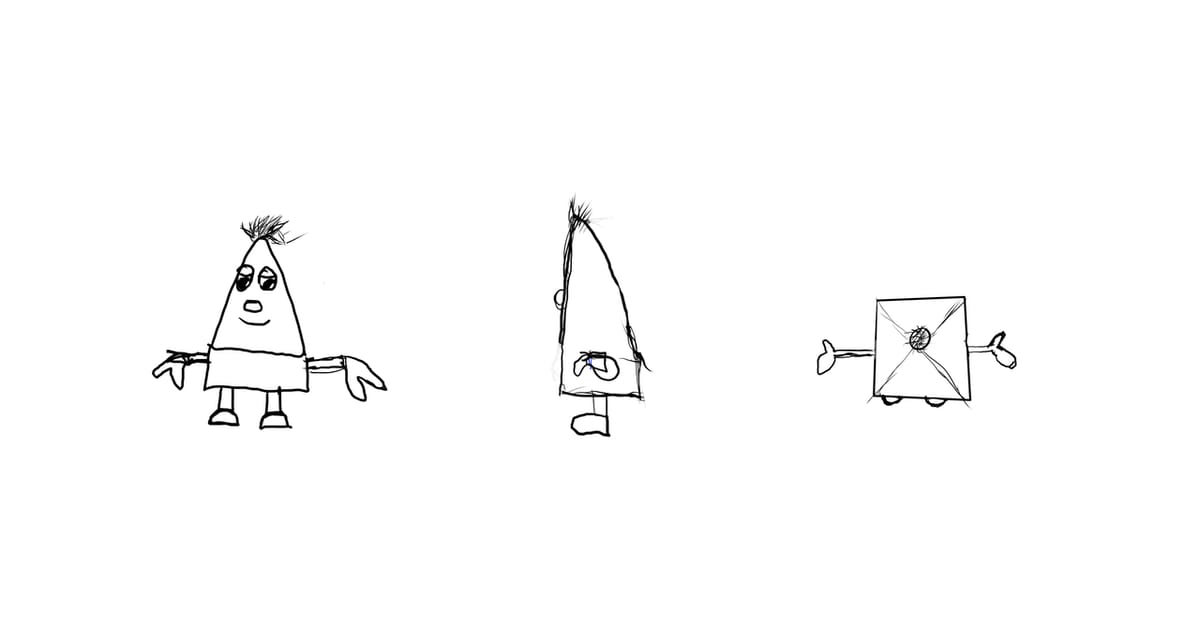
It’s a good idea to have reference images to look at while you’re modeling in Blender. This way, you can focus on modeling instead of trying to figure out what the final character should resemble. You don’t have to have every detail down, but it’s a good idea to have a rough idea that you can use to block out the character.
We’ll look at two methods we can use to set up our reference images. You can use the first method if you have reference images saved to your computer but not imported into Blender. You can use the second method if you want to draw your references directly in Blender.
Importing Images
To import images in Blender, you can follow these steps:
- Delete the default cube by pressing the ‘X‘ key, then selecting “Delete”.
- Press the ‘1’ key on the number pad to go to the front view.
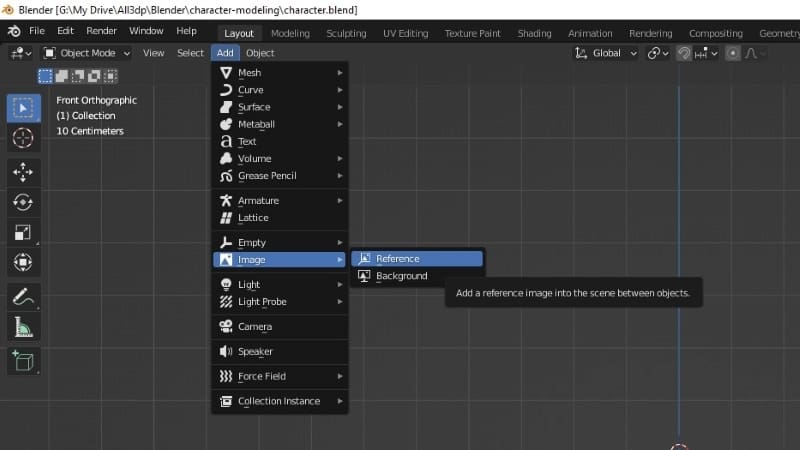
- Go to the left-side of the header menu and select “Add”. Alternatively, you can press “Shift + A” to bring up the Add menu.
- Hover over “Image” and click on “Reference”.
- Select the reference image that corresponds to the front view of your model, then click on “Load Reference Image”.
- Adjust the reference image so that it’s properly aligned in the center of the front view by using transformations. (Refer to the Transformations section above.)
- Repeat steps 1 through 6 for the other views you have reference images for. Remember that you can press ‘3’ and ‘7’ on the number pad for the right and top orthographic views respectively. (Refer to the 3D Viewport Editor section above.)
Creating Reference Images
To create your reference images in Blender, you can follow these steps:
- Delete the default cube by pressing the ‘X’ key, then selecting “Delete”.
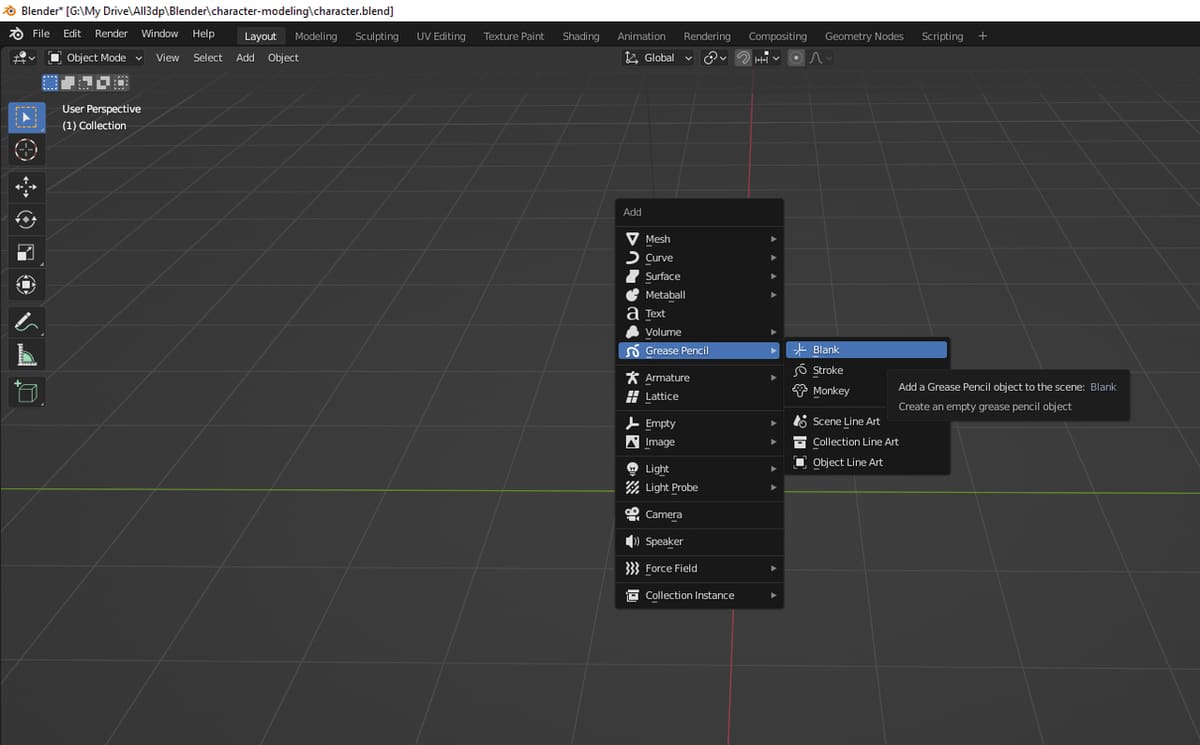
- Ensure that you’re in Object Mode, then add a blank grease pencil object by pressing “Shift + A”, hovering over “Grease Pencil”, then selecting “Blank”.
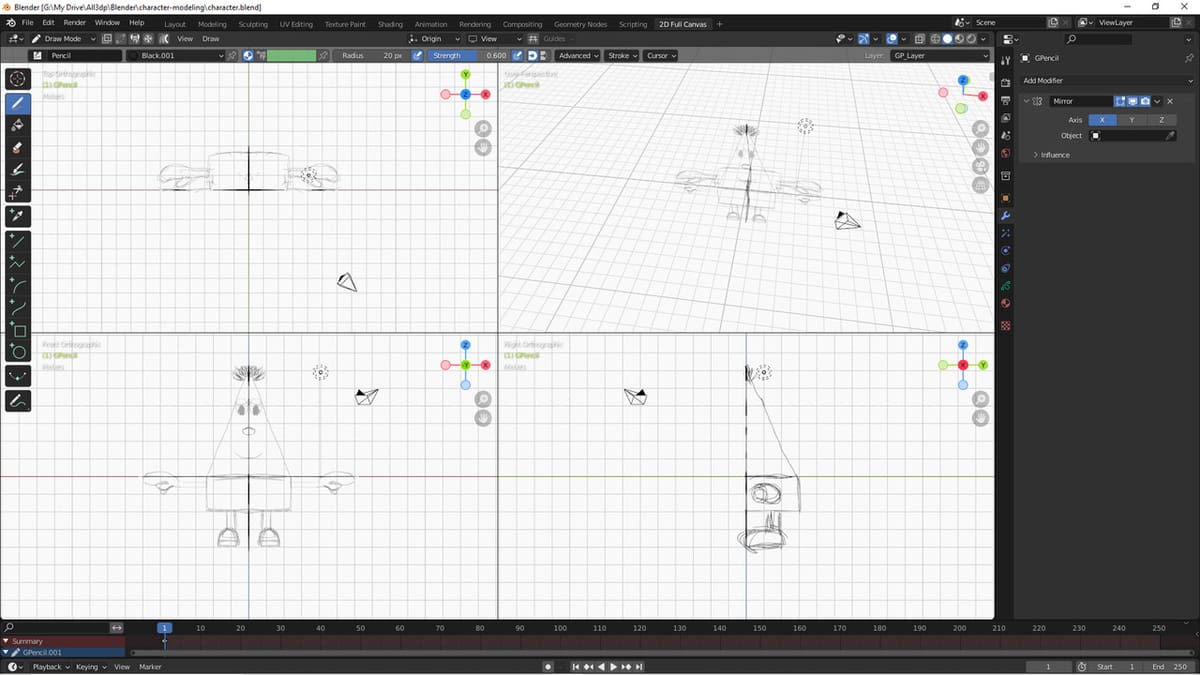
- Click on the ‘+’ button after the workspace options on the Topbar, select “2D Animation”, then “2D Full Canvas”.
Because many characters are symmetrical, adding a Mirror modifier can help save time.
- Create a new area to the right of the 3D Viewport using one of the methods described in the Areas section above.
- Open the Properties editor in the new area. (Refer to the Layout Workspace section above.)
- Go to the “Modifier Properties” tab on the left side of the editor.
- Click the “Add Modifier” dropdown menu, then select “Mirror”. (Refer to the Modifiers section above.)
- Make sure ‘X’ is selected for the “Axis” option to mirror the X-axis.
Now that the Mirror modifier is activated, let’s get to drawing!
- Go to the front view or the view you want to draw a reference image for.
- Use the Draw tool, or any of the other tools on the Toolbar, to draw the front view of your reference image.
- Once you’re done, switch to the other orthographic views and create sketches for the corresponding views.
With our reference images in Blender, it’s time to start modeling our character. We’ll be using the reference images we created with the Grease Pencil object.
Part B: Shaping Geometry
An important concept to keep in mind while modeling your character is to keep clean mesh topology. Simply put, topology is how the vertices, lines, and faces of the mesh are put together. Clean meshes look simple and easy to review in Edit Mode. Good topology keeps the way light interacts with the object consistent and predictable. It also makes the object deform well during animation.
Another good modeling tip is that it’s a good idea to model in the T-pose for characters with arms. This pose lets you edit the mesh more easily because you can edit the torso without accidentally editing the arms and vice versa. It’s the default position when working with poses.
With these tips in mind, let’s begin modeling your character:
- Switch back to the Layout workspace by clicking on the “Layout” button on the Topbar. You should see your Grease Pencil images.
- Add a cube by pressing “Shift + A”, hovering over “Mesh”, then selecting “Cube”.
- In Edit Mode, subdivide the cube by pressing ‘A’ to select all of the vertices, right-clicking, then selecting “Subdivide”. (Refer to the Vertices, Edges, & Faces section above.)
- Make sure the X-ray mode is on.
- Delete the right side of the cube.
- Add a “Mirror” modifier in the Modifier Properties tab of the Properties editor, and make sure “Clipping” is ticked.
- Then add a “Subdivision Surface” modifier.
- Go to Object Mode, right-click, then select “Shade Smooth”.
- Go back to “Edit Mode”. Block out the shape of your character using a combination of Proportional Editing, transformations, and extrusions. Refer to the Transformations section and the Other Useful Tools section above for reference. While doing so, make sure that the mesh’s edges follow the reference images.
- Use the Knife tool to cut out the shape of the limbs. (Refer to the Other Useful Tools section above.)
- Extrude the faces of the limbs and tweak the vertices to match the reference images.
- Create loop cuts to make the edges of the limbs smoother and more defined. (Refer to the Other Useful Tools section above.)
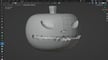
Some parts of your character may be easier to edit from primitives, which are essentially basic objects used as the starting point for modeling. In our example, we’ll use spheres to model the character’s shoes.
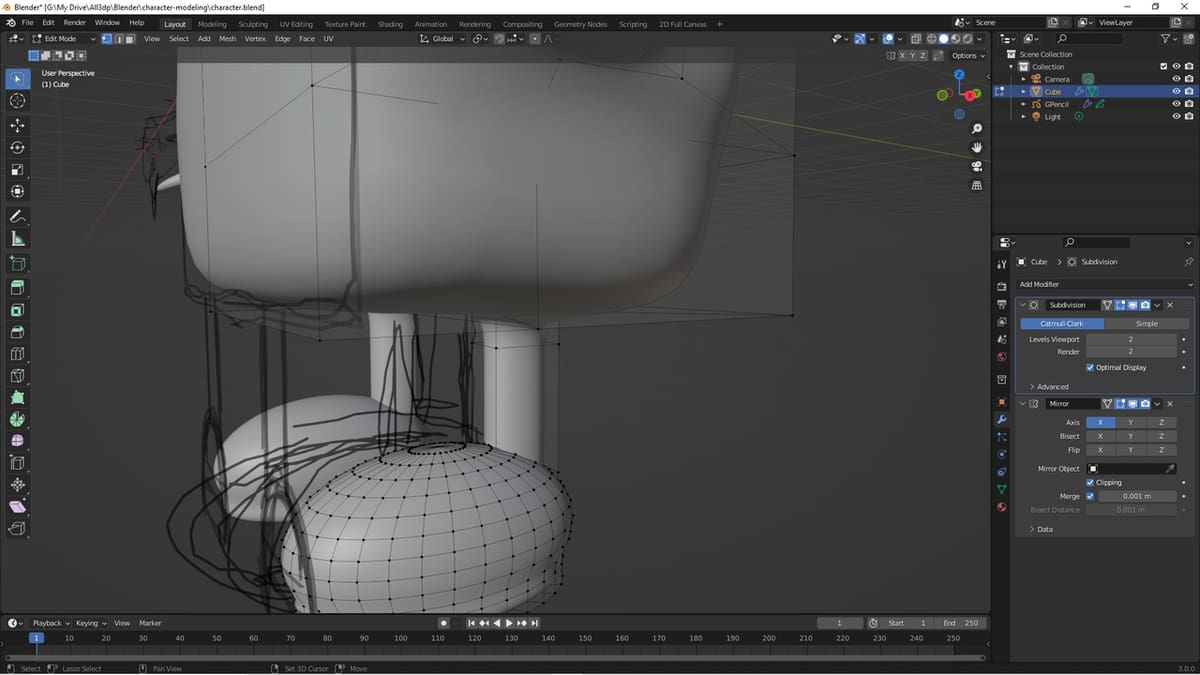
- Ensure you’re in Edit Mode.
- Left-click and hold the “Add Cube” icon on the Toolbar, then select “Add UV Sphere”.
- Add the shape, then use transformations to modify the shape to align with your design.
- After you’re done, join it to the object (i.e. your character) by pressing “Ctrl + J”.
Once the new shape is part of the object, the modifiers you applied to your character model will also affect the new shape. You should see that the shape is mirrored on the other side.
Add final touches to your model until you’re content with the design of your character. It’s okay if you realize that you don’t want to follow your references to a T. It’s your character, so have fun with it!
You should now have the base shape of your character. We’ll build upon this base to create the clothes. Before we do that though, let’s organize our project using Collections.
Using Collections
Collections are important in Blender projects because they help keep you organized. The organization will be particularly helpful because you’ll be making clothes as separate objects in the next section. In the Outliner, hide the Grease Pencil object to make the 3D Viewport tidier, then rename your “Cube” to the name of your character.
Part C: Creating Clothing
Alright, let’s give this naked guy some clothes:
- Make sure you’re in Edit Mode.
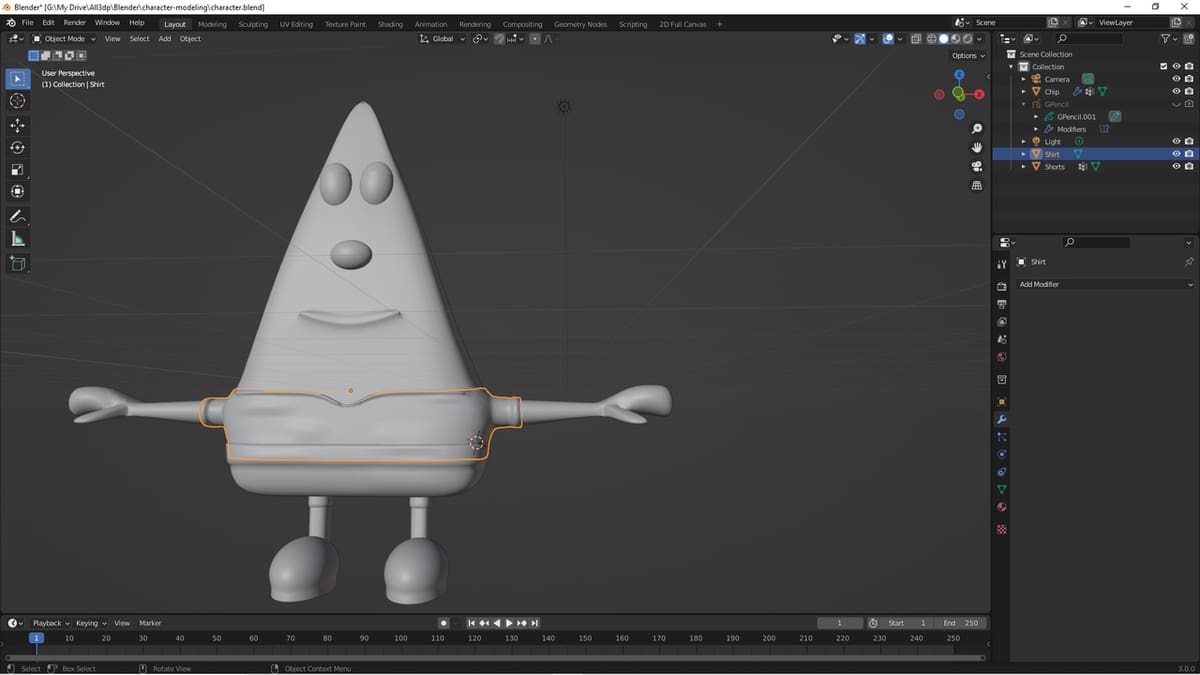
- Select a section of the character that you want to be covered with clothes (e.g. torso), duplicate the selection, then separate this selection from the object by pressing ‘P’.
- Go to Object Mode, then select the new object.
- In the Outliner, rename the object “Clothing”.
- Add a “Shrinkwrap” modifier in the Modifier Properties tab of the Properties editor, and select the character base object as the “Target”.
- Also, add a “Solidify” modifier to give the selection depth.
- In the Solidify panel, change “Offset” to “1.0” and “Thickness” to at least “0.03 m”.
- Close the Solidify panel by clicking the arrow icon in the upper left-hand corner of the panel, then make sure that the order of the modifiers in the Modifier Properties tab is as follows: “Mirror > Subdivision Surface > Shrinkwrap > Solidify”.
- Edit the clothes to give them character (e.g. cuffs, wrinkles), and make sure that the clothes don’t overlap with the base character.
Part D: Creating Hair
Since our character has hair, we can use the Particle System to quickly create the hair. You can follow these steps:
- Make sure that the base character is the active object.
- Ensure you’re in Edit Mode.
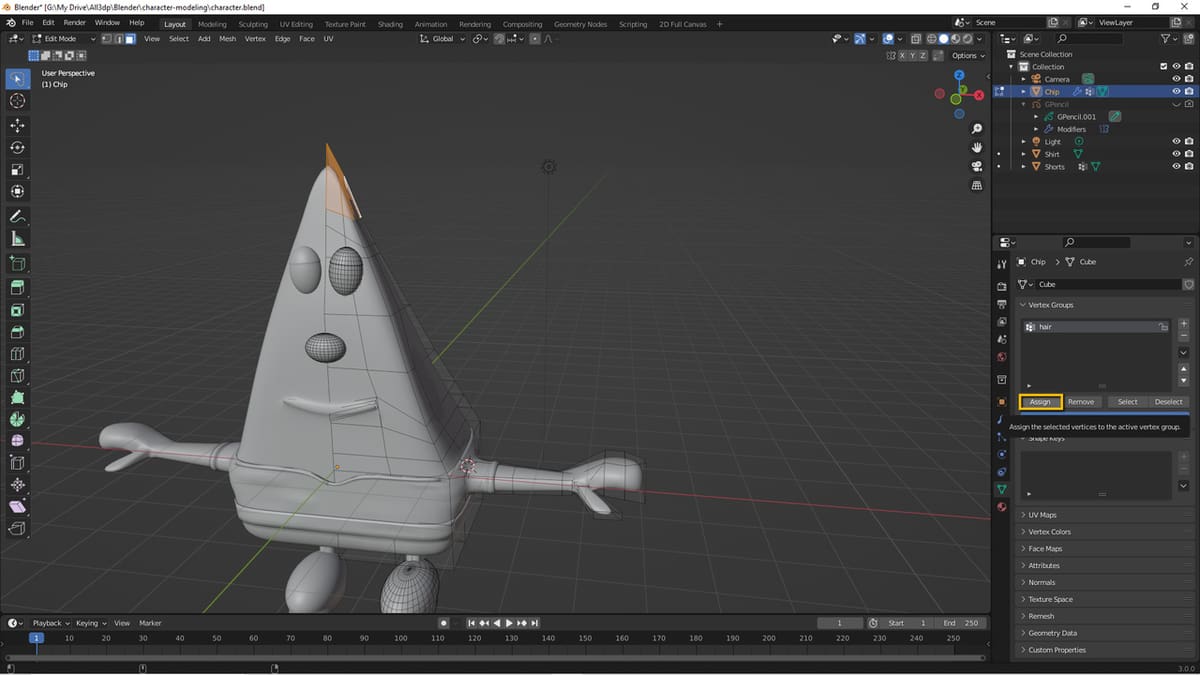
- Go to the Object Data Properties tab on the Properties editor, and create a vertex group by clicking the ‘+’ button on the right side of the “Vertex Groups” panel, selecting the group of vertices that you want the hair to appear on, and clicking on the “Assign” button.
- Rename the vertex group to a more descriptive name by double-clicking on “Group” and typing “Hair”.
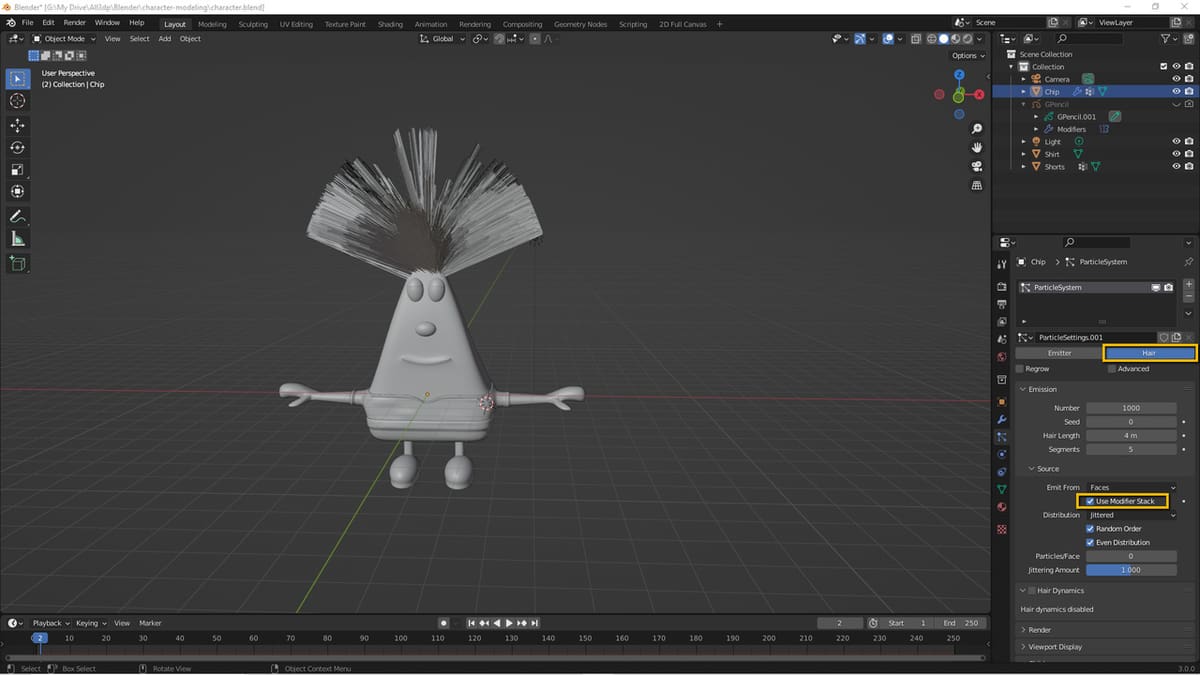
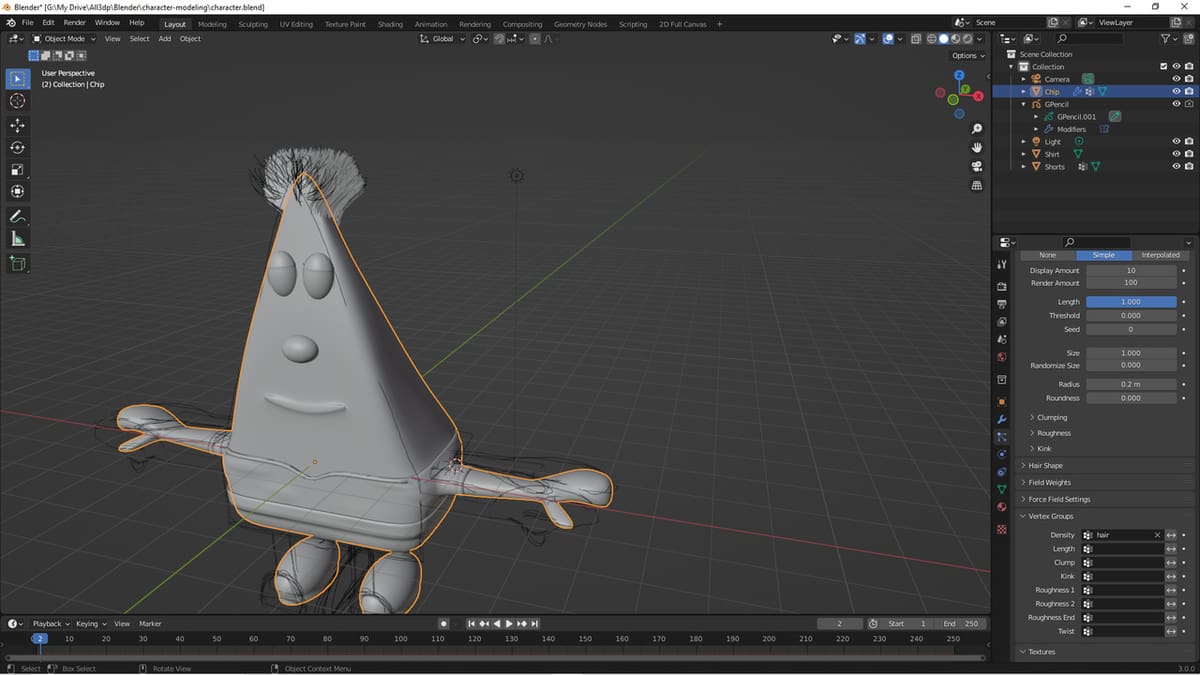
- Go to the Particle Properties tab (indicated with a large dot with three lines and vertices sticking out) and add a “Particle System” by clicking on the ‘+’ button on the right side of the panel.
- Select “Hair” instead of “Emitter” like in the image above.
- Under the Emission panel, expand Source, then check “Use Modifier Stack” to see the hair mirrored.

- Expand the “Children” panel, then select “Simple” to make the hair look fuller.
- Expand “Vertex Groups”, then change the “Density” value to the vertex group you created in step 1 (i.e. the “Hair” vertex group).
- Toggle the visibility of the Grease Pencil object in the Outliner to see how the hair looks in our reference images.
- If needed, select the “Particle Edit” mode from the 3D Viewport’s header to tweak how the hair particles look.
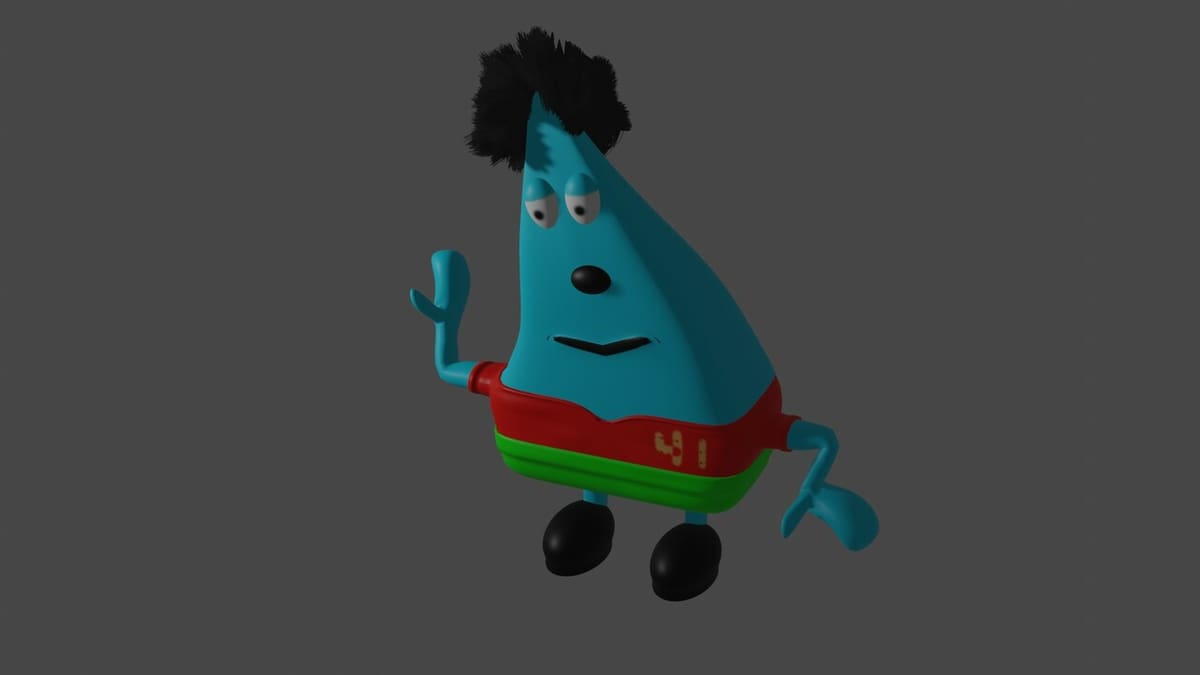
With the hair finished, it’s time to add color to our character.
Part E: Texturing Your Model
We’ll be adding colors to our character to make it stand out in renders. If you’re only going to 3D print your character, you can skip this part.
We recommend using a drawing tablet to get fine control while we’re texture painting. We’ll briefly go through the process, but if you want a more in-depth guide, you can read our article on texture painting.
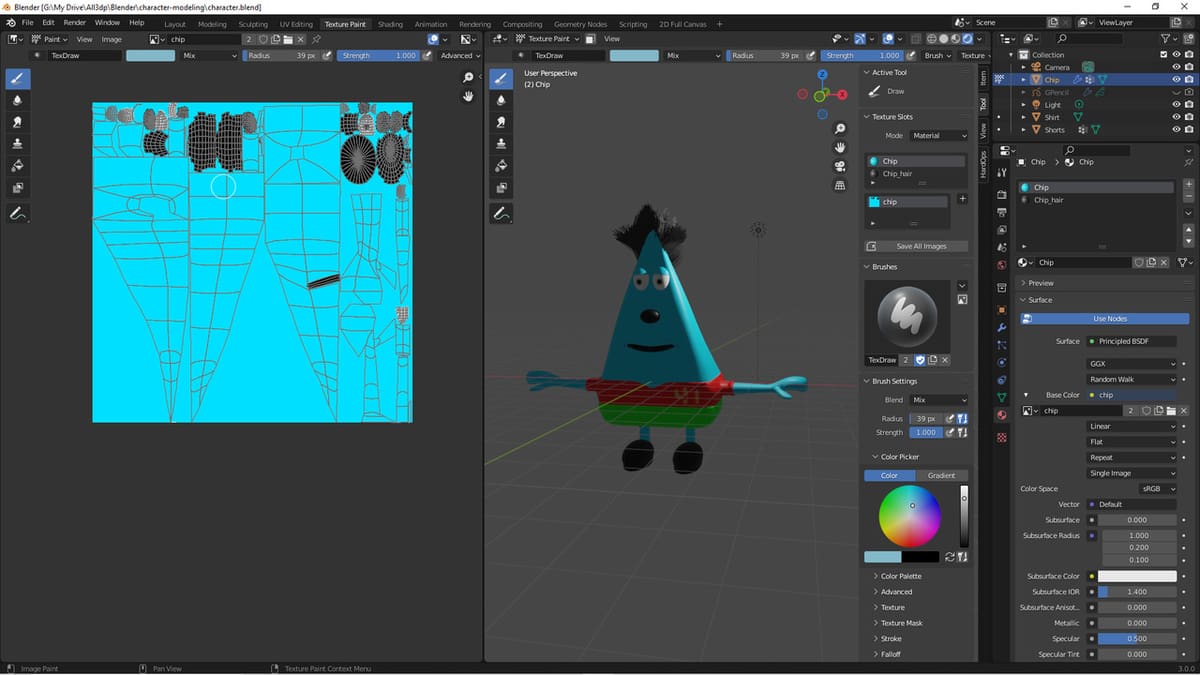
We’ll be painting textures in the Texture Paint workspace. To get started, you can follow these steps:
- Select the object you want to paint. In the Outliner, you can hide the objects you aren’t working on.
- Go to the Material Properties tab on the Properties editor.
- Create a new material for the object if it doesn’t exist by clicking on the “New” button.
- Expand the “Surface” panel, then change the base color of the material by clicking on the yellow dot next to “Base Color”, then selecting “Image Texture”.
- Create a new image texture and give it a descriptive name (e.g. the name of the character). Confirm that you saved it to your computer. Make sure you’re editing this texture in the Image Editor area.
- In Edit Mode, select the whole mesh, press the ‘U’ key, then select “Smart UV Project” to unwrap the object. (Check out this YouTube video about UV unwrapping to learn more.)
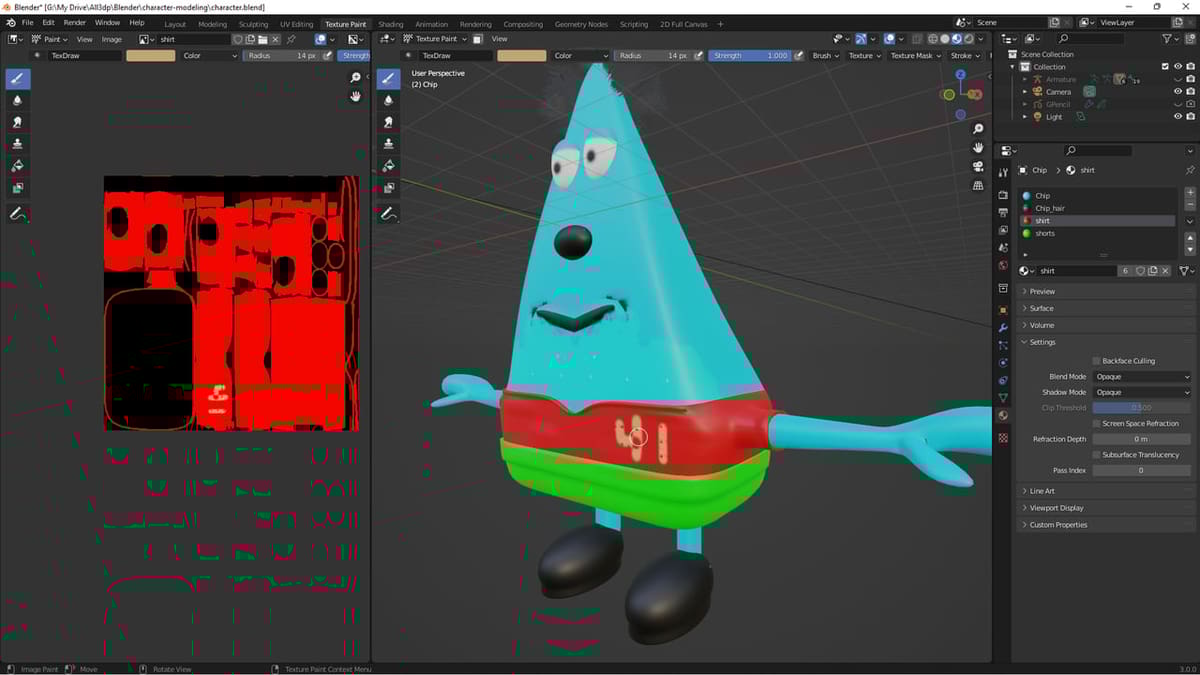
- In the Texture Paint workspace, you can either paint on the image texture in the Image Editor area or paint directly on the object itself in the 3D viewport if you’re in Texture Paint mode.
Painting Tips
Texture painting in Blender becomes easier the more you do it. However, we understand that it can be overwhelming for beginners to Blender. We have a few tips to make it easier.
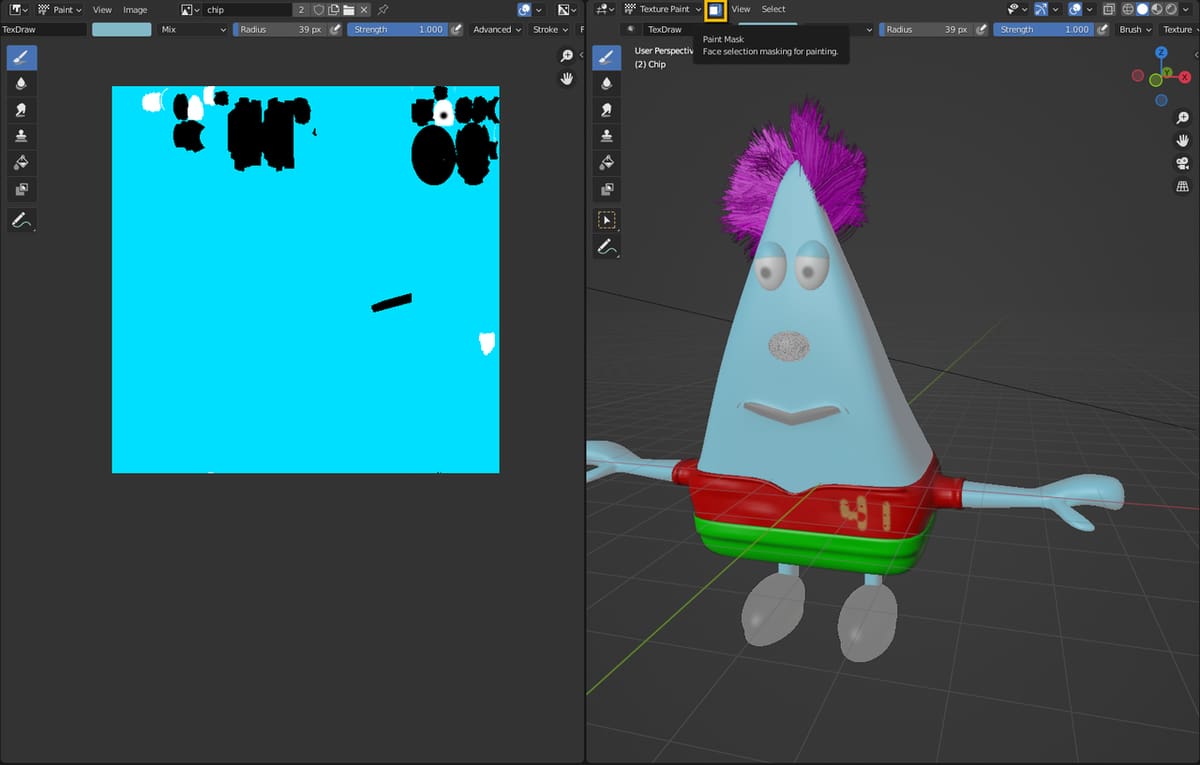
You may want to enable Paint Mask to prevent painting on areas that shouldn’t be painted. To enable it, click on the “Paint Mask” button right next to the mode dropdown menu on the 3D Viewport’s header as shown in the screenshot above. In Edit Mode, select the areas you want to paint, then go back to Texture Paint mode and continue painting.
The Mirror modifier for the object will mirror the texture paint. Alternatively, enable the Mirror options under the Symmetry panel on the Sidebar. (Refer to the 3D Viewport section above.)
After you’ve painted your object to your heart’s content, make sure to save the image texture:
- Go to the Image Editor area of the Texture Paint workspace.
- Click on the “Image” button on the right side of the mode dropdown menu.
- Selecting “Save”.
Alternatively, you can hover over the texture image and press “Alt + S”. For any other objects you’d like to texture paint, simply repeat steps 1 through 7 above.
Coloring the Hair
You may have noticed that you can’t texture paint the Particle System hair. Instead, you’ll need to do the following:
- Create a new material for the hair in the Material Properties tab of the Properties editor.
- Go to the Particle Properties tab, then expand the “Render” panel.
- Choose the newly created material from the “Material” dropdown menu.
Now that you’ve added color to your character, it’s time to rig and pose your character.
Part F: Rigging Your Model for Animation
To pose your character, you need to rig it. For the first three steps, check out our article about rigging a character for more detailed instructions.
After you’ve done that, proceed as follows:
- In Object Mode, add an armature object to the scene by pressing “Shift + A”, hovering over “Armature”, then selecting “Single Bone”.
- Create more bones that correspond to the movable parts of the character.
- Parent the object to the Armature with automatic weights by selecting all the objects that are part of the character, then the Armature (make sure you select the Armature last), and pressing “Ctrl + P”.
- Select “with Automatic Weights” in the context menu that pops up. Doing this will create an Armature modifier for our character.
- Select the base character.
- Go to the Modifier Properties tab on the Properties editor, then drag the “Armature” modifier panel to the top. Repeat this step for all of the objects that you parented to the Armature.
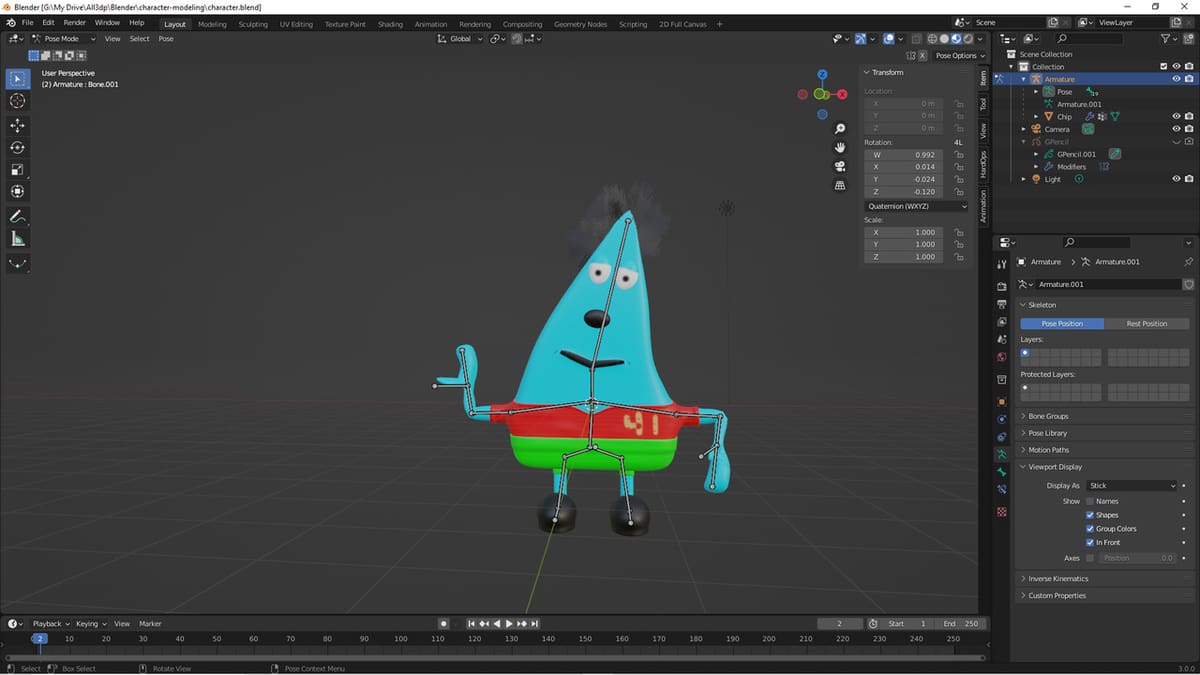
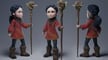
Your object will now deform with the bones in Pose Mode, which is where you create poses for your character to use in renders or animation. You must save the pose to a keyframe, and for each new pose, you must select a new keyframe in the Timeline.
Here are the steps to select the Armature and pose the character:
- Ensure that you’re in Pose Mode in the 3D viewport. If you’re in another mode, you can press “Ctrl + Tab” to switch to Pose Mode.
- Select the bone you want to transform and rotate or move the bone. Repeat this step for all the bones you need to transform to get the desired pose.
- Select all the bones by pressing ‘A’.
- Save the bone transformations to a keyframe by pressing ‘I’ and selecting “Location & Rotation” in the context menu.
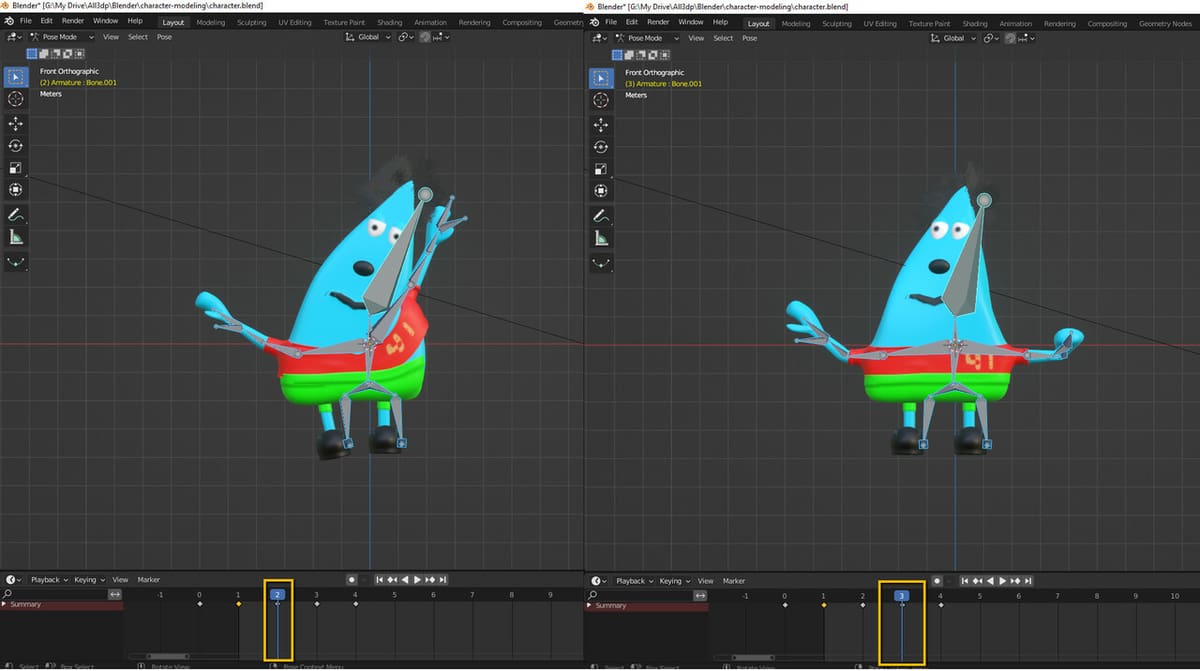
If you want to create multiple poses, you can continue as follows:
- Move to another frame in the Timeline by hovering over the 3D Viewport or the Timeline and pressing the left or right arrow key on your keyboard.
- (Optional) To reset to the default pose, select all the bones, click on the “Pose” button on the 3D Viewport’s header, hover over “Clear Transform”, and select “All”.
- Create another pose and save it to a keyframe as described in steps 1 through 4 above.
- Repeat this process to create as many different poses as you’d like.
Part G: Rendering or 3D Printing Your Model
The final step is rendering your character. It’s pretty easy. Click on the “Render” menu on the Topbar, then select “Render Image”. Alternatively, you can simply press the F12 key.
Since Blender can export to STL and OBJ formats, you can also easily 3D print your character. Simply export the model, and open it with your preferred slicing software.
Before you exit Blender, make sure to save your work!
License: The text of "Blender: Character Modeling – Simply Explained" by All3DP is licensed under a Creative Commons Attribution 4.0 International License.