Blender: Background Image – Simply Explained

Blender's background image is useful for modeling, designing, and more. Find out how to set it up and how it differs from reference images.
In Blender, reference images can be vital, especially for new artists. Figuring out how to create and manipulate faces can be hard enough, without worrying about the anatomy of the model itself.
Thankfully, Blender has a nifty feature called “Background Images”. By directly importing an image into your workspace, you can easily make it your reference. The image only appears when your view is aligned with the axes and doesn’t appear in your final render.
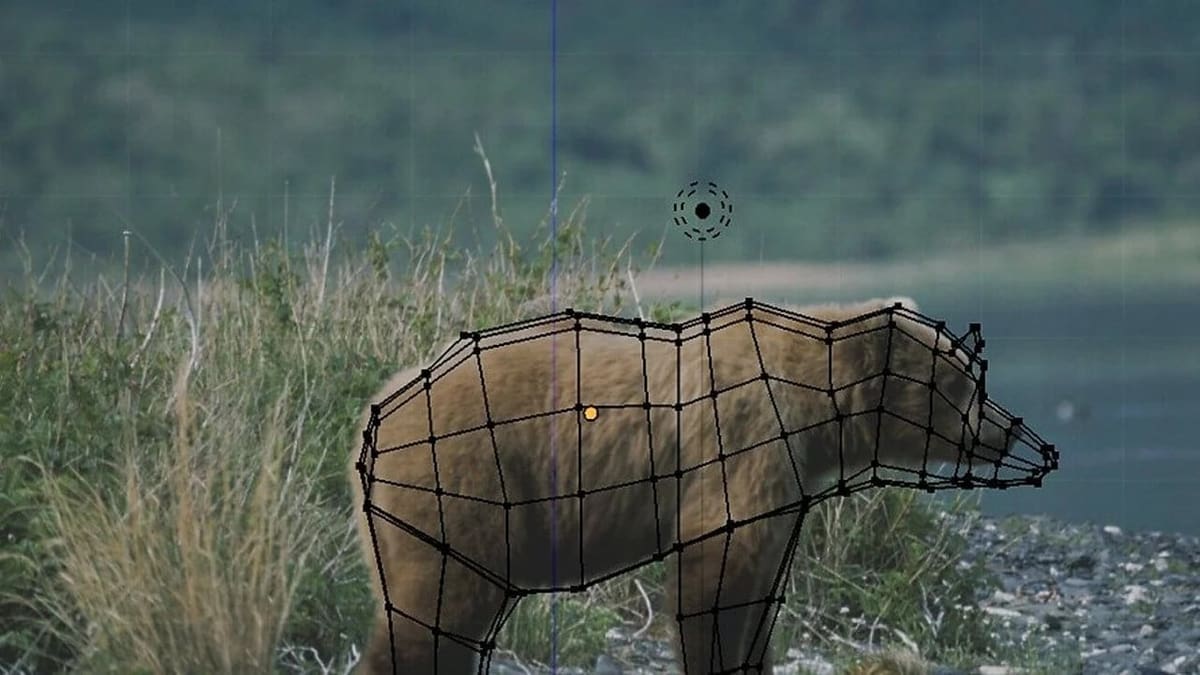
For example, if you want to model something from real life, you can simply take a picture of it. Using that as your reference, building up the model’s foundation and fine-tuning its details can be much easier. You can also include a background image to guide you when painting a model.
That said, you may have also heard about “Reference” images…
In this article, we’re going to break it down so you can figure out which one works best for you and your needs.
Adding Images
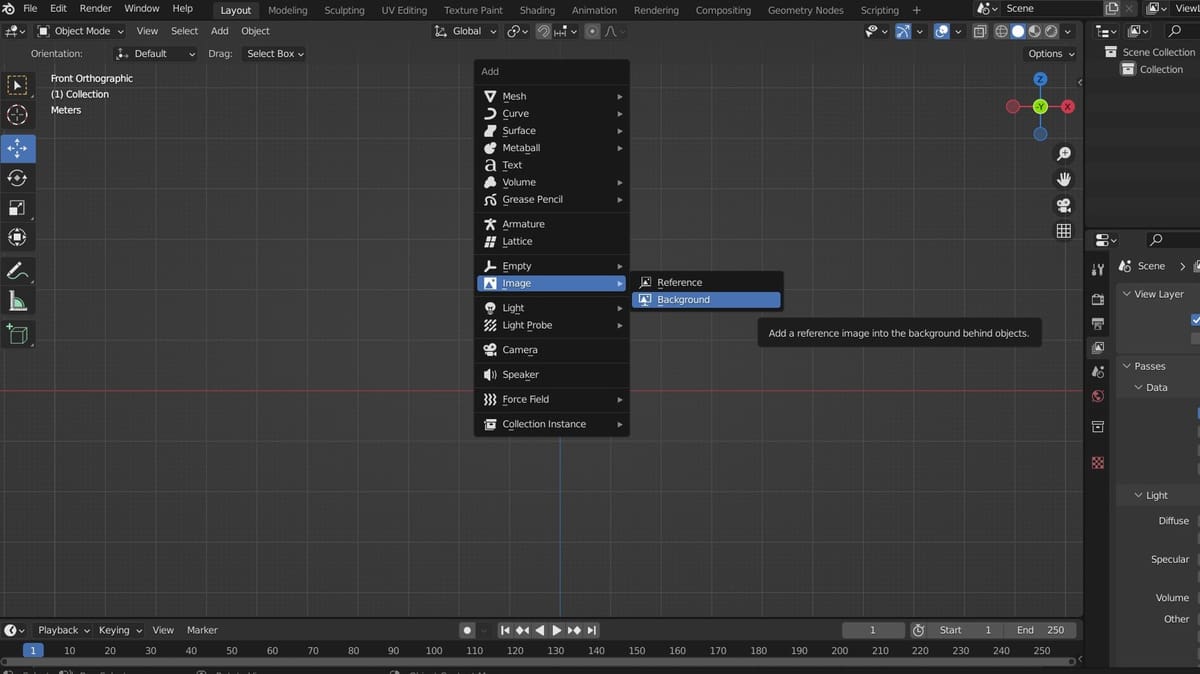
Adding images in Blender is as easy as it gets: In “Object Mode”, simply press “Shift + A”, and, on the dropdown menu that pops up, select “Image”.
Alternatively, you can find the dropdown menu under “Add”, at the top of the 3D Viewport.
You may notice that you can choose between adding either a “Background” image or a “Reference” image. What’s the difference between these two? Let’s find out!
Background vs. Reference Images
Both images will behave similarly when working with them in Blender, but they have some key differences that you may want to take note of:
- Background images are transparent by default, meaning that you can have objects behind them and still be able to see both the objects and the image. Also, they’re only visible from the front; you won’t see anything from behind.
- Reference images are opaque and are visible from both sides.
When to Use Which?
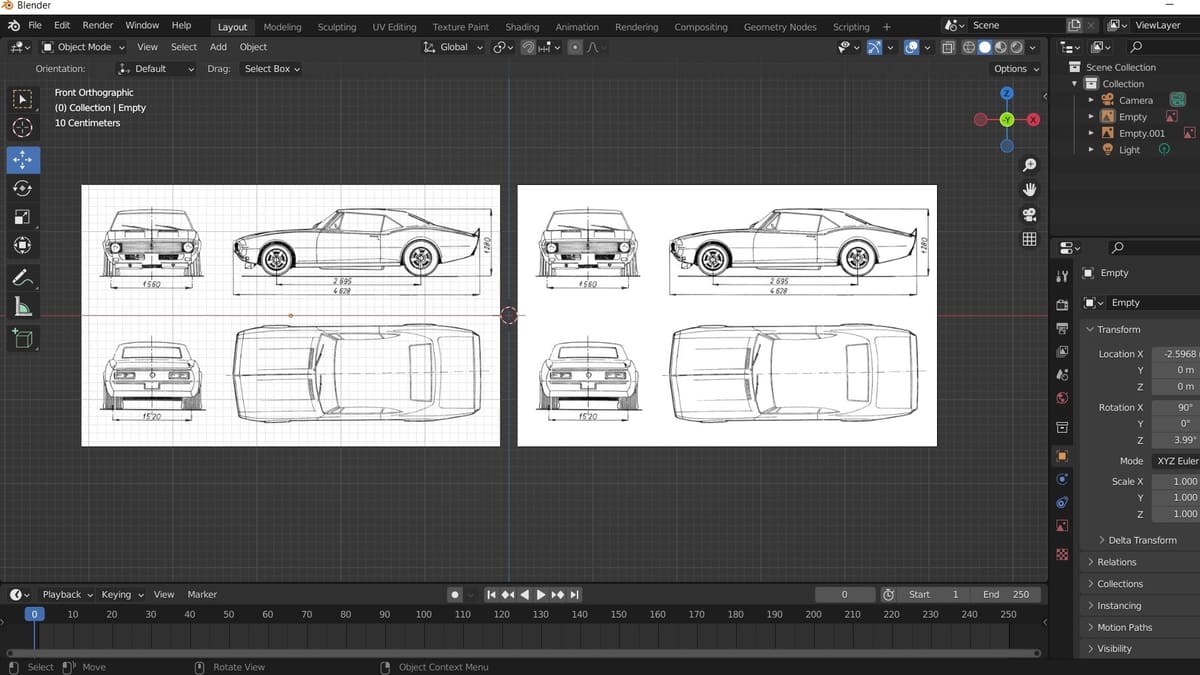
Their names already give a big hint as to which situations are best suited for each type of image. If you’re modeling based on 2D images, adding reference images will help you greatly. You can also make use of the Quad View (Ctrl + Alt + Q) once the images are set up for a clearer idea of the model as it’s coming along.
On the other hand, if you want to make a transparent render with a background image that you’ll use later in another editing program, you can use a background image to see how the 3D assets would look in a particular scene.
Additionally, background images are only visible by default when in Camera Perspective view (Numpad 0), or when in the preset Orthographic (not User Perspective) views: Front/Back (Numpad 1), Right/Left (Numpad 3), and Top/Bottom (Numpad 7). So, if you anticipate wanting to move away from these, then opting for a reference image may be the way to go. (Note that this can be changed under the “Object Data Properties” in the Properties Editor.)
Final Touches: Adjusting Image Properties
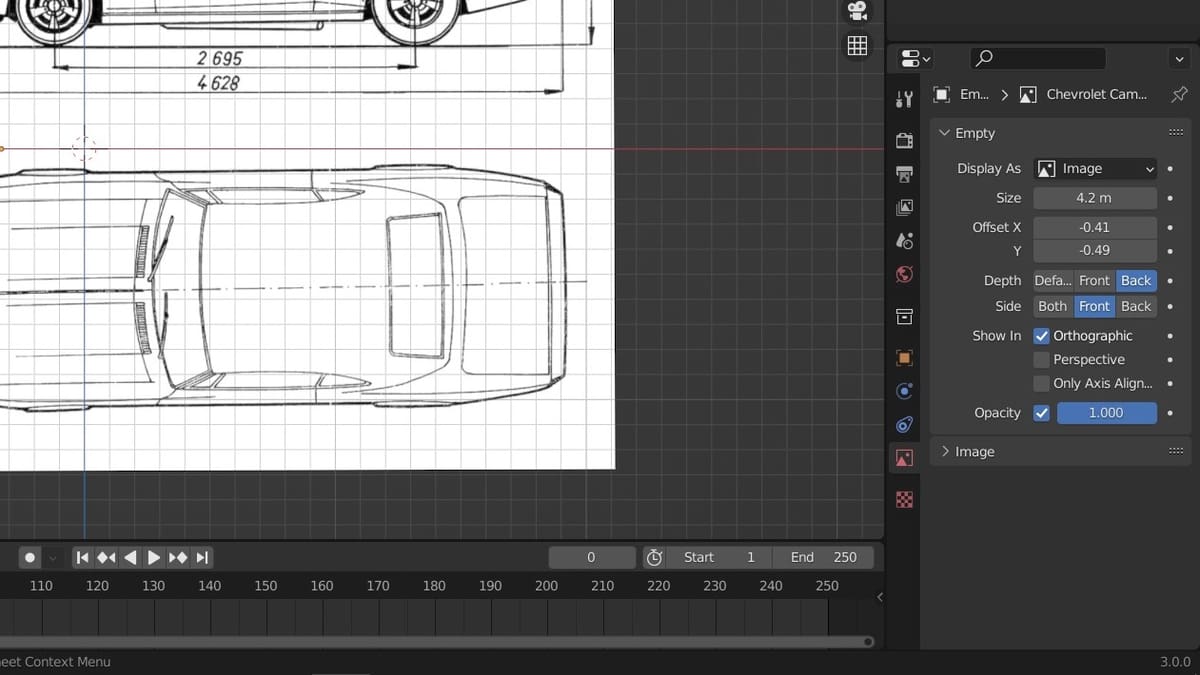
Lastly, you’ll want to know how to tweak the basic settings of either background or reference images. (Don’t worry, it’s the same process.) To do this, select the image, and then, in the menu in the Properties Editor, on the right, click on the “Object Data Properties” icon to see some display options:
- Size: How big the image is
- Offset X, Y: How far from the center you want to move the image
- Depth: Whether the image is displayed in front of or behind other objects
- Opacity: How transparent you want the image to be
And that’s how you add and tweak background images in Blender!
License: The text of "Blender: Background Image – Simply Explained" by All3DP is licensed under a Creative Commons Attribution 4.0 International License.