Blender is free, open-source software that’s great for beginners as well as more experienced users to create animations, video game models, CGI, and real-world model presentations.
Meanwhile, After Effects is post-production editing software from Adobe. Using it, artists and production professionals can generate stunning visuals for videos. It has the capabilities to add special effects, shadows, and more to your video productions.
This makes it a great partner for Blender to fine-tune aspects of your creations, as although Blender already incorporates a built-in compositor, it is not as advanced as what After Effects offers.
That said, unlike Blender, Adobe programs aren’t free to download and use. After Effects is purchased as a subscription for about $21 a month. There is, however, a 30-day free trial, so you’ve got time to decide if the program is right for you.
Now that we know a bit about these two programs, let’s look at the advantages of using After Effects together with Blender and how this can be accomplished.

Why Export to After Effects
Blender has become increasingly popular thanks to its multi-purpose nature, as well as being free and open source. This allows us to save up a ton of money if we need to purchase specific software for each of the features that Blender offers for free.
The downside to this is that despite Blender being a Jack of all trades, it usually falls behind its paid competitors. This does vary, and can be mitigated via the use of add-ons, but generally speaking, you’ll be looking at using other specialized software for more professional workloads.
This is why combining After Effects with Blender can be a great way to take your creations to the next level, and we will be guiding you through the main ways of exporting from Blender into After Effects. These are:
- Exporting .glb (GL Transmission Format Binary file) files from Blender and into After Effects
- Using Blender’s community-made add-on to export .jsx (JavaScript) files into After Effects
- Rendering transparent layers and importing them into After Effects
You’ll find that each method has its own purpose and advantages over the others, so make sure to read through to the end to find the most suitable for you!
The other option is to use a paid add-on such as Element 3D, which provides a larger variety of options and features when working with 3D models in After Effects. Starting at a base price of $200 and going up to $600 with extra features, it’s definitely not a cheap option, but depending on your workflow and needs, it may be worth the price.
Method 1: Exporting .glb into After Effects
The first method involves exporting a 3D model as a .glb file, which will be imported into After Effects later on.
To do this, we will simply follow these steps:
- In Blender, select the 3D model you want to export, then navigate to “File > Export > glTF 2.0 (.glb/.gltf)”.
- Choose a folder you want to save your file in, name your file, and click on the Export button.
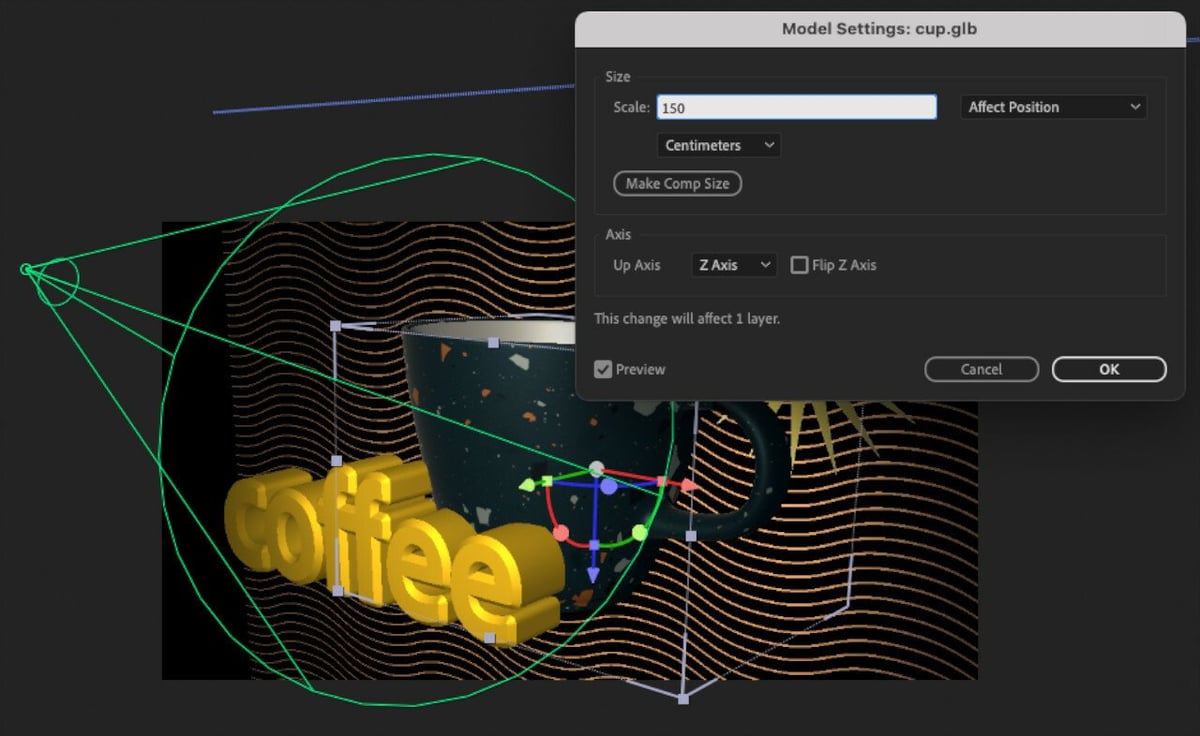
- Open up After Effects (this will have to be the beta version because it’s the only one that supports 3D models), then import the .gltf file by navigating to “File > Import > File…” and then selecting said file.
Unlike the other two methods, this is the only way in which you can export the object as a 3D model and still have it recognized by After Effects. The downside to this is that, as of the time of writing, After Effects does not natively support 3D models outside its beta version.
The good news is that if you already own After Effects, installing the beta version is free and can be done so in a matter of seconds.
This beta version of After Effects currently only supports three types of 3D models: .obj, .glb, and .glft, with the latter two being different versions of the same file type. We suggest exporting your files as .glb or .gltf, as these usually have the best results when importing into After Effects.
Another important thing to note is that animations are currently not supported when importing any 3D files into After Effects, so you will only be able to export static meshes. On the upside, textures are supported.
Method 2: Exporting .jsx into After Effects
This second method includes the use of a free add-on that allows you to export cameras and objects’ positions as nulls. Unlike the previous method, you aren’t actually exporting any 3D models, just the coordinates. This means that it is only really suitable for exporting cameras or other animated objects’ positions.
First, we need to install the add-on. To do this, we will:
- Download the add-on from its GitHub repository.
- Inside Blender, open the add-ons menu by navigating to “Edit > Preferences > Add-ons”.
- Click on the “Install” button located on the top of the add-ons menu and select the .py file we just downloaded.
- Once installed, enable the add-on by clicking on its checkbox and close the add-ons window.
With the add-on installed, we will now proceed to export a 3D camera.
- Select the camera you want to export. Note that it doesn’t matter whether it is a fixed or an animated camera.
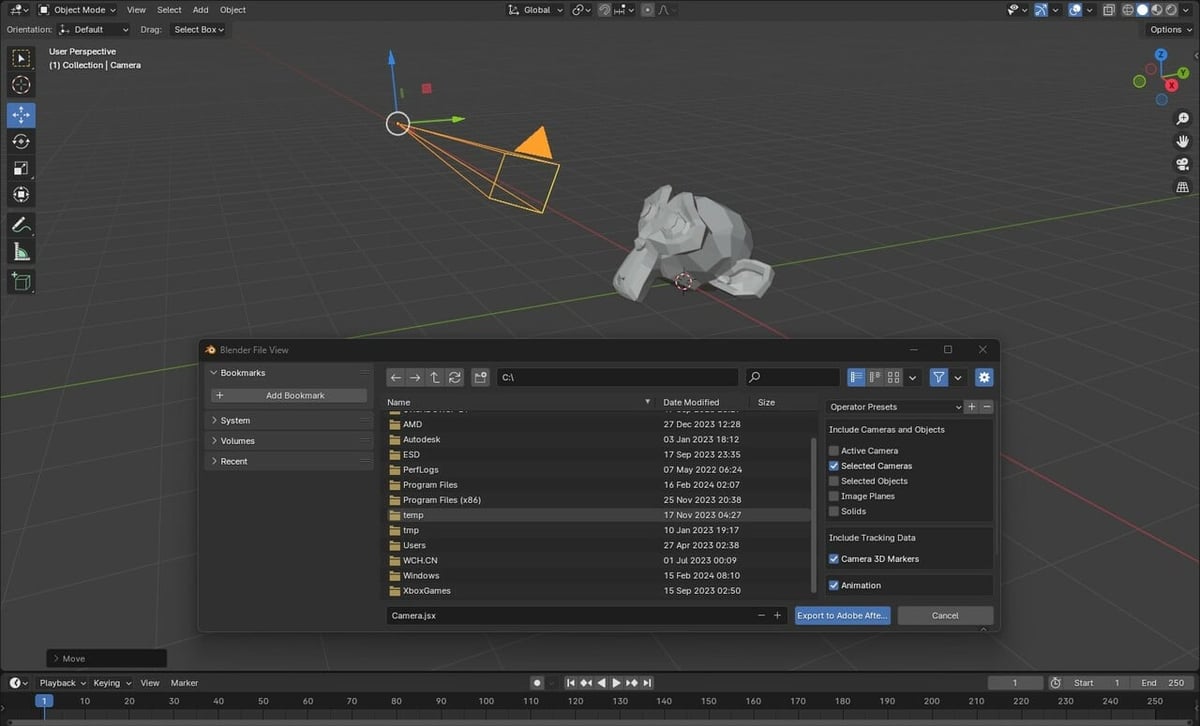
- Go to “File > Export > Adobe After Effects”.
- Make sure you only check the “Selected camera” checkbox when exporting, as well as “Animation” if it’s animated.
- Choose the location you want to export your file to, give it a name, and click on “Export”.
Lastly, we will have to import our camera into After Effects.
- Open up the beta version of After Effects.
- Create a sample project, then navigate to “File > Scripts > Run Script File…”.
- Select the camera file you just exported.
You should now see the camera has been imported. Other assets will show up as null objects inside your project. In case you want to learn more about Null objects inside After Effects, there’s a handy video that talks about them to help you get your bearings!
Method 3: Exporting Transparent Render Layers
The final method involves using the more traditional approach of rendering your scene or animation into an image or movie file, which can then be imported into After Effects and edited accordingly.
Whether you’re exporting a single frame, an image sequence, or a movie file, it will be important to enable transparency inside the film menu so that empty areas won’t be rendered and instead be transparent. To do this, we will:
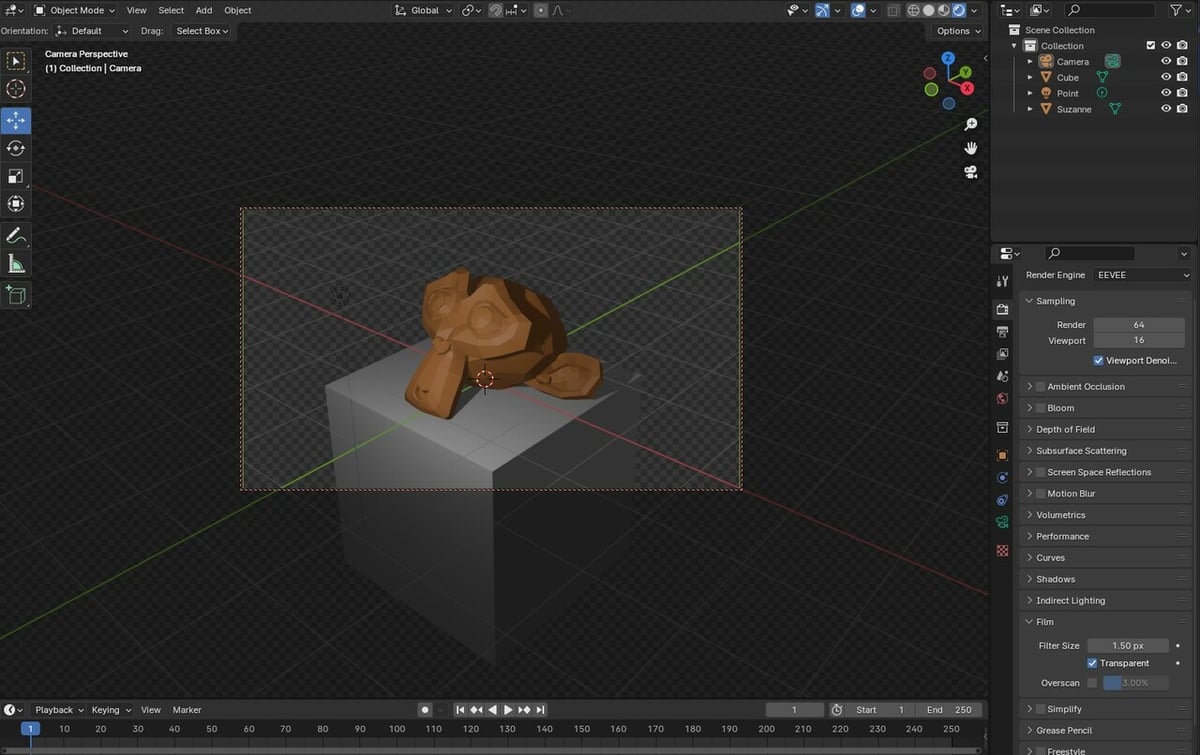
- Open up the render menu located inside of the Properties panel. This will have a small camera icon.
- Locate the “Film” subsection and enable the “Transparent” checkbox.
You will also want to make sure that you’re exporting your animations and frame sequences as .png or .avi formats, as these both support transparency and have little to zero compression loss.
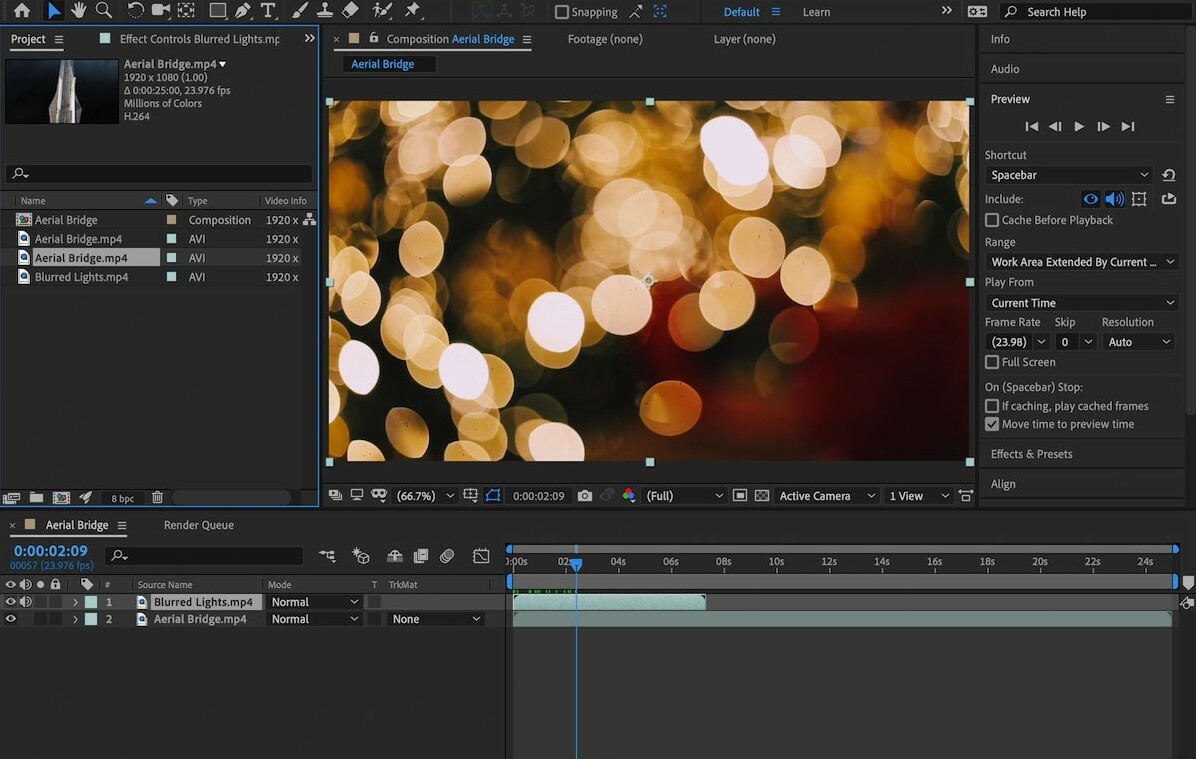
Once exported, you will simply want to import them directly into After Effects and make all your necessary editing just as you would with any other video file.
Tips & Tricks
Before we finish, there are three simple tips that may help you when working with Blender and After Effects.
- Separating render passes: Instead of rendering a single final layer, you can separate render passes and split your different render layers into separate files. This can make editing in After Effects much easier as you can select exactly which layer you want to modify.
- Export tracked cameras into After Effects: Both Blender and After Effects have a built-in 3D camera tracker. However, in certain scenarios, we have found Blender’s to provide better tracking results. This means that with the help of the second method, you can also export your tracked cameras from Blender directly into After Effects.
- Don’t be shy to ask for help: Most of us will find ourselves getting stuck or unable to find a solution to a problem that may arise while working with Blender or After Effects. Googling the issue can sometimes help you find a solution, but we also suggest taking a look at Blender’s and After Effect’s subreddits, as you can create a post specifying your issue and have other fellow artists help you out.
License: The text of "Blender & After Effects: How to Make Them Work Together" by All3DP is licensed under a Creative Commons Attribution 4.0 International License.