10 Raspberry Pi Projects with Python to Boost Your Skills

Looking to improve your programming language skills? Check out these fascinating Raspberry Pi projects with Python!
The internationally popular series of Raspberry Pi boards comes with the simple, yet powerful, Python programming language built in.
As a programming language, Python is easy to learn and handy for developing fun and practical Raspberry Pi projects due to its versatility. A special aspect of Python is its customization and simplified syntax, so it’s adjustable and beginner-friendly. You can use Python to write your own programs, whether that involves reading sensors, coordinating lighting, or many other functions.
Once you’ve got your bearings and have things set up with your Pi, you can get your hands on projects that work with additional Python derivatives such as MicroPython and CircuitPython.
In this list of Raspberry Pi projects that work with Python, you’ll find some intriguing ways to sharpen your programming skills. Whether for practical use or just for fun, being able to program in Python is a valuable asset.
All the projects listed are replicable and recent. They’ve been selected to ensure that Pi users, from beginners to the highly adept, can find something to put together.

Sense HAT
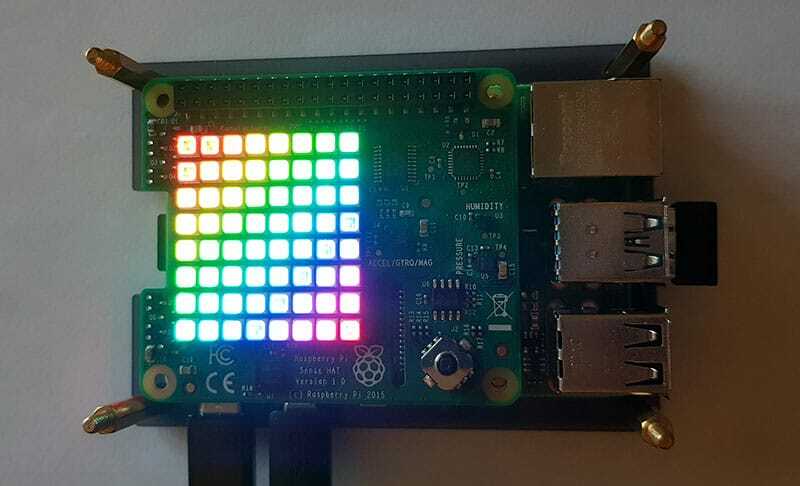
Of all the HATs on Raspberry Pi, the Sense HAT (hardware attached on top) is arguably the most popular, and for good reason. Did you know it was actually on board the International Space Station? But first, a quick clarification: The Sense HAT is an expansion card that includes a LED matrix, sensors, and a joystick. All of the items can be controlled with a Raspberry Pi and Python code.
In this tutorial, RaspberryTips walks users through setting up the Sense HAT and some of the things that can be done with it. For example, one of the included sensors is a magnetometer, which allows the Raspberry Pi to use it almost as a compass. Whether it’s calibration or running a basic Python script test to ensure everything’s in working order, this excellent tutorial covers all the bases of what users can do with the Sense HAT.
There are also instructions that include using Python (the code is provided in the tutorial) to flash “Hello world” to flash on the LED matrix. This can be a great way of both testing that the HAT is working correctly, as well as learning the basics on Python (although RaspberryTips has another tutorial on that topic).
Once this first part of the tutorial is mastered, there’s a handy second part to follow up on, which includes more Python coding adventures and explanations as to how the different sensors can be used. Our hat’s off in admiration!
- Designer: Patrick Fromaget
- Core components: Raspberry Pi 3B or 4, Sense HAT
- Difficulty: Beginner
- Project page: RaspberryTips

Playing Sounds
Here’s a project that’s absolute perfection for Pi and Python beginners: making an audio playback via a USB audio device and a Raspberry Pi. It’s fast, simple, and only requires a Raspberry Pi Zero and the USB device of your choice.
The creator gives tips on how to best make Python work in this project, having found previous tutorials on the topic somewhat lacking or not fully addressing his setup. The sound device will need to be recognized by the Raspberry Pi, which is a very straightforward process. After running a command – specified by the creator – the USB device should be listed among the results.
Depending on the Raspberry Pi model you’re working on, there may be a built-in device that will also be listed. The project’s creator specifies how to work around this should it be your case.
Once the device is connected, there’s an easy Python code to play sounds (in the form of already saved .wav files). For this, make sure to have Pygame set up; this is an open-source library for media development in Python.
- Designer: Jeff Geerling
- Core components: Raspberry Pi Zero, USB audio device
- Difficulty: Beginner
- Project page: Jeff Geerling
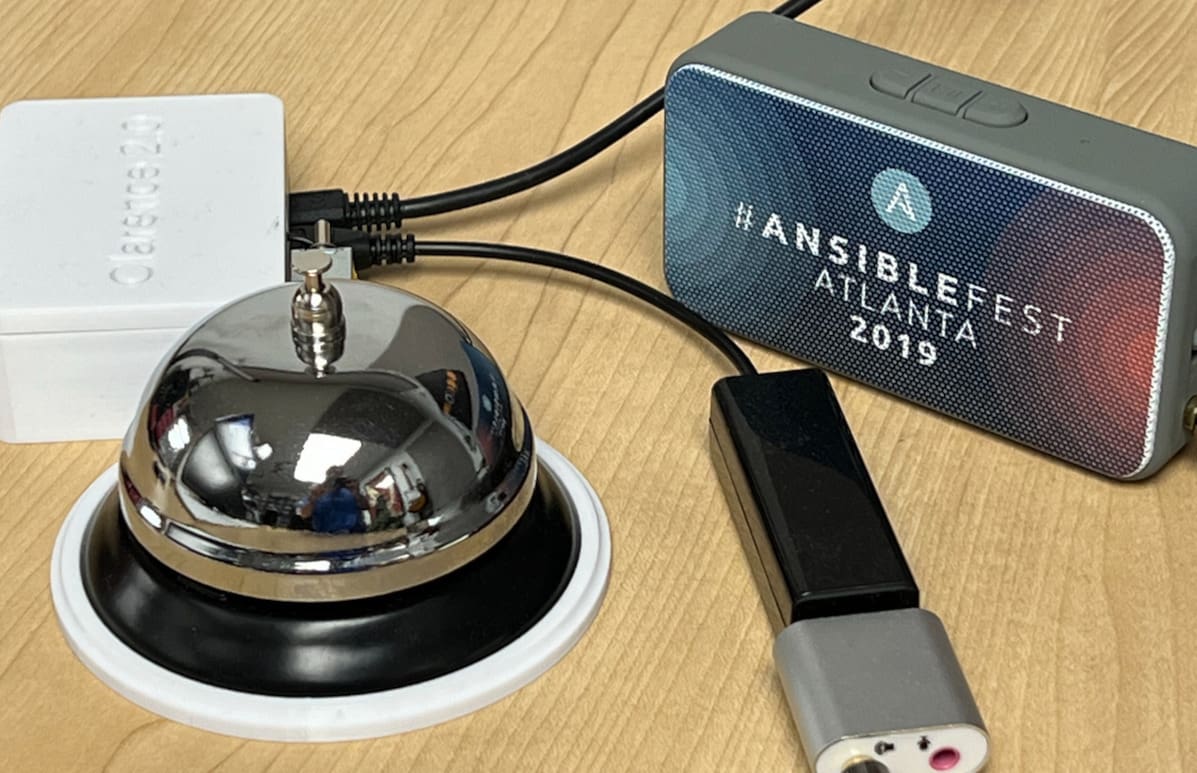
Office Bell Ringer
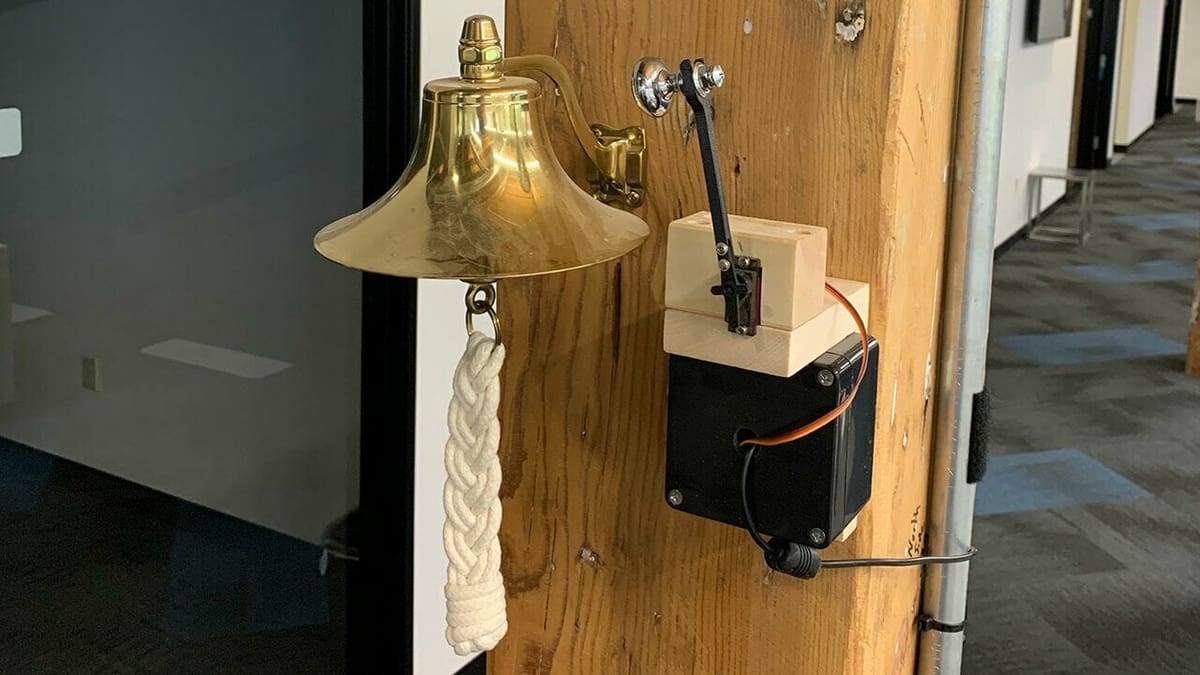
This Slack-based bell ringer uses a Raspberry Pi to ring – you guessed it – a bell via Slack command. While the creator used it for their office, the sky’s the limit with how this bell ringer might be used; schools and home could also benefit from its presence.
The project’s creator used the Python GPIO module to allow for automatic bell ringing and created the associated Python script. It does require a 3D printed part, so make sure you’ve got access to a 3D printer or a printing service. Alternatively, you can opt for a CNC router and have your setup made of wood.
The project, including Slack integration and hardware, is fairly straightforward, although the creator notes that during the integration, one issue was noted. Because of the overall setup, a permanent Wi-Fi connection is necessary, which could be a potential issue if the connectivity is poor or fails. The solution was to create a scheduled command to check up on the bell’s ringing and, if it isn’t, the bash script would start it.
As a general note, the creator suggests that a HAT might do the trick better, so if you’re feeling creative and want to take this project one step further, you might consider further developing your skills!
Programmable Lights
Next up is a fantastic Raspberry Pi project for making a customizable light display for the household. It can be used to celebrate holidays or any other special occasion – the sky’s the limit.
This project uses WS12811/2 light strings, which are LED lights that contain a driver chip. What’s especially relevant about these is that each light is individually programmable, affording plenty of customizability to makers. The creator notes that, while the code as provided by Adafruit is CircuitPython, he opted for Python 3 – the specific libraries that need to be installed are detailed to avoid any issues.
When it comes to the code itself, you might need to tweak it after you look into how many lights your particular setup has, as it can differ from the creator’s. And with everything that’s provided in the project, because the library and script match lights and colors together, you can rotate lights and turn them off, among other functions. Of course, once you’ve got your bearings, you can code your own twinkling designs!
In addition to the hardware, a Flask application provides a front-end browser graphical user interface for accessing light control.
- Designer: Darin London
- Core components: Raspberry Pi Zero W, WS2811 LEDs
- Difficulty: Intermediate
- Project page: Opensource, GitHub
Coffee Consumption Tracker
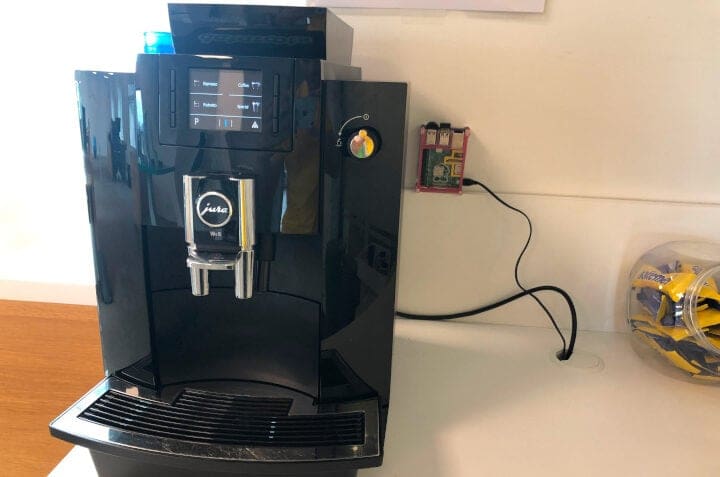
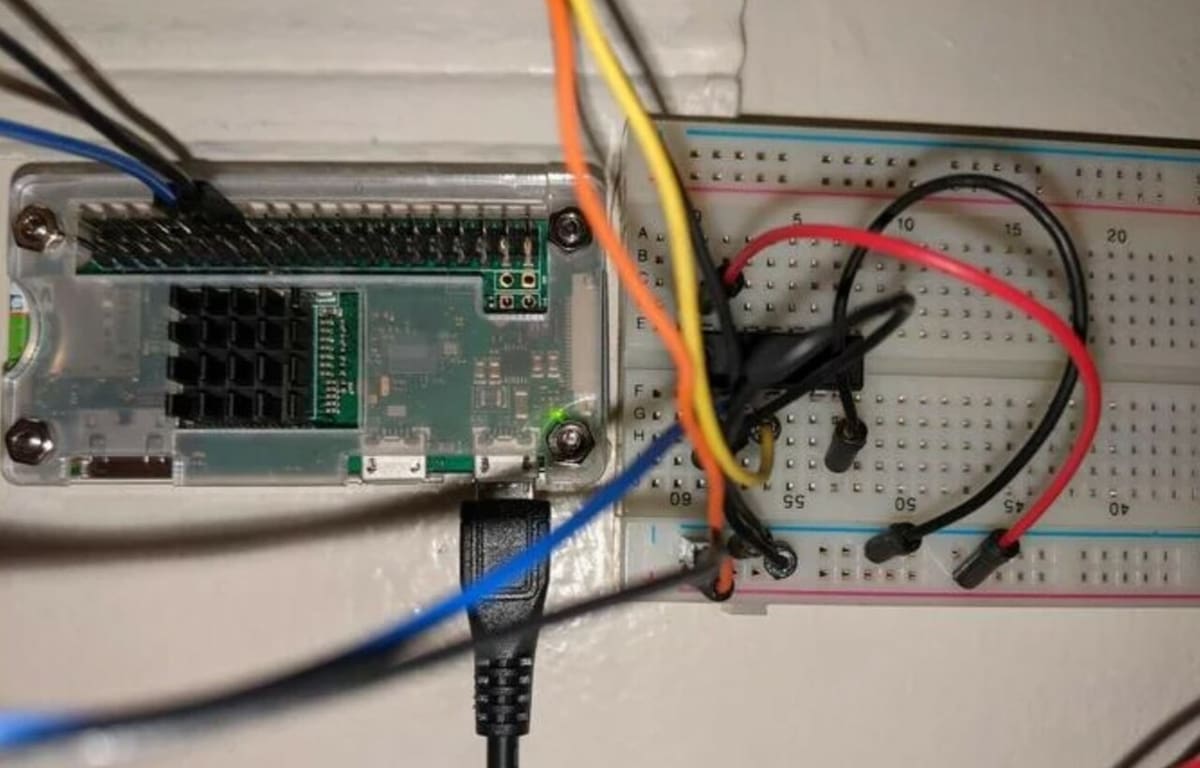
This clever coffee consumption tracker listens to the sound of coffee being ground and records the amount of coffee consumption that happens within a set time frame. Make sure that the machine has enough coffee left… it’s critical!
Using Python 3, the project’s creators set up a sound detection parameter for the coffee machine – a one-second recording of the grinding process. That said, users should record their own coffee maker grinding sounds to replace the default audio. The external microphone records the sound, and the next step in the process is scheduling the “job” of listening out for the grinding sound with a system service and timer.
Makers will set up a PostgreSQL database at a remote platform (the creator notes that it shouldn’t be installed on the Raspberry Pi). Finally, once the app is deployed, it’ll be easy to keep track of how frequently the machine is being used so that supplies don’t reach tragic levels at the office.
- Designer: baturayo
- Core components: Raspberry Pi 3B, external microphone, coffee machine
- Difficulty: Intermediate
- Project page: GitHub

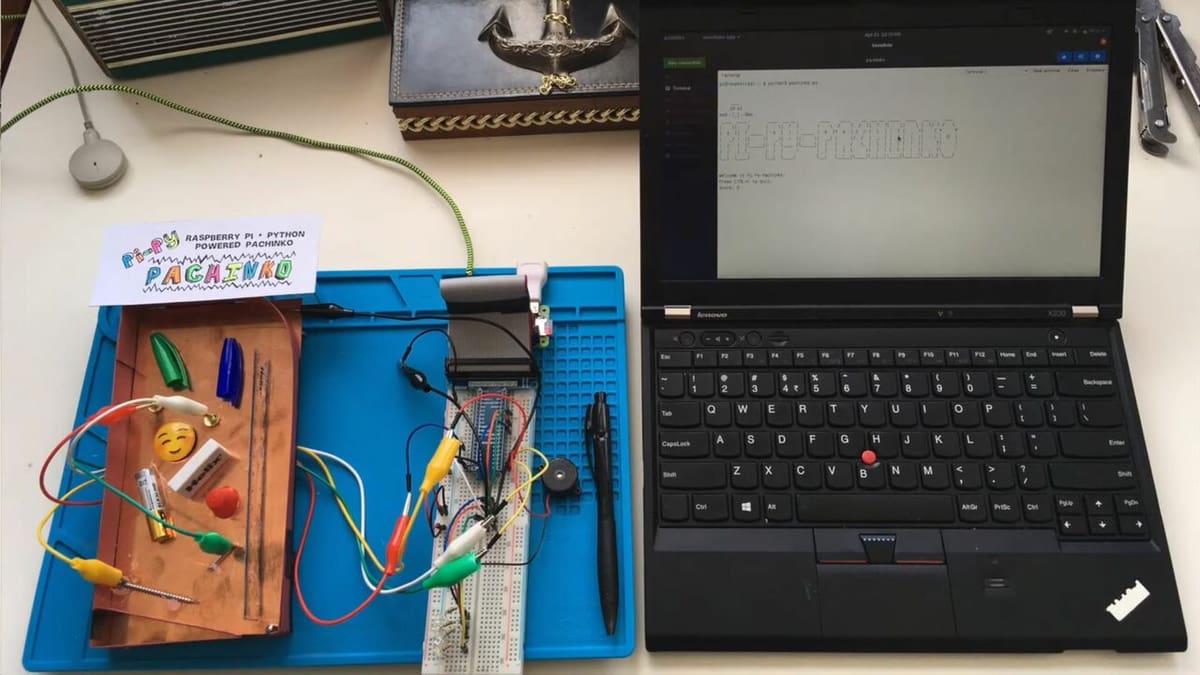
Pachinko
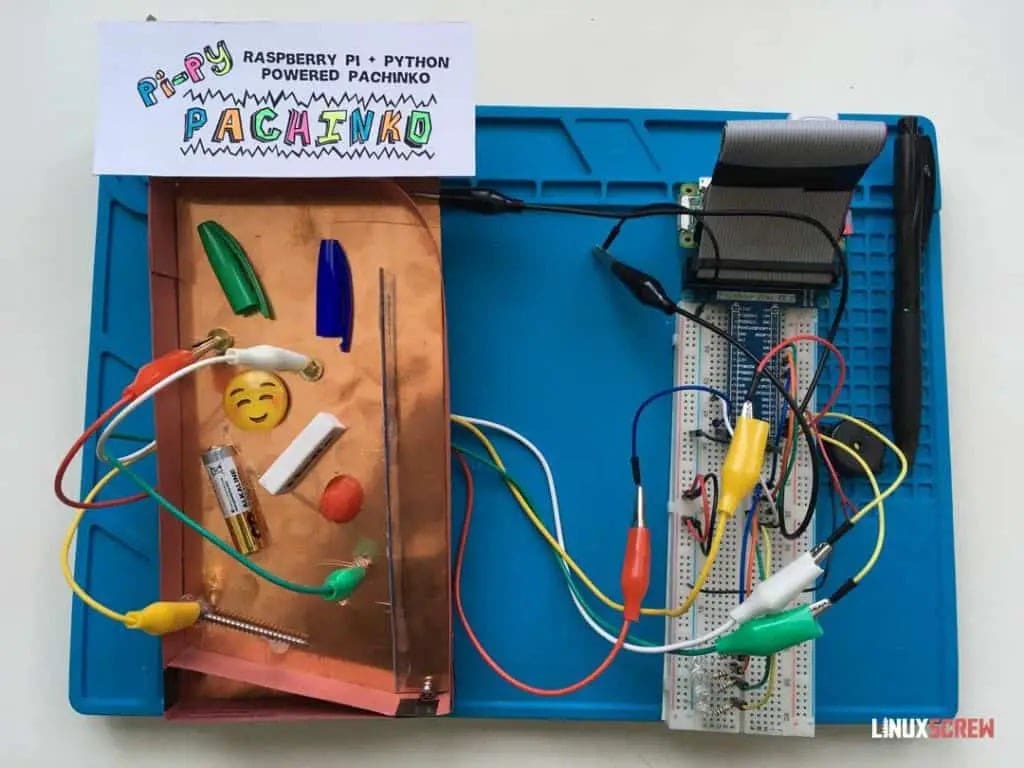
Pachinko is a popular Japanese mechanical gambling arcade game. With the help of your Raspberry Pi and Python, you can make your very own pachinko game for your home!
A nice feature of this project is that it repurposes a number of household objects you’ll likely have lying around anyways, so it’s a cool way to recycle or repurpose them. These get transformed into elements like triggers and obstacles for the ball as it travels.
This project utilizes Python 3 to carry out tasks like flashing LED lights and playing musical sounds, with all the commands explained so that you can learn and make any changes to suit your custom pachinko.
In addition to some helpful suggestions of resources for Pi tunes that you can use for the pachinko game, the project’s creator has included a few improvements that could be done to the setup that might inspire you for your own version.
- Designer: Brad Morton
- Core components: Raspberry Pi Zero, copper sheet, ball bearings, obstacles, LEDs, score triggers (metal), buzzer, ohm resistors
- Difficulty: Intermediate
- Project page: LinuxScrew
Time-Lapse Camera

Get ready to make a wearable time-lapse camera that operates with Raspberry Pi! Since the Pi Zero is so nicely compact, there are many ways to construct the wearable. The makers behind this particular project went for glasses, but you could just as easily fashion a lanyard.
Coding the time lapse is a key part of the project, and all the lines are thoroughly explained. Adding Blinkt RGB LED indicators would be a cool feature. With individually controlled pixels, they can provide visual notifications for the Pi. If you want to go this route, you’ll need to attach a header to the Raspberry Pi, then code the lights.
If you’re not opting for the LEDs, though, after coding the time-lapse, you’ll simply have to boot the Pi and set up all the hardware.
It’s also worth noting that the photos taken with the camera wearable are stored on the Pi at a somewhat low resolution. The project’s creator wanted to avoid overly large images, but depending on your intended use, the image resolution can be changed at the coding stage.
- Designer: Raspberry Pi
- Core components: Raspberry Pi Zero, Micro-USB power pack, Blinkt (optional), Raspberry Pi Camera Module V2
- Difficulty: Intermediate
- Project page: Raspberry Pi

Greenhouse Monitoring
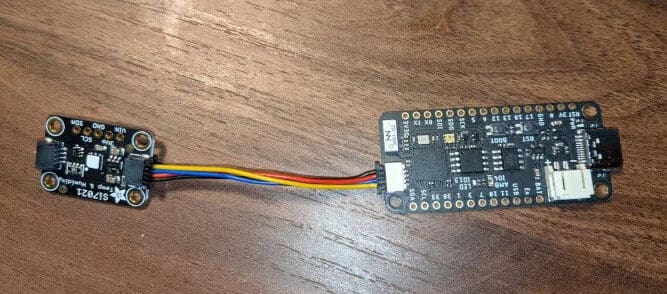
This greenhouse monitoring project is an excellent showcase of how CircuitPython interacts with a Raspberry Pi. When the project is fully set up, it will publish greenhouse statistics to an MQTT broker. Once the broker is established, different metrics, such as temperature and humidity, can be subscribed to. These will publish messages to the broker.
For users new to CircuitPython, the project’s creator recommends checking out Adafruit’s guide to get your bearings and a clear idea of the whole scope of what can be done with it. When it comes to the hardware, in addition to the Raspberry Pi 4, an Adafruit Feather S2 was chosen given its compatibility to CircuitPython. The Feather S2 has a built-in ambient light sensor, so you’ll need to get additional sensors (e.g. temperature and humidity).
After coding the microcontroller and gathering the data, it’s time to process the information. The project’s creator includes different options of what can be done, such as setting up different processes for different actions (for example, if you want to get notified via email when a particular value gets too high or too low). He also includes an explanation on how he set up a web server, in case it’s the outcome that’ll suit your needs.
- Designer: Darin London
- Core components: Raspberry Pi 4, CircuitPython-compatible microcontroller, temperature sensor (if necessary), humidity sensor (if necessary)
- Difficulty: Intermediate
- Project page: Opensource, GitHub
Face Recognition
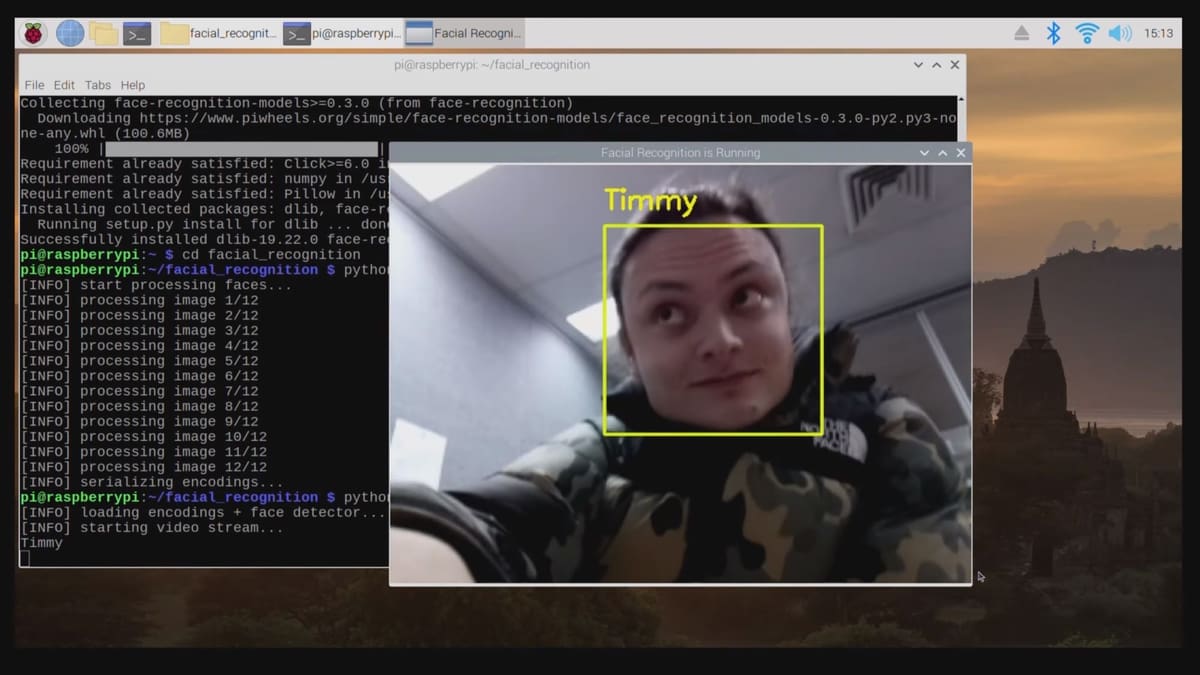
With this fascinating project, you can train a Raspberry Pi to recognize human faces and successfully identify its owner upon “sight”. Essentially, the project involves taking photos of a person, then using them to train the setup, thanks to a Python training model.
And if this seems like a simple enough project, it doesn’t end here. Not only does it make facial recognition possible, but once the Pi recognizes a face, it can carry out different actions, such as producing a virtual box around the person’s face on the screen with their name above it. This can be taken a step further by attaching a servo motor to the Raspberry Pi and coded the setup to rotate when a specific person is “captured” on camera.
- Designer: Core Electronics
- Core components: Raspberry Pi 4, Raspberry Pi Camera Module V2 or Raspberry Pi HQ Camera Module, MicroSD card
- Difficulty: Intermediate
- Project page: YouTube, Core Electronics
Automated Jack O'Lantern

Bring a jack o’lantern to life with automation and spooky noises in this creative Python-powered Pi project. Whether you want to use it for Halloween or potentially utilize the techniques for some other automation project, it’s a fantastic pick for advanced Pi users to challenge themselves.
After setting your Pi up, you’ll connect the breadboard with LED lights and define the board and pin setup with the RPi.GPIO package. The code will direct the infrared motion sensor to power the LEDs on or off depending on the input. In this case, it will react to motion near the pumpkin.
The creator provides explanations on why certain calls were made, such as wanting to have a flickering effect, like a candle. The pumpkin itself requires quite a bit of hands-on work (which is all explained with helpful photos), but once it’s all set, you can turn everything on for a test run. The neighbors will be impressed!
- Designer: Jessica Cherry
- Core components: Raspberry Pi 4, large plastic pumpkin, Pi-compatible Arduino starter kit including infrared motion sensor, LEDs
- Difficulty: Advanced
- Project page: Opensource
License: The text of "10 Raspberry Pi Projects with Python to Boost Your Skills" by All3DP is licensed under a Creative Commons Attribution 4.0 International License.