
20 Easy Raspberry Pi Projects for Beginners

The Raspberry Pi makes physical computing accessible to all. Take a look at some of the best Raspberry Pi projects for beginners.
Many decades ago, there were no personal computers, only giant mainframes. These were machines that could fill up whole buildings, and for the time, they had serious power. The computing landscape began to change, however, after the invention of Intel 4004, the first microprocessor.
By the 2000s, personal computers could be found at the home. Fast-forward to the present day, and we have credit card-sized devices known as single-board computers.
A popular and accessible example is the Raspberry Pi. First released in 2012, it was designed to make computer science education accessible to people all over the world. It has a global community and a wide range of accessories that make physical computing more accessible for beginners.
In this article, we’ll take a look at some of the most impressive beginner projects you can make with a Raspberry Pi!
Added Functionality
To start, these are projects or tutorials that’ll help you get your bearings with a few devices. They might also come in handy as a base for other, more intricate ideas.
Ultrasonic Sensor
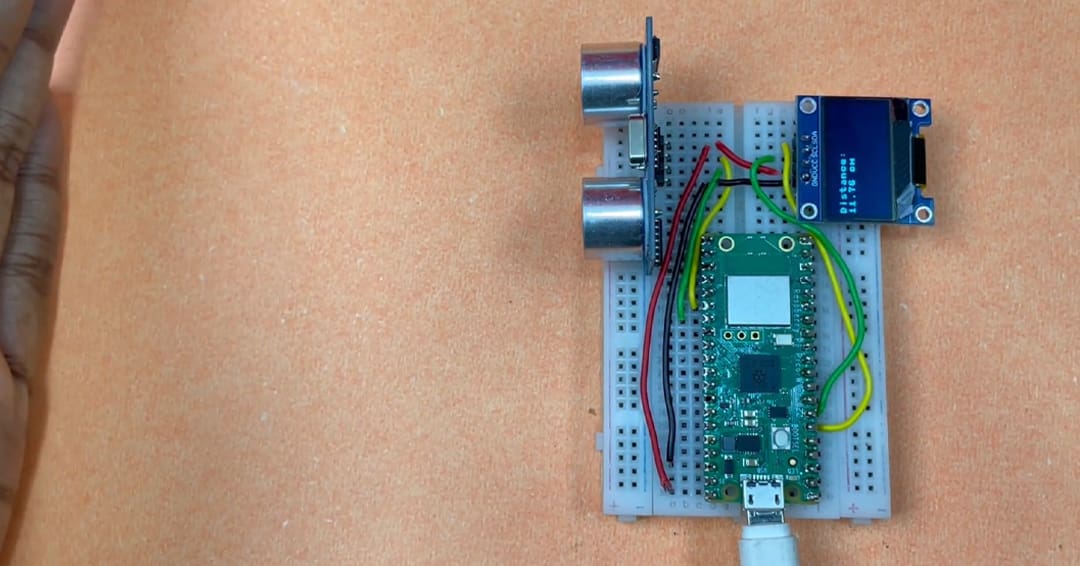
The Raspberry Pi Pico is often used in smart home applications since it’s cheap and really powerful. You can connect a lot of different devices to it to realize numerous cool projects – so let’s play with it by adding an ultrasonic sensor.
An ultrasonic sensor is an electronic device that can measure its distance from an object that’s approaching it. To achieve its goal, it sends a sound wave and “listens” to the echo to determine how far the object is. Ultrasonic sensors are widely used nowadays, for example, in parking assist systems and robotics projects.
In this case, the wiring is simple, and there are only a few cables to solder. You’ll use the Raspberry Pico with MicroPython firmware. When it comes to the code, not only can you find it on the project site, but the lines are also explained by the creators, so you can learn about what the different segments achieve.
Once you run the code, the Raspberry Pi will show distance values on the computer or OLED screen that it’s connected to. After you’ve learned how to set up an ultrasonic sensor with your Raspberry Pi, you can use this sensor as a trigger for automation routines, for example, or integrate it with other sensors for more complex projects.
- Who designed it: Circuit Digest
- Core components: Raspberry Pi Pico W, ultrasonic sensor, breadboard, OLED screen (optional)
- Where to find it: Circuit Digest
Neopixel Control
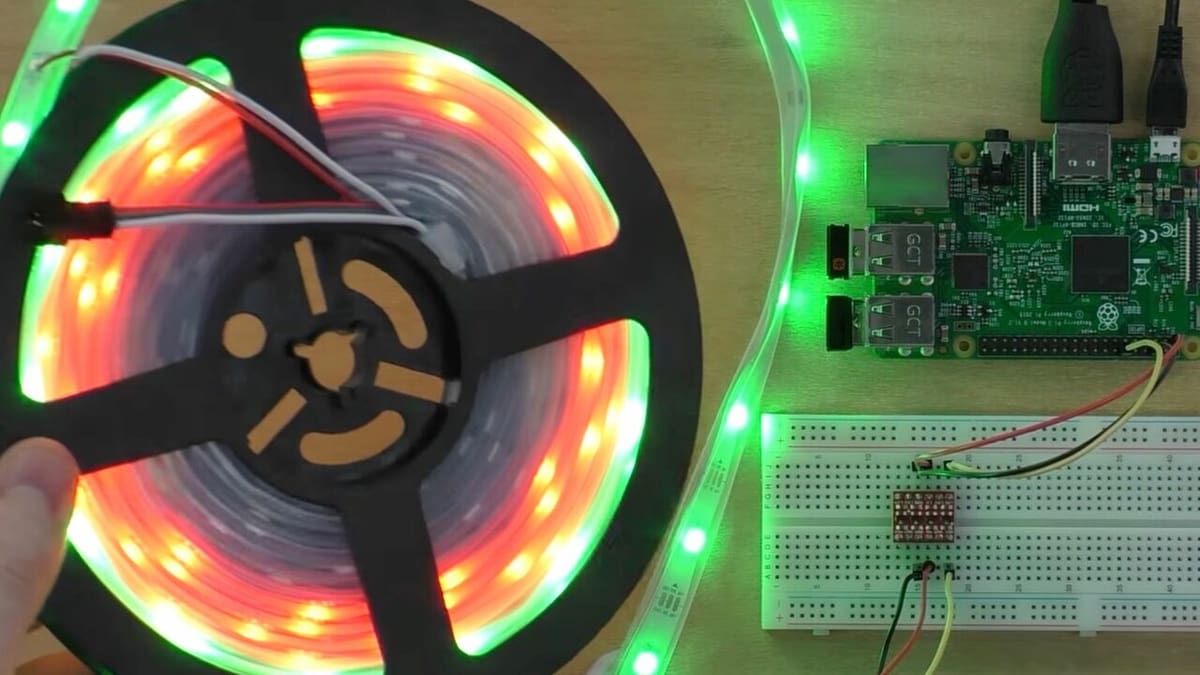
RGB LEDs are all the rage these days! In this project you’ll get a deeper understanding of how to interface the Raspberry Pi with other components. You’ll need a Raspberry Pi with GPIO pins, so make sure you buy one with a pre-soldered header unless you’re comfortable soldering them yourself. For example, the Pi 4 would be a fitting choice.
Make sure you have a power supply appropriate for your LEDs on hand, as they require more current to drive them than the Pi can supply. This will depend on how many LEDs are in your reel and their voltage. You should be able to find this out at the time of purchasing them. Generally, WS2812 LEDs are 5V, but do check yours. This is especially important if you’re opting for a Pi that would need an additional logic level converter.
With a video tutorial and great instructions, this project will give you your own customizable LEDs in no time! If you’re looking for options other than decorating, once you have this project down, why not use it to create a NeoPixel-lit enclosure for your 3D printer?
- Who designed it: Michael
- Core components: Raspberry Pi (with GPIO pins), WS2812 or NeoPixel LEDs, 5-V DC power supply
- Where to find it: Core Electronics
Macro Keyboard
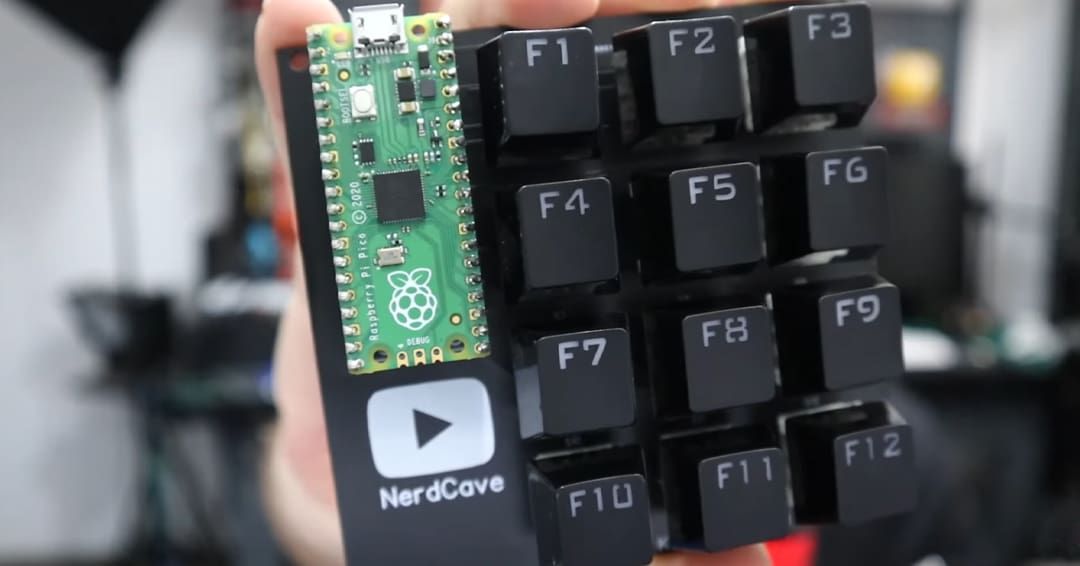
We use our computers every day to do all sorts of things. Some actions are repetitive and boring, but there’s a way to make them faster. Enter the macro keyboard. A macro pad is used to create macros, a series of actions that are performed one after the other with a single click. Macro keyboards allow you to save a ton of time. For example, you can speed up your design workflow or video editing. Plus, it’s a cool way to recycle old keyboards.
For the hardware, you’ll need a custom PCB, to which you’ll have to solder the Raspberry Pi Pico and the keyboard switches. Note that if you recreate the version with four buttons, you should pay attention to the schematic correction of the creator that’s pinned in YouTube (“voltage should be connected to Pin36 the 3V3 out”). After that, you can move on to the software.
For this project, you’ll need to install Circuit Python to create macros for the Raspberry Pi Pico. You can use the example macro that the maker has provided and customize it for your needs.
- Who designed it: Guitarman9119
- Core components: Raspberry Pi Pico, custom PCB, keyboard switches
- Where to find it: YouTube, GitHub
Nanoleaf Controller
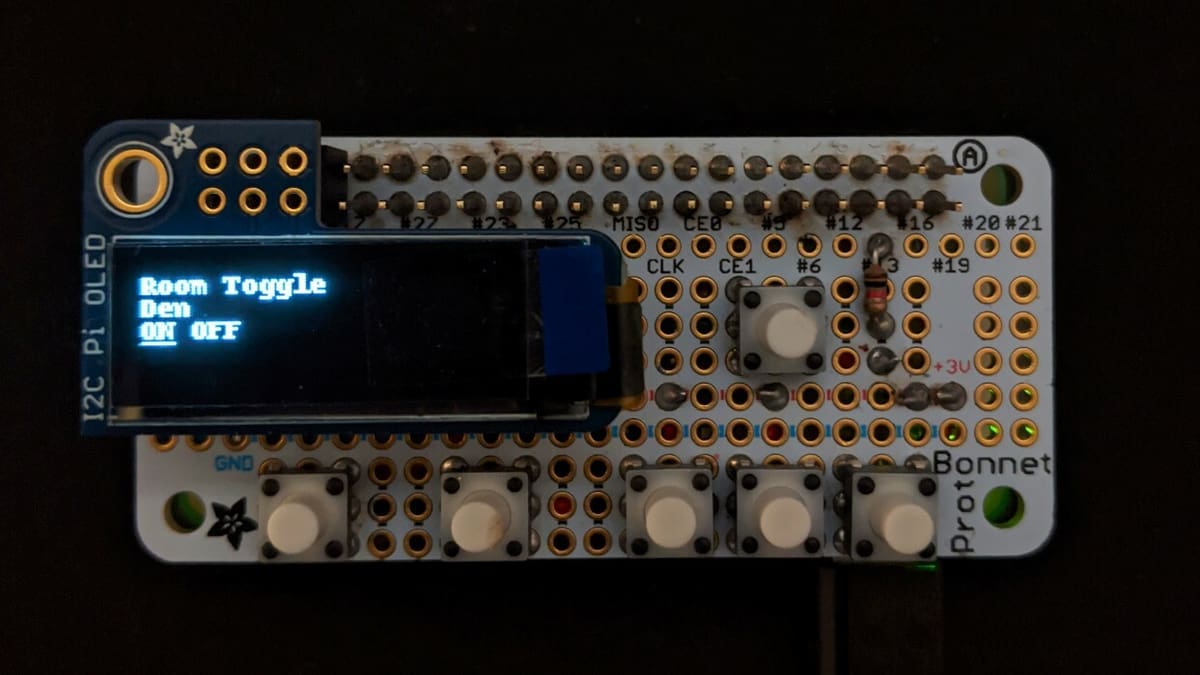
Upgrade your smart home system by building a controller for the Nanoleaf or Phillip Hue lights. Alternatively, build your own mini DIY Nanoleaf. There are even variations designed with hexagonal shapes.
According to the maker of this controller project, the Hue dimmer is based on an ATMega256RFR2. However, the available control switch wasn’t easy to further customize. So instead, the maker decided to create their own controller from scratch.
For the build, a Raspberry Pi runs the Python code that provides the functionality for menus, applications, inputs, and display. Besides toggling lights on and off, it’s also capable of controlling network connectivity. On the software side of things, PyGame was used to create the display and get input to work.
- Who designed it: Tim Schonberger
- Core components: Raspberry Pi Zero W, perma proto HAT, 128×32 Adafruit PiOLED display
- Where to find it: Hackaday
Relax & Stretch

We spend most of our time seated in front of the computer at home and work. But to stay healthy, we should do some movement every once in a while. Stretching is a simple yet effective way to improve your health: Regular stretching improves your posture and reduces stress.
That’s where this project comes in to help you acquire this habit. It’s a little bit different from the other items on this list, since it doesn’t involve realizing a device, but rather a program to help us. In fact, with this project, you’ll create a stretching routine composed of relaxing exercises that you can do while sitting down.
To achieve the goal, you’ll use Scratch as the software. Scratch is a visual programming language that will make it easy for you to create the code. In this way, you’ll be able to learn how to use conditions and variables while having fun. You can either recreate the motions as presented in the project or, once you’ve gotten your bearings, write your own program that fits your needs or goals.
- Who designed it: Raspberry Pi Foundation
- Core components: Raspberry Pi 2, 3, 4, or Pico, computer or tablet
- Where to find it: Raspberry Pi Foundation
Time-Lapse Camera

With this project, you’ll be hooking up the Raspberry Pi to a camera module and using some Python code to take photos at certain intervals. With these individual snaps, your code will then combine them one after the other to create a time-lapse video.
Part of the Raspberry Pi Digital Curriculum and an awesome way to learn more about Raspberry Pi, this project is beginner-friendly with detailed instructions. It’s a fantastic introduction to working with computer vision, an increasingly growing area! And it’s also great for learning basic Python.
If you’re looking for ideas of what to record a time-lapse of, a tree you can see from your window can be pretty great. And if you set up the Raspberry Pi with a large enough SD card, you could record how the tree changes throughout the seasons. Really, you can record anything that will change over time.
- Who designed it: Raspberry Pi Foundation
- Core components: Raspberry Pi, Raspberry Pi camera module
- Where to find it: Raspberry Pi Foundation
Home
In this group of projects, you’ll find diverse ideas for the home, including a security system, a digital photo frame, and even a Google desk calendar. We also threw in a weather station because you never know when one might come in handy.
NAS
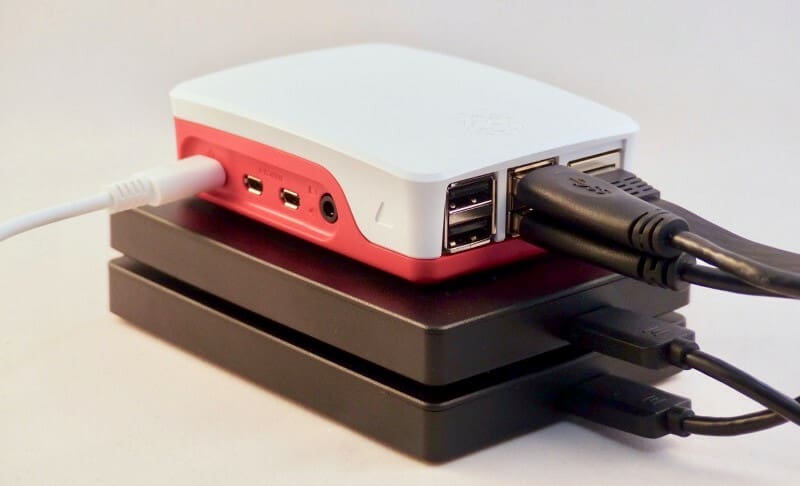
A network-attached storage (NAS) is a network-connected file storage for authorized network users. With a Raspberry Pi, an affordable NAS can be easily made, conveniently protecting users from hard drive failure.
In this build, the maker created a fully featured NAS device with a Raspberry Pi 4. There are also other alternatives, such as using Raspberry Pi OS (formerly known as Raspbian) with SFTP, OpenMediaVault, and Nextcloud.
- Who designed it: Rob Zwetsloot
- Core components: Raspberry Pi 4, external USB drives, USB 3.0 powered hub
- Where to find it: MagPi
Digital Photo Frame
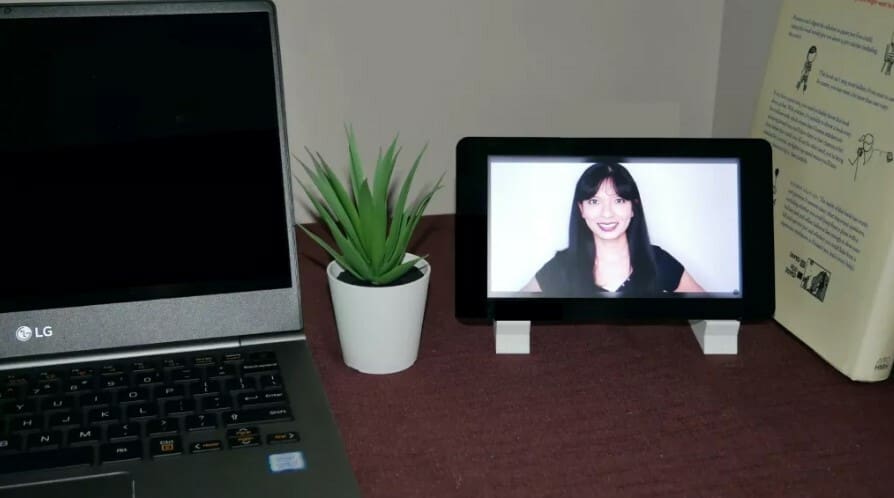
Digital photo frames were first released in the 1990s. Now with a Raspberry Pi, makers can create their own digital photo frames at home. This build uses a Raspberry Pi 4 with an 8-GB MicroSD card and connects to an album on Google Photos.
What makes this project possible on a Raspberry Pi is Magic Mirror, an open-source and modular smart mirror platform. What’s a magic mirror? Imagine your home mirror but with text and images that appear to float in the air! Originally, it was built to turn any mirror into a personal assistant. However, in this use case, it transforms a Raspberry Pi into a digital photo frame.
For a 3D printed enclosure, take a look at this 7-inch Raspberry Pi HDMI screen case with VESA mounts.
- Who designed it: Caroline Dunn
- Core components: Raspberry Pi 4, 3B+, or 400, 7-inch HDMI touchscreen monitor, 8-GB MicroSD card, power supply, HDMI cable
- Where to find it: Tom’s Hardware
Desk Calendar

Tired of constantly checking the calendar on your phone? This project will teach you how to connect a Raspberry Pi to your Google calendar so you can have your calendar at hand at all times.
This comprehensive proposal will take you from a Pi fresh out of the anti-static bag to a working calendar quickly. In addition to a little programming, you’ll use a modified Google Chrome window to display and update your calendar all the time.
You’ll need an external monitor for your calendar to display on, which might take up valuable real estate on your desk. However, you’ll avoid having to zoom in or possibly missing things as you’ll have all the information in a clearer layout.
Motivational Box
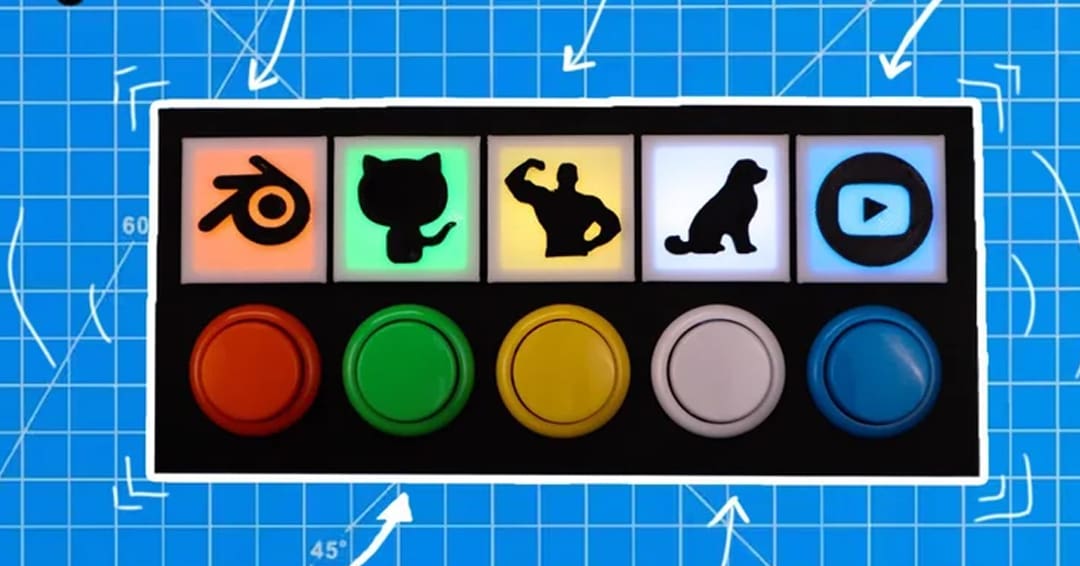
Nowadays, creating good habits is difficult because there are a lot of distractions around us. A strategy to facilitate this task is gamification, which refers to the way in which we can present tasks to make them more fun and easier to complete, and that’s where this motivational box comes in. With this project, we can create a super cool device to put on our desks that’ll help us stick to good habits.
The box uses an array of LEDs to help with the to-do list. When the task has to be completed, the LED is red, and once you’ve completed your task, you push the corresponding arcade button to turn the LED green. With the help of a web host, such as Netlify, the task will be signed as done in your tracker. With the actual version, you can keep track of five habits.
For 3D printing the task indicators, you can use whatever material you like, but you should consider white or clear filament to diffuse the LEDs. Fortunately, the creator has optimized this project for 3D printing so you won’t need any supports. You can glue the symbols to the task indicators and assemble all the components.
- Who designed it: Guitarman9119
- Core components: Raspberry Pi Pico W, LEDs, custom PCB, arcade buttons, 3D printed parts
- Where to find it: YouTube, Instructables, GitHub
Security System
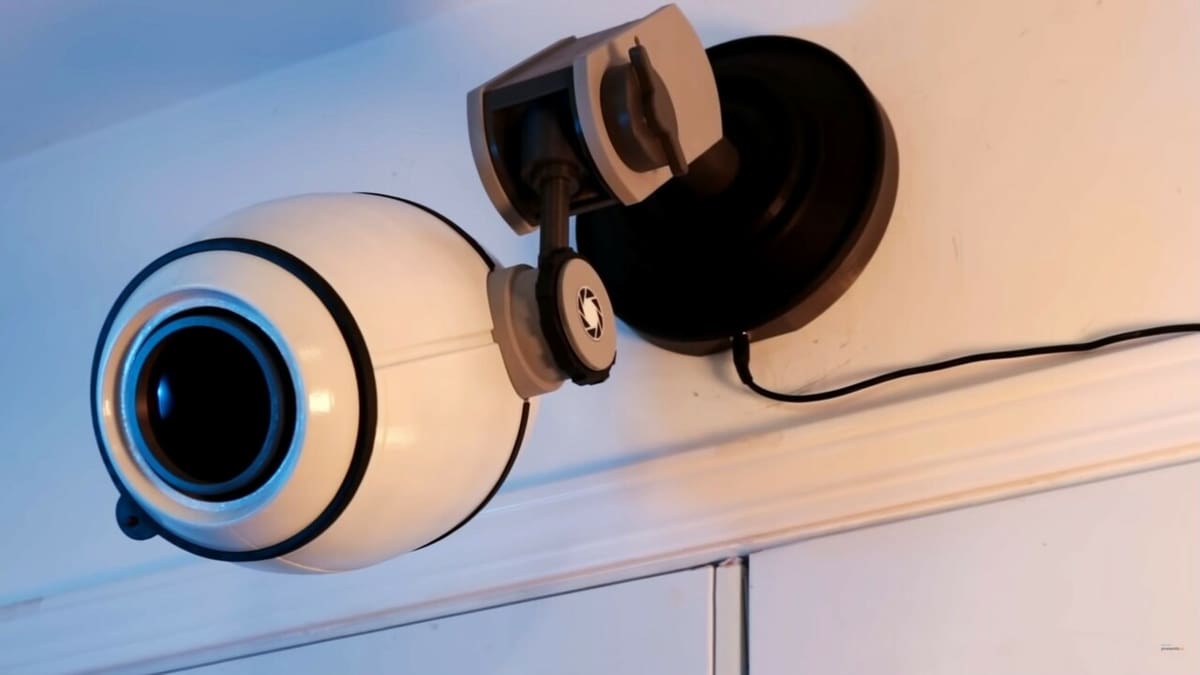
Monitor your home or premises with a Raspberry Pi 4 and camera module. This build shows how to create a Portal 2-inspired security camera with 6-mm wide-angle lenses.
According to the maker, no programming is necessary for this project. You can create this security camera without writing a line of code using motionEyeOS. Basically, all you need to do is flash the motionEyeOS image onto a MicroSD card. Then, insert the MicroSD card into the Raspberry Pi! Alternatively, there’s also a build that houses the much more portable Raspberry Pi Zero instead.
- Who designed it: element14 presents
- Core components: Raspberry Pi 4, Raspberry Pi HQ camera, Raspberry Pi 6-mm wide-angle lenses, red LED
- Where to find it: YouTube, Raspberry Pi Blog
Weather Station
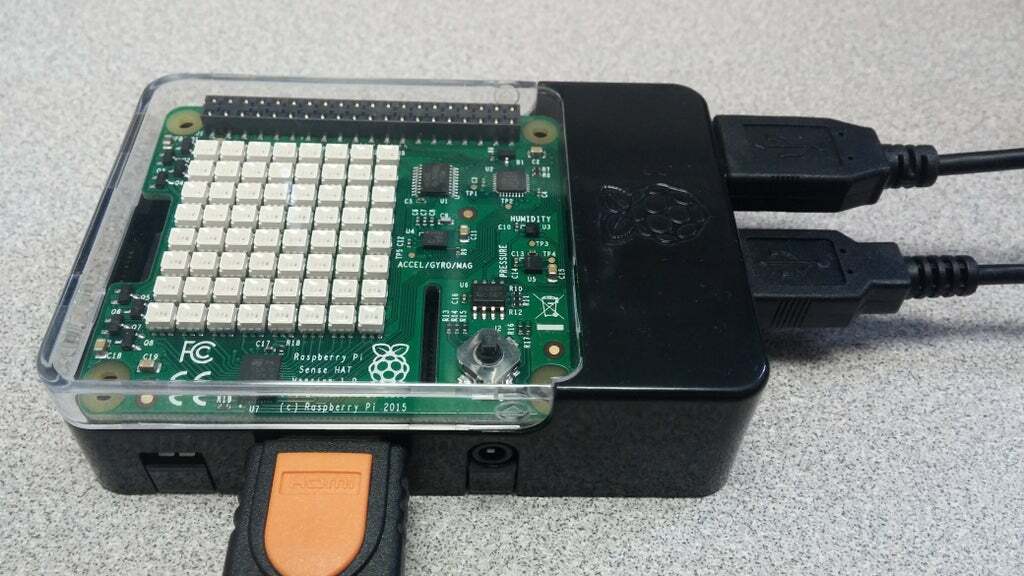
Build your own weather station in a few simple steps! This project uses a Raspberry Pi Sense HAT, packed with a variety of sensors to measure temperature, humidity, and barometric pressure. The maker also shows how to write text to the LED matrix.
The weather is measured in the immediate location of the Raspberry Pi, and you can choose how frequently it records information. The data is saved in a .txt file and can then be further manipulated or imported to other programs.
If you’d like to try building a more advanced version, check out this build by spacemanlabs.
- Who designed it: ZRob314
- Core components: Raspberry Pi 3, Sense HAT, Raspbery Pi enclosure, HDMI cable, monitor
- Where to find it: Instructables
Entertainment
And now, onto the fun!
Yes, you’ll have some fun setting these projects up. However, the amusement won’t stop there because then you get to play games, stream music, or have a robot, or…
Portable Pi
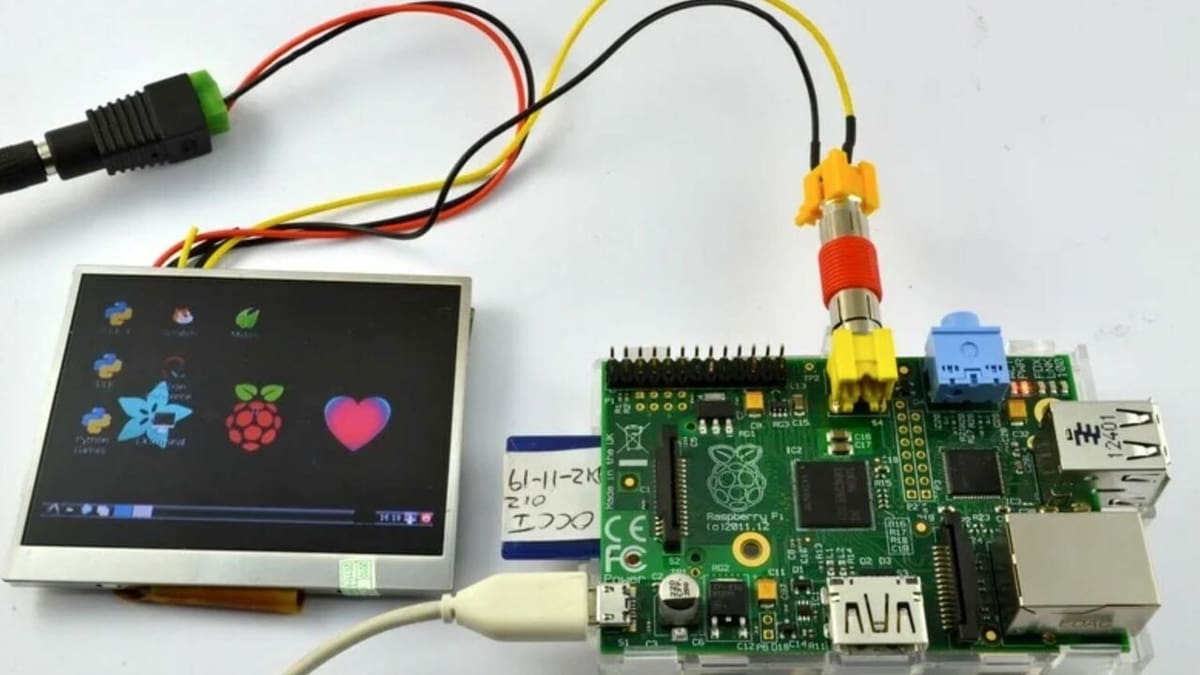
If you want to take advantage of the Raspberry Pi’s tiny form factor, this project is for you! Here, you’ll learn all you need to about configuring a display to work with the Pi. With a small case, you then have the power of the Pi in a portable format.
This is a slightly more complicated project, as you’ll need to work with the command line. Consequently, finding the right settings to interface your Pi and your display might take a bit of trial and error.
Because your portable Pi might be a bit delicate to carry around, a fantastic follow-up project would be making a case for it. From here, you might want to explore the option of turning this into your own portable gaming console.
- Who designed it: yolomolo1999
- Core components: Raspberry Pi 3 or 4, mini display, RCA coupler male-to-male, female DC power adaptor (unless your display has a DC barrel socket), 12-V 1A power supply (unless included with the display)
- Where to find it: Instructables
Music Streaming
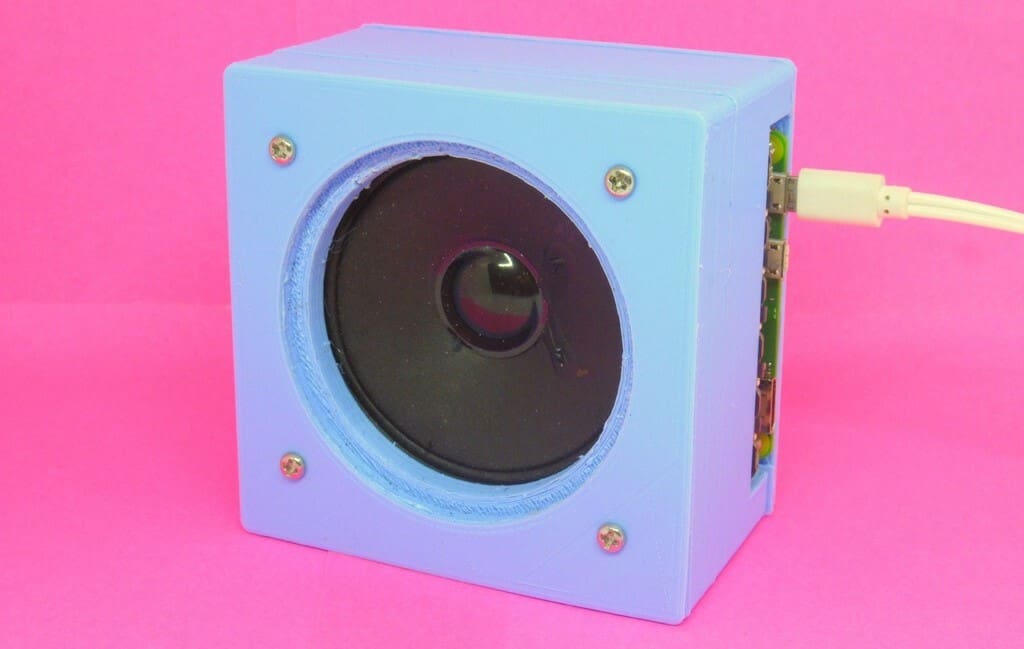
You can create your own music streaming device with the Raspberry Pi. After setting it up, you’ll be able to play music from Spotify! This is made possible with the use of Raspotify Connect, a client for Raspberry Pi OS that works out of the box.
Once you’ve got it running, you’ll want a speaker to house it. 3D printing is one way to create your own custom speaker, but any speaker will work. On the software side of things, there are other alternatives, such as Pi MusicBox (no longer supported, but with proposed substitutes), which also includes the use of Spotify Connect. Additionally, it also supports AirPlay and OpenHome.
- Who designed it: dtcooper (Raspotify), zombiekitten (case)
- Core components: Raspberry Pi Zero W, 3″ 4-Ω (5-W) speaker, Pimoroni pHAT beat, power supply
- Where to find it: All3DP, Thingiverse

LED Matrix Sand Toy
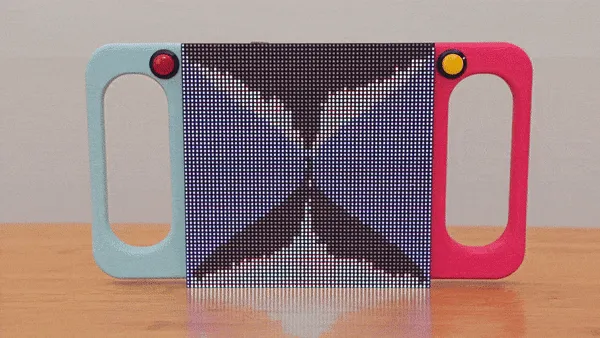
An LED matrix sand toy is a unique device that simulates sand motion using LEDs. The virtual sand seems to be moved by gravity in a fascinating way, and this beautiful result is achieved through an accelerometer. The LED matrix sand toy is a fun way to join together physics and electronics.
It’s a mesmerizing decoration for your house and a stress-relieving toy, too. With a little bit of soldering, you’ll be able to recreate this cool project. The handles are 3D printed, and joined to them are buttons that allow you to either reset the simulations or choose different modes.
- Who designed it: Ruiz Brothers
- Core components: Raspberry Pi Zero WH, LED matrix, 3D printed parts
- Where to find it: Adafruit, Thingiverse
Wire Loop Game
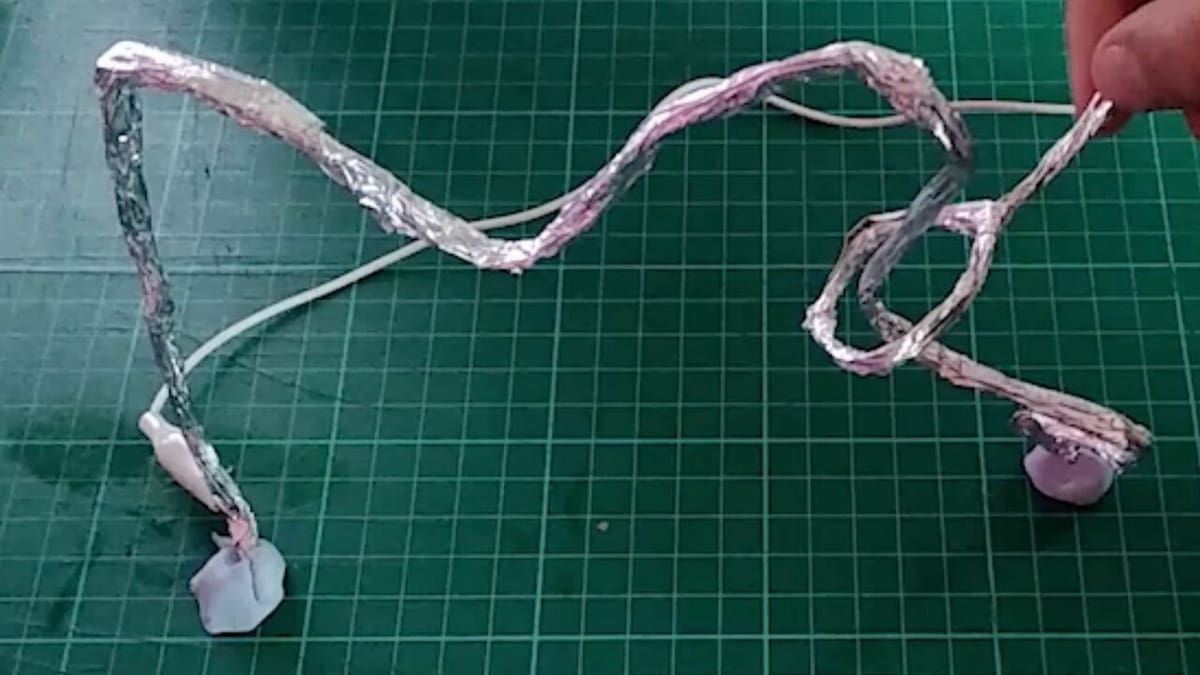
This is a Raspberry Pi-powered version of the classic wire loop game. As this is programmed with Scratch, it’s ideal for kids or people totally new to programming. Scratch is a very friendly and entirely visual programming language. As a drag-and-drop way of programming, it’s easy to pick up with trial-and-error, and best of all, no previous programming experience is needed!
This is an ideal project if you’re looking for an interactive pursuit, given that there’s instant feedback from the game if you accidentally touch the loop to the wire. As a simple and fun project, this is a great introduction to the capabilities of the Raspberry Pi, basic circuit design, and simple programming. And if you want to make this project slightly more difficult, why not design a case for it? Maybe 3D print one or upcycle something you have on hand already.
- Who designed it: Raspberry Pi Foundation
- Core components: Raspberry Pi, jumper wires, buzzer, tin foil
- Where to find it: Raspberry Pi Foundation
Arcade Machine
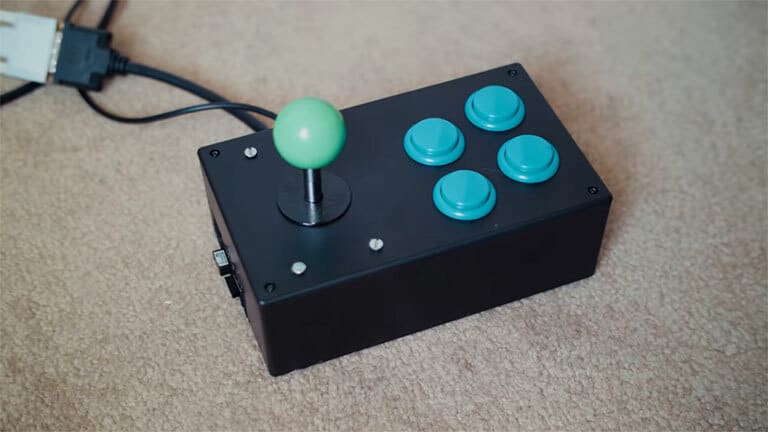
You could get an arcade machine off the shelves, but with RetroPie and a Raspberry Pi, a DIY arcade box can be made at home for a fraction of the cost. This maker went ahead and used a Raspberry Pi 3, RetroPie, and a 3D printable housing. The code and wiring diagram has also been provided on the maker’s GitHub page. The guide also shows how the build can be hung on a wall.
Besides customizing the hardware, you can also change up the RetroPie theme, and even use a Scraper to download a thumbnail of each game on your build. With all that said, it should be noted that it’s completely possible to run RetroPie on the Raspberry Pi 4 now.
- Who designed it: Hacker Shack
- Core components: Raspberry Pi 3, female-to-female jumper wires, arcade buttons, joystick
- Where to find it: Hackaday, YouTube
Minecraft Pi
Learn programming while playing Minecraft with the Pi edition, Minecraft Pi! According to this guide, since 2014, Minecraft is installed by default in Raspberry Pi OS. However, if you’re running an older version of the operating system, you can install Minecraft with two simple commands. Python is used to play and learn to code.
In this guide, the Raspberry Pi Foundation shows beginners how to control the player, build blocks, and use the Python interface to manipulate the game world. Besides learning to code with Minecraft, the Raspberry Pi can also be used to create a Minecraft server. For more Minecraft goodies, be sure to check out the best resources for Minecraft with the Raspberry Pi and our Minecraft 3D printing guide!
- Who designed it: Raspberry Pi Foundation
- Core components: Raspberry Pi, power supply, MicroSD card
- Where to find it: Raspberry Pi Foundation
Retro Handheld Console
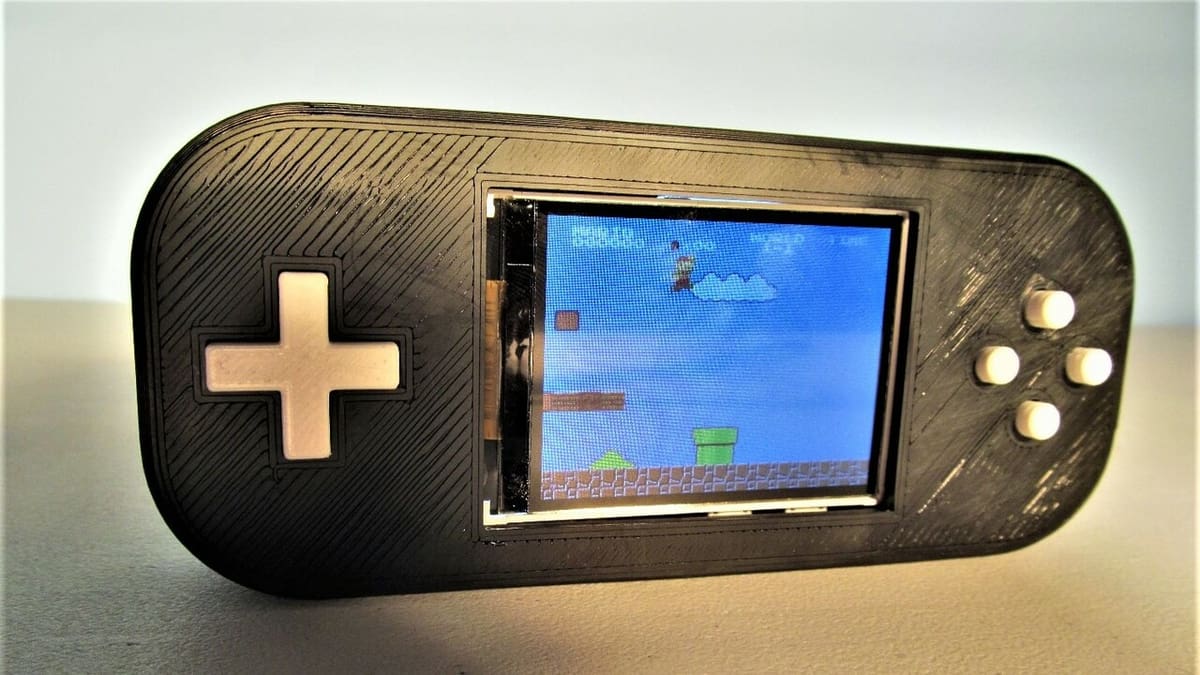
There are plenty of retro gaming consoles that can be bought off the shelves at stores. But for a fraction of the price – an estimated $20 – you can build one at home with a Raspberry Pi. This handheld build runs with a Raspberry Pi Zero, which makes it really compact.
The console has a 3D printable shell, and the maker has documented the wiring and programming required. The 3D printed enclosure files are also provided.
- Who designed it: Mach_5
- Core components: Raspberry Pi Zero, 2.4-in 240×320 display, battery, charging circuit, USB Micro-B breakout board
- Where to find it: Instructables
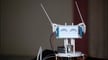
Robot
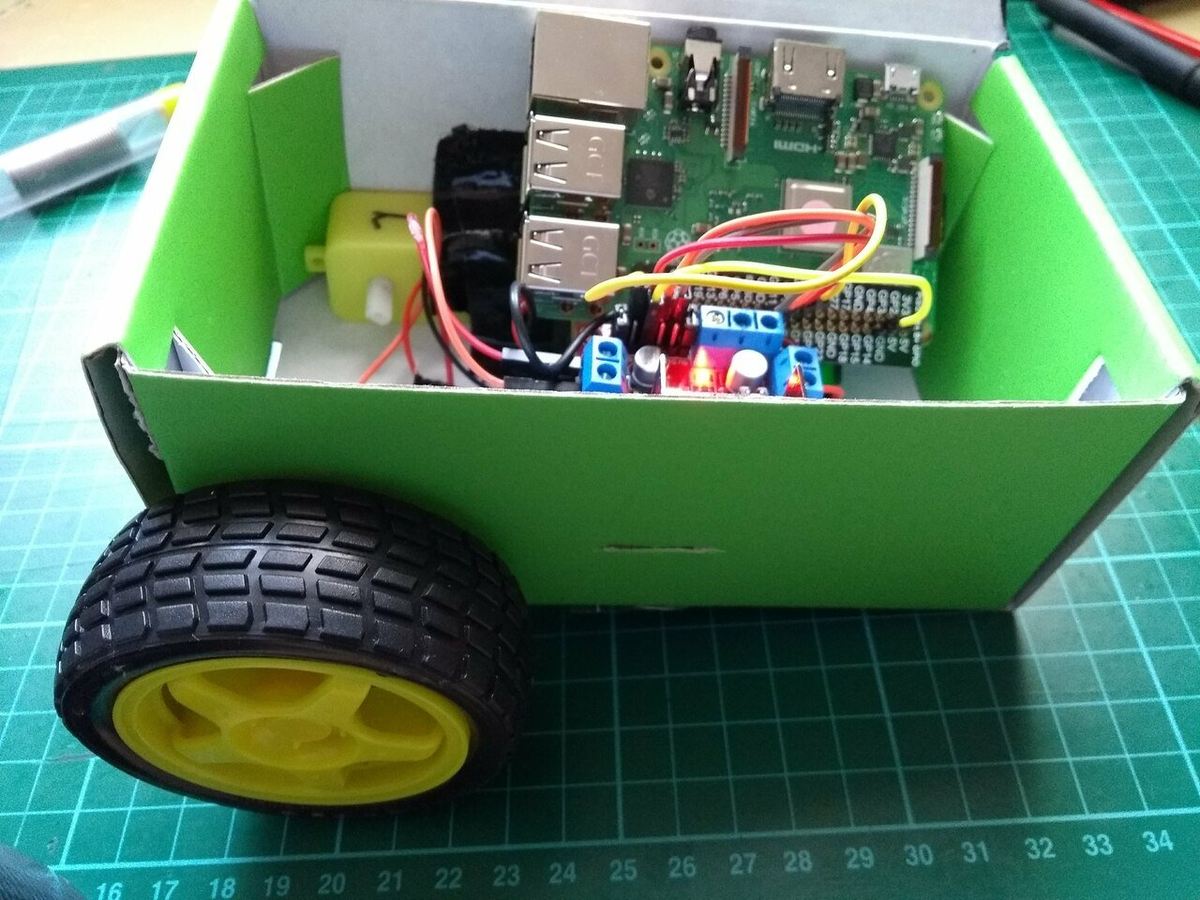
Raspberry Pis are an ideal platform for robotics. They’re not only small, but also powerful enough to build various robotics applications. Raspberry Pis have been used to create robots with obstacle avoidance, security, computer vision such as with OpenCV, and more.
The Raspberry Pi Foundation has created a guide that touches on the basics. By the end of it, beginners will know how to build a buggy that can move left, right, forward, and backward. If you want to 3D print an enclosure or further your build in other ways, there are many 3D printable files available. Check out the SMARS modular robot and Combat Spinner bot, as well as this robot chassis for Raspberry Pi!
- Who designed it: Raspberry Pi Foundation
- Core components: Raspberry Pi 3, motor controller board, 3-V to 6-V DC motors, wheels, USB battery pack, soldering iron and solder, small cardboard or plastic box
- Where to find it: Raspberry Pi Foundation
License: The text of "20 Easy Raspberry Pi Projects for Beginners" by All3DP is licensed under a Creative Commons Attribution 4.0 International License.