The Best Raspberry Pi Camera Projects

Raspberry Pi projects can be instantly upgraded with a camera! Read on for some amazing Raspberry Pi camera projects (with full tutorials).
Raspberry Pi is by far the most popular single-board computer (SBC). There’s an endless number of cool projects and tutorials for this board, showing the true potential of Raspberry Pi’s hardware when combined with some programming skills or open-source software.
Humans are visual creatures and it’s only natural that many of our DIY and maker projects would involve a camera somehow. The Raspberry Pi board makes this an easy task, with all its camera-compatible ports and its own plug-and-play 8-MB HD camera module V2. More recently, there’s a newer “high quality” camera module, too.
For this article, we’ve selected the eight best Raspberry Pi projects with a camera, all of which can be reproduced by anyone with the will and skills required. So, let’s go ahead and check these amazing projects!
DSLR Camera Control
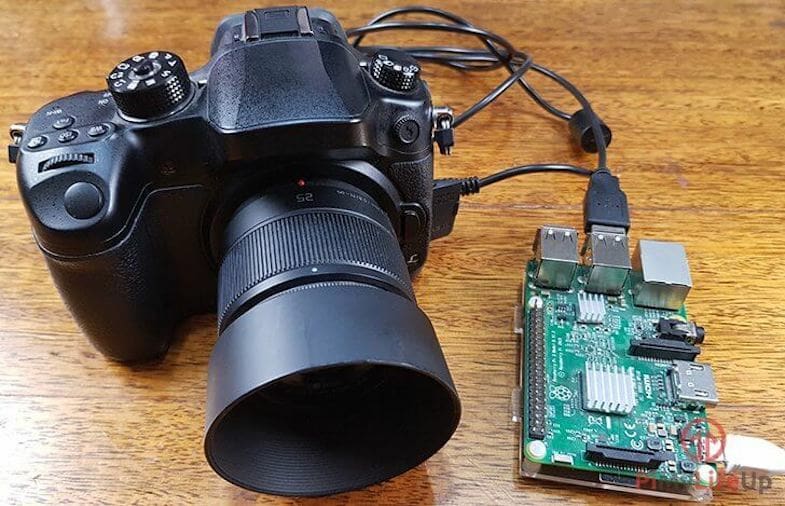
Starting out, here’s a simple beginner project in which a Raspberry Pi is used to control an external camera. Our beloved board is connected to any camera supported by gPhoto2 software (see the full compatibility list) and controls basic tasks like taking photos, changing settings, and even downloading files from the camera.
The components required for this project are minimal and the setup is very straightforward. The full tutorial by Emmet is found at PiMyLifeUp. Those wanting to extract even more functionality can also check the gPhoto2 documentation website.
- Level: Beginner
- Board: All Raspberry Pi models
- Camera: Compatible with over 2,777 cameras
- Tutorial at: PiMyLifeUp
Remote Viewing Camera
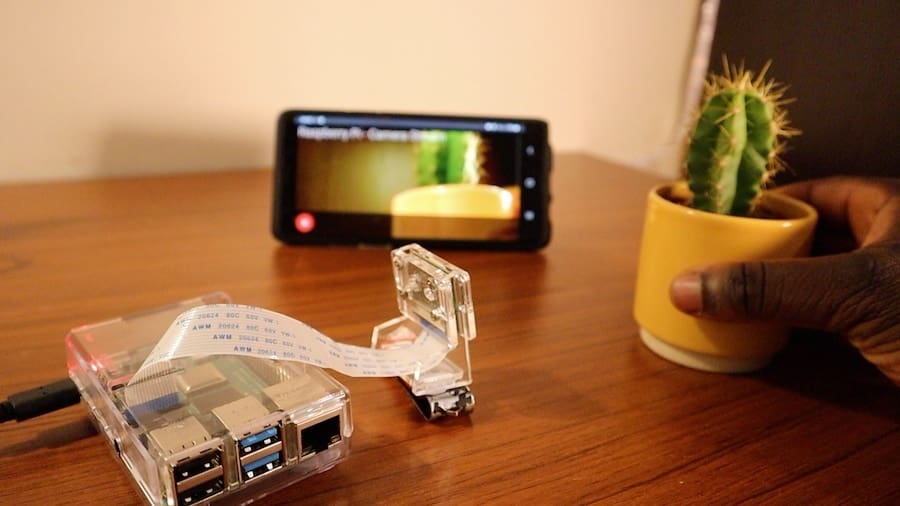
When talking about camera projects in general, streaming systems are very popular. It allows the user to check the live image from a number of devices and can serve various purposes.
This project by Eben Kouao from Make does exactly that: You can set up a wireless stream to view the camera’s feed live from a device (like a smartphone) that’s connected to the same network. It uses basic components and the final setup is very compact, ideal for attaching on a wall or a high shelf.
- Level: Beginner
- Board: Raspberry Pi 4
- Camera: Raspberry Pi camera module (V2 or HQ)
- Tutorial at: Make: Magazine
Time-lapse Machine
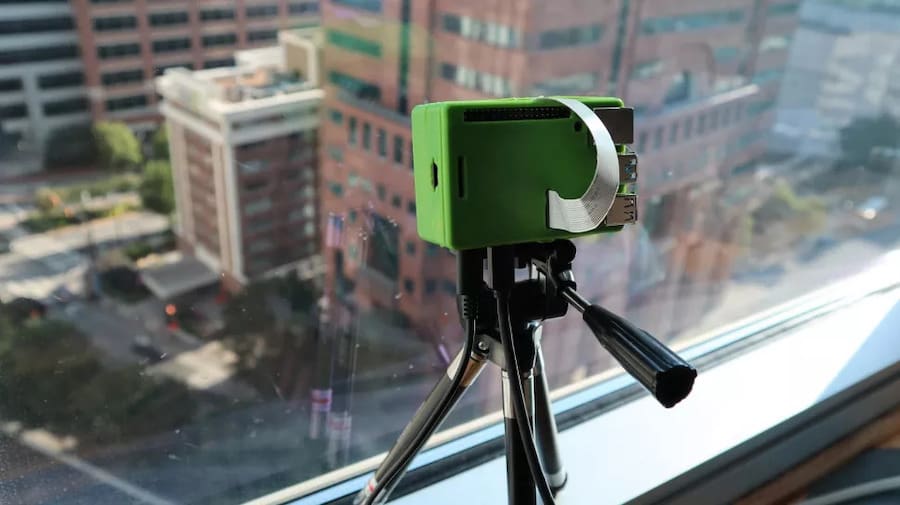
Time-lapse is a photography technique in which a huge number of pictures are taken in pre-defined intervals and later stitched together to form a video. Time-lapses are great for displaying long periods of time in just a few seconds, like a house construction, a sunset, or the printing of a 3D model.
This tutorial by Caroline Dunn covers in great detail all the steps required to create a small time-lapse machine with a Raspberry Pi, a camera module, and some 3D printed parts. With it, you’ll be able to set the time interval and when the camera starts so you can don’t need to wake early or be there to push go. In the end, the time-lapse machine will automatically stitch all the pictures together and output a full video ready for viewing.
- Level: Beginner
- Board: Raspberry Pi 4
- Camera: Raspberry Pi High-Quality camera module
- Tutorial at: Tom’s Hardware
Security System
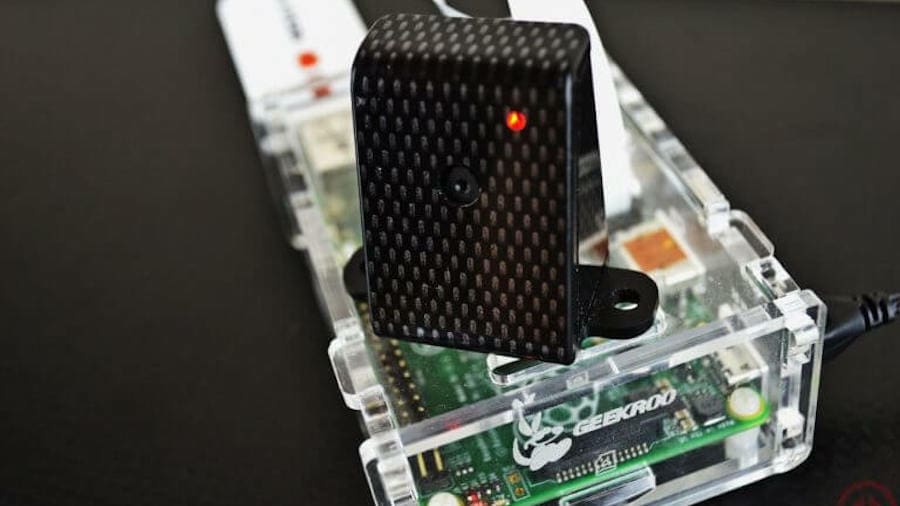
We just can’t have a list of camera projects for the Raspberry Pi without a home security network project. The tutorial by Gus at PiMyLifeUp is a comprehensive yet reasonably simple example that allows hooking up multiple cameras depending on the Raspberry Pi board’s capacity.
Another cool aspect of this project is the motion detection feature, where the Pi can take a snapshot or even start recording when any movement is recognized by the software. Finally, the tutorial also covers the setup of a DNS server so the user can access the camera system outside of their Wi‑Fi network.
- Level: Beginner to intermediate
- Board: Raspberry Pi 3 or 4 (recommended)
- Camera: Raspberry Pi camera module (V2 or HQ) and/or USB webcam (can be more than one)
- Tutorial at: PiMyLifeUp
Smart Video Doorbell
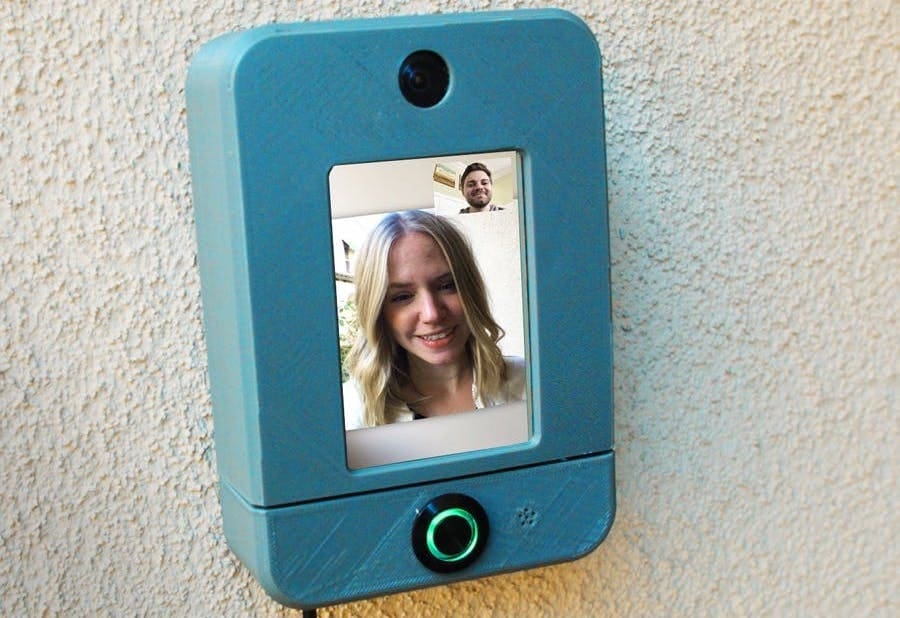
If a camera system isn’t your thing, you can also work your security by making a smart doorbell. This is what the folks at Hacker Shack YouTube channel did with a Raspberry Pi, a camera module, an LCD screen, 3D printed parts, and a few other electronics.
It works like this: The doorbell has a screen and a button, and when a guest presses this button, a notification and an email are sent to you. You can then start a sort of “meeting session” in which you and your guest can talk and see each other through the doorbell and your smartphone camera.
Be sure to check this device working on the video below, it’s really cool.
- Level: Intermediate
- Board: Raspberry Pi 3
- Camera: Raspberry Pi camera module (V2 or HQ)
- Tutorial at: YouTube
Face Recognition
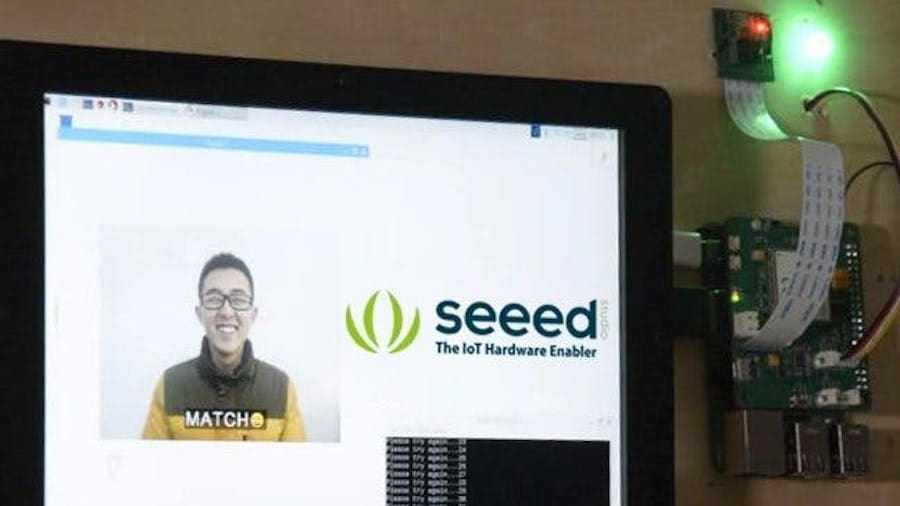
The good people at Seeed have stepped up a notch by creating a face recognition smart lock with simple components such as a Raspberry Pi, a camera module, and a handful of electronics.
Basically, the idea is for the Raspberry Pi to take a picture of the guest and compare it to an existing database of pictures (that’s pre-defined by the user). If there’s a match, this system uses a control relay to unlock the door.
The full tutorial can be found at Hackster but know that it’s mostly focused on the face recognition software, meaning that integrating a lock is all on you.
Instant (Polaroid-Style) Camera
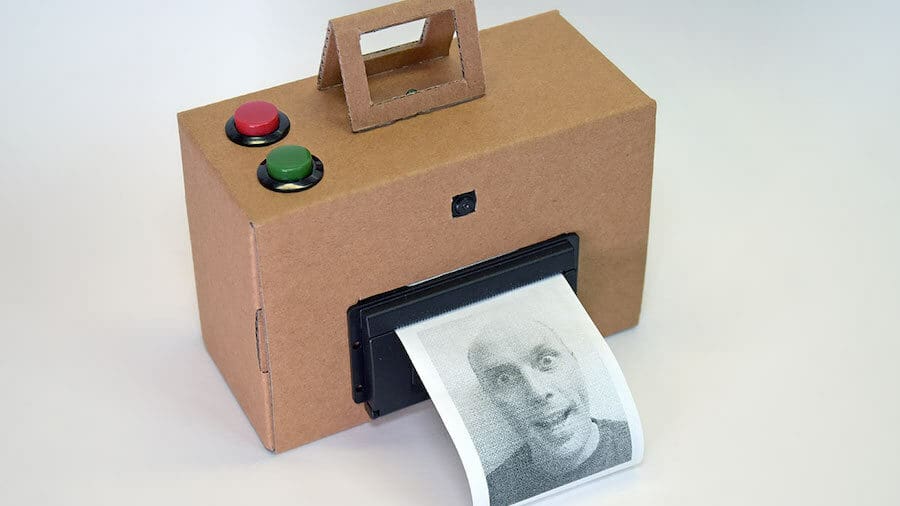
Polaroid cameras were a huge trend back in the 1980s. The ability to take a picture and have it instantly printed all in the same device was cutting-edge technology. Now you can build your own instant camera with a Raspberry Pi, a camera module, and a small thermal receipt printer.
The tutorial by Phillip Burgess at Adafruit shows in detail how to set up and build a Polaroid-like device. The housing used was the box that the thermal printer came in, but the author encourages creativity and improvisation, even mentioning 3D printing a case. Quite a project!
Magic Mirror with Personal Stylist
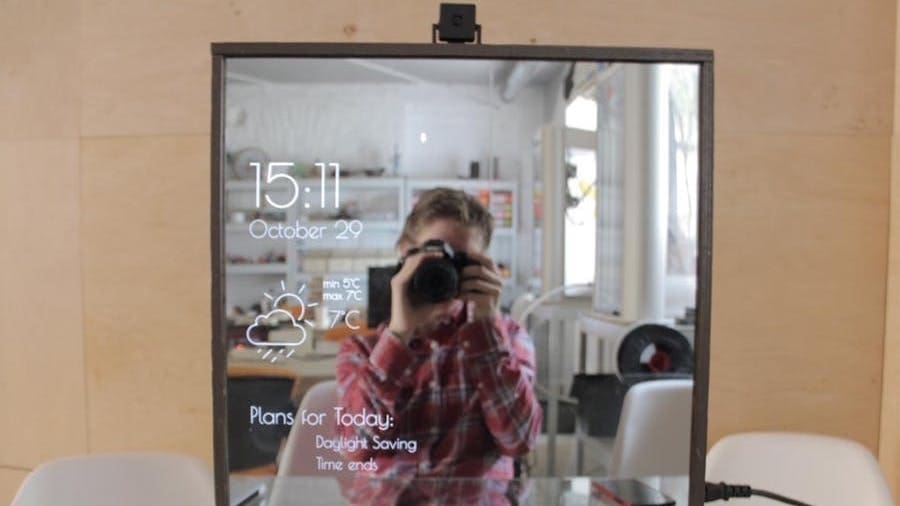
Now, to end this list in style, we have the “magic mirror” by Fedor Bobylev. Magic mirrors are very popular among makers, as they’re a useful creation for daily life. Besides showing the weather, your calendar, and the time, this mirror offers a unique feature: It can recommend outfits to wear.
In the author’s own words, it’s a virtual wardrobe where you can create a database of looks. Pictures or videos are taken by the Raspberry Pi camera and certain tags can be assigned to each stored outfit.
The “personal stylist” then can recommend clothes based on the dress code tag and even suggest outfits based on the current weather outside.
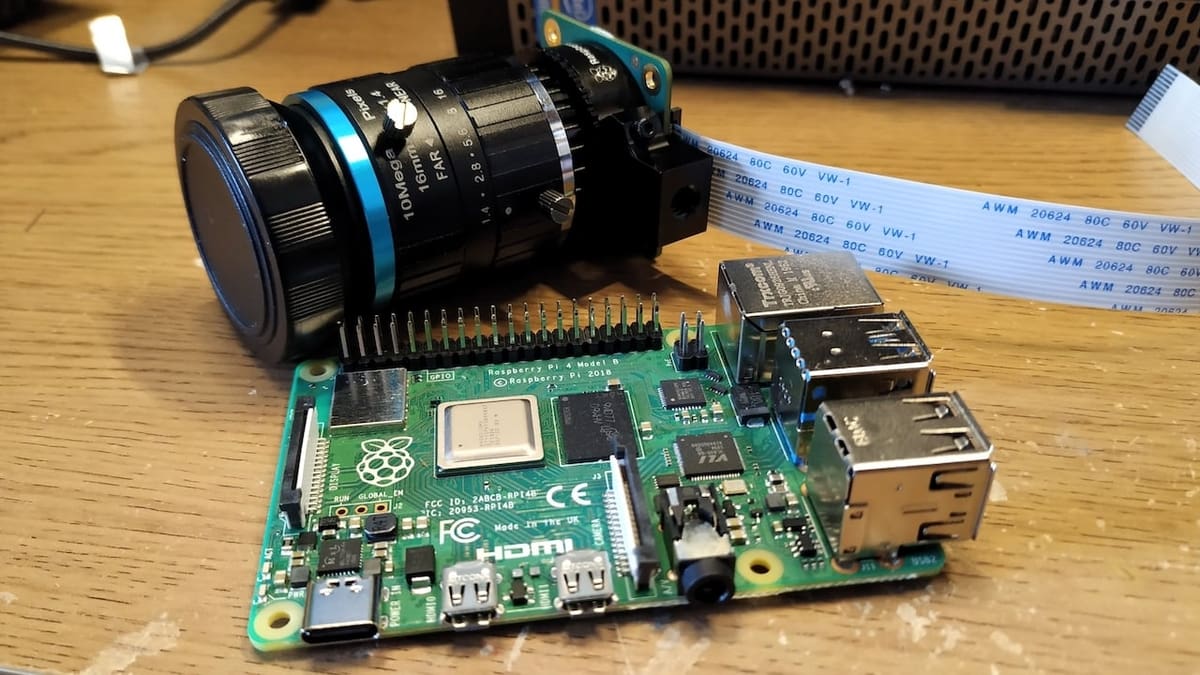
Lead image source: Tom's Hardware
License: The text of "The Best Raspberry Pi Camera Projects" by All3DP is licensed under a Creative Commons Attribution 4.0 International License.
CERTAIN CONTENT THAT APPEARS ON THIS SITE COMES FROM AMAZON. THIS CONTENT IS PROVIDED ‘AS IS’ AND IS SUBJECT TO CHANGE OR REMOVAL AT ANY TIME.