Auto-Leveling 3D Printer: Do I Really Need It?

Auto-bed leveling is an increasingly popular feature on 3D printers, but do you need it? Read about what it is, the methods, and more!
One of the most important things to check before starting a print is that the bed is level. An unlevel bed means that the distance between the nozzle and the build plate changes at different points and can result in problems with print adhesion and the quality of the first layer.
Most budget 3D printers, like the Ender 3 V2, achieve a level bed through manual leveling, where the user rotates bed screws. However, automatic bed leveling (ABL) is another option that can reduce the amount of effort you have to put into leveling your bed and helps yield more consistent results.
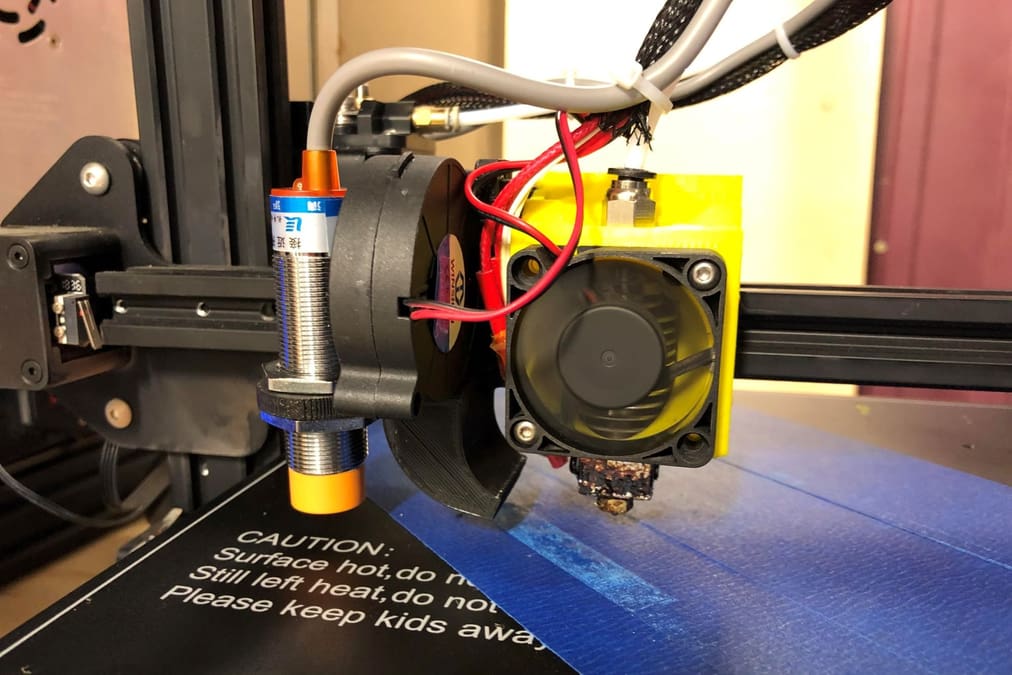
Auto-bed leveling is executed by the printer’s firmware and uses a probe device to measure the distance from the printhead to the build plate at different points on the bed. Depending on how you set your firmware, the printer then applies these distances as offsets or compensations while printing (in different ways depending on the specific method used). This attempts to ensure that the nozzle stays equidistant above the build plate and can thus achieve a good first layer.
In this article, we’ll go over whether ABL is “worth it” or not. To explore this question, we’ll compare manual leveling and ABL, as well as review a number of specific firmware leveling methods, using the popular Marlin 3D printer firmware for reference. Lastly, we’ll go over a few popular ABL sensors (probes). Enjoy!

Manual Leveling vs. ABL

To understand if you need auto-bed leveling for your 3D printer, it can be helpful to compare ABL to traditional manual bed leveling.
Before we get into that, though, it’s important to note that ABL doesn’t actually level the bed as with physical, manual bed leveling. Instead, ABL compensates for an unlevel or uneven build plate within the printer’s firmware. The printer uses measurements taken by the ABL probe to dynamically change the height of the printhead to keep the nozzle the same distance above the bed at all times.
Now that that’s clear, let’s go over a few different factors.
Cost
To start with, ABL is naturally more expensive than manual leveling. Because most printers come equipped with manual leveling screws on the build plate, its cost is virtually zero. Meanwhile, printers with ABL are typically more expensive, and to equip a machine with ABL, you’ll at the very least need to purchase an ABL sensor, which can cost anywhere from $15 to $65.
Consistency
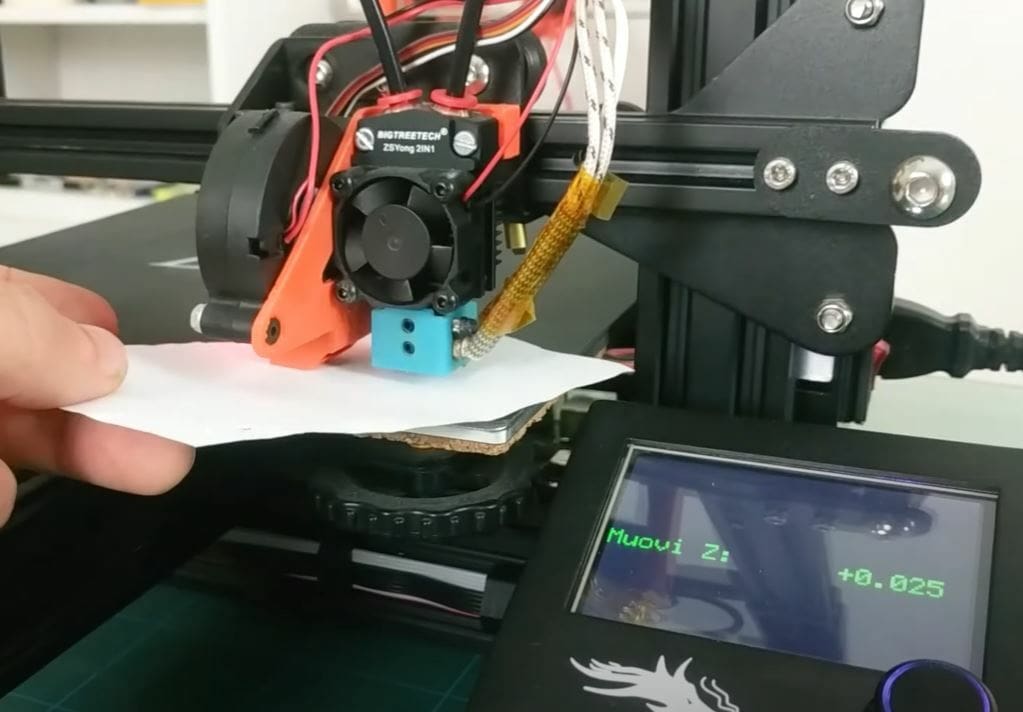
Assuming both are done correctly, neither ABL nor manual leveling achieves “better” first layers than the other. However, ABL is typically more consistent, as it’s directed by a computer using precise sensors rather than human hands using a piece of paper (which is commonly used for manual leveling).
Time & Effort
As you might expect, ABL sensors can make it much easier to level your printer than manual leveling; all you have to do to run a leveling sequence is click a few buttons on your printer’s interface. Often, it’s even the default before a print!
However, setting up ABL can be somewhat difficult, as you need to configure your firmware and your machine’s printhead to work with the ABL sensor. Still, manual leveling is easier to understand because it simply involves raising or lowering four corners of the bed plane based on their position relative to the nozzle.
Mesh Bed Leveling
If you can’t decide between manual or auto-bed leveling, mesh bed leveling might be for you. Mesh bed leveling is directed by firmware but relies on the user to carry out adjustments, meaning it doesn’t require an ABL sensor.
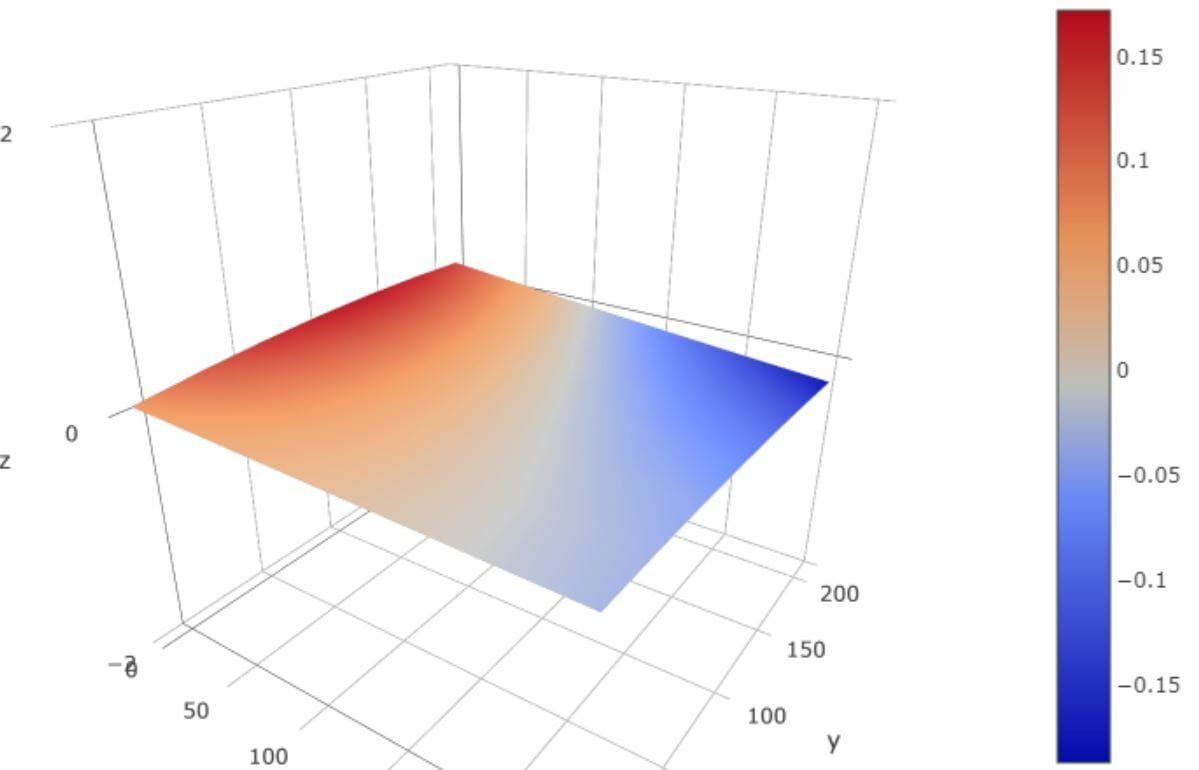
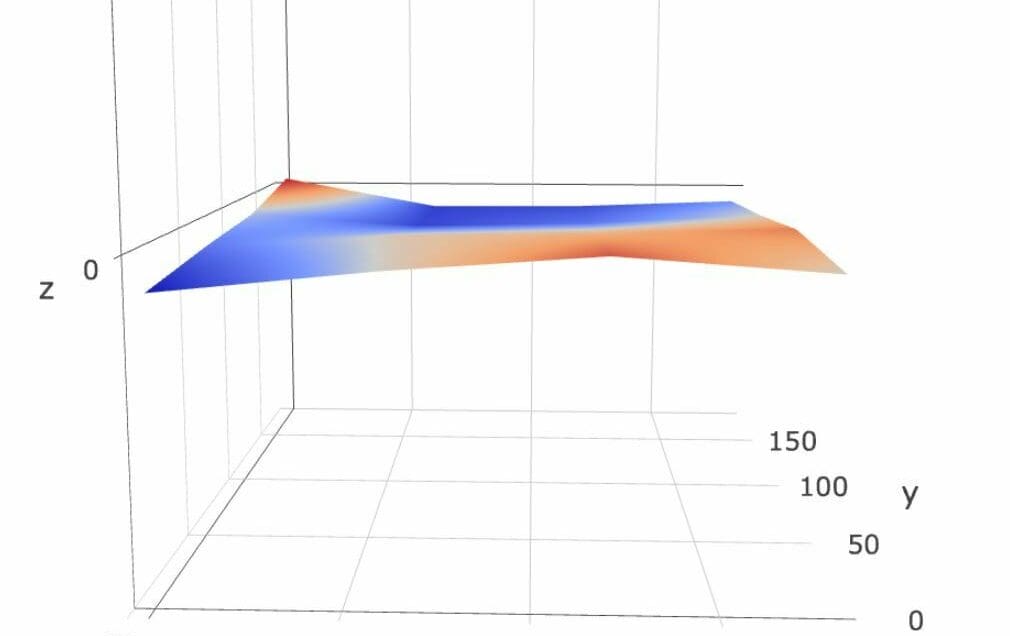
Using the measurements entered by the user, the firmware constructs a mesh, that is, a grid of points, each with its own “elevation”. This mesh determines how the printhead should be raised and lowered depending on where it is in the XY-plane.
As you might expect, mesh bed leveling is a mesh-based leveling method, of which there are several. These contrast with matrix-based methods, which accommodate the overall tilt of a bed rather than specific points of elevation.
Naturally, points in a mesh will follow the plane of a bed, so mesh-based methods can partially accommodate tilt. That said, because they don’t attempt to determine the overall tilt, they don’t directly accommodate it by rotating the coordinate system. This means that a tall, straight part on a very tilted bed may print straight up, relative to the printer, but come out slightly crooked.
In theory, mesh-based methods can also have undesirable effects with particularly warped beds. For example, printed on a bed with extreme valleys or “craters”, a model with a flat top may exhibit the same dips. This is where fade height (or graduated bed compensation) – a firmware setting – should be activated. It tells the firmware to gradually reduce the application of mesh compensation offsets.
Types of Firmware Bed Leveling
When it comes to auto-bed leveling, there are a few specific methods that you can choose from in your firmware package (only one at a time). Each method processes the measurements taken by your printer’s ABL probe in different ways and has its own benefits and downsides.
In this section, we’ll go over four popular ABL methods available in Marlin firmware, including 3-point, linear, bilinear, and unified bed leveling. For each method, we’ll briefly describe how it works and its advantages and disadvantages.
3-Point
First up, 3-point leveling directs the ABL probe to measure the distance from the printhead to the build plate at three different points, all with preset coordinate points specified in the firmware configuration.
3-point leveling is a matrix-based method, meaning it’s best for tilted (rather than warped) beds. Using the three user-specified points (as coordinates) on the bed, it generates a tilted plane (or matrix) that represents the angle of the bed. As such, it accommodates the overall tilt by rotating the coordinate system, meaning a tall, straight print will print perpendicularly to the build surface and possibly slanted relative to the printer.
One of the best parts of 3-point leveling is that the leveling sequence is very quick, and you can specify whatever three points on the bed you want.
Linear
Second, linear bed leveling is a matrix-based leveling method that uses a least-squares mathematical algorithm to compensate for a single-direction tilt on the print bed. A specified number of points is probed in a rectangular grid (e.g. 3 x 3). As with 3-point leveling, this matrix-based method effectively rotates the coordinate system to be perpendicular to the bed.
This makes linear leveling great for compensating a tilted, non-warped bed. And while the plane procured through linear bed leveling may be more accurate than 3-point leveling, it takes longer to generate because more points are used for the calculation.
Bilinear
Bilinear is one of the most popular auto-bed leveling methods. Like linear leveling, it probes the bed in a grid of (specified) points. Yet, unlike linear leveling, instead of creating a single tilted plane, bilinear leveling uses the measurements to create a mesh. As such, bilinear leveling is mesh-based, generating a virtual topology of the bed.
This makes bilinear leveling a great option for build plates that are warped at multiple points and in multiple directions (e.g. with multiple bumps). Severe bed tilts, on the other hand, won’t be strongly compensated for.
Unified Bed Leveling
Lastly, unified bed leveling (UBL) is a firmware leveling feature that’s similar to bilinear leveling, but with a mix of the previously discussed mesh bed leveling. UBL can use an ABL sensor, but you can still input the measurements manually and adjust them. Even though UBL involves many points, prints will still come out uneven based on the compensation needed for the bed, so try your best to get an actual (manual leveling) flat bed before making your mesh.
UBL typically involves a much larger grid than any other leveling options, as UBL meshes are meant to be long-term, which is in part why you can manually edit them. Marlin’s UBL feature also comes with a few integrated tools, like storage for multiple meshes – which is excellent if you have numerous build plates – and mesh validation – which prints a leveling test print.
Popular ABL Sensors
If you’ve decided that you want a printer with auto-bed leveling or you want to upgrade your current machine to have this feature, then you’re going to need an ABL sensor. There are many different types of ABL sensors, like Hall-effect and capacitive, and many individual products for each style. Below, we’ve gone over a few of the most popular ABL sensors, describing what they are and how they can be used:
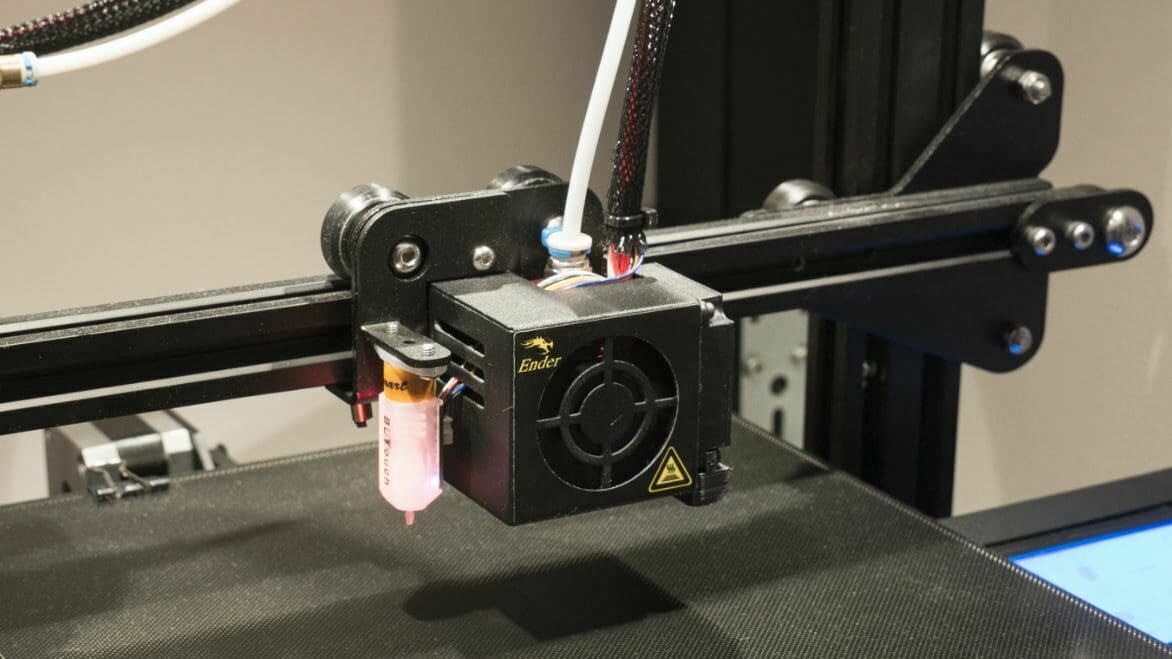
- BLTouch: BLTouch sensors are perhaps the most popular ABL sensor, known for reliability, compatibility, and ease of use. The sensor itself is a physical (touches the bed) hall-effect sensor. There are many available firmware configurations and printable mounts that let you add this device to your printer.
- EZABL Pro: Brought by 3D printing company TH3D, the EZABL Pro is a capacitive sensor, meaning it can detect both metallic and non-metallic surfaces without ever touching them. The EZABL Pro is also pretty easy to use and reliable, although its firmware and hardware compatibility is more limited than the BLTouch.
- SuperPINDA: The SuperPINDA sensor is a high-quality Prusa Induction Auto Leveling Sensor (PINDA), seen on the Prusa i3 MK3S+. As an inductive sensor, the SuperPINDA can detect metal surfaces without direct contact, and it’s pretty accurate and reliable in doing so. The SuperPINDA is also pretty inexpensive and comes pre-configured in Prusa’s version of Marlin firmware.
Final Thoughts
As we’ve shown, there’s really no clear winner when it comes to auto-bed leveling vs. manual leveling. You should decide what type of leveling you want to use based on what you want and need for your printer.
If you’re new to 3D printing or are averse to complexity, then you may want to stick with manual bed leveling because it’s easier to set up and use. Manual bed leveling is also an excellent choice for those who don’t mind the extra few minutes of preparation before prints. Indeed, if you don’t make any changes to your setup between prints, it’s even possible to make small tweaks while your printer sets down a model’s skirt.
If you’re not a fan of manually leveling your build plate before every print, then ABL might be for you. ABL is also useful if you want to have more consistent first layers but don’t mind running a multi-point leveling sequence before every print.
Of course, even if you want to use ABL, be mindful of whether it’s matrix- or mesh-based. Either way, it’s good to perform manual bed leveling once in a while, and if it’s the latter, consider whether fade height (or graduated bed compensation) is necessary for a particular print.
License: The text of "Auto-Leveling 3D Printer: Do I Really Need It?" by All3DP is licensed under a Creative Commons Attribution 4.0 International License.