Anycubic Photon Workshop: Get Started with the Photon Slicer

Anycubic Photon Workshop is a great program for resin printers. Read on to learn all about this slicer and how to get started!
The success of your 3D printed object depends on how you get your design to your printer. To do that, you need a good slicer program. A slicer converts 3D digital designs into instructions for the machine to follow. With it, you can control the resolution, printing speed, and other details that make or break your model.
It’s especially important to know how your slicer program works when it’s interacting with a 3D printer that uses unusual materials, such as resin. Resin printing requires specific knowledge since it’s very different than filament-based 3D printing, in terms of both printer operation and relevant slicer settings.
The Anycubic Photon Workshop is the slicer program that comes with the Anycubic Photon printer line. We’re here to show you how it works so you can maximize your output while minimizing your learning curve.

Getting Started
If you don’t have Anycubic Photon Workshop installed already, or are looking for the latest version, you can download it from the manufacturer’s official website. Otherwise, you can find the program on the SD card that came with your Photon printer. Installing the latest software version can give you the most recent fixes and features, so it’s worth checking out.
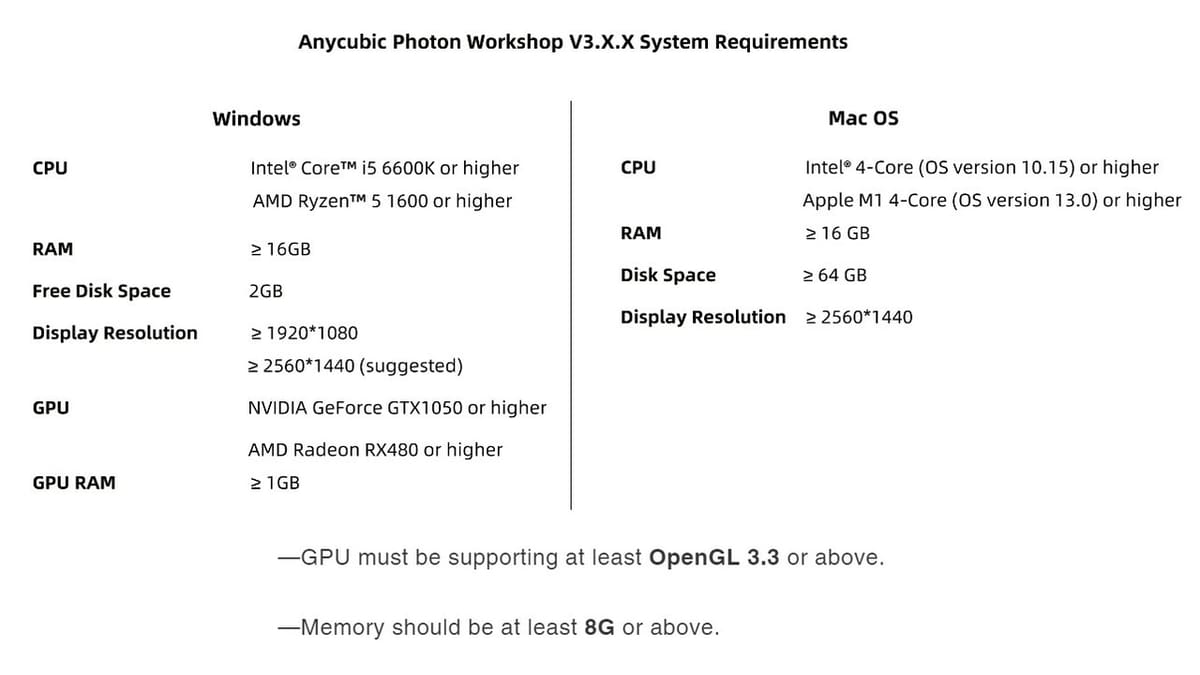
In terms of system requirements, Anycubic specifies that you need at least 8 GB of memory and a GPU that supports OpenGL 3.3 or above. Without meeting these, the software may present some instability, so this is an important point to keep in mind. Further system requirements can be found in the Anycubic Photon Workshop manual.
Anycubic Photon Workshop is currently in version 3.2.0 and is available for Windows and MacOS systems, in addition to having two languages: English and Chinese. Previous versions of the software had a predominant dark theme interface, which can be seen in several tutorials that have not yet been updated. The latest version has a clean white interface with some new tools and features, such as profile management for different printers and materials.
One of the things that make Anycubic Photon Workshop powerful is its support for many different file types for 3D models, including STL, OBJ, 3MF, IGES, and STEP. So no matter what type of file format your 3D model is in, you’re ready to get slicing. Without further ado, let’s take a closer look at what this slicer has to offer!
UI Overview
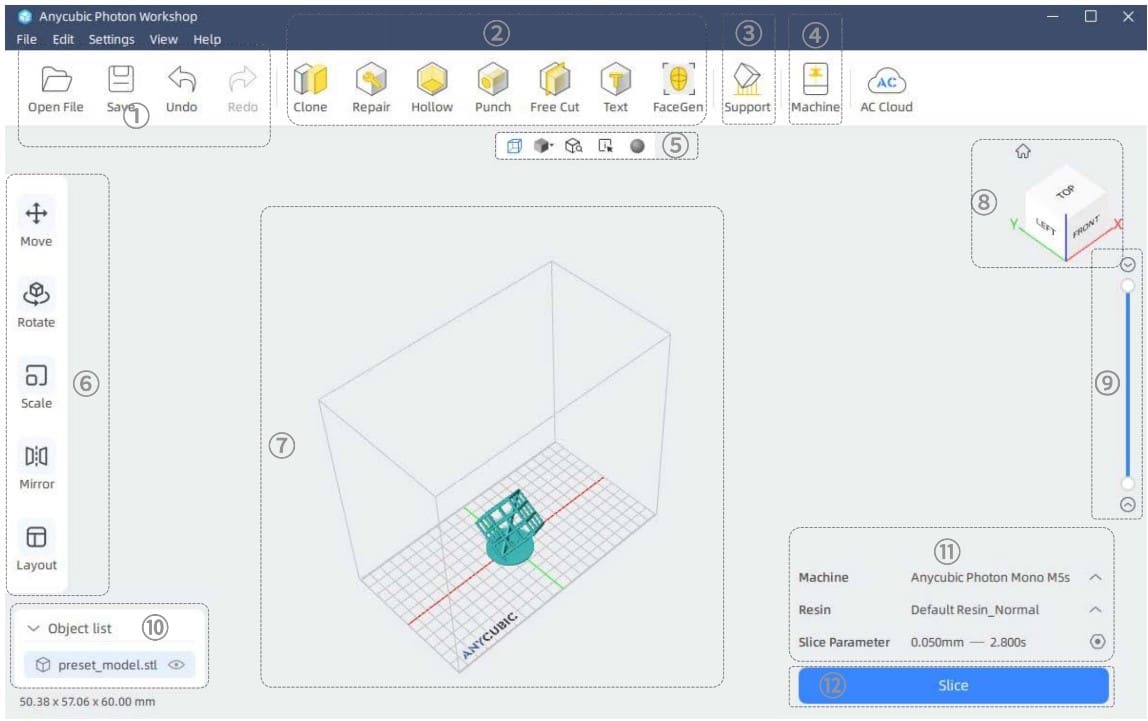
Anycubic Photon Workshop’s interface is very intuitive and clean, but there may be more than one way to get to the same feature in some cases. In the image above, we’ve indicated the main areas of the interface, so let’s check what we will find in each one:
- Open, Save, Undo, Redo: By clicking on “Open”, you’ll be able to load your 3D model file into the program’s work area, for example. When saving, you can also choose between STL and OBJ file formats to save your 3D model, but note that this function does not save or perform slicing.
- Advanced edit panel: Here are some very important functions for editing models. You’ll find here the “Repair” tool for models that have any flaws in their mesh and the “Free Cut” function to split the model into two parts for easier printing. There are also the “Hollow” and “Punch” tools to create empty space in your model and add a drainage hole to prevent trapped resin.
- Support settings: Clicking on this option opens the Support window where you can insert supports automatically or manually edit and customize their parameters. In previous versions of this software, this window appeared as a fixed panel.
- Machine settings: In this window, you’ll be able to select and manage the preset printer and resin profiles. In addition to all of the Anycubic Photon printers, you’ll also find the option to include a personalized printer profile.
- View mode: In this little toolbar, toggle between visualization modes for the model, such as “Solid”, “Point structure” or “Wireframe”. You can also enable model shadows on the print platform.
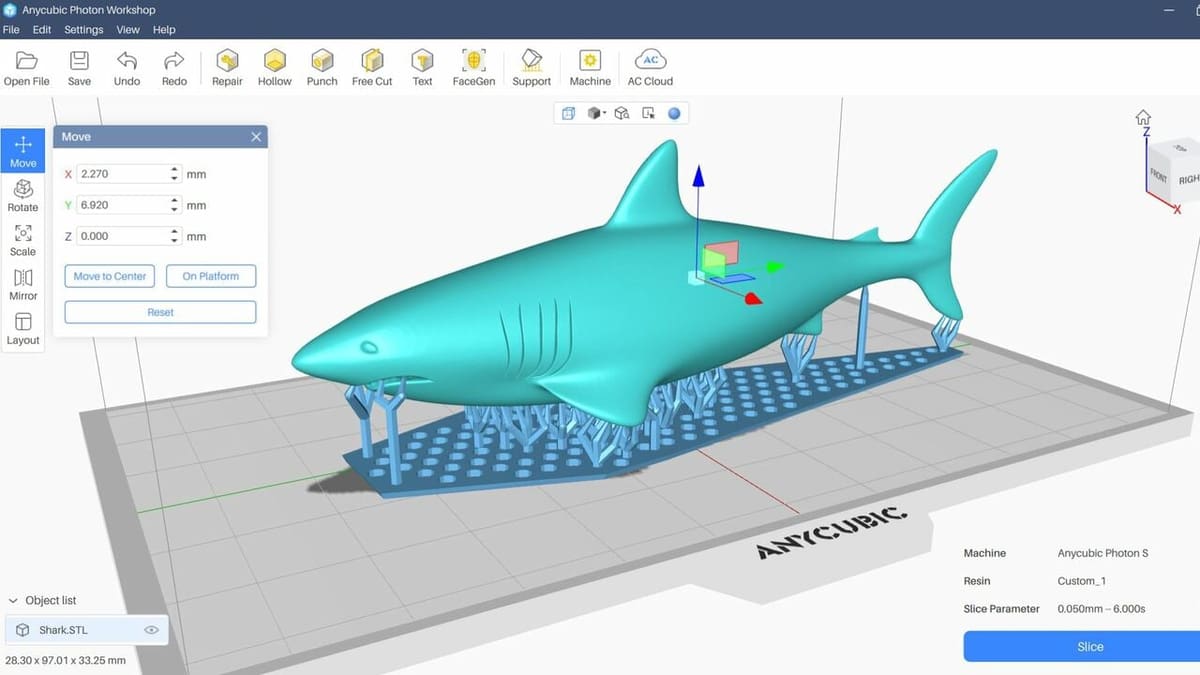
- Basic edit panel: Here, you can find all the basic editing functions like “Move”, “Rotate”, “Scale”, “Mirror” and “Layout”. This last one can be used to effectively distribute multiple models on the building platform.
- 3D model preview: View the virtual build plate and the preview of your model front and center of the UI. Here, you can use the mouse to manipulate the object and make adjustments.
- View switcher: Here, you can quickly switch between predefined model viewing points.
- Layer preview bar: In this small sidebar, you can choose which layer(s) of the model to view or run a small animation showing the layers in ascending or descending order by clicking on the arrows above or below the vertical slider.
- Object list: All the models that you include in the printing platform are listed here, and you can toggle their visibility. It’s important to note that models that are not visible are not sliced and printed.
- Slicing configuration: In this panel, you can quickly select between preconfigured profiles of printers and resins before going for the final slice.
- Slice button: When everything is properly prepared, this is the button that starts the slicing process and brings you to the final print preview for the last check before loading it to your printer.
Features
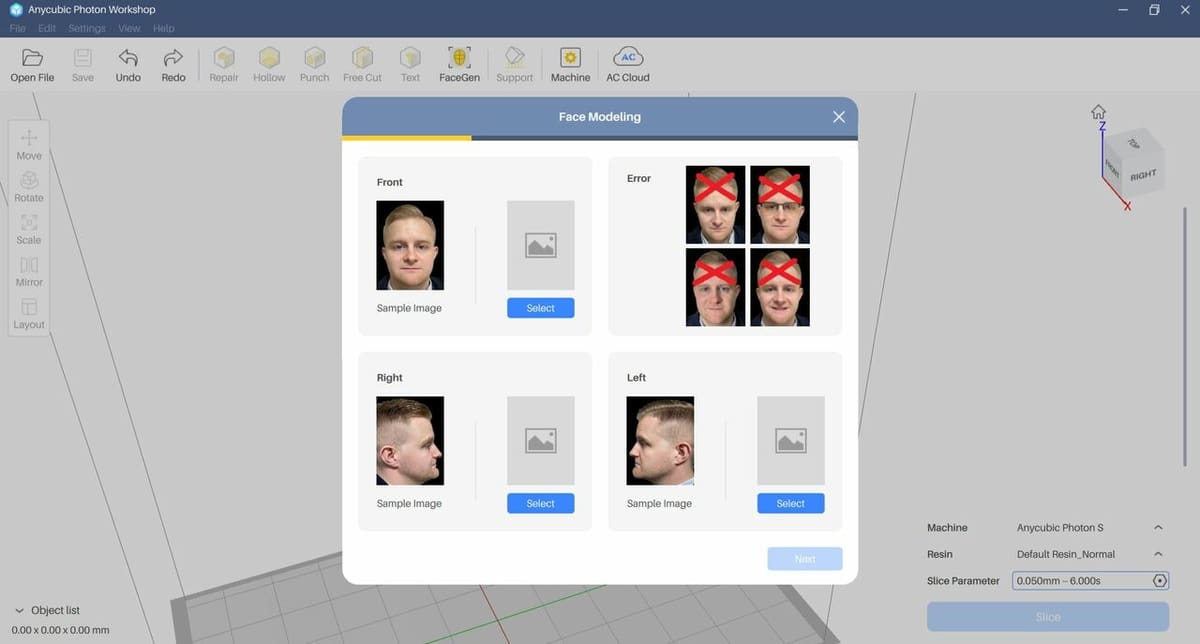
Photon Workshop has many interesting features, including special ones like “FaceGen” to generate facial models from a few photos. For now, let’s focus on the main ones you will need to operate this program well:
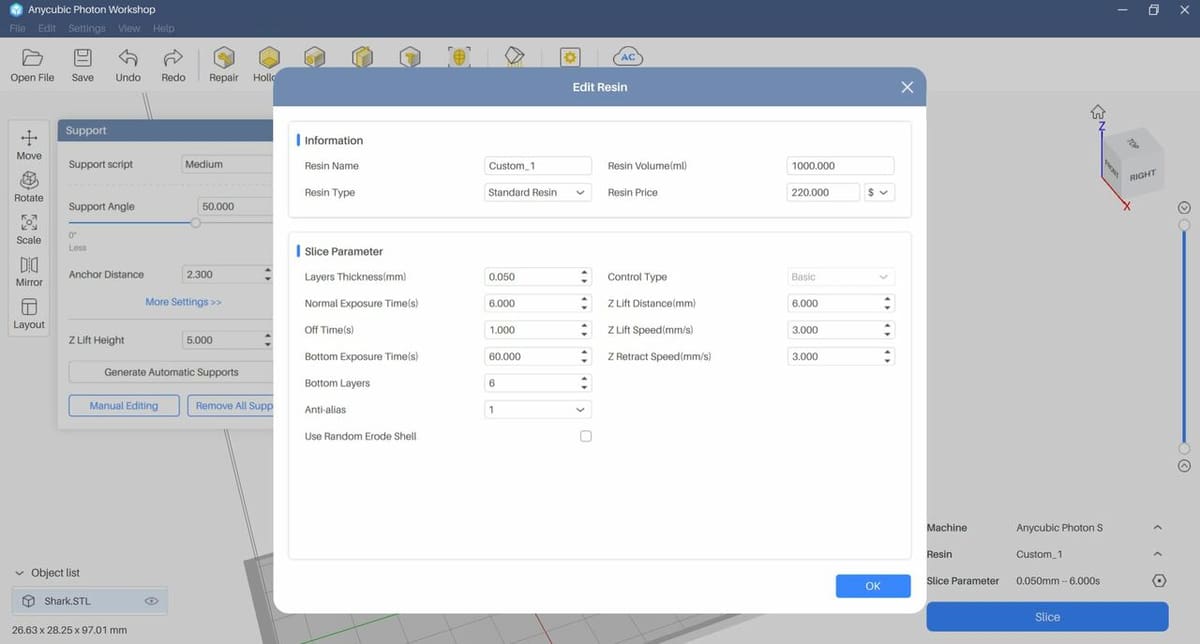
Printer & Resin Profiles
In the latest versions of Anycubic Photon Workshop, you can save profiles of different printers and resins to facilitate daily operation. This makes all the difference if you have more than one printer or regularly swap out our resin. Materials can behave very differently depending on their properties and manufacturer, so testing each new resin you’re working with for the first time and saving custom settings can save you a lot of trouble.
Printer profiles are limited to the Anycubic Photon line, but it’s also possible to create a custom printer profile.
Model Editing Tools
Anycubic Photon Workshop is stocked with resin printing tools that allow for small, but often essential, adjustments. Similar to FDM, resin prints typically don’t need to be totally solid. Using the Hollow function will remove excess internal material from your model for you.
However, it’s crucial to the lifespan of your printed resin pieces that liquid resin does not get trapped inside the hollow spaces that you create. The Punch tool allows you to easily add drainage holes to your model.
The Repair tool is very useful for solving simple problems in the models without having to resort to other programs, such as closing holes in the object’s mesh. It’s not a bad practice to run a repair on a new model – just to be safe.
A new and interesting feature is the integrated FaceGen, which can generate faces from photos that you can add to your models. This is a pretty new feature, so the jury is still out on how realistic printed models end up.
Print Preview
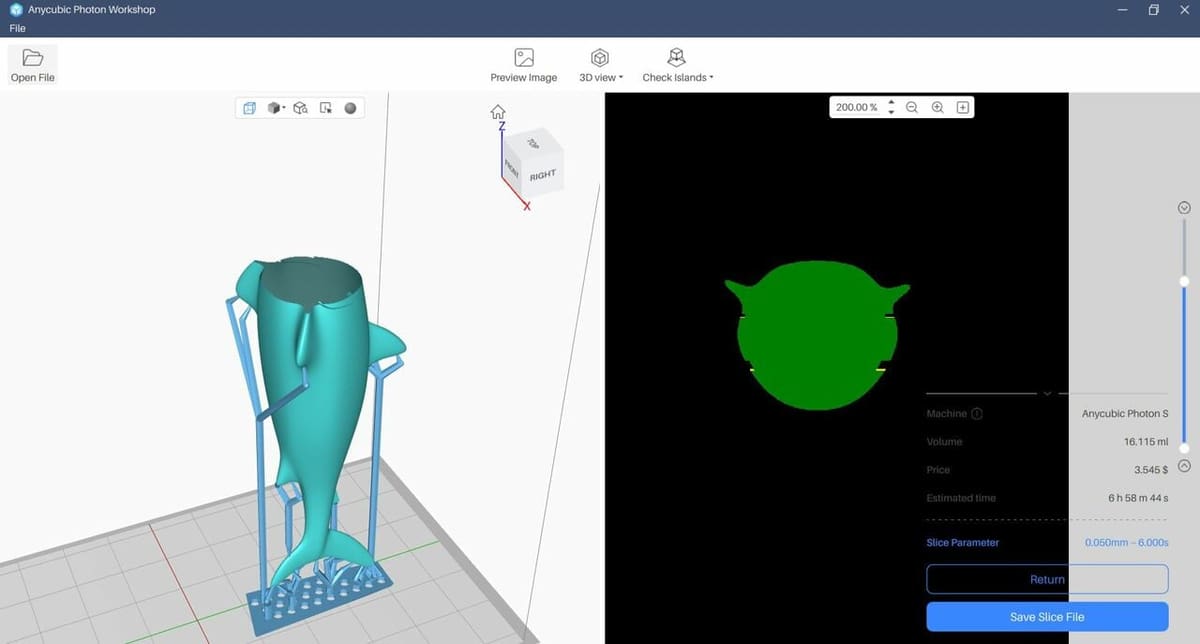
After all the necessary care is taken to prepare the model, it’s time to slice it and check for possible problems before moving on to printing. After processing the request, a new window will open that looks similar to the image above. To view your model on the build plate simultaneously, select “Enable 3D View” from the overhead bar.
With this preview function, you can use the right-hand side layer preview bar to scan through your sliced layers. Keep an eye out for surface printing without supports or other anomalies.
Other important information, such as the volume of resin used, the estimated price of resin, and approximate printing time are displayed at the bottom right of the screen, next to the save sliced file button.
From here, you can save the print-ready file either to your hard drive or a USB stick, but remember that this file format (G-code) is not a 3D model, but instructions for the printer on how to print the model, and it varies according to the selected printer model.
Slicing Considerations
After mastering the basic commands, you can begin experimenting with advanced settings within Photon Workshop to help optimize your results. Here are some hints to get you started off right:
- Layer thickness: You’ll be safe sticking to values between 0.01 to 0.2 mm. The thicker the layers, the faster the finished object will print, degrading layer resolution and print quality.
- Normal exposure time: On an LCD 3D printer like the Anycubic Photon, the exposure time works a bit like the exposure time for photos. The longer the exposure time, the thicker and more detailed the layer will be. Longer exposure times also mean longer print times in general. Photon Workshop has a range of 1 to 15 seconds, but this will largely depend on your printer.
- Off time: This value refers to how long the UV light in your Photon printer pauses between layers. After one exposure, the UV light goes out, and the build plate peels off the bottom of the resin vat, rises up a bit, then returns to the next defined layer height before the light comes back for the next exposure cycle. The more time off, the more time the resin will have to settle and make room for the next coat. Longer break times are good for especially viscous resins. Photon Workshop has a range of three to six seconds.
- Lower exposure time: The first layer is crucial for establishing a firm foundation for your 3D object to grow, so the longer the underexposure time, the better grip that first layer will have on the build platform. You can set anything from 20 to 80 seconds.
- Support: When you have a project with a lot of gaps or protruding parts, printing the support material along with the object holds everything in place until it hardens enough to hold its own shape. The Anycubic Photon Workshop lets you decide which degree of support you want: light, medium, or heavy. Remember that the heavier the support, the more difficult it is to detach from the design itself.
- Object orientation: It’s important to not let large flat surfaces be completely parallel to the print bed to avoid failure. When printing, a vacuum forms between the build plate and the resin vat that is stronger with greater surface area. If the vacuum is too strong, the movement of the build plate can create unwanted defects on your print or even cause a catastrophic failure.
- Hollowing: Whether to save material or simply out of necessity, hollowing out a model can be very relevant, but you need to remember to include the holes in the right places, like in the area of your model that will be printed last (farthest away from the build plate), so that uncured resin can completely drain out.
Community Support
For more information on how to use Anycubic Photon Workshop, you can try checking out the beginner tutorial videos that Anycubic posted on YouTube.
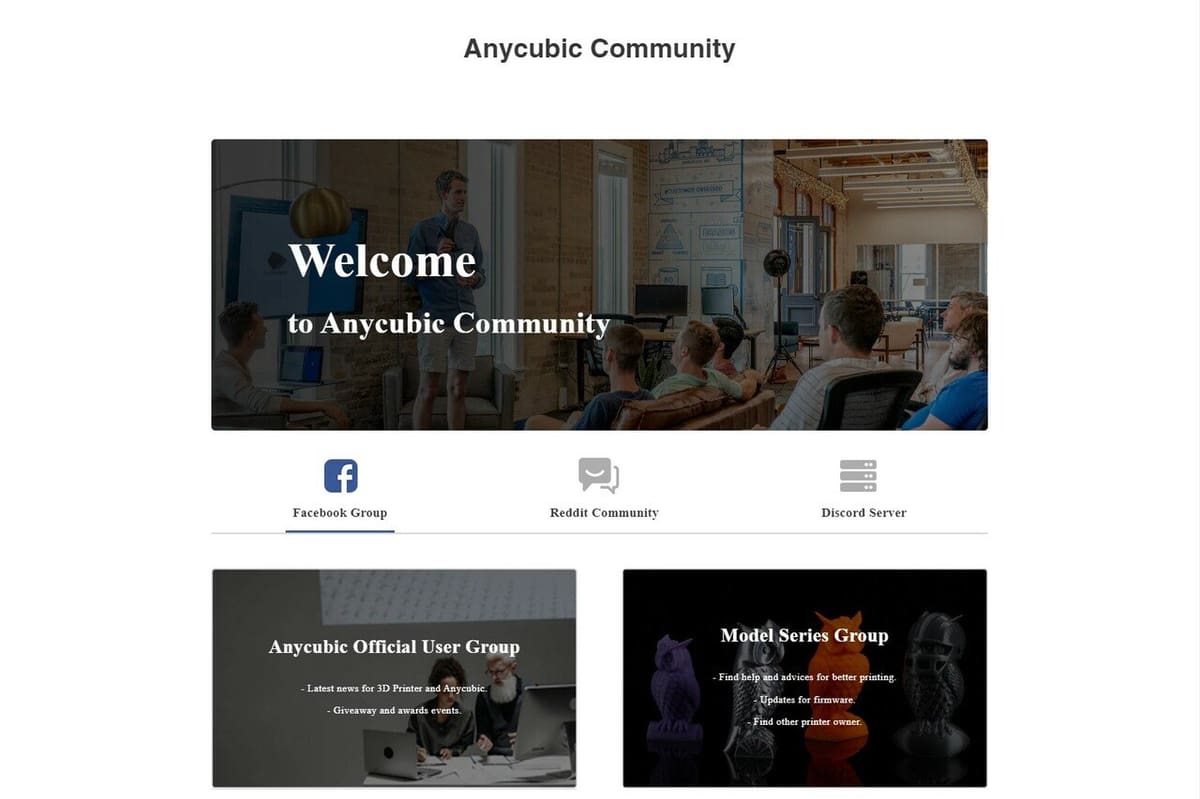
If you’re having specific problems, chances are someone has already asked about it on one of several online forums. This includes dedicated Anycubic Photon and general Anycubic subreddits, as well as several GitHub pages. According to their website, you can also access the official Discord server and Facebook groups if either of those platforms happens to be more your speed.
User Experience
Anycubic Photon Workshop has undergone major changes since it was released. In previous versions, its interface was dark, but this has been switched to a lighter theme with no option to customize. While previous versions also lacked features that other slicers already had, Anycubic took some time to integrate functions such as model repair, automatically checking for software updates, and a 3D text tool.
With the release of new resin printer models, the software seems to have gained more attention, even adding some special features like a face model generator. Although there clearly have been efforts to make the software more prominent, it still lacks important considerations like languages other than English and Chinese.
Updates to the software are released regularly. However, users often complain of new issues and bugs with each new release, too.
In any case, the advances that have taken place so far have made this slicer a very powerful tool, capable of even solving small problems in models, and this is nothing to scoff at. A good example of how the software has been maturing is the new, frequently-requested “Free cut” function, which despite being simple, is super useful and eliminated the need to use a separate program for multi-part prints.
If you have an Anycubic, you’ll be able to obtain good results with this versatile slicer, given you take the time to learn the ins and outs of resin 3D printing.
Alternatives
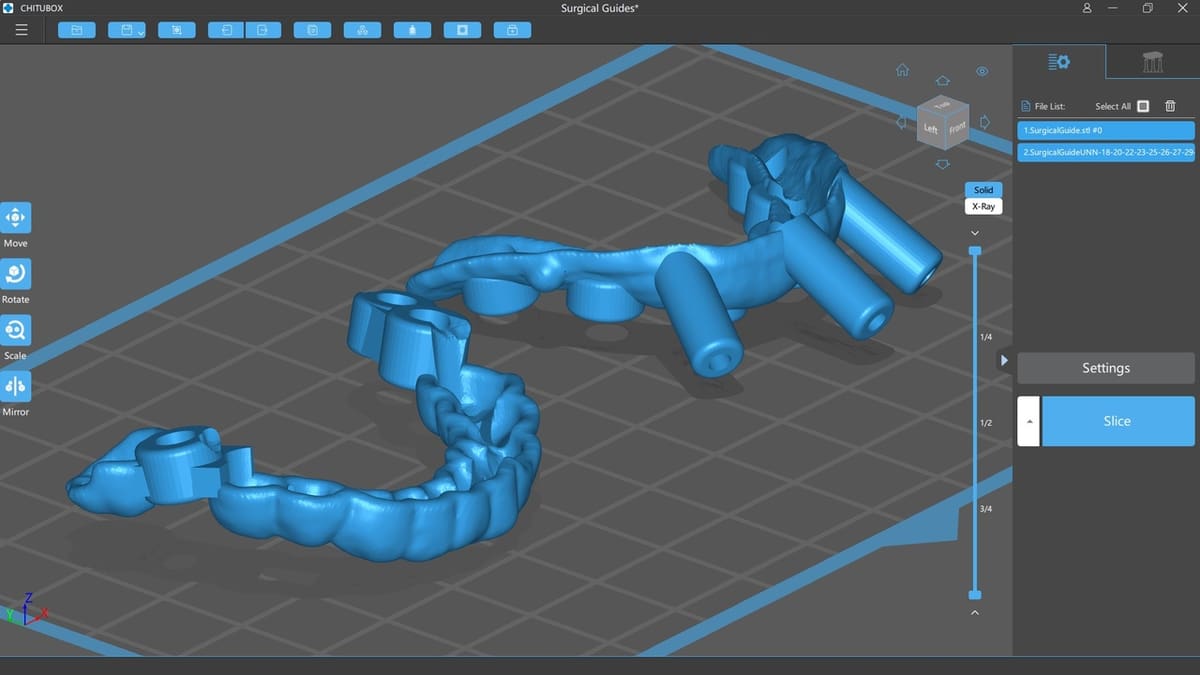
If you’re not convinced of the Photon Workshop’s merits, there are a few alternative slicer options for Photon printers, including Zortax Z-Suite and Chitubox. Let’s see how they compare!
- Zortrax’s Z-Suite is designed for Zortrax printers, but it’s free and can be used with Photon printers. Like Photon Workshop, it’s easy to use and has auto-generated props that you can edit. Unlike Photon Workshop, it’s known for not having such accurate cure times.
- Chitubox is a very popular third-party option that offers options similar to the Photon Workshop, including an excellent hollowing tool. It is also compatible with Linux (the only slicer of the bunch). Still, like Photon Workshop, it’s intuitive to use.
License: The text of "Anycubic Photon Workshop: Get Started with the Photon Slicer" by All3DP is licensed under a Creative Commons Attribution 4.0 International License.