The Best ABS Print & Bed Temperature Settings

Temperature settings for ABS are crucial for high quality and strong prints. Read on to learn all about the best ABS print settings!
Acrylonitrile butadiene styrene, abbreviated as ABS, is a common plastic that’s found all around us, with one of the most well-known uses being Lego bricks. Its mechanical properties, such as toughness and temperature resistance, makes it a good choice for a variety of applications.
The material also offers the possibility of a good surface finish. ABS dissolves in acetone, which tends to smooth and polish the surface. It’s also a material that’s easy to sand, so there are quite a few options for post-processing.
Unfortunately, it can be a little tricky to print with. An issue you may face is difficulty getting ABS to have a proper adhesion to the bed. Printed parts not only tend to warp at the sides and corners but also can have poor layer adhesion or layer delamination. Here’s where temperature settings come in!
Temperature settings are especially important for ABS filaments due to its tendency to shrink. In this article, we’ll pay special attention to the temperatures that help yield high-quality and strong ABS parts. While we’ll be going over general settings, note that it’s always useful to check the manufacturer’s guidelines.
Let’s get started!

Possible Problems
Warping, poor layer adhesion, and overheating are common problems (considerably) caused by bad temperature settings. Let’s establish what these terms are and how to alleviate them.
Warping
Warping happens when corners or sides of a part curl up from the bed, resulting in a large amount of dimensional inaccuracy. As ABS has a relatively high coefficient of shrinkage, higher layers tend to contract while it cools, while lower layers are warmer due to heat from the bed.
This creates forces that pull the bottom layers upward and inward, causing the bottom layers to eventually curl up from the bed. It’s a bit like setting a sponge on a table and pinching it at the top: The bottom edges will rise up towards the point of the pinch.
Typical Causes
- Too low bed temperature
- Too low enclosure temperature
- Too high part cooling
Poor Layer Adhesion
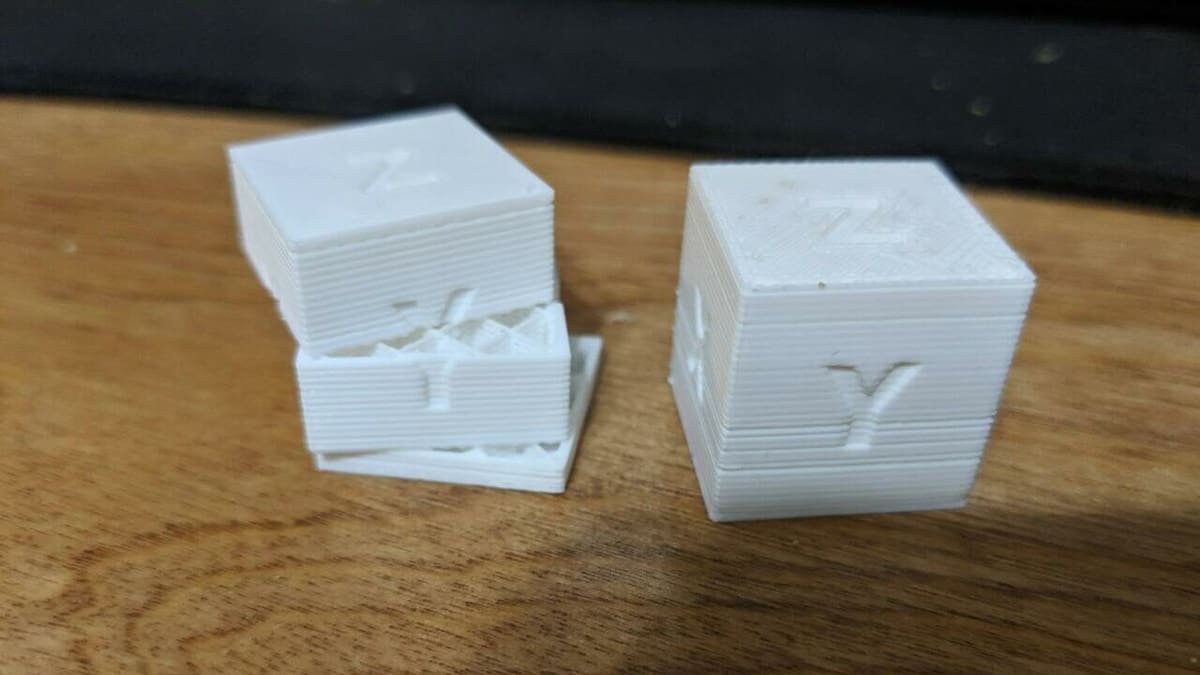
Poor layer adhesion is when the strength between the layers is very weak. Due to shrinkage, the higher layer experiences a force that tends to pull it away from the layer underneath. As a result, the layers are weakly bonded and can give way under even a small amount of force.
Parts printed under such conditions are much weaker, making them mechanically unsound and unusable in practical applications. Layer delamination is a severe form of poor layer adhesion in which the ends or edges of parts completely separate without any force applied.
Typical Causes
- Too low hot end temperature
- Too high part cooling
- Too low enclosure temperature
- Improperly calibrated flow rate
Overheating
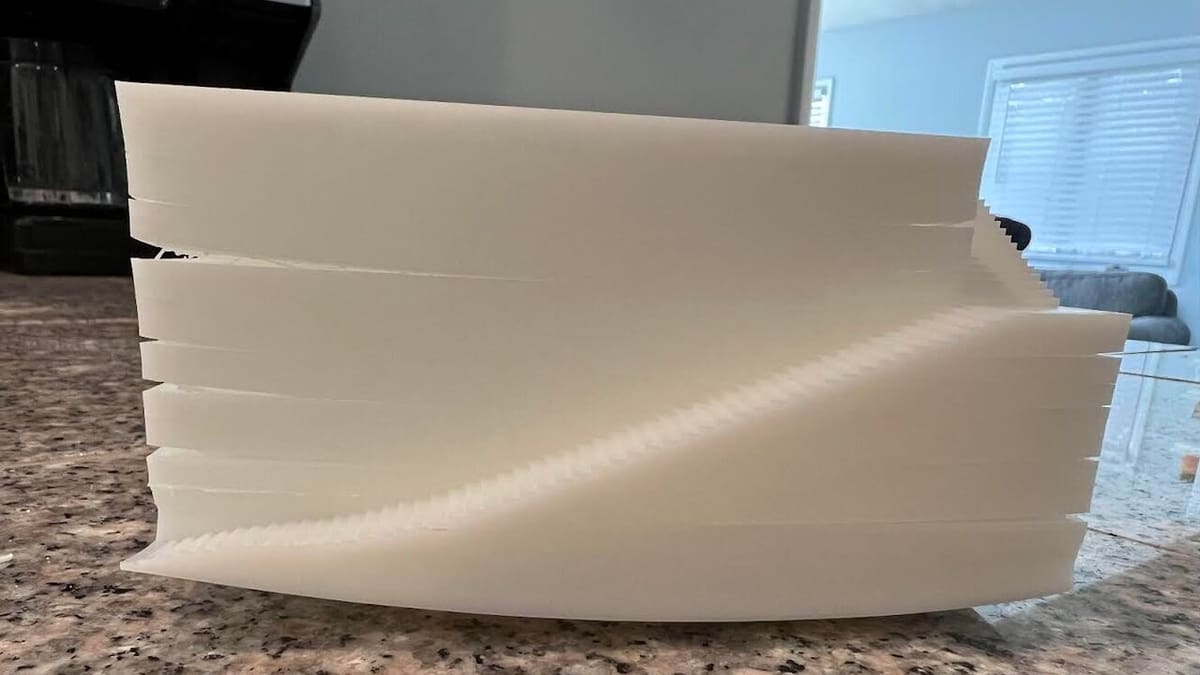
Overheating occurs when the layer above is deposited while the layer below has not cooled down to a sufficiently stable, solid form. This causes the bottom layer to also become soft. This adds up across many layers, eventually causing sagging on overhangs and across the part in general. The net result is dimensional inaccuracy.
Typical Causes
- Too high temperature of hot end or enclosure without sufficient cooling
Solutions
In the next few sections, we’ll look at solutions to all of the problems we discussed above.
Hot End

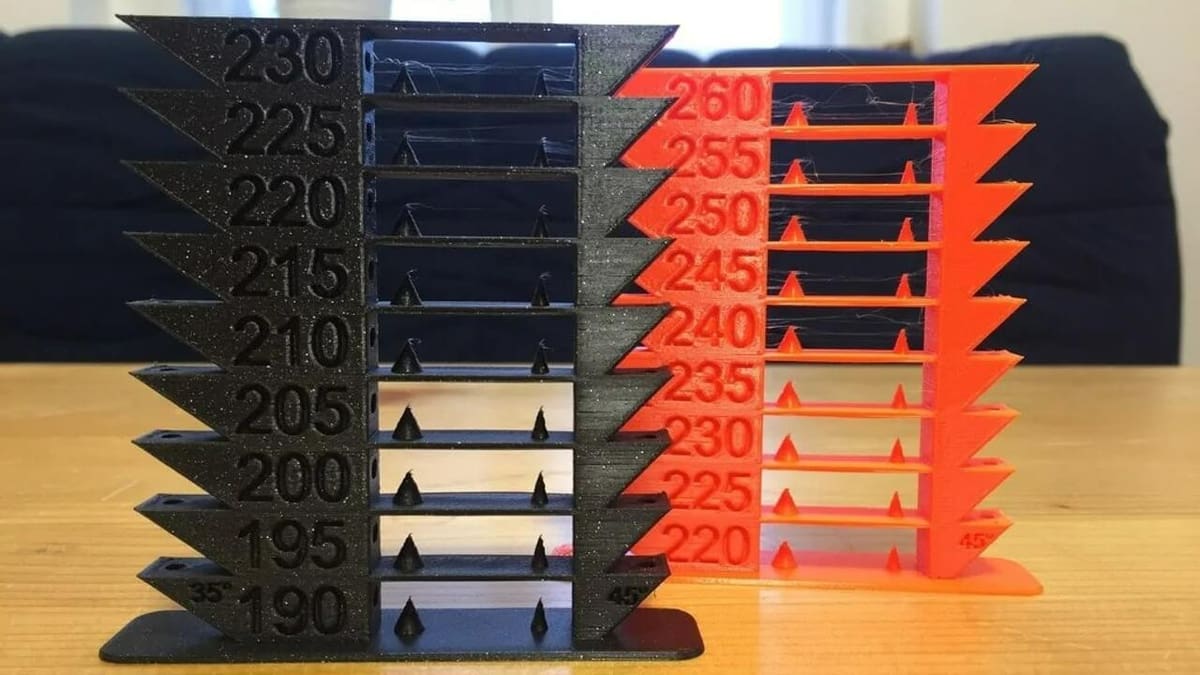
ABS flows somewhere between 220 and 260 °C. If nothing specific is indicated by the manufacturer, you should be free to play around with temperature settings within this range.
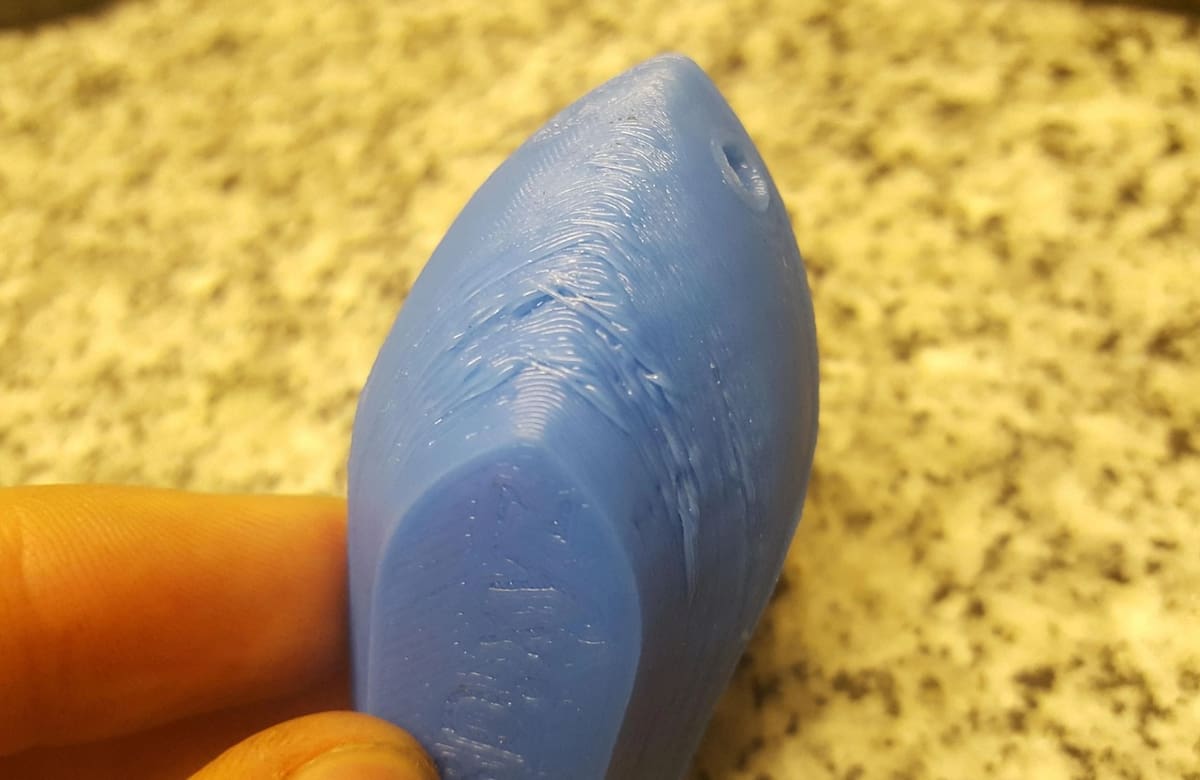
If you set the nozzle too hot, you may notice excessive stringing. If you go too cold, you might run into poor layer adhesion and under-extrusion, as the layers are unable to bond to each other sufficiently. Regardless, it’s always useful to run a few test prints to try different temperature settings.
It’s recommended to stay at the higher range of the recommended temperature for better layer adhesion and flow rates; 235 °C is a good start. Feel free to increase the setting as long as you don’t notice excessive stringing. However, keep in mind that hot end temperature that’s too high may not be the only cause of stringing.
Heated Bed
The purpose of a heated bed is to aid with build plate adhesion. For passively heated enclosures (i.e. those that gain heat from the heated bed), the enclosure temperature is largely dependent on bed temperature. So, it’s good to lean to the high side for a more toasty enclosure – We’ll discuss that in more detail later.
The temperature at which a plastic changes phase from a brittle to a more rubbery state, but not yet melted, is known as the glass transition temperature (scientifically notated as Tg). You’ll want to set the heated bed temperature just above that point. The further above that temperature you go, the more of a temperature gradient you’ll create. And below this temperature, you won’t get the benefits of improved bed adhesion.
For ABS, the glass transition temperature is ~105 °C, so a bed temperature between 100 and 110 °C would be good.
PID Tuning
To get strong and high-quality ABS prints, it’s important to maintain constant hot end, bed, and enclosure temperatures. Large deviations in temperature can cause uneven shrinkage, which can result in parts having uneven or low strength, not to mention poor print quality.
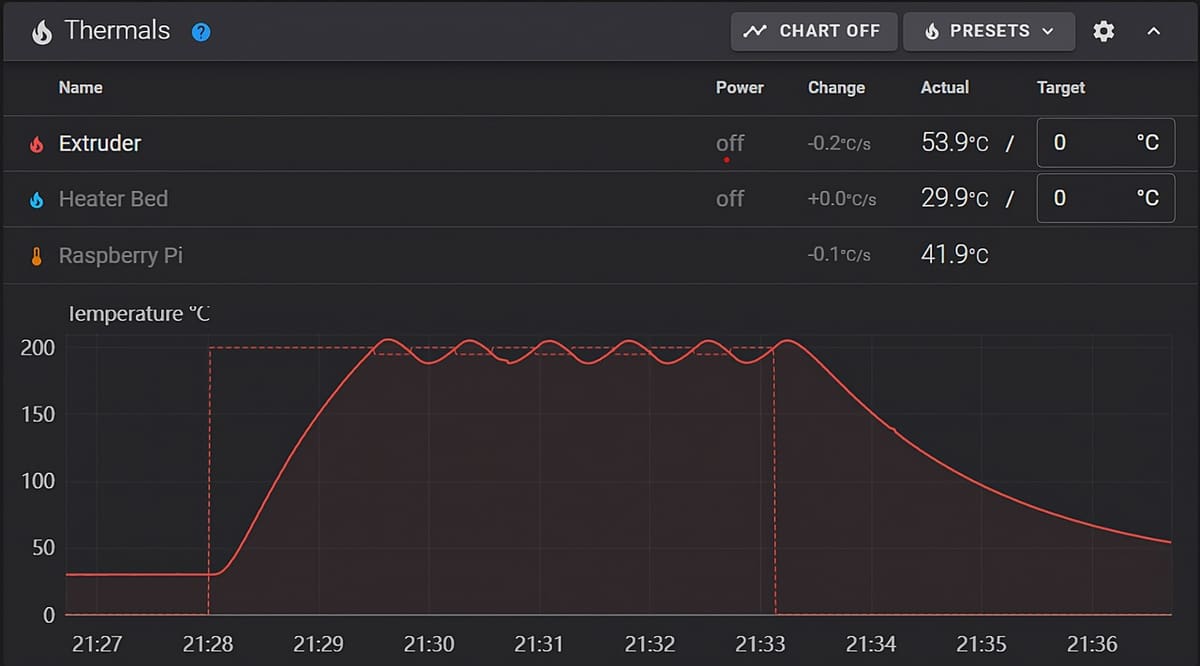
PID tuning counters this by enabling the firmware’s algorithm to maintain a heater at a set temperature. The tuning process sets the heater above and below the desired temperature repeatedly, all the while recording the actual heater temperature throughout the whole process.
Then, it calculates how to maintain the desired temperature by integrating any recorded errors and using a derivative to modulate speed. This allows the temperature to be almost constant throughout the entire printing process, deviating by less than 1 °C. Without PID tuning, this can vary wildly, up to even 5-10 °C.
To learn more, check out our PID tuning guides for Marlin and Klipper firmware.
Enclosure Temperatures

An enclosure is essential for the quality and strength of parts printed in ABS, as it reduces air drafts and keeps the print at a constant, elevated temperature.
For actively heated enclosures (i.e. those that include a heating unit inside the enclosure), we recommend setting the enclosure temperature to 70 °C for the best layer adhesion. Above 80 °C, the printed layers bond completely, resulting in near-perfect layer adhesion, but a lot of cooling must be used to prevent sagging and overheating issues.
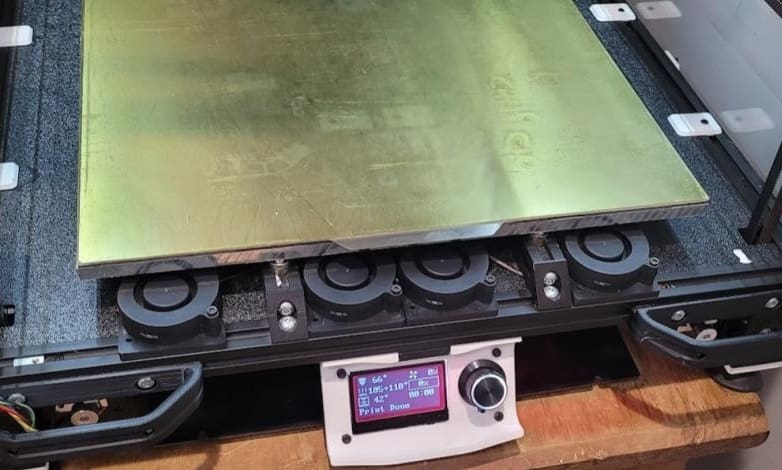
For passively heated enclosures, a large enclosure for a small bedslinger – a printer where the bed moves along the Y-axis – may result in an enclosure temperature of only 40 to 45 °C, while a dedicated enclosure designed for a specific CoreXY printer can reach enclosure temperatures of 50 to 60 °C. Therefore, it’s suggested to add insulation to the enclosure or circulation fans under the bed to raise the chamber temperature further.
Also, remember to adjust your part cooling fan speed based on your enclosure temperatures. The higher the temperature within the enclosure, the more part cooling should be used. For an enclosure temperature of 40 to 45 °C, a low fan speed of 15% is a good start. For a nice, toasty enclosure temperature of 60 to 65 °C, try about 40%.
Draft Shields
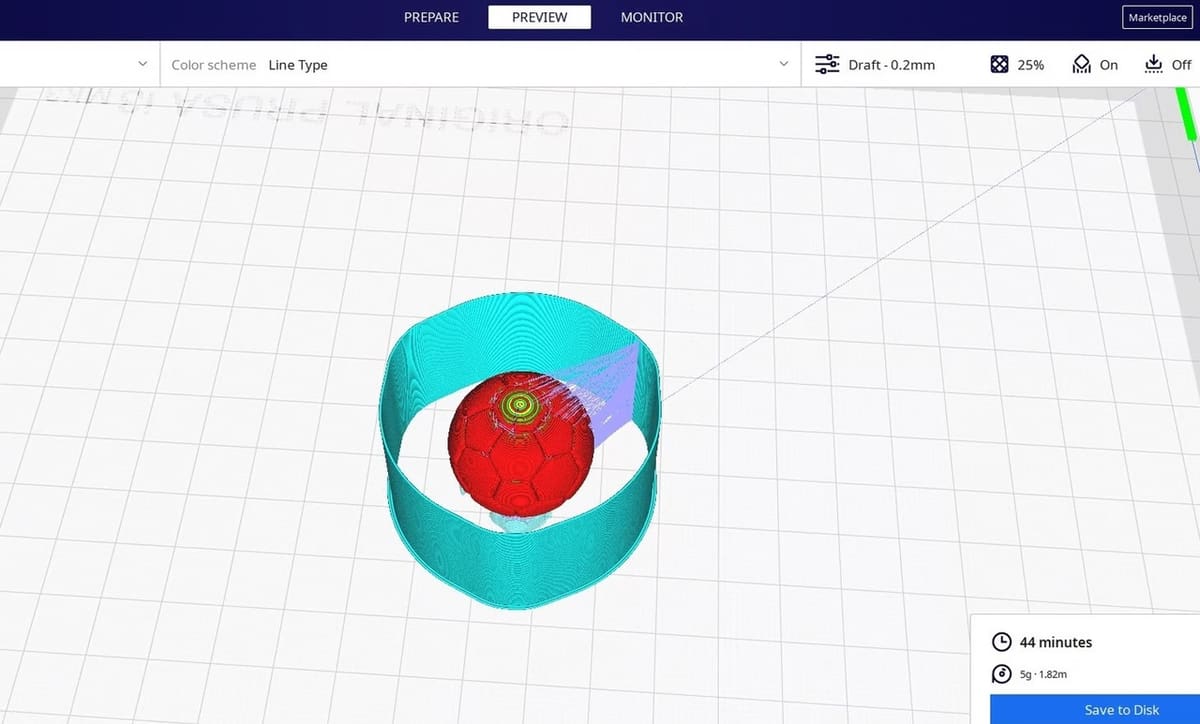
A draft shield is a slicer feature, where a single-walled “shield” is printed around your part. This does a meager job of insulating heat, but its main purpose is to prevent sudden temperature changes from drafts, which may cause poor layer adhesion.
Temperatures within draft shields only reach around 35 °C, which will be problematic when printing medium to large ABS parts. However, if you’re eager to give ABS a try and have yet to invest in an enclosure, a draft shield should be sufficient for small and thin parts!
License: The text of "The Best ABS Print & Bed Temperature Settings" by All3DP is licensed under a Creative Commons Attribution 4.0 International License.