3D Printer Stepper Motor: All You Need to Know

An essential component in CNC machines and 3D printers, stepper motors make your machines move. Read on to learn all about them!
A stepper motor is an integral part of machines such as 3D printers, CNC mills, lathes, laser engravers, and similar machines that use computer numerical control (CNC). Stepper motors are responsible for all linear movements made by your machine; for example, a change of position in the Y-axis is caused by a rotation in a stepper motor.
When building your own 3D printer, an important part of the process is choosing, connecting and setting up the stepper motors, if you don’t get this part right, your machine will simply not move. So, to help you out, we’ve developed a comprehensive guide with all the basic facts about stepper motors.
In this article, we’ll go over everything you need to know about stepper motors, from what they are, how they work, what they do in 3D printers and CNC machines, a few variations, and considerations to keep in mind when installing them.
But let’s start with the basics.

What's a Stepper Motor?

A stepper motor is a type of electric motor. This means that it’s powered by electricity, as opposed to, for example, gasoline motors, which turn thanks to the reaction of gasoline when it’s compressed in the pistons.
A typical motor, electric or otherwise, turns around continuously, in a periodic, regular, circular motion. The difference between a general electric motor and stepper motors is that stepper motors selectively turn a certain percentage of a revolution, called steps, and can start and stop at will, which allows machines like 3D printers to achieve precise movements.
In the image above you can see a disassembled stepper motor. The coils inside are powered up when electricity courses through the wires, making the rest of the components move. These coils are controlled by means of electrical pulses, which can be very precisely controlled, giving the machine the precision it’s known for.
Where to Find Them?
Before taking a deep dive into the technical aspects of stepper motors, let’s look into what they’re actually doing in your machine.
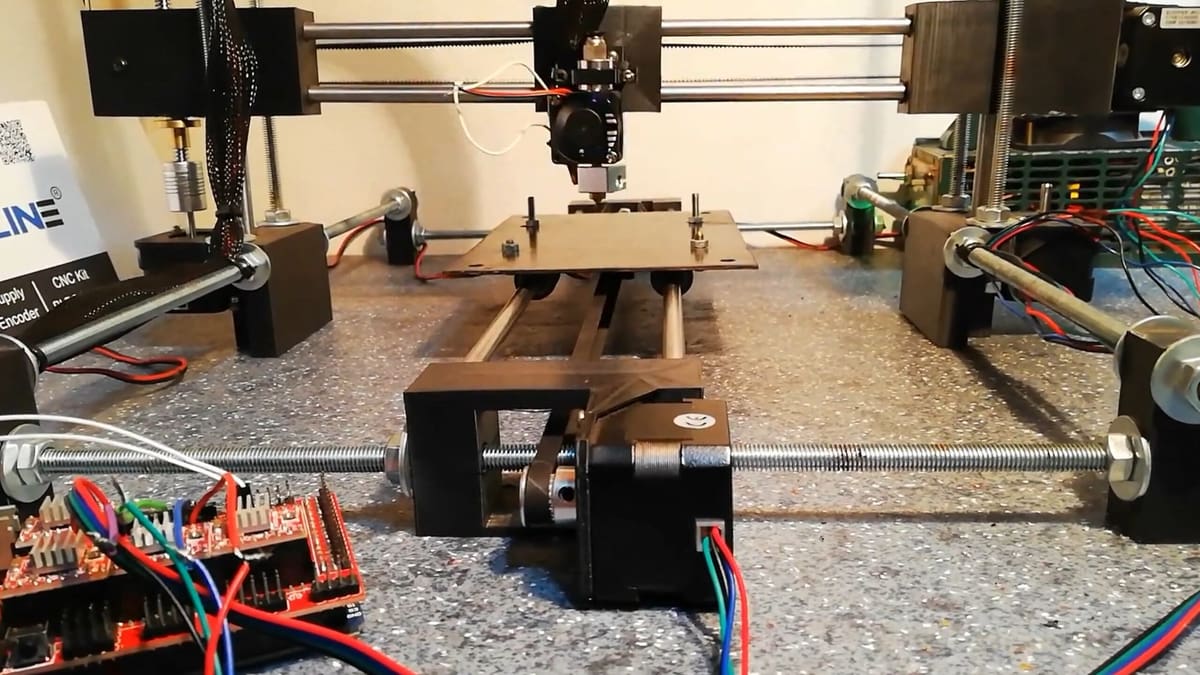
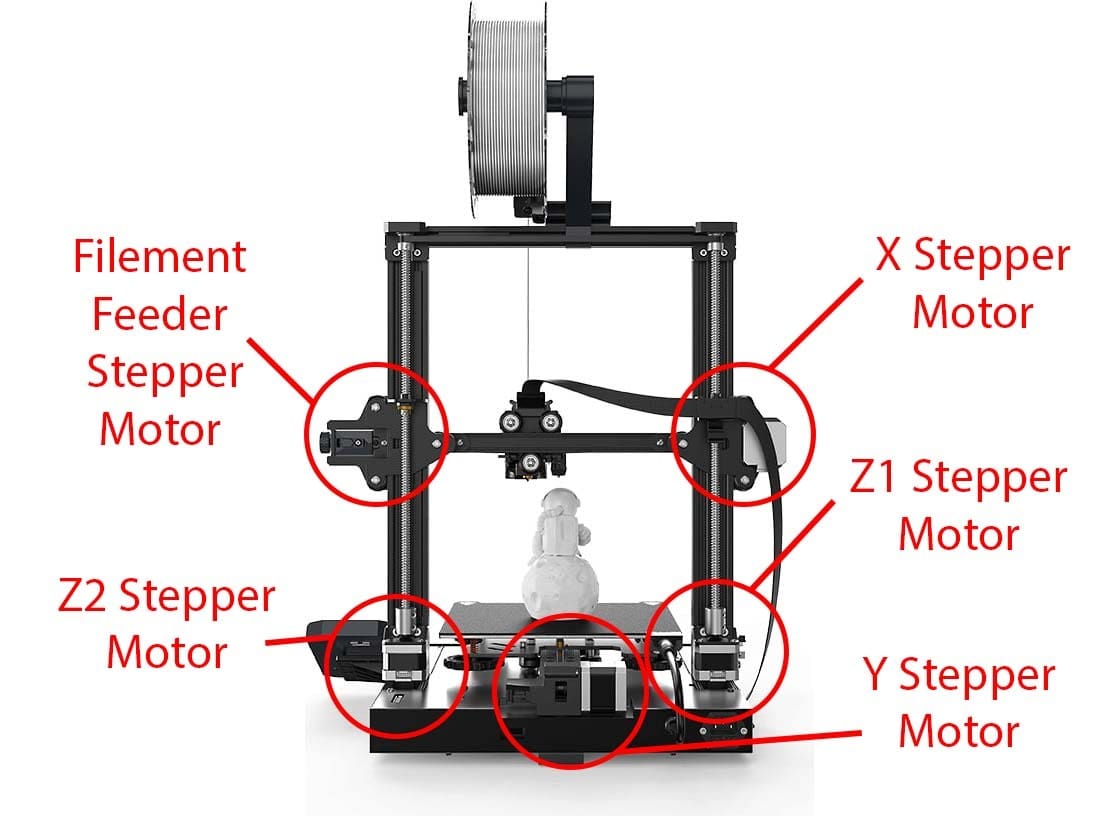
In any 3D printer or desktop CNC machine, you’ll find stepper motors attached to the X-, Y-, and Z-axes. For X and Y they may use belts or screws to transmit the rotation into linear movement, and they typically use one motor each. On the Z-axis, you may find one or two, depending on your machine, and it (or they) will usually use a screw, as the Z-axis has to carry the weight of the whole toolhead.
Additionally, in 3D printers, there’s one more stepper motor: the one that controls filament extrusion. It’s usually attached to a system composed of a spring, a pulley, and a gear, all of which together make the filament move. You don’t use one for spindles on CNC machines as they need a much higher torque, greater speed, and come with their own integrated electric motor.
Now that we’ve got a clearer idea of why they’re relevant to 3D printing and CNC machining, let’s look at how stepper motors work.
What's NEMA?
When talking about DIY 3D printers, DIY CNC machines, or stepper motors in general, it’s pretty common to hear the word “NEMA” thrown around. But what does it mean? It’s commonly thought that NEMA and stepper motor are interchangeable words, and although that’s not entirely wrong, it’s not technically correct, either.
NEMA stands for National Electrical Manufacturers Association and it is the largest trade association of electrical equipment manufacturers in the US. NEMA has set the standard for stepper motors worldwide, which is why the terms may be used interchangeably. Setting a standard means that all stepper motors categorized or identified as NEMA will have the same set of dimensions, capacity, torque, voltage input, etc., as established by the association.
It’s important to note that you could find some other electric component, for example a traditional AC motor, that’s also NEMA (meeting specific standards), but it obviously wouldn’t be a stepper motor, so caution is warranted when referring to “NEMA” and “stepper motors”.
Let's Talk Torque
When looking at stepper motors, you’ll also see the word “torque” thrown around a lot, as it’s in the specifications of a motor and it will affect what your motor can and can’t move.
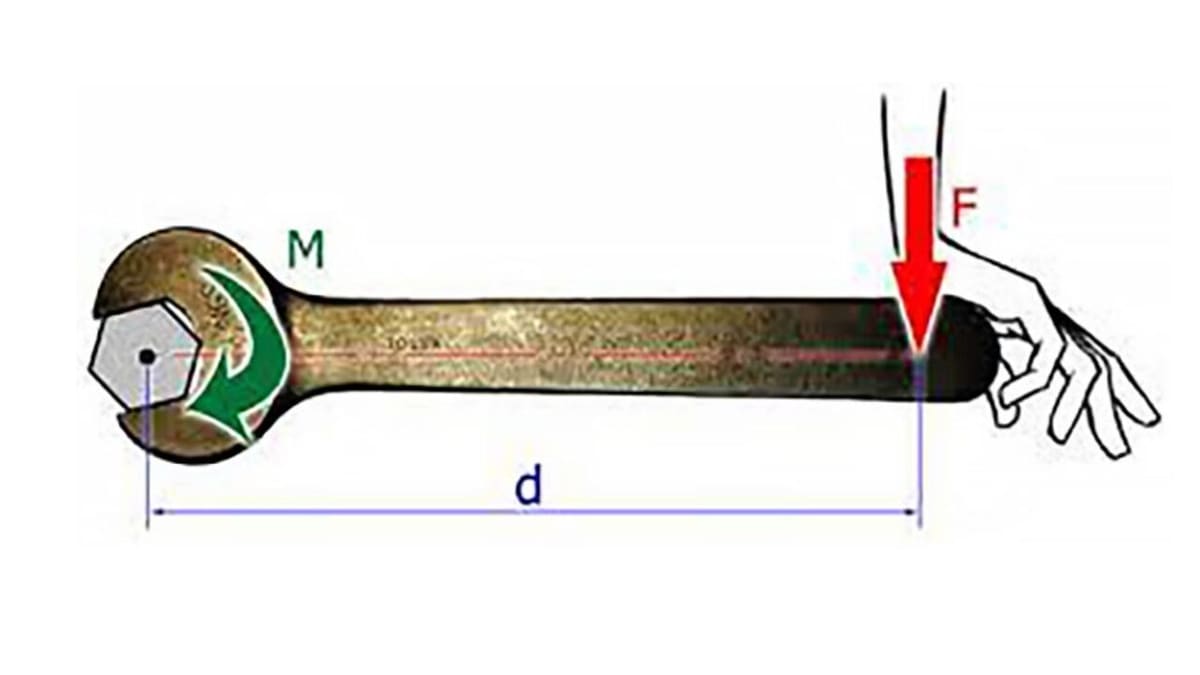
Mathematically speaking: Torque = Force x Distance
Torque is to a circle what force is to a line; that is to say, it’s the force associated with rotational movement. Simply put, the more torque something has, the more weight it can push around in a circle.
As can be inferred from the formula, torque is described in units of force and distance, and for stepper motors, you’ll usually find them in N-cm (Newton x centimeter) or Oz-in (ounce x inch).
Types of NEMA
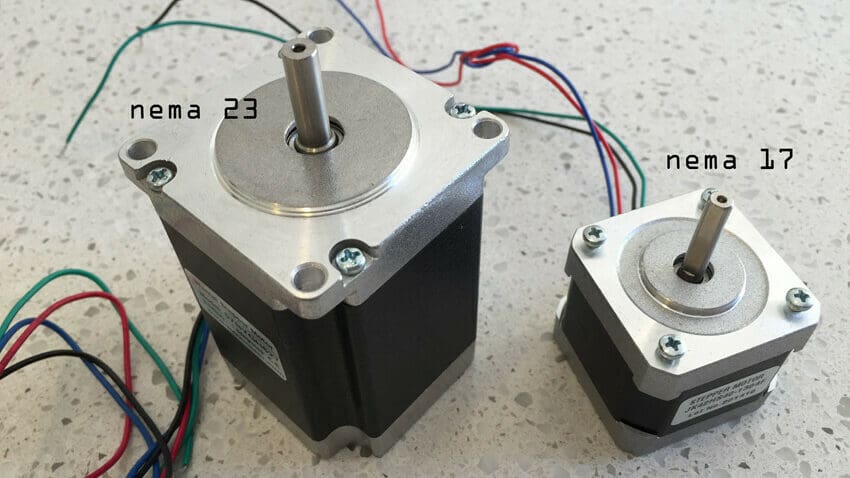
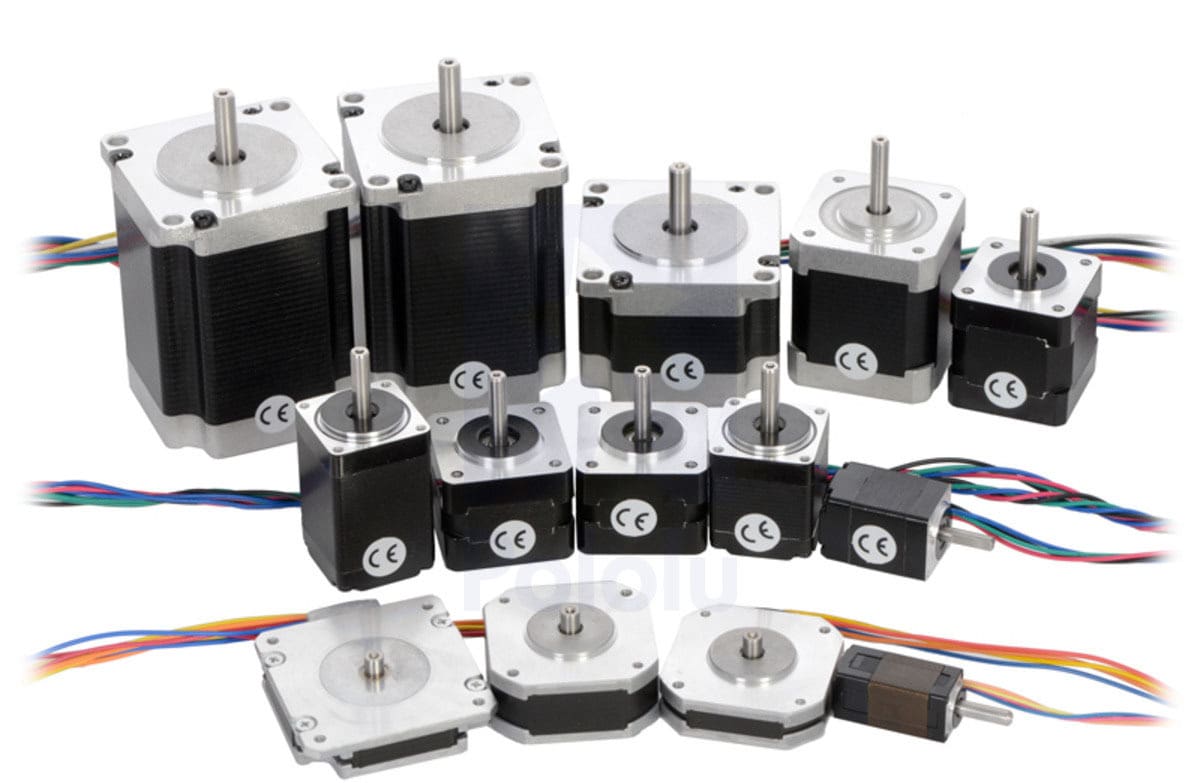
There are two standards for NEMA stepper motors: NEMA 17 and NEMA 23. These numbers refer to the size of the motor. A NEMA 17 has a 1.7″ x 1.7″ faceplate and a NEMA 23 has a 2.3″ x 2.3″ faceplate. A larger faceplate implies a larger torque, as torque is a result of the transmission components (like the rotor and gear sets) that fit inside the shell of the motor.
A NEMA 17 has a maximum torque of around 50 N-cm, while NEMA 23 goes from 100 to 125 N-cm. NEMA 17 is the more common of the two, but NEMA 23 is necessary when working with heavier materials like metals such as aluminum.
Additionally, even within one standard, you can also find different variations of the same motor. In the case of the NEMA 23, all motors are high torque; the lowest torque for a NEMA 23 is still higher than the highest torque for a NEMA 17. So, if you needed a low torque motor, you would opt for NEMA 17, because there’s no such NEMA 23.
Regarding NEMA 17, there are three main variations that cause a change in length of the NEMA, because the larger the rotor, the higher the torque.
The three most popular varieties of a NEMA 17 stepper motor are:
- Pancake motors: These are low torque. The shortest is just 2 cm long with a torque of 13 N-cm.
- Standard length: The most common, with a length of 4 cm and a torque of 50 N-cm.
- High torque: The highest NEMA 17 torque (if still not as high as a NEMA 23), with a length of 6 cm and a torque of 65 N-cm.
There are more options of NEMA 17, but they may not be as commercially available as the three mentioned above.
Variations
Sometimes, the standard choices don’t fit your needs. Fortunately, there are a few more options that you can look into:
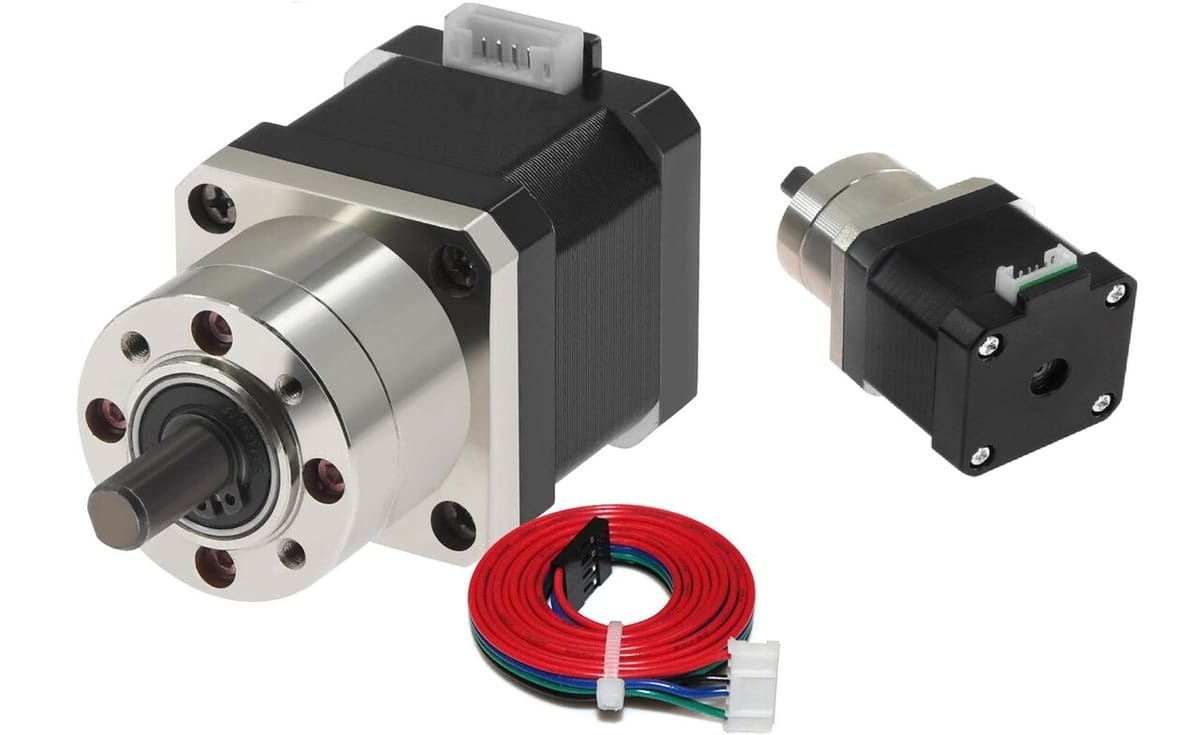
- Geared steppers: Usually consisting of modified NEMA 17s, these motors are characterized by the use of a gearbox to either increase speed or torque. An increased torque will reduce the speed, and vice versa. They’re good for a variety of uses. For example, as mentioned above, a NEMA 17 has a smaller cross-section than a NEMA 23, so if you need a torque higher than the maximum a NEMA 17 can provide but don’t have space for a NEMA 23, A NEMA 17 with a gearbox to increase torque might be the solution.
- Brushless motors with encoders: A relatively new style of CNC movement, a setup with brushless DC motors is much faster (and sometimes even stronger) than typical steppers, but also more expensive and difficult to set up. This is because they use a different, more sophisticated system to reduce noise and vibrations and to increase torque and precision.
- Servo motors: They’re (usually) not as precise as a stepper motor and they lack the ability to rotate continuously. Servo (meaning “Slave”) motors are useful for small actuating parts, such as couplers or mechanisms within a filament switching system. It’s important to note, though, that servo motors are not meant to be primary motors but rather lower-demand motors, in terms of torque. They’re usually used for simple tasks, like pressing a button.
Drivers
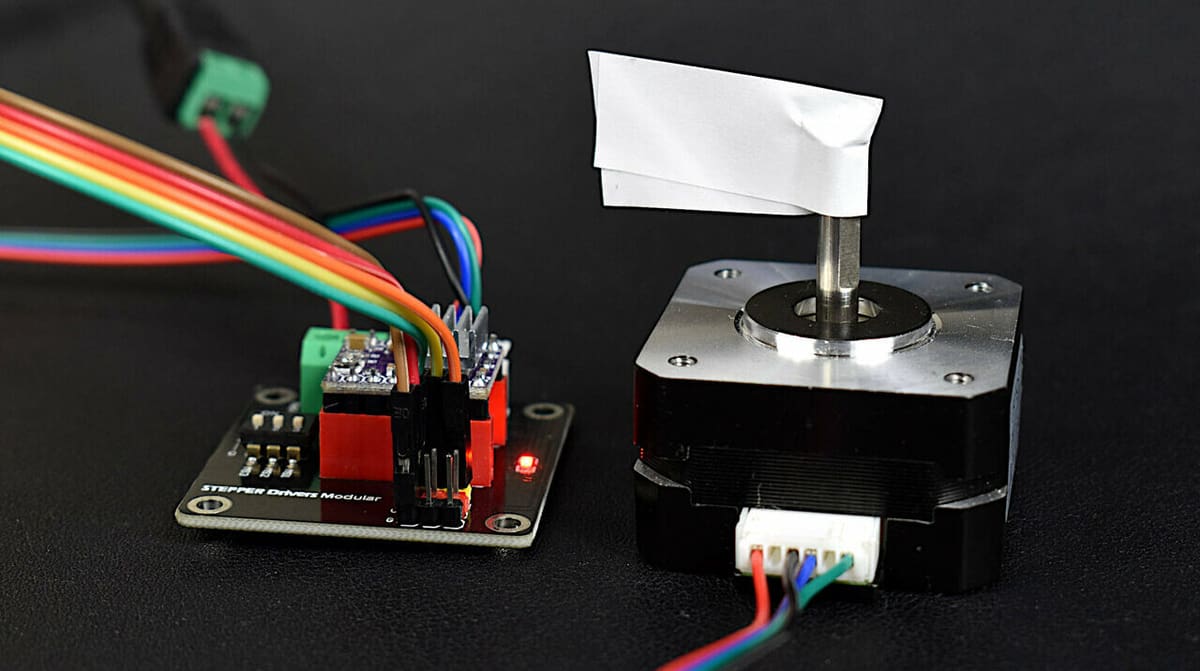
Drivers are the communication between the computer and the stepper motor. They take a software command and convert it into electric pulses that make the motor turn according to the instruction given. Drivers are electronic components that are connected to the mainboard of your printer, and the stepper motors are, in turn, connected to the drivers.
When selecting drivers you must take into account the reference of your stepper motor, as not all drivers are inherently compatible with all references. It can also be beneficial to take note of whether the drivers are silent. The shrill sound you hear in your machine may just be the drivers at work.
Drivers play an important part in the precision of a stepper motor. Drivers control the movement of a motor through micro-steps, which depend both on your printer’s firmware and the drivers you’re using. A micro-step is defined as the number of electric pulses the driver needs to send to the stepper motor for it to complete one step. Micro-steps come in multiples of 8, so 8, 16, 32, 64, 128, etc. Too low means bad resolution but too high can result in problems of communication, so a good number is between 32 and 64.
Steps Per Unit
Your stepper motor moves in a rotational motion, but the printer moves in a linear motion. How do you ensure that the rotation of the motor equates to a desired linear motion?
For example, if you want your machine to move 2 cm on the X-axis, the motor is going to rotate a certain number of degrees. So how can you make it so that the machine rotates the correct amount to equate to a desired linear distance? This is called steps per unit.
First of all, a stepper motor has a step angle, which is the angle a stepper motor moves in one single step. It’s inherent to the motor’s reference, meaning it’s decided by the manufacturer and cannot be changed. For NEMA motors, the step angle is 1.8°. This means it takes the motor 200 steps to complete one turn: 200 x 1.8° = 360°.
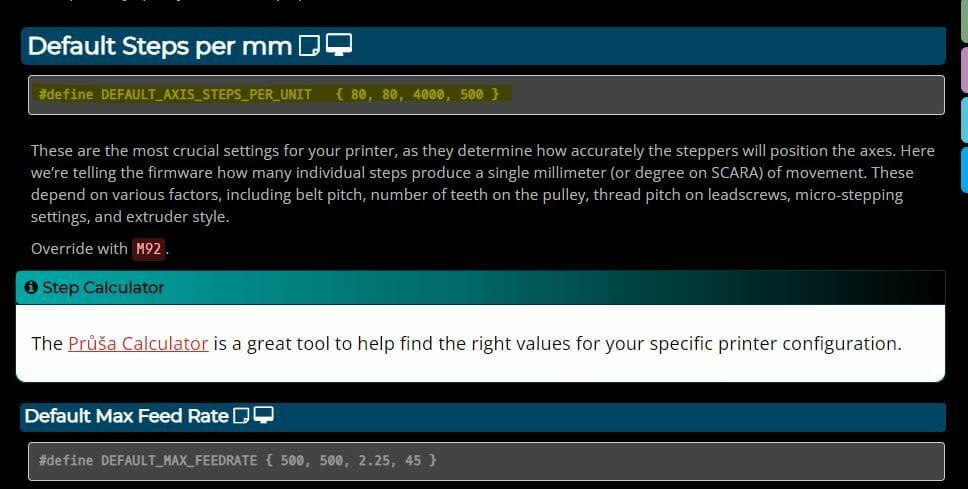
Steps per unit are the number of steps the motor needs to take to move one unit of linear movement. It’s dependent on your motor specification, your driver’s precision, and the transmission elements like the belt or screw you use. If math scares you, don’t worry, Prusa Printers has a stepper motors calculator where you type in the specifications of all your transmission elements and it tells you the steps per unit.
If your machine is store-bought, you needn’t trouble yourself with this, it will be already configured, but if you want to DIY, it’s time to get out the calculator.
Safe Installation

Installing stepper motors is a fairly straightforward process thanks to the standardized connectors used by most manufacturers. Simply plug the motor into the correct slot of the control board and you should be good to go.
However, there are still a few things to watch out for:
- First, never install a motor (or anything, for that matter) on a printer while it’s plugged in and on. This is hazardous because if done incorrectly, you risk shocking yourself, frying delicate components, and starting an electrical fire. Always power off the printer and unplug it before commencing any kind of work.
- Second, never unplug a stepper motor that’s being powered. If you paid attention to the first step, this isn’t a problem, but if you didn’t, you’ll likely end up frying your stepper motor driver and possibly your control board.
- Third, ensure that your stepper motor drivers are supplying the correct amount of current to the motors. This can be adjusted through the potentiometers on the driver board, or in some cases through the printer’s software. Too little current means the motor won’t have the proper torque, and too much can cause it to overheat.
- If your stepper motor seems correctly connected but isn’t turning on, don’t throw it away or give up. It may be that the wires are literally crossed. Use a multimeter to check that the connections correctly match so that the wire colors are soldered to the correct pin. If your wires are inverted, when you press left, it will turn right (and vice versa). And if they’re crossed, it won’t turn on at all as they go to different coils.
Finally, if you notice anything obviously wrong with the operation of the motor after installation, stop whatever you’re doing and power off the printer. Carefully examine your wiring and driver circuit to ensure that there are no mistakes before continuing to use the motor (if there aren’t any, make sure that the motor, driver, and software are all compatible). This is good practice anyway while working with electronics to avoid fires, fried components, or, worst of all, exploding capacitors.
License: The text of "3D Printer Stepper Motor: All You Need to Know" by All3DP is licensed under a Creative Commons Attribution 4.0 International License.