3D Print a Computer Mouse: 10 Cool Projects

Since you use your mouse every day, you might as well use a good one. Read on for some cool (partially) 3D printed mouse projects!
From scrolling social media to designing 3D models, computer mice are perhaps one of the most used objects in our daily lives. It’s not surprising that many people choose to upgrade their mouse, some for performance reasons (it’s too slow or doesn’t have enough buttons, for example) and others for aesthetics (it doesn’t look cool enough).
While purchasing a mouse is probably what most people would do, many have built their own. In this article, we’ll present 10 DIY mouse projects that incorporate 3D printing. For each project, we’ve gone over the mouse’s features, the parts used, as well as some other information.
It’s important to note that not all of these mice are makeable, and some are just posts of successful DIY projects that involve 3D printing. Enjoy!
Ploopy
First up, this multi-purpose optical mouse is made by Ploopy, a manufacturer of customizable computer mice. It uses a Pixart PMW3360 sensor and a custom Arduino Leonardo-based PCB. Five buttons allow you to perform regular right and left clicks, go forward or back, and even adjust the dots per inch (DPI), which is a measure of the mouse’s sensitivity. As it isn’t wireless, the mouse requires a USB connection.
The mouse runs on QMK (Quantum Mechanical Keyboard) firmware. Although QMK firmware is popular among open-source devices, the Ploopy’s mouse isn’t completely open-source, as the 3D printable files aren’t publicly available. Luckily, you can purchase a build kit from Ploopy’s website or find other kits online.
Basic
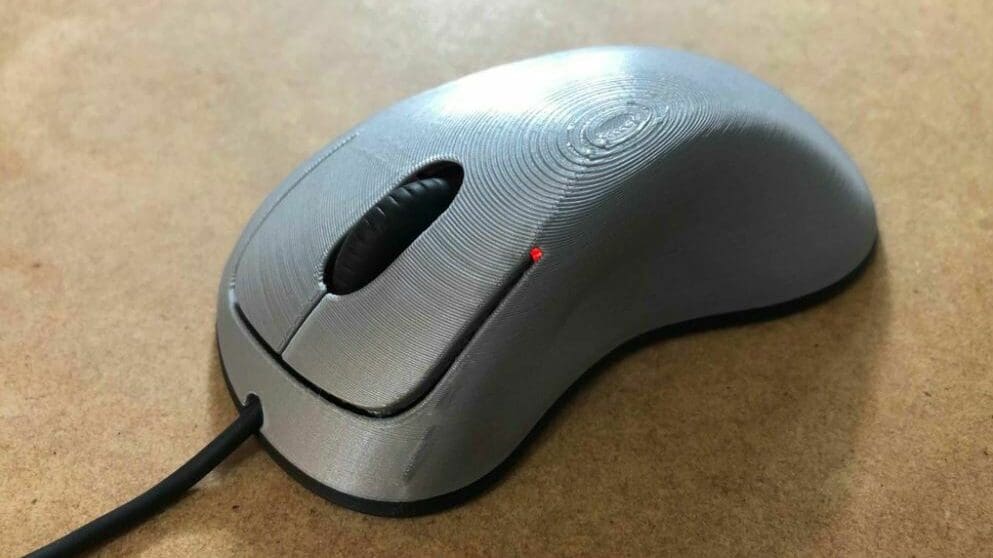
Based on the Logitech B100, you can build this basic optical mouse for under $20. The mouse uses the same PCB as a Logitech B100 mouse, which costs under $10. Like the B100, this mouse uses an 800-DPI (maximum) optical sensor, and it’s also wired to the computer via a USB cable.
As seen in the image above, the casing – made up of three parts – follows a pretty basic design with a simple hand curve grip, a scroll wheel, and two click buttons (left and right). Although this means there aren’t any unique capabilities for this mouse, the project should be pretty easy to print and make.
- Designer: itstomotime
- Project page: Thingiverse
- Key components: 3D printed parts, Logitech B100 electronics
- Approximate cost: $20
Assistive Joystick
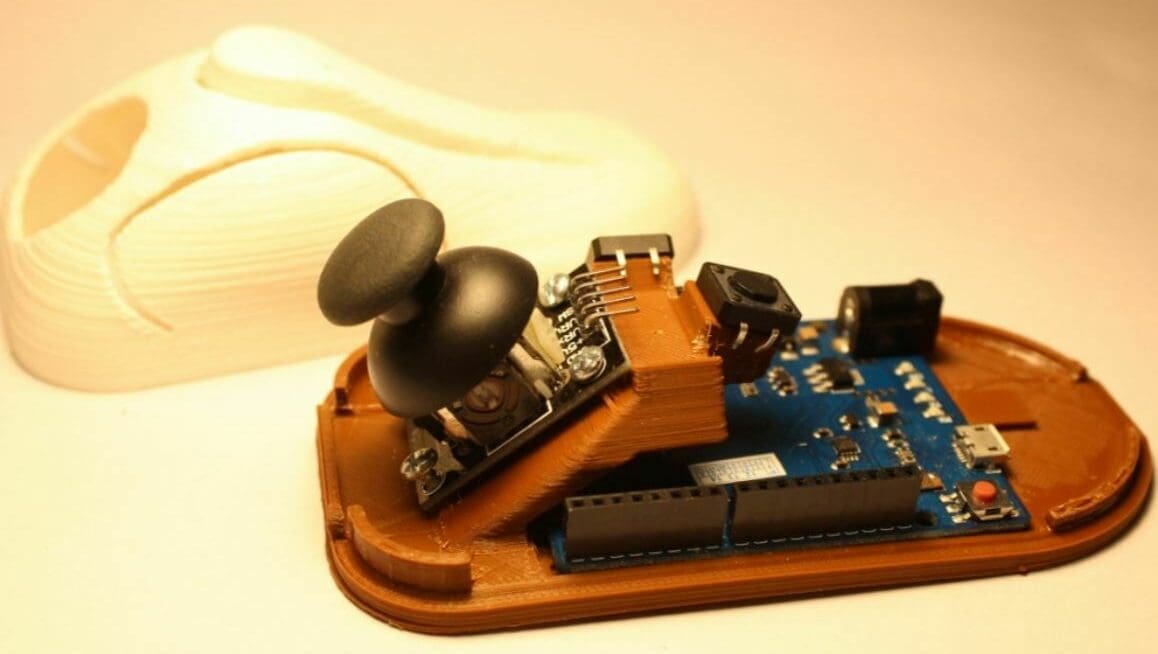
This stationary mouse uses a joystick to let you move your cursor, unlike most other stationary mouses, which use a trackball. As pointed out by the designer, the mouse only allows for finite movement across the screen because the joystick can only go so far in any direction. The mouse isn’t battery-powered and needs to be connected via USB to a device.
Key components include an Arduino microcontroller, a joystick, a few 3D printed components, and some other parts. This assistive joystick mouse features three buttons, one on the top (standard left click) and two on the sides. Being fully open source, you can build this project yourself without any constraints. Check out the GitHub page for the files, assembly instructions, and more.
- Designer: pabardini
- Project pages: Thingiverse, GitHub
- Key components: 3D printed parts, Arduino microcontroller, joystick, pushbuttons, header pins
- Approximate cost: $65
Low-Poly
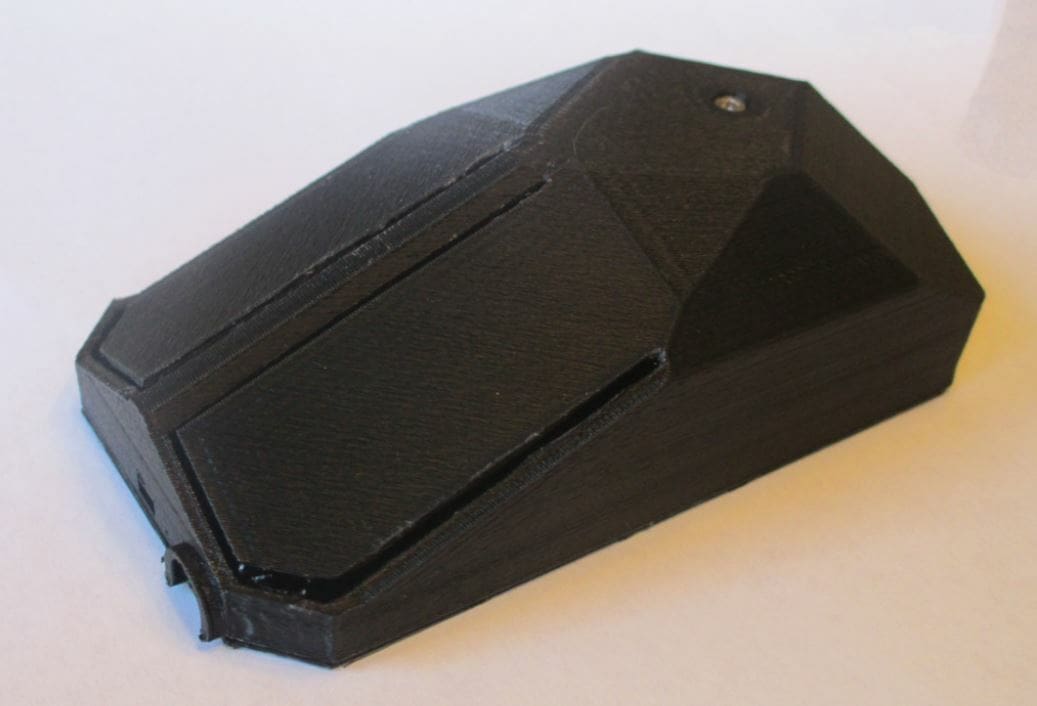
This mouse is another optical option that somewhat follows a low-poly design, meaning it contains no substantial curves because all edges are regular geometries. It’s made up of two 3D printed parts and some pretty basic electronics, including two buttons, an LED, an ADNS-3050 navigation sensor, and some other components.
Given the detailed assembly instructions on the project’s GitHub page, making this device should be a breeze. If you don’t have access to a 3D printer or the necessary parts, you can purchase a build kit from the maker’s Tindie page.
- Designer: tom101222
- Project pages: Thingiverse, GitHub
- Key components: 3D printed parts, ADNS-3050 sensor board, endstop switches
- Approximate cost: $75
Buttons
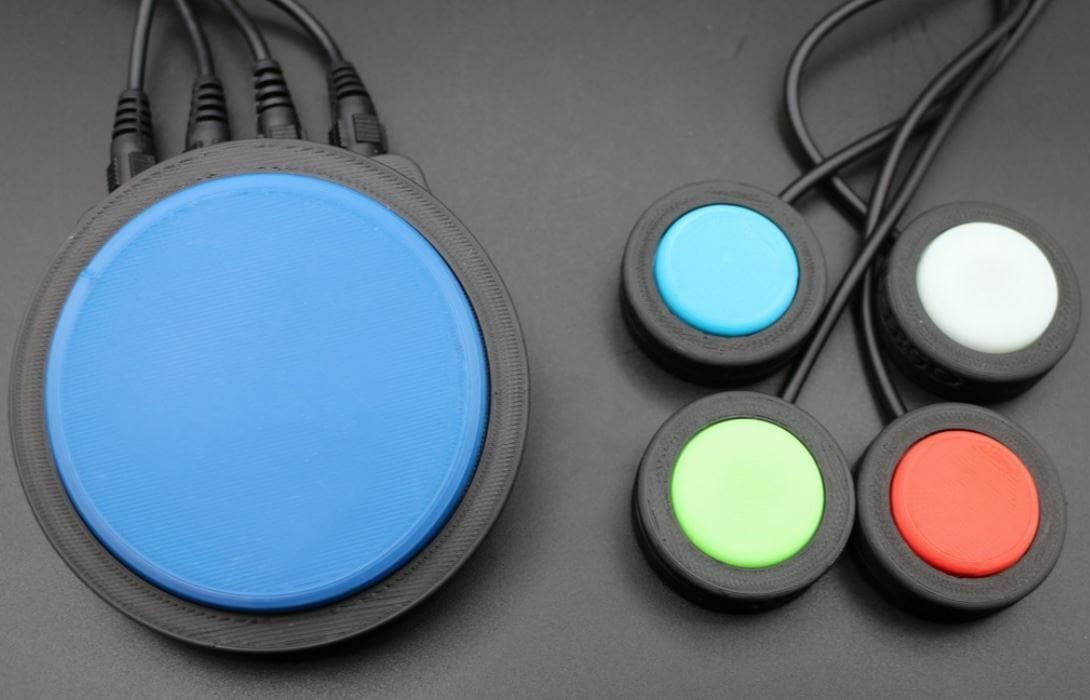
Typical computer mice use optical sensors or trackballs to control your cursor, but this option uses five buttons. Of course, this isn’t the most convenient way to control your computer’s cursor, but this mouse makes for a great DIY project.
The four small buttons, seen in the image above, are responsible for the vertical and horizontal motion of the mouse (like arrow keys). The fifth and largest button is for left-clicking once you’ve used the other buttons to position your cursor.
Components include a Teensy 2.0 microcontroller, pushbuttons, a power jack, some wires, and three different 3D printable parts (some need to be printed multiple times). To make the electronic configuration a bit easier, the designer posted some basic instructions for uploading the firmware.
- Designer: Pole_ergo
- Project page: Thingiverse
- Key components: 3D printed parts, Teensy 2.0 board, USB pushbuttons, wires, a power jack
- Approximate cost: $75
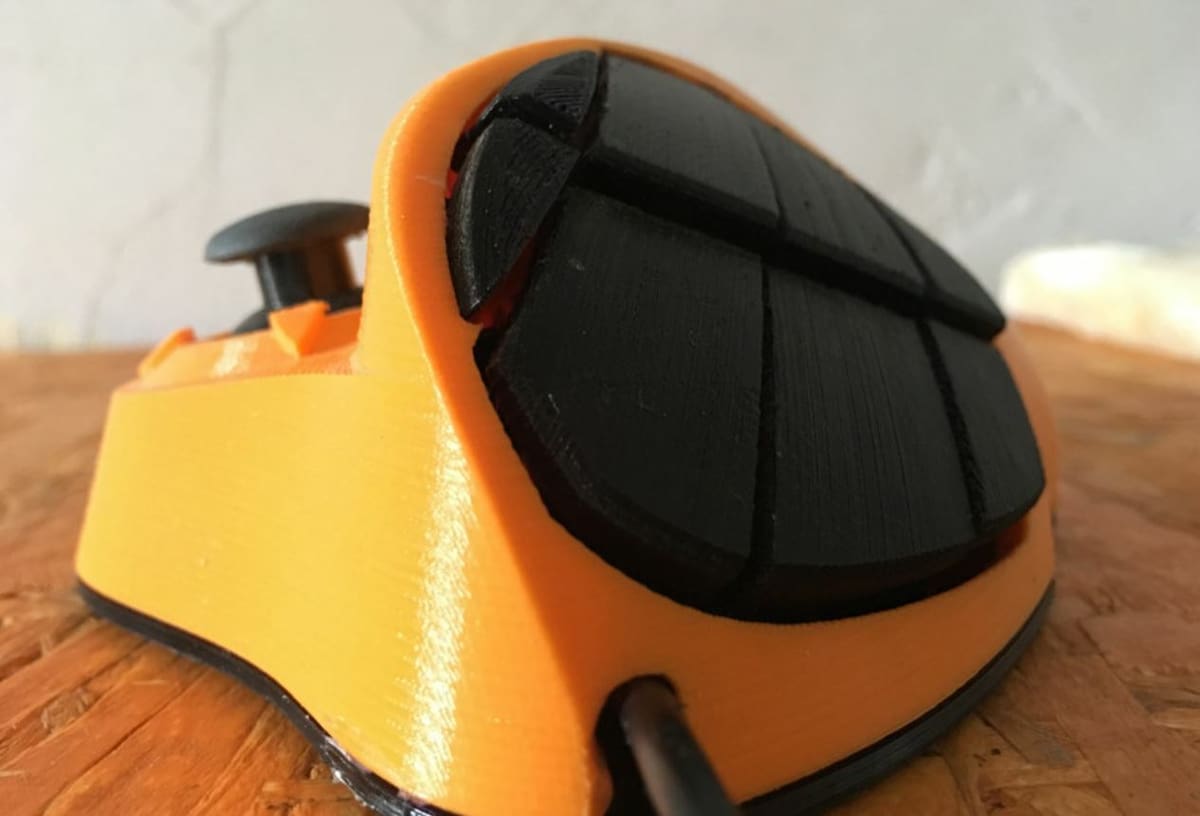
Ploopy Trackball
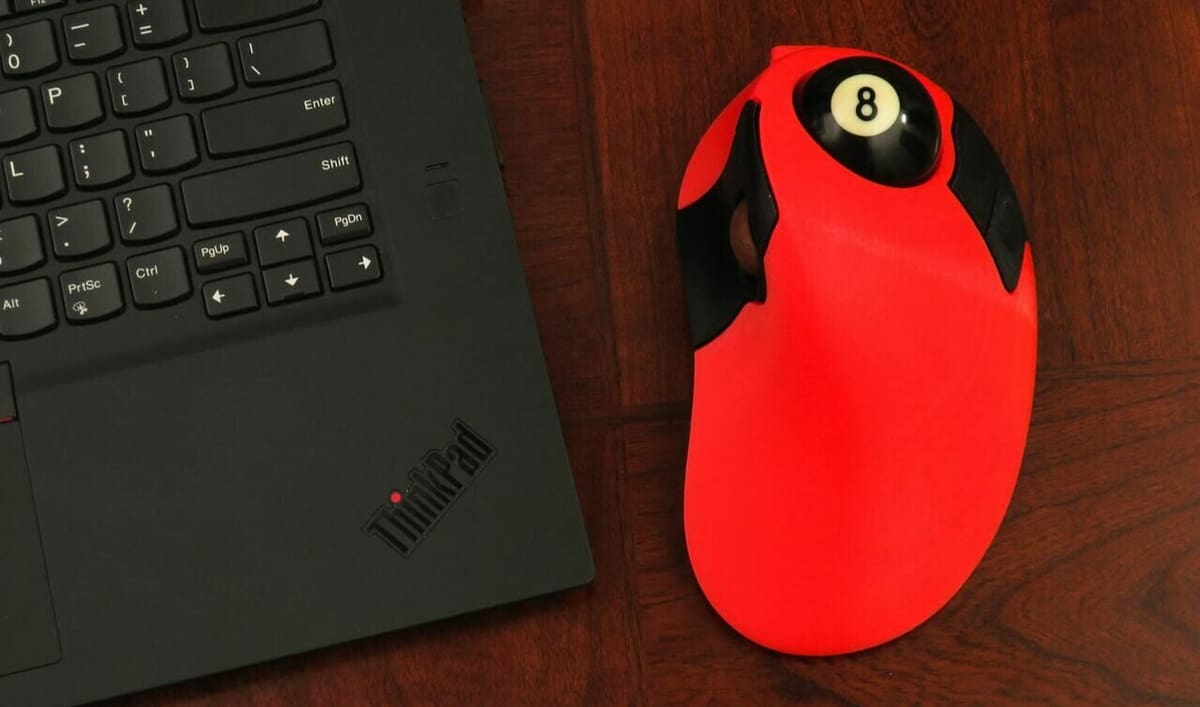
The Ploopy classic trackball mouse is another DIY project that’s stationary. This is achieved by placing a spherical ball over an optical sensor to sense the motion of the ball.
This device uses a pre-assembled Ploopy PCB with an integrated sensor for the trackball and some other hardware. The 3D printed exterior casing also features a custom-designed hand grip to improve comfort, especially around the thumb.
Being fully open source (both hardware and firmware), you can print the 11 3D printable frame pieces for the mouse on your own. The STL and STEP files for these parts, as well as the firmware files, can be found on the project’s GitHub page. Alternatively, if you don’t want to make this mouse on your own, you can purchase a fully-made or kit version on Ploopy’s website.
Space
A normal mouse slides across the XY-plane of a mouse pad or other surface to move a cursor over the XY-planes on a screen. Due to the mouse’s 2D limitations, there isn’t a way to control the view of a third perspective (such as on a CAD program) without specially programmed buttons or digital features.
This mouse is actually a cheaper, DIY alternative to more expensive professional CAD-focused computer mice. Using an Arduino Micro board, this mouse gives you control over the depth (Z-axis) perspective with a programmable joystick and a few buttons. There are five 3D printable parts, and although assembly may seem complex, the Instructables guide is very helpful.
- Designer: StefanoS48
- Project page: Instructables
- Key components: 3D printed parts, Arduino Micro, joystick, pushbuttons, thread inserts
- Approximate cost: $70
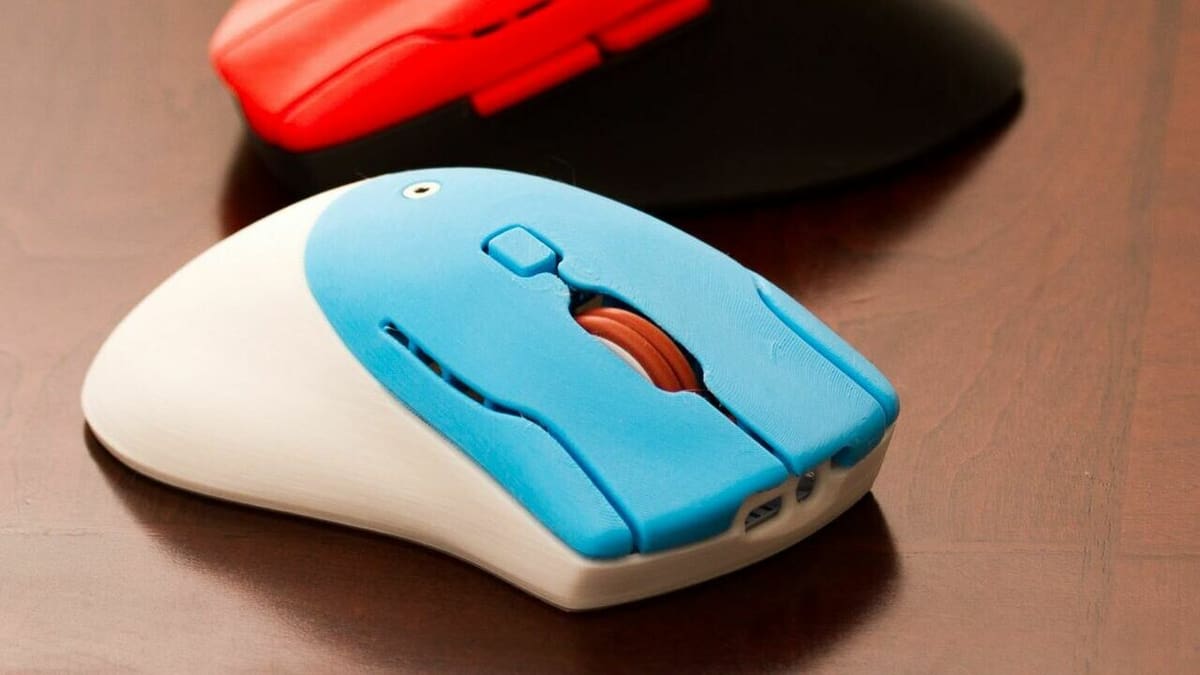
Gaming
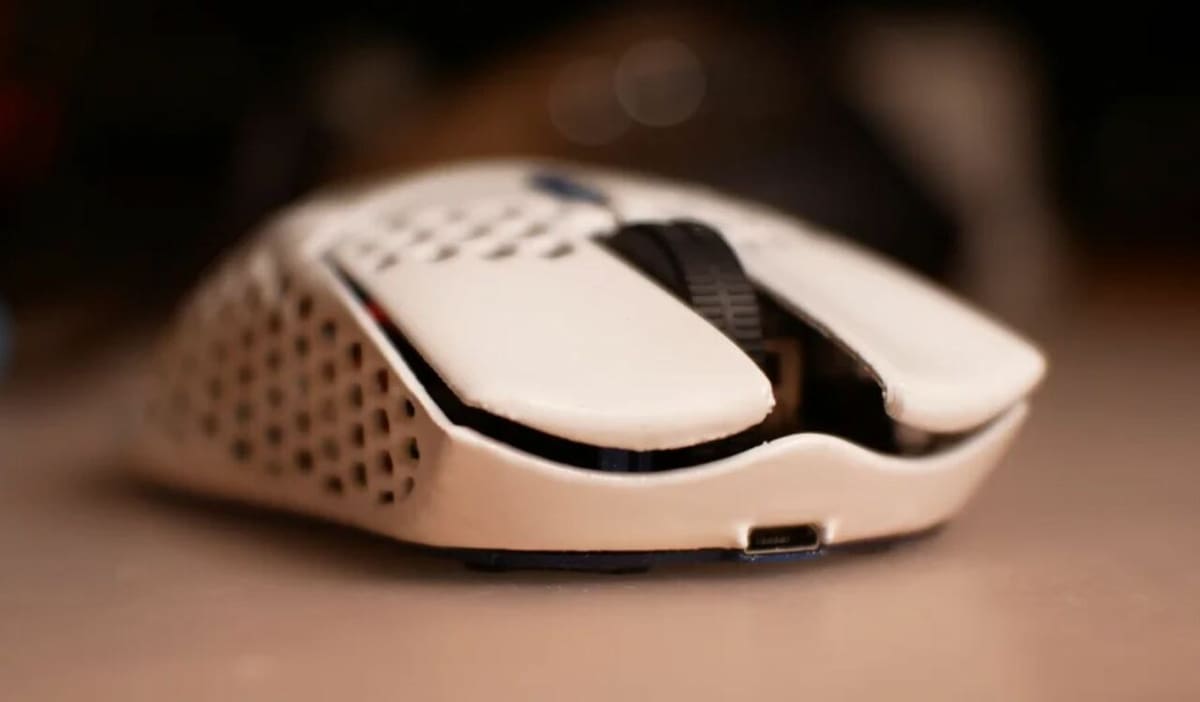
Gaming mice are all the rage these days, and this gaming mouse not only looks fantastic but is very high quality. It combines a 3D printed frame with the same electronics as the Logitech G305, a popular gaming mouse that costs around $55. Like the G305, this mouse is wireless (battery-powered) and uses a Logitech Hero optical sensor with a maximum DPI of 12,000.
The files for this design are available for purchase on a user’s Etsy shop. The lightweight hexagonal frame makes the mouse look very high-tech, and as noted on the project page, you can use spray paint to color the frame pieces to make the mouse look even cooler.
If you want to save some money, you can download the basic frame design, with no hexagonal pattern, on Thingiverse. Another good resource for this project is the Instructables page, which goes over the disassembly of the G305, assembly, and configuration.
- Designer: amotoma
- Project pages: Instructables, Thingiverse
- Key components: 3D printed parts, Logitech G305 electronics (PCB, Hero sensor), drone battery, voltage step down module, Micro-USB port
- Approximate cost: $65
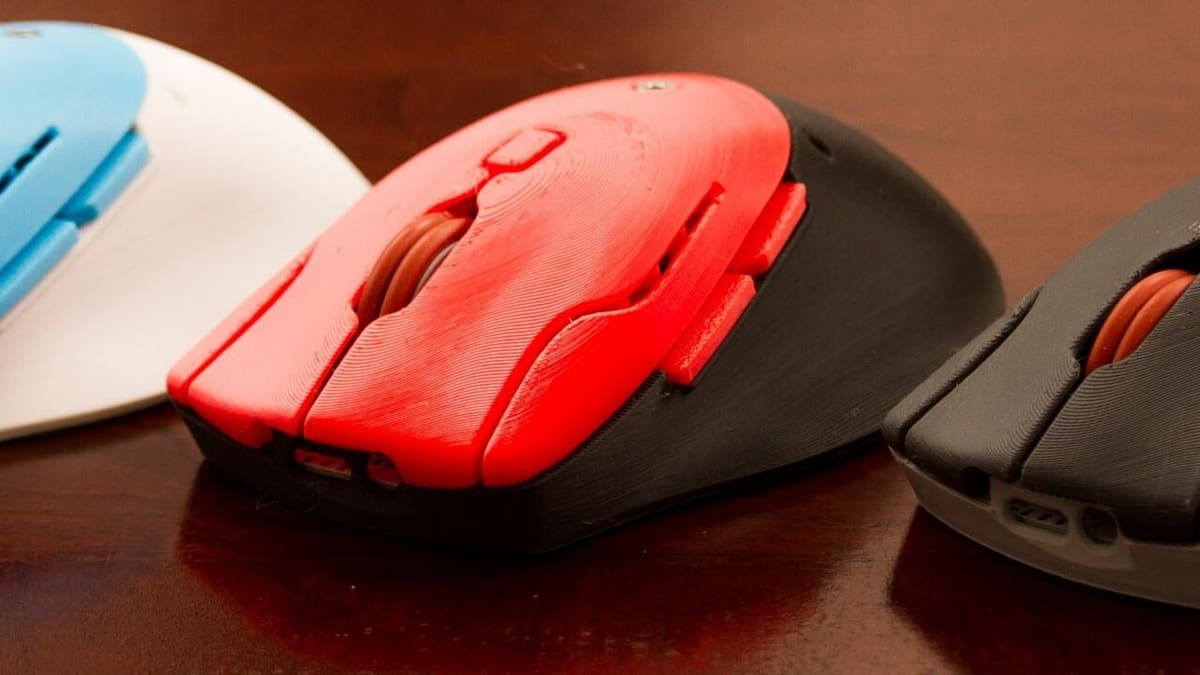
Logitech G Pro Wireless Clone
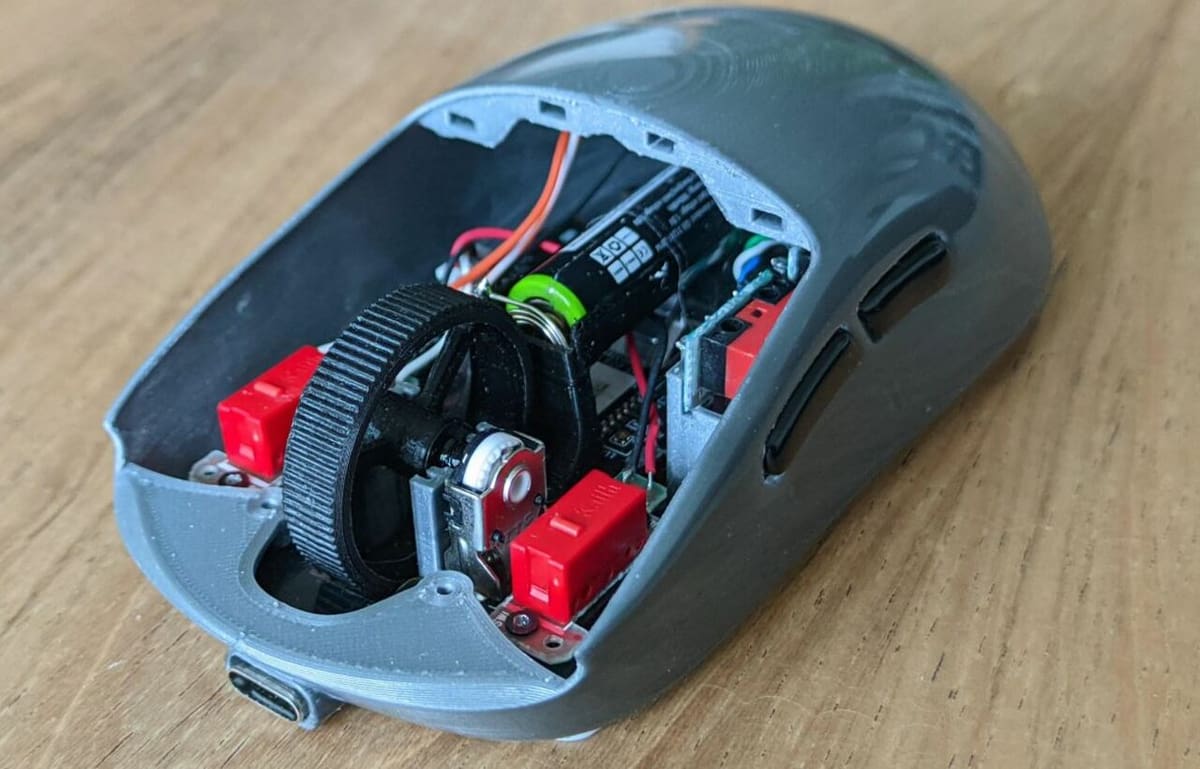
While the Logitech G305 is a popular, relatively inexpensive gaming mouse, the Logitech G Pro Wireless is a popular and slightly higher quality gaming mouse, which costs around $130. This DIY mouse project combines elements of both of them.
Its 3D printable parts mimic the shape of the G Pro but the mouse uses the electronics of a G305. As a result, much of its features are the same as the G305, including the buttons (six total) and Hero sensor. It’s also optical and battery-powered, using a USB-C port for charging.
While there aren’t any publicly available files or instructions for this project, this DIY mouse is an excellent showcase of 3D printing’s abilities.
- Designer: MoederBeer
- Project page: Reddit
- Key components: 3D printed parts, Logitech G305 electronics (custom PCB, Hero sensor)
- Approximate cost: $65
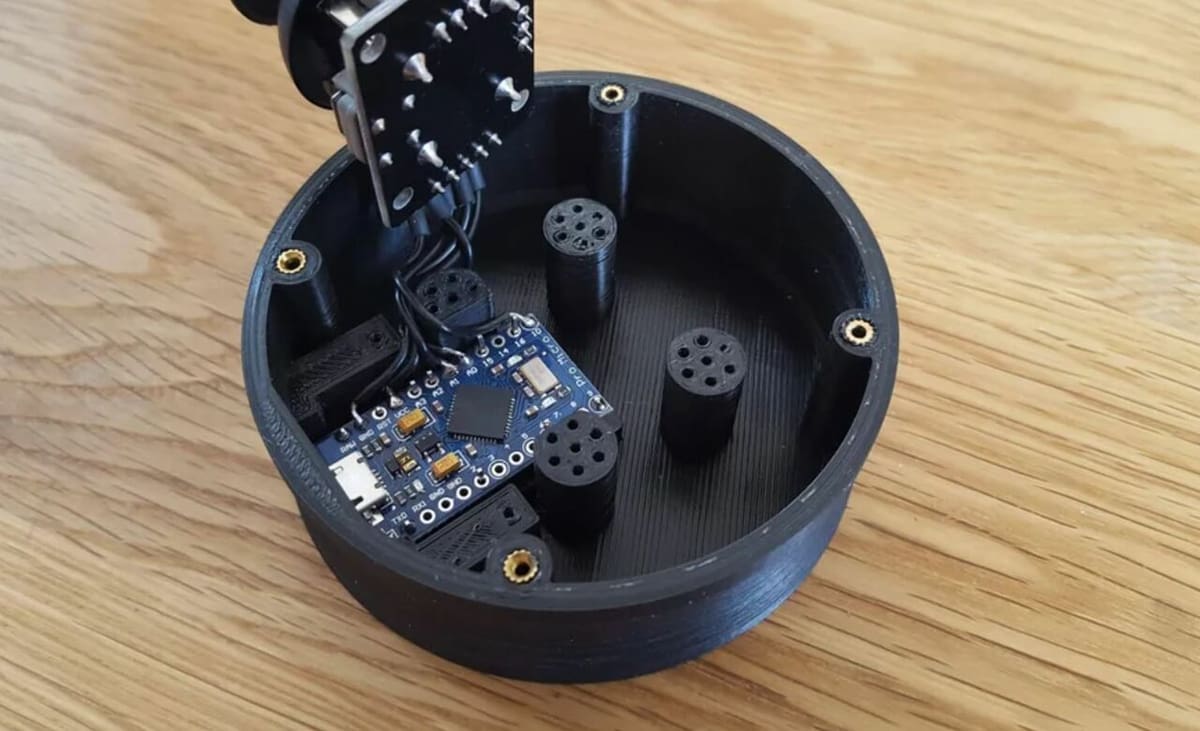
SpaceMouse Clone
Lastly, this joystick SpaceMouse clone is another CAD-focused 3D perspective mouse. The mouse was partially inspired by and made to be a cheaper alternative to the popular SpaceMouse product by 3Dconnexion, which costs around $285.
It uses an Arduino Pro Micro with a joystick to control the 3D perspective. Also featured is an assortment of buttons, which are located on the side of the mouse’s 3D printed frame.
In the project files, you can find different assembly images, firmware files, and 3D model files. Sadly, not much direct information is given for assembly, so it may be a little difficult to make this mouse without some DIY electronic experience.
- Designer: Enrico Strona
- Project page: GrabCAD
- Key components: 3D printed parts, Arduino Pro Micro, joystick, pushbuttons
- Approximate cost: $50
License: The text of "3D Print a Computer Mouse: 10 Cool Projects" by All3DP is licensed under a Creative Commons Attribution 4.0 International License.