We’ve seen a variety of 3D printed speakers that use a cone-like design to amplify music from a smartphone or some other device, but few of them actually utilize non-printed components to turn up the volume. While there are more complex speaker system designs that can be 3D printed, these projects typically require a copious amount of soldering, post-processing, and time.
But one maker and YouTuber known as 3DSage has recently created a 3D printable speaker that is easy to make and actually works. We first came across this project on the DIY-centric website Instructables, and found that the simple and surprisingly functional design was too good to press skip on.
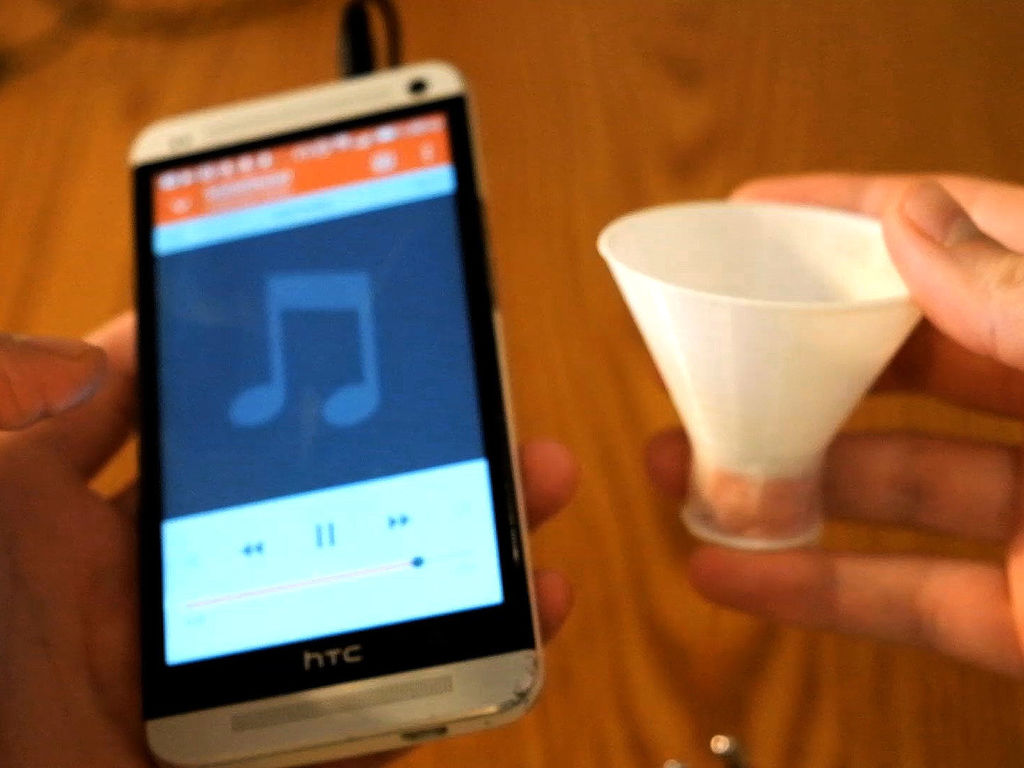
This 3D printed speaker works by sending electricity through a coil of wire, turning it into an electromagnet that attracts to magnets placed inside of the cone. When the music device is playing, it sends out intensities of electric current that cause vibrations in the cone and air. You won’t get a surround sound listening experience, but this DIY speaker is a great educational project involving magnets and sound.
Using magnets, wire, and your 3D printer, you can create your own cone-shaped speaker faster than you can sing “do re mi fa so la ti do.” How does that sound? Let’s take a closer look at this Weekend Project to find out more!
What You Need & How to Build it
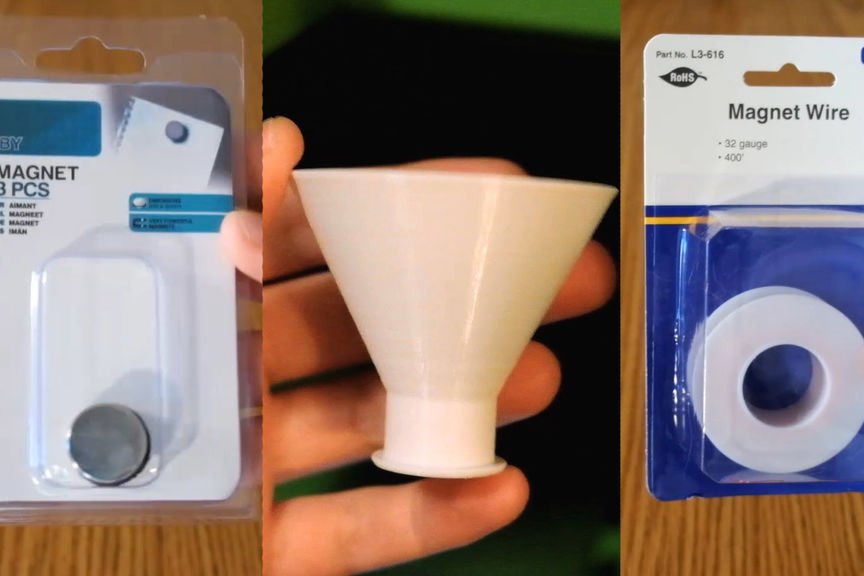
The only part that you need to 3D print for this project is the speaker design, which was inspired by a speaker used by Alexander Graham Bell in 1876. You can download the STL file from Thingiverse.
Aside from the 3D printed speaker, here’s what else you’ll need:
Once you’ve 3D printed the speaker cone and gathered your supplies, it’s time to start putting the simple speaker system together.
After leaving a few inches of the wire extended, start by tightly wrapping the wire around the base of the 3D printed cone for around 150 turns. Next, leave another few inches of wire and cut it with scissors. Taking a piece of scotch tape, wrap it around the magnetic wire to keep it tightly wound and in place.
The magnetic wire has an enamel coating that needs to be removed with a lighter (burn it away) or blade (scrape it away). Take one end of the wire and place it around the base of the headphone jack while wrapping the other end around the tip of the headphone jack.
For the next step, take two 3-inch pieces of scotch tape and connect them to make a plus sign. Place the three magnets on the sticky side of the tape and mount it inside of the cone. Finally, turn on your smartphone or musical device and listen to your new DIY speakers!
If you want to learn more about this 3D printed speaker, check out the video below.
License: The text of " Pump up the Volume with this 3D Printed Speaker" by All3DP is licensed under a Creative Commons Attribution 4.0 International License.