One of the greatest joys that come with being a 3D printer owner is watching your own idea become actualized right before your very eyes. When a concept comes to mind, a maker can simply hop onto their 3D design software of choice and bring their prototype or product to life straight through the extruder.
After traveling with his wife in Portugal, a software engineer and Instructables user who goes by the username of wentworthm became captivated by the country’s traditional Azulejo tiles. Commonly found in both Portugal and Spain, these painted tin-glazed ceramic tilework are used to decorate and also help control the temperature of indoor homes.
Inspired by the intricate and vibrant designs, the couple set off to try and integrate these tiles into their own housing projects. However, they struggled to find a design that they both loved and was available in smaller quantities, eventually leading wentworthm to tinker around with his 3D printer until he came up with a solution.
The results that were achieved are truly spectacular, making the Azulejo tiles one of the featured projects on Instructables. Want to learn more about how to create these ornamental tiles on your own? Let’s take a brief look at this Weekend Project!

What You Need & How to Build it
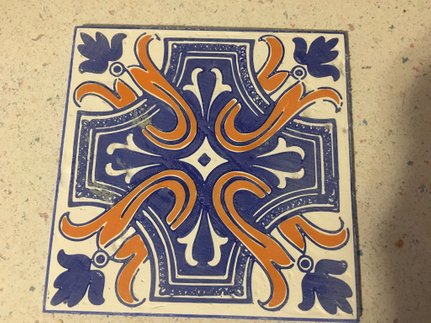
![Image of [Project] How to 3D Print Portuguese Azulejo Tiles: What You Need & How to Build it](https://i.all3dp.com/workers/images/fit=scale-down,w=1200,gravity=0.5x0.5,format=auto/wp-content/uploads/2019/02/14015506/3d-printed-tile-1.jpg)
For those that want to dive right into the printing process, wentworthm has shared his own STL and SVG (vector file format) on the Instructables page.
Aside from your 3D printer and some PLA filament, here are the other materials you’ll need to create 3D printed Azulejo tiles:
- Drywall Spackle
- Exacto Knife
- Hand Sander or Orbital Sander
- Rustoleum Semi-Gloss Clear Spray Paint
- Isopropyl Alcohol
If you want to make your own pattern for the Azulejo tiles, the first step of the Instructables project demonstrates the maker’s design process. After gathering non-commercial photos online, wentworthm uses Gimp to create a silhouette of each color aside from white. Once the JPG files are created, these are converted into a vector file (SVG).
The software engineer utilizes TinkerCAD, a free browser-based CAD program, to transform the vector file into the 3D world. Simply import the file and make the design about 1 mm thick, along with setting the tile on a square base with a 1mm thick wall around the perimeter, which will help to catch the white drywall spackle that will be required later on.
The next step is to 3D print the parts for the tile. Instructables user wentworthm suggests using PLA over other filament types since it’s easy to print with and doesn’t warp. He also recommends using thick layers for the print, personally raising each layer to 0.2mm.
Without a multi-material 3D printer, that blue and orange sections need to be printed separately and assembled after the fact. You may need to use the exacto knife to clean up the edges so that the orange pieces fit snugly into the gaps of the blue tile.

Next, using pre-mixed drywall spackle, you’ll need to scoop up and lather the material across the entire print, filling all holes and gaps along the way. Once the spackle is spread throughout the 3D printed tile, scrape away the excess and make sure that the surface across the tile is both level and smooth.
If the printed parts are visible, there’s no need to be alarmed, as wentworthm will show you how to deal with this in the following steps. Now that the spackle is applied, let it dry overnight before moving onto the final post-processing steps.
According to the maker, he used both a hand sander and orbital sander on this project but ultimately found the latter to be more successful with large open areas. However, the hand sander was still necessary to remove extra spackle and smoothen the filament.
Finally, to achieve a visually appealing shimmer, you’ll need to apply some Rustoleum semi-gloss clear spray paint to the surface of the tile. This will probably take two coats, so be patient and allow the first couple of layers to dry before judging the results. The Instructables user is also planning to experiment with food-safe resin, allowing him and his wife to turn the tile into a cutting board.

If you want to learn more about this Weekend Project, check out the full details on Instructables.
License: The text of " How to 3D Print Portuguese Azulejo Tiles" by All3DP is licensed under a Creative Commons Attribution 4.0 International License.