![Featured image of [Project] 3D Printed Automatic Smart Plant Pot](https://i.all3dp.com/workers/images/fit=scale-down,w=1200,h=675,quality=79,gravity=0.5x0.5,format=auto/wp-content/uploads/2019/04/14051835/Automatic-Smart-Plant-Pot-DIY-3D-Printed-Arduino-Self-Watering-Project-0-4-screenshot.jpg)
[Project] 3D Printed Automatic Smart Plant Pot

Looking for a way to keep your plants alive while you're traveling the world or stuck at work? How about 3D printing your very own Arduino-powered automatic smart plant pot!
Whether it be for work or pleasure, traveling provides a great opportunity to encounter new experiences and grow as a person. But what about the growth of your houseplants? If you’re worried about what will happen to your precious plants while you slip away for a few days, DIY Machines, a 3D printing-centric YouTube channel which is run by UK-based designer Lewis Aburrow, has a solution for you!
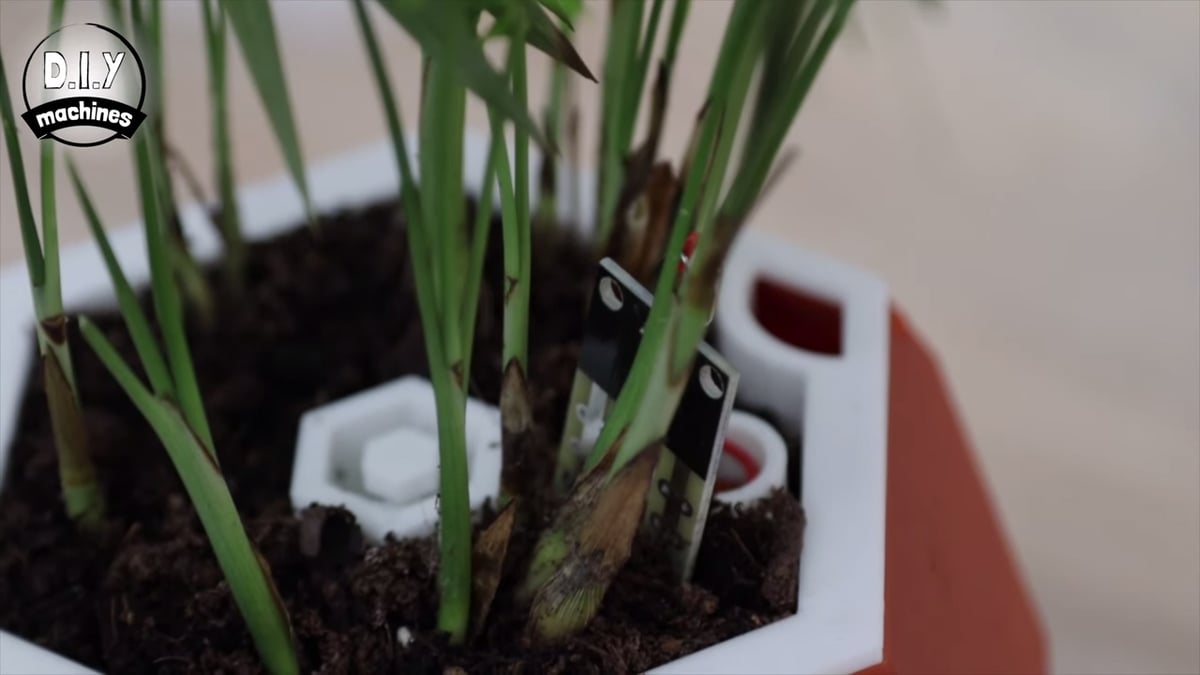
This 3D printed Automatic Smart Plant Pot looks simple on the outside, but inside there are electronics, pumps, and a water reservoir that work together to keep your plants healthy and happy. All of these components are controlled by an Arduino Nano. It’s equipped with a built-in reservoir to store water, a soil moisture sensor, and an integrated pump to automatically water the plant.
The Automatic Smart Plant Pot is a relatively inexpensive and fun project that is perfect for any maker who has a green thumb. DIY Machines has even created a video to walk you through the assembly process. The self-watering plant project was recently featured in the Best of the Week category on Thingiverse for March 31 through April 6, becoming a popular model in just a matter of days.
Want to bring a smarter solution into your home to keep those indoor plants green and growing? Let’s take a quick look at what you need and how to build this 3D printing project.
What You Need & How to Build it
The STL files for the 3D printed smart plant pot can be downloaded from Thingiverse. There are three different parts: the outer pot, inner pot, and stand. In Aburrow’s example, he uses a layer height of 0.15 mm and no support structures.
Keep in mind that this 3D printing project also requires a fair amount soldering and Arduino code, so experience with both of these will be particularly beneficial.
Aside from the 3D printed components, here’s what else you’ll need to build this self-watering smart planter:
- Arduino Nano
- Mini submersible pump
- 5mm tubing
- Transistor
- Resistors (1k and 4.7k)
- Wire
- 3mm LED
- Water level sensor
- M3 x 10 Nuts and Bolts
- Soil moisture sensor
- Half Perma-protoboard
If you want to start on the project right away, we recommend that you check out the YouTube video at the bottom of the article to get the full set of instructions. Otherwise, we’ll provide you with a brief overview of the assembly process so you know what you’re getting into.
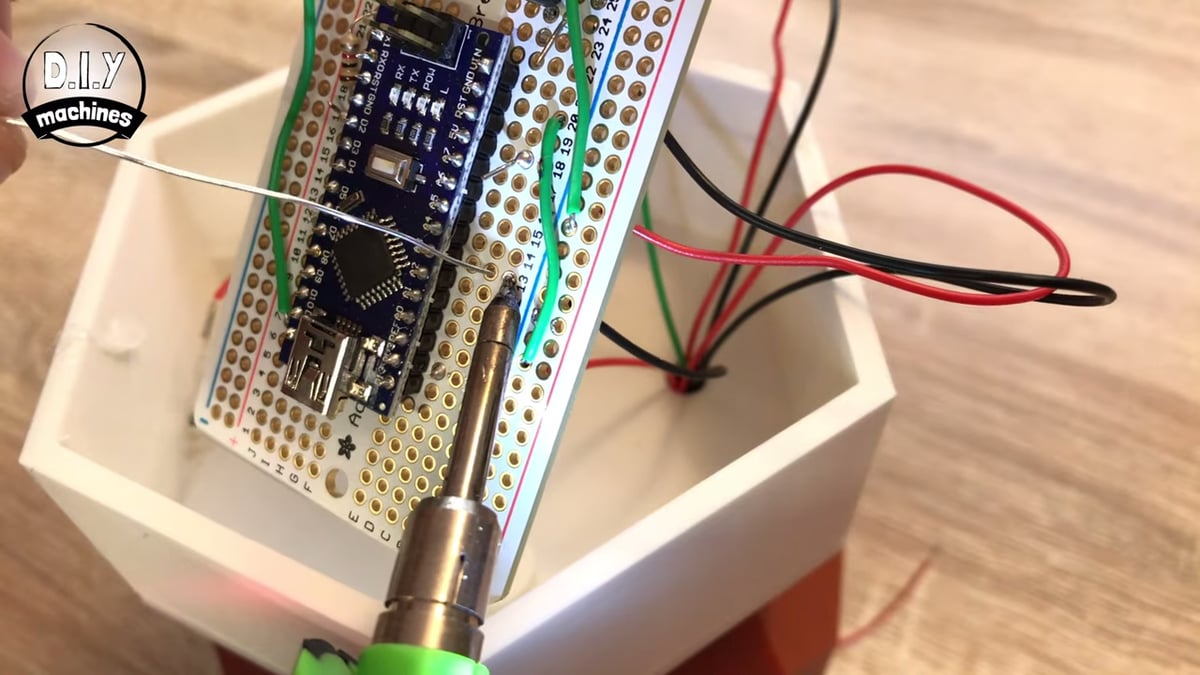
Once you have all of your 3D printed parts and components gathered, it’s time to start the assembly process. In the DIY Machines video, the maker starts by soldering the Arduino to the protoboard. You can follow him step-by-step or look at the circuit diagram below.
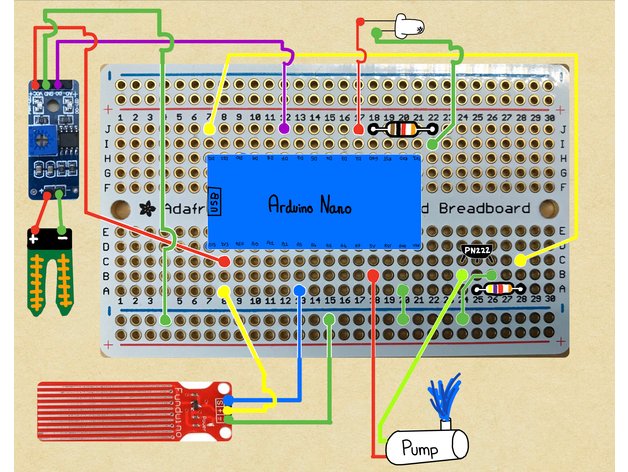
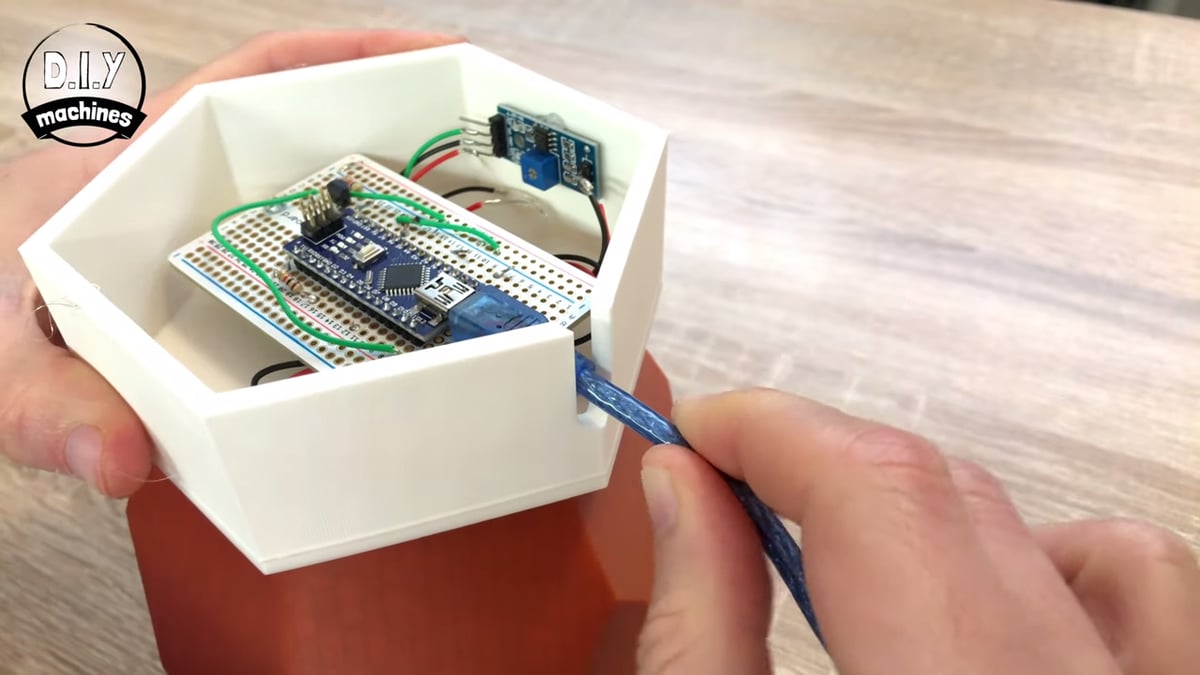
Following the Arduino, the next step is to mount the transistor and resistors (as pictured above). You’ll also need to connect the wires to the LED and solder that to the board. Be aware that not everything will be ready to solder right away. For instance, the wires for the water pump need to be extended before that component can be attached to the board, while three different wires need to be soldered to the water level sensor before it will get installed.
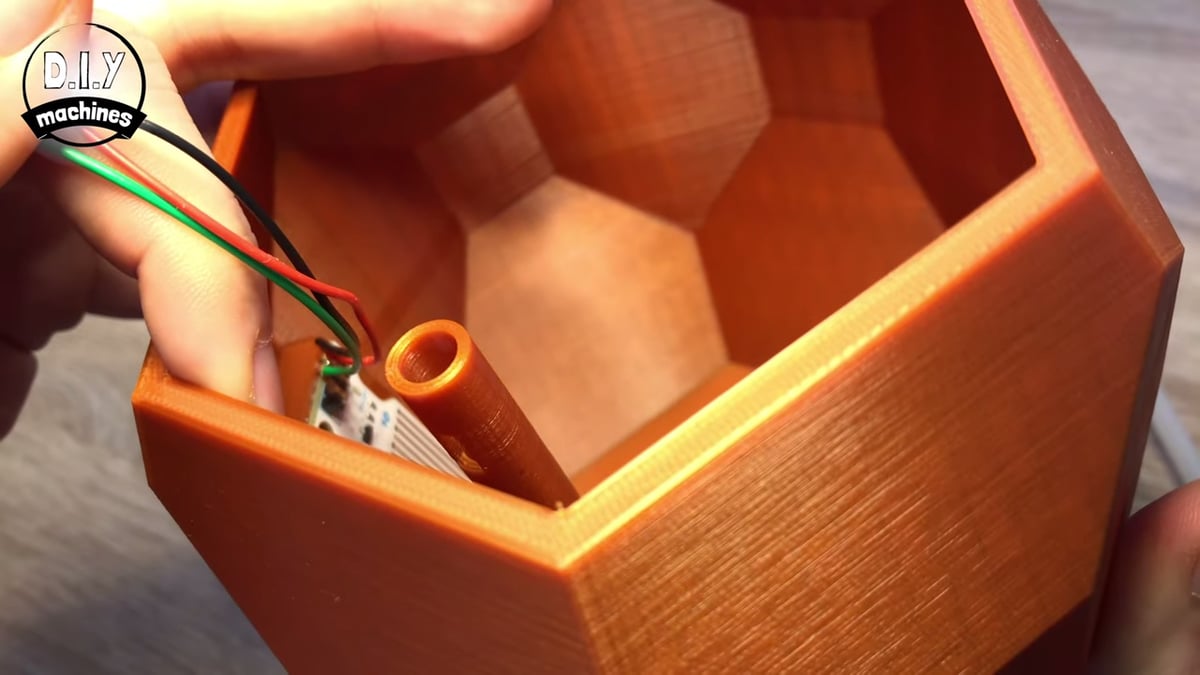
After the aforementioned components are soldered onto the board, the next step requires you to take the 3D printed base and fix the water level sensor into its mounting point with some hot glue. This consists of inserting the three wires into the hole until they pop out of the other end of the planter. The two wires that are attached to the water pump should be threaded through the same hole. Aburrow suggests labeling each wire to ensure that they are soldered into the right place.
Following the wiring installation, the next step is to mount the tubing onto the water pump and connect it to the 3D printed inner pot and lower it into the outer pot, lining it up with the groove. Take the stand, which holds the electronic components, and feed the wires from the outer pot through the base. Solder the wires from the water pump and sensor onto the protoboard, which will be held in place with the two M3 screws.
At this point, you should now have all of the components soldered and in place (aside from the soil moisture sensor. Connect a USB cable to the Arduino Nano and flap the planter right side up. Here comes the fun part, potting the plant! Be sure not to let any soil spill into the hole in the center or corner of the pot. Solder the soil moisture sensor into the wires at the top of the pot.
You can find the Arduino code on the Thingiverse page. Download it and use the Arduino IDE to upload it to your Arduino Nano. When it starts, the LED in the plant should flash five times to let you know that the code is running. After a few seconds, the pump will start up and the LED will blink to alert that no water has been added yet. You can follow the video to learn how to upload and read the Arduino code.
When the water is added and the planter’s code is properly calibrated, you’ll have yourself a 3D printed self-watering smart planter!
License: The text of " 3D Printed Automatic Smart Plant Pot" by All3DP is licensed under a Creative Commons Attribution 4.0 International License.