Snapmaker Review: Best Budget 3-In-1 3D Printer
Rating
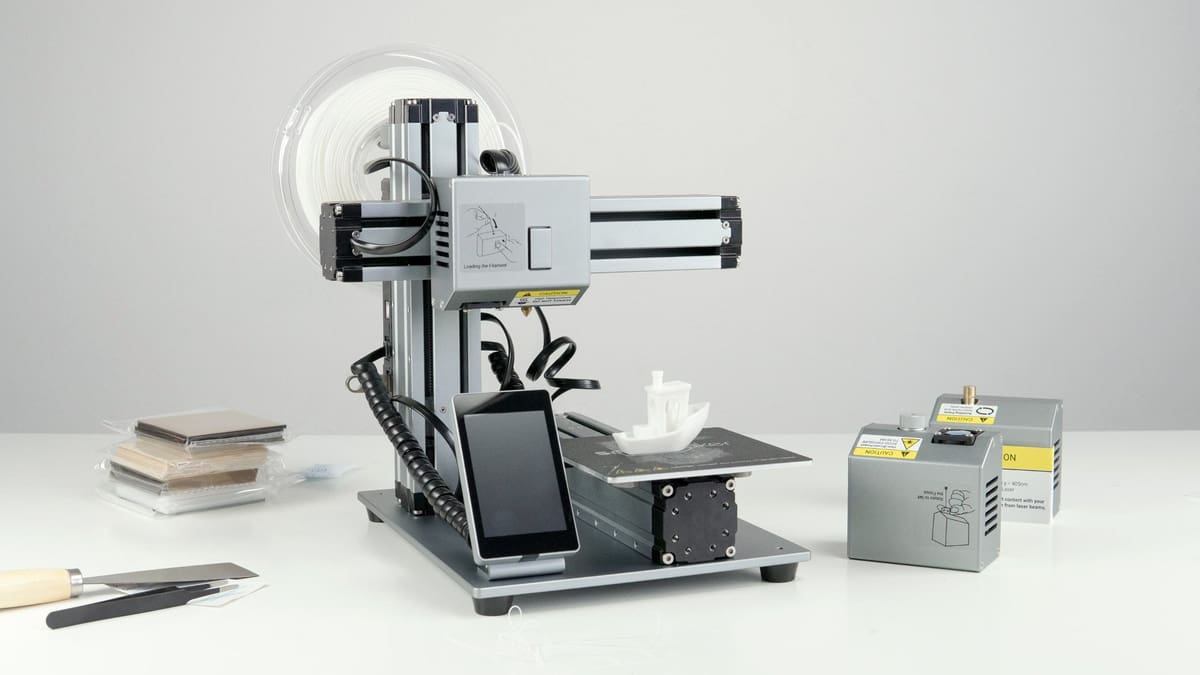
The Snapmaker, a super-compact 3D printer, laser-engraver, and CNC carver, is our pick for the "Best Budget 3-In-1 3D Printer" in winter 2019/2020. Check out our review to find out why it offers the best value for money.
There was a great deal of excitement around the Snapmaker when it launched on Kickstarter in March 2017. And that excitement translated into big numbers. Very big numbers indeed.
How big? Well, let’s put it this way. In the spectrum of crowdfunding success stories, the Snapmaker 3D printer occupies a unique position. After raising $2,277,182 from 5,050 backers, Snapmaker is currently the third most funded 3D printing project on Kickstarter.
Garnering something of a following for its wealth of powerful features in an easy to use form, the Snapmaker presents itself as the affordable solution for makers that just want to get stuff done.
So, should you believe the hype about this diminutive all-in-one? Is it the be all end all, the jack of all trades, or a fancy looking paperweight? Read on to find out.
Features
The concept of the Snapmaker is a modular machine with three distinct functions. The intended audience is the workshopper pushed for space.
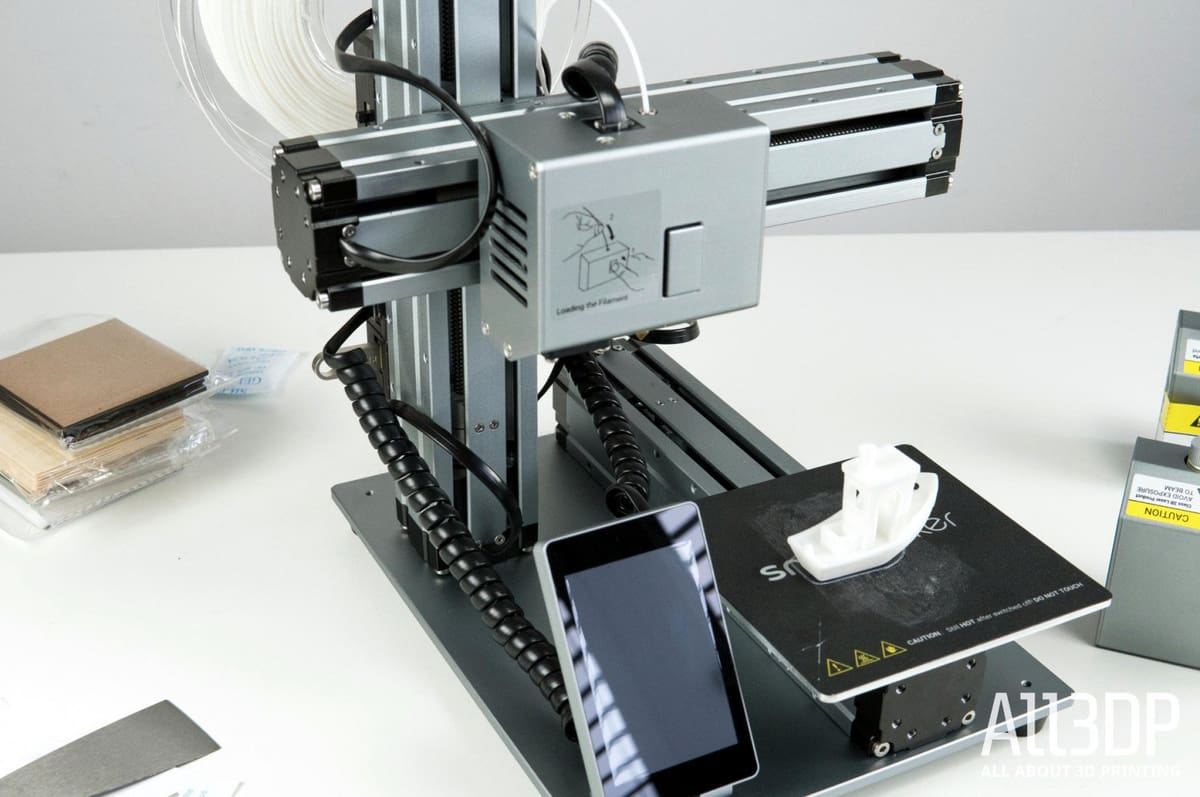
First and foremost, the Snapmaker is an all-metal 3D printer. The aluminum frame encases all wiring and components, with the exception of a few tidy cables.
But the killer feature is that three interchangeable modules can be swapped onto the Snapmaker’s X-axis rail. In addition to 3D printing, it’s also capable of laser engraving and CNC milling.
The fused deposition modeling (FDM) 3D printing module accepts a standard 1.75mm filament spool. The bed can be heated up to 80 degrees Celsius. But with a build volume of only 125mm square, prints are going to be strictly limited in size.
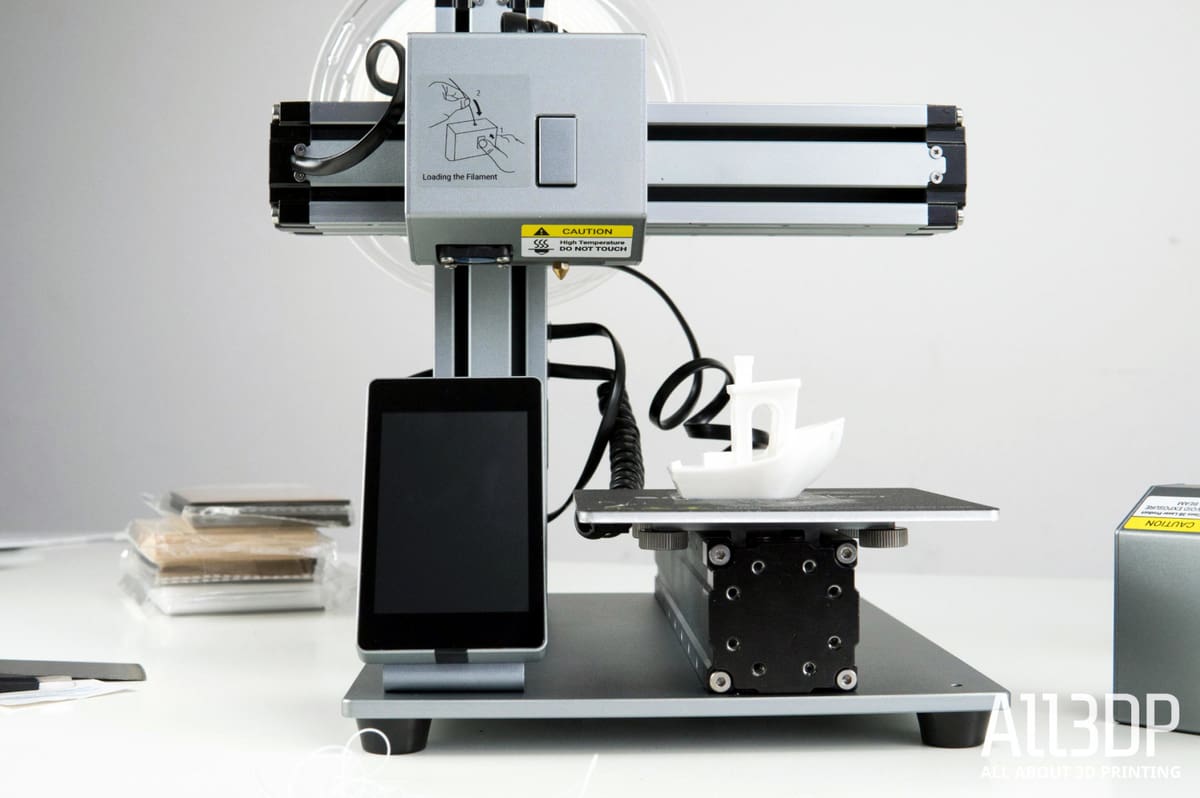
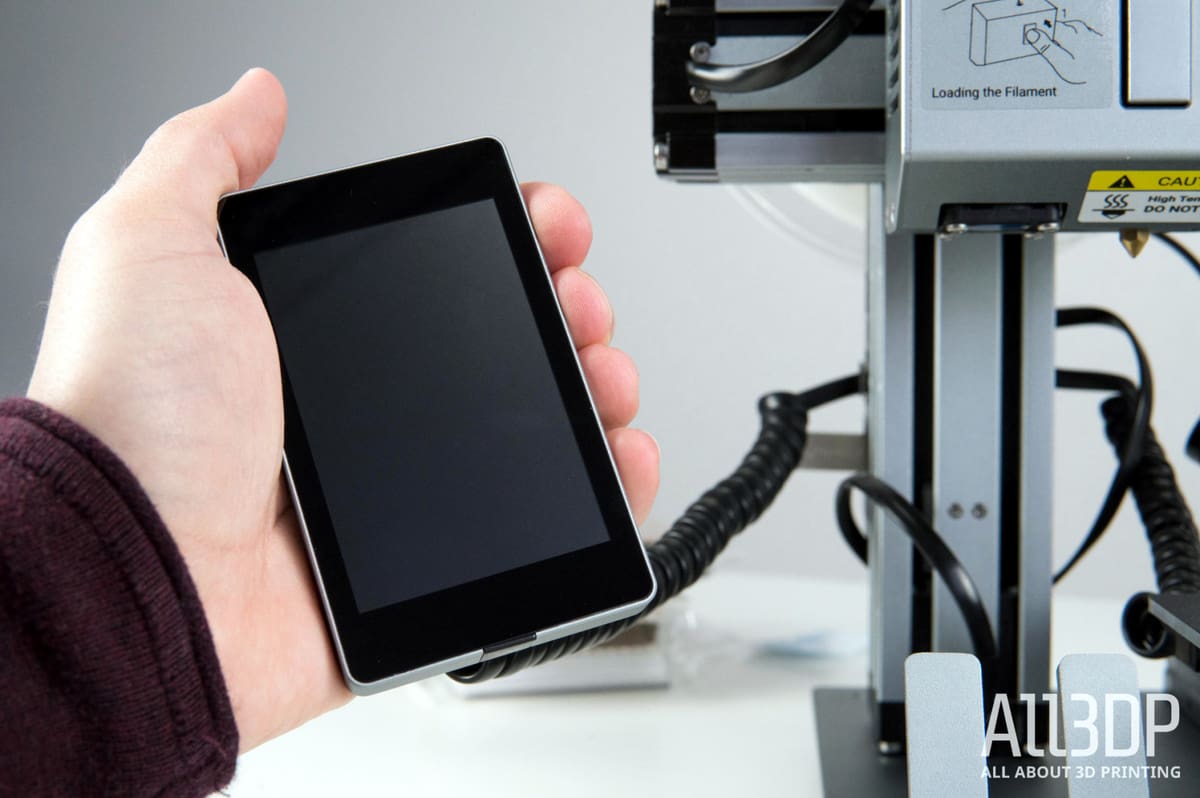
Ease of use is another core proposition with the Snapmaker 3D printer. It has an LCD touchscreen for operation, is simple to assemble, and comes bundled with the proprietary Snapmaker3D software.
The laser engraving module has a 200 mW laser capable of burning designs into wood, leather and similar materials. Additionally, a CNC module opens the Snapmaker up to carve wood, acrylic, foam, and even (with a little patience) carbon fiber.
Verdict
Pros
- Solid as a rock
- Feels premium
- Effortless transition between functions
- Out of the box 3D printing better than expected
- Fast and responsive UI via handheld touchscreen
Cons
- Tiny work volume
- Accompanying software needs work
- Terrible screwdriver
- Labeling errors could lead to confusion
- No control over CNC spindle speed
Performing an admirable job across three distinct functions, the Snapmaker is a maker’s dream tool for small-scale work. There are better individual tools that cost less than the Snapmaker’s $799, but few, if any, that challenge it for 3D printing, laser engraving and CNC carving all in one.
Unboxing
We’ve had the pleasure (and the pain) of unboxing a fair number of desktop 3D printers in our workshop. The vast majority of them come in brown cardboard boxes. Some of them even come in wooden crates.
And always — always — there is a mountain of polystyrene and foam peanuts to wade through.
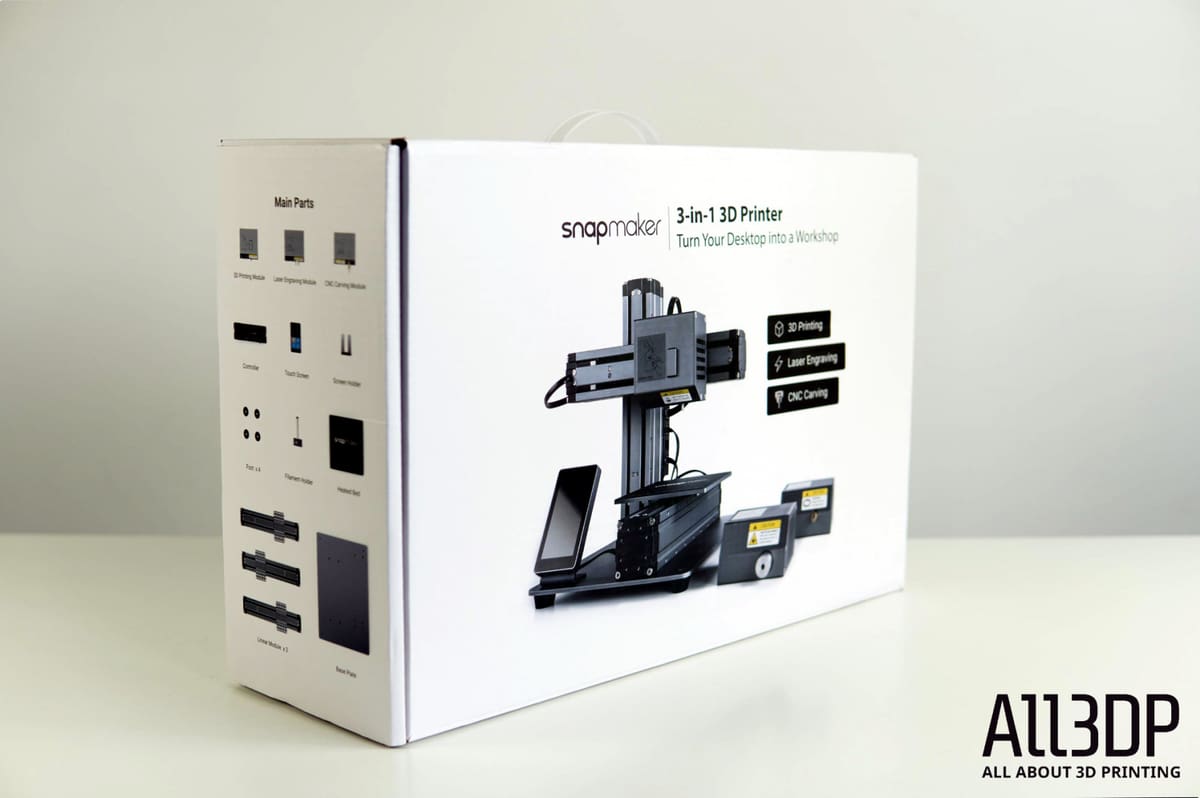
So when the Snapmaker 3D printer landed on our workbench — with a reassuring THUNK — the first impression was positive. It’s packed into a compact briefcase, with a little handle on the top. Yes, it’s still a cardboard box, but the packaging is more reminiscent of a games console or a new laptop.
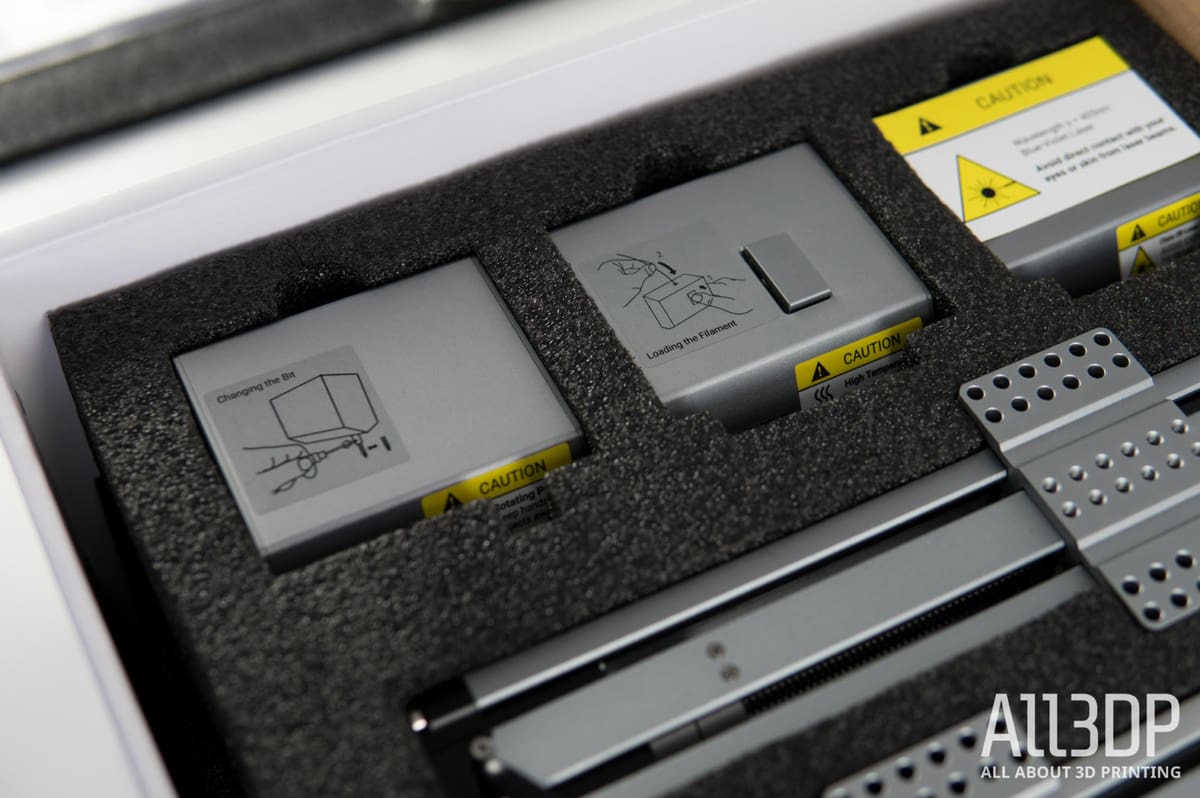
Flipping the lid open, the positive first impressions continued. The components are arranged in two stacks, held securely in place by black foam inserts.
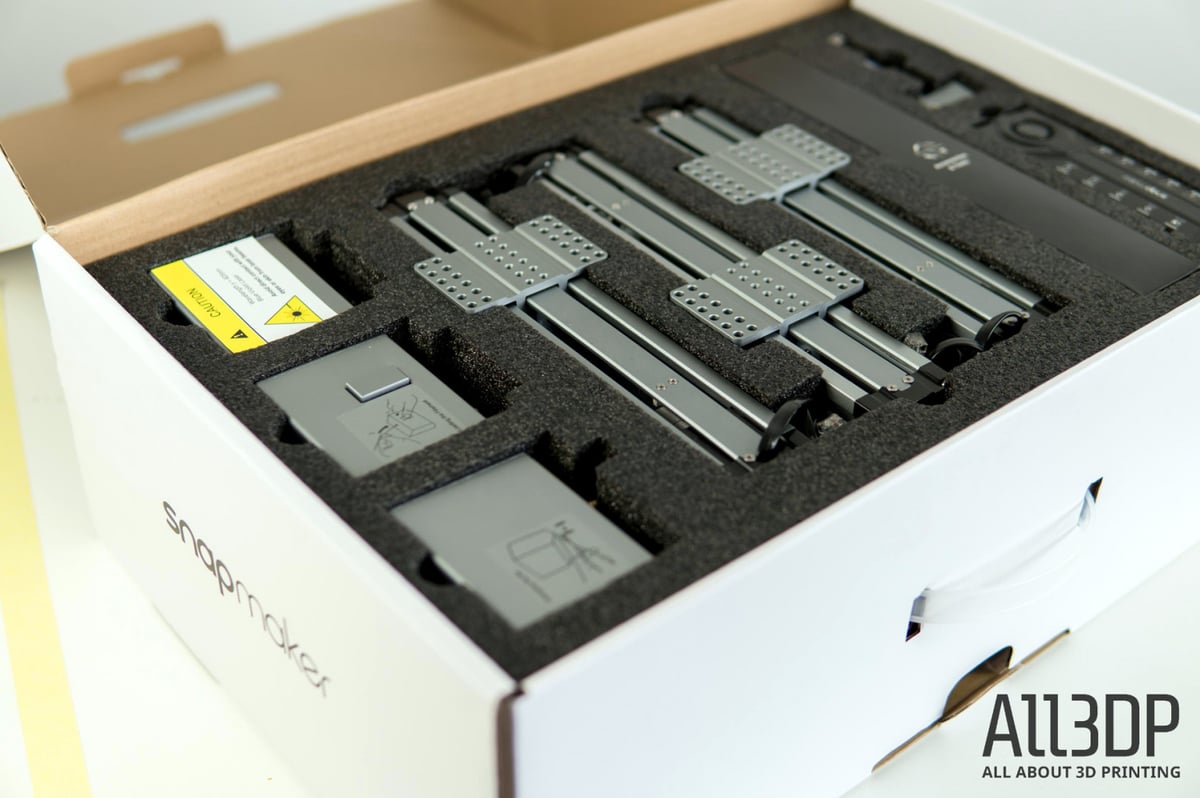
That’s correct, the Snapmaker 3D printer will require assembly. It would be impossible to create such a small package otherwise. But the assembly stage is an absolute cinch, as we’ll discuss later.
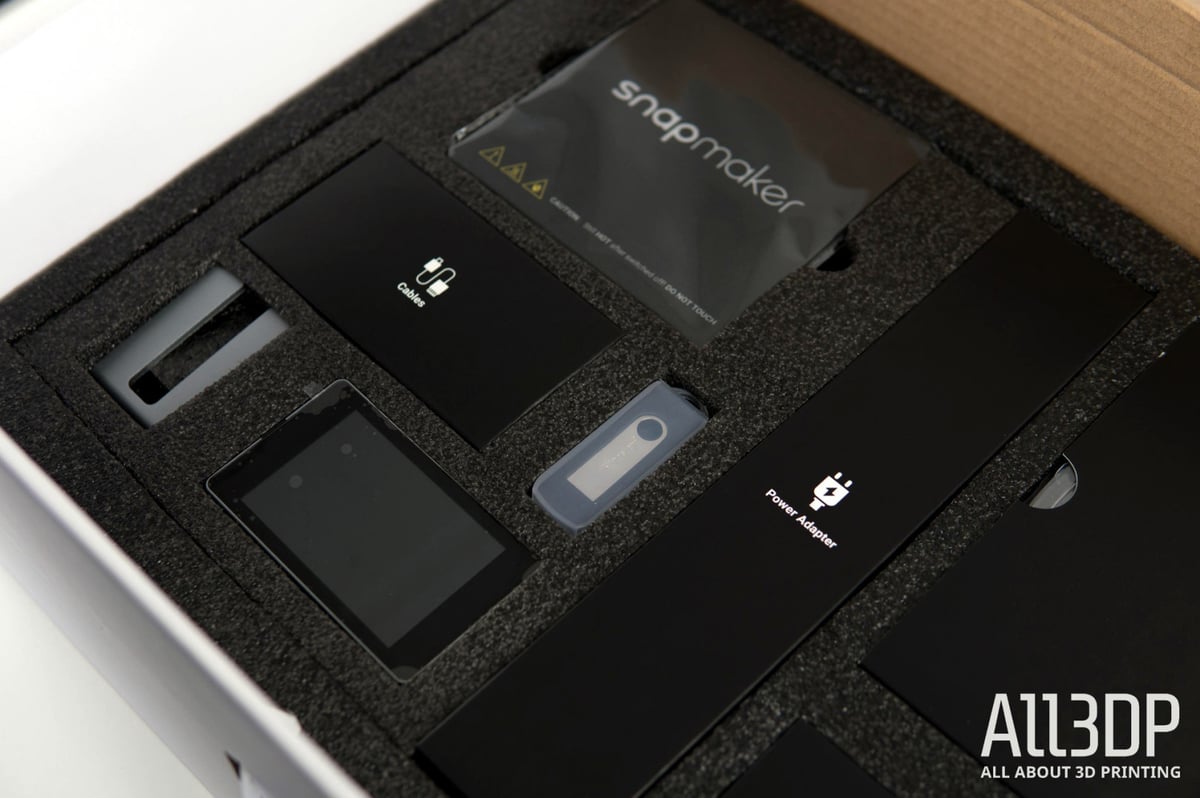
So what’s in the box? Alongside the obligatory welcome note and quick-start instructions (though no Haribo candy, sadly), you’ll find the following; three linear modules, a base plate, heated bed and PEI sheet, screen holder, touch-screen controls, filament holder, a power pack and a control box.
Also included are a set of tools, cables, screws, rubber feet, stickers, and the three “function” cubes that handle 3D printing, laser engraving and CNC milling. There’s an extra print bed and PEI sheet, a blank USB drive, a spool of filament, some squares of wood for engraving, and a pair of safety goggles.
Pleased to report, there’s nothing missing in the package we received. But we are surprised that the USB key doesn’t contain slicing software or sample models to get printing with. And stickers with vaguely motivational quotes are no substitute for candy.
Assembly
Ah yes, the assembly. Another pleasant surprise concerning the Snapmaker 3D printer is how easy it is to put together. The instructions are laid out with the clarity of an IKEA build guide, and from start to finish the process will take 25 minutes at most.
How is that even possible? The secret lies in the trio of linear modules that make up the foundation of the printer. They are identical in every respect, with the same fittings, dimensions and screw holes.
The modules contain the wiring, rails, bearings and motors necessary for each axes of operation. So strictly speaking this isn’t a full DIY 3D printer kit. It’s more of a part-assembly job, where the final mile of construction is undertaken by the end user.
In many respects, the Snapmaker 3D Printer is very similar in concept and execution to the Trinus 3D Printer, another Kickstarter success story. The difference is that the Snapmaker operates uses three linear rail modules instead of four. Presumably this helps keep costs down, but whether it impacts on operational quality remains to be seen.
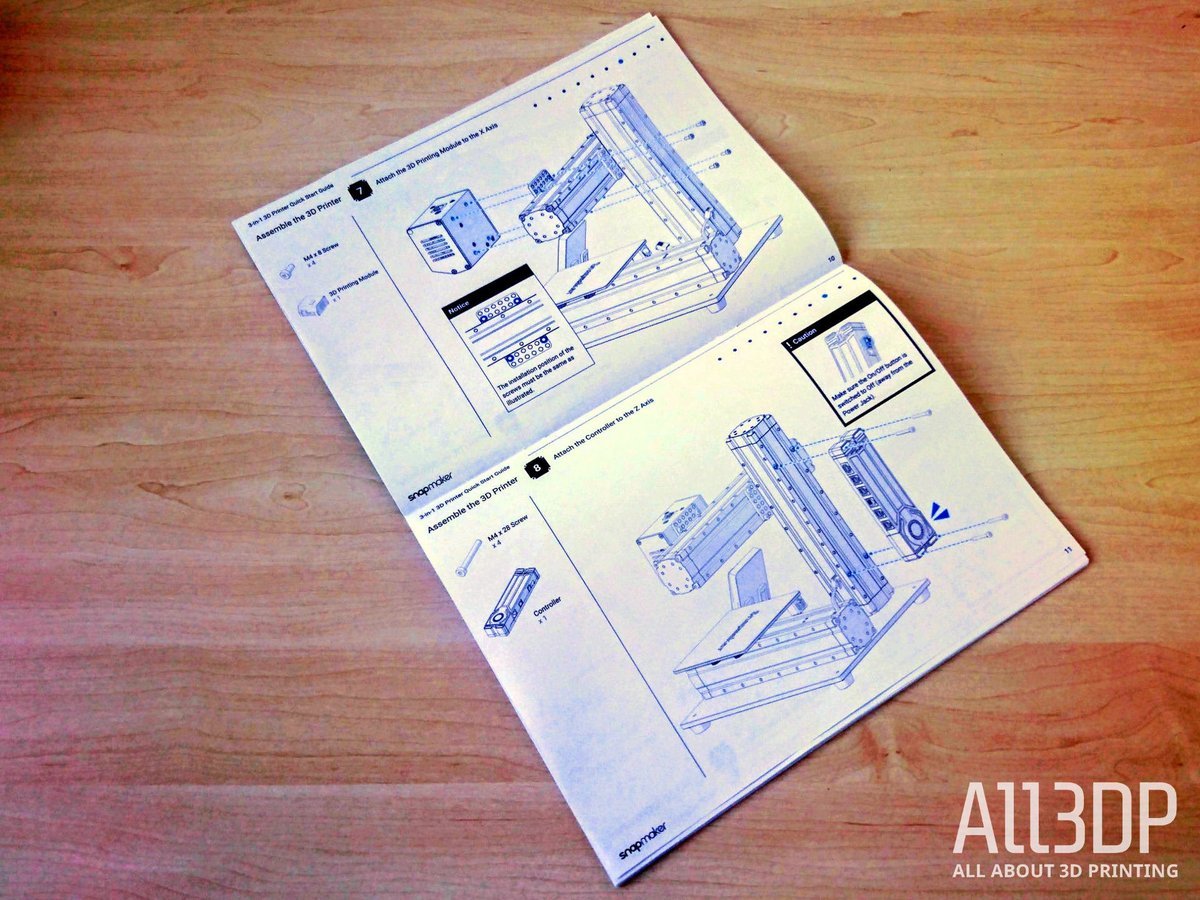
So yes, in just ten steps we had assembled our Snapmaker and were ready to rock. No word of a lie, it was actually very fun. At no point were the instructions confusing or unclear.
Two minor observations along the way. Firstly, the supplied screwdriver is abysmal. It kept falling apart in our hands, and assembly time would have been even quicker if we dispensed with it and used our own hex keys.
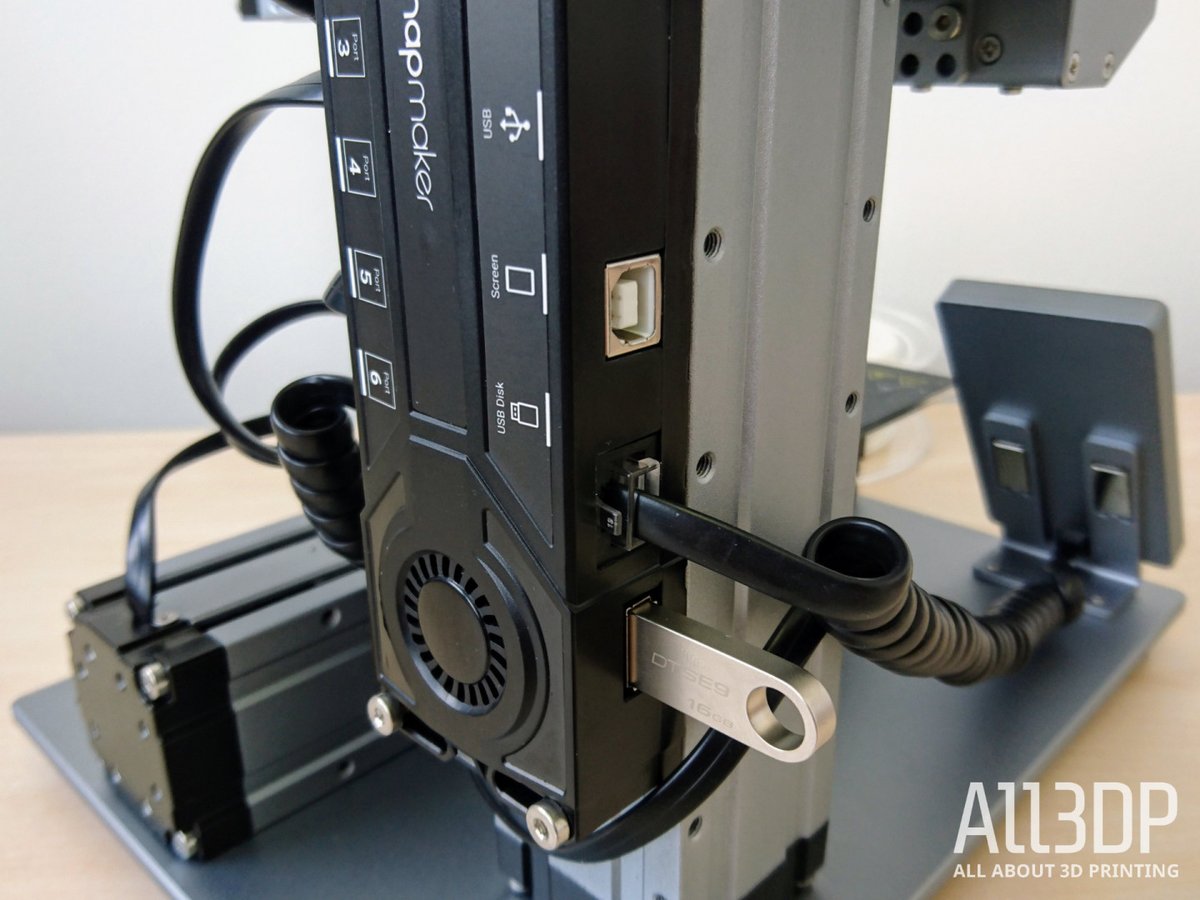
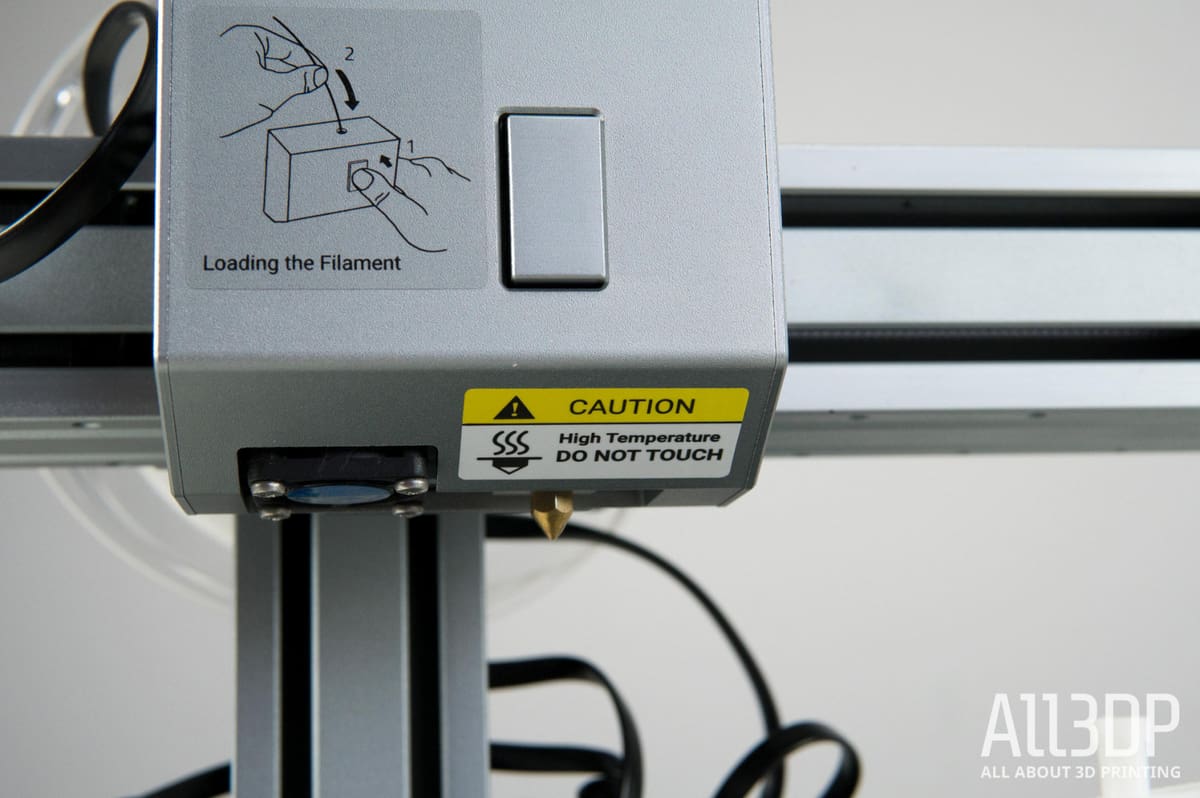
Secondly, there is a curious mislabeling on the control box a.k.a. the brains of the Snapmaker. The labels don’t align with the actual peripherals. It’s a small but important detail that might cause you to double take when wiring up the necessary bits.
These issues notwithstanding, the end result is a solid, robust and compact desktop 3D printer. Just as was promised in the original campaign. But to satisfy ourselves that everything was in order, we proceeded to calibration and a pair of test prints.
Calibration
To begin using the Snapmaker 3D printer, you have to follow a few more steps. The first is to level the heated bed using the touchscreen controls.
This procedure is reasonably uncomplicated; it’s a mixture of manual adjustments and jogging the module on the vertical axes using the touchscreen. It’s not bad, per se, but it’s not as sophisticated as other printers we’ve used in the past.
The second step is loading up the filament. This is a point where we begin to have a few concerns. Loading the filament into the direct drive extruder is fine, but because it’s a closed box, we’re not looking forward to having to prise it open in the event of a filament jam.
Moreover, the position of the filament spool holder to the rear of the unit feels counter-intuitive. We’re concerned about filament getting tangled in the power cables or worse over the course of a print job.
Putting the "Fun" in Multifunction
Switching between the three modules of the Snapmaker furthers the impression of this mini-machine being a premium product. Each has a heft and solidity that communicates an unspoken assurance of quality, which is delightful when paired with the simple process required to switch between them.
Making the jump from 3D printing to laser engraving, for example, sees you unscrew four hex screws from the module baseplate and unplugging the RJ45 cable. Stowing the print head for later use, you simply reverse the order and attach the laser head. Simple.
The same goes for the CNC tool head, too. Each exists as part of the same design philosophy, rather than being disparate parts of other tools that have been hodge-podged together.
An additional step is required when switching between the print head and the laser and CNC functions — swapping the heated print bed for carving/engraving platform. Again, unscrew, unplug, re-screw, re-plug and you’re good to go.
It’s worth noting there’s no wasteboard provided for when you CNC carve, so you will need to source your own to protect the machine’s metal platform.
3D Printing
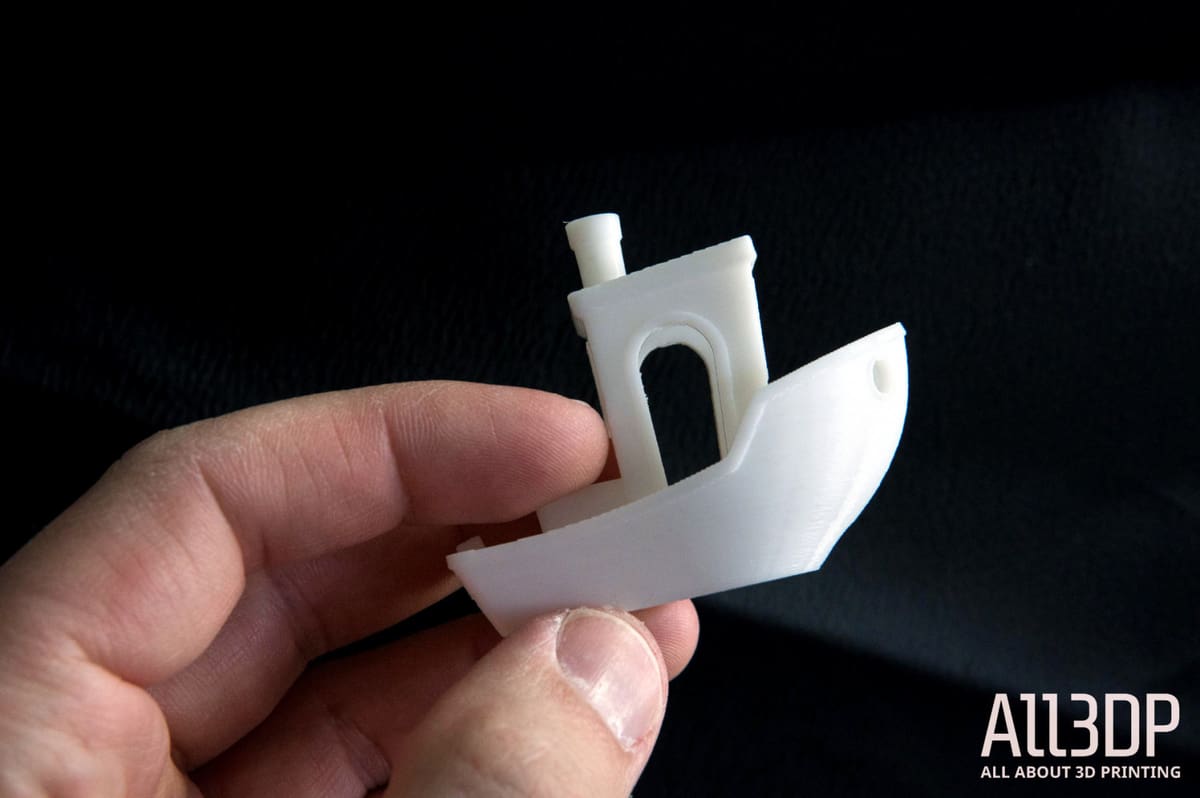
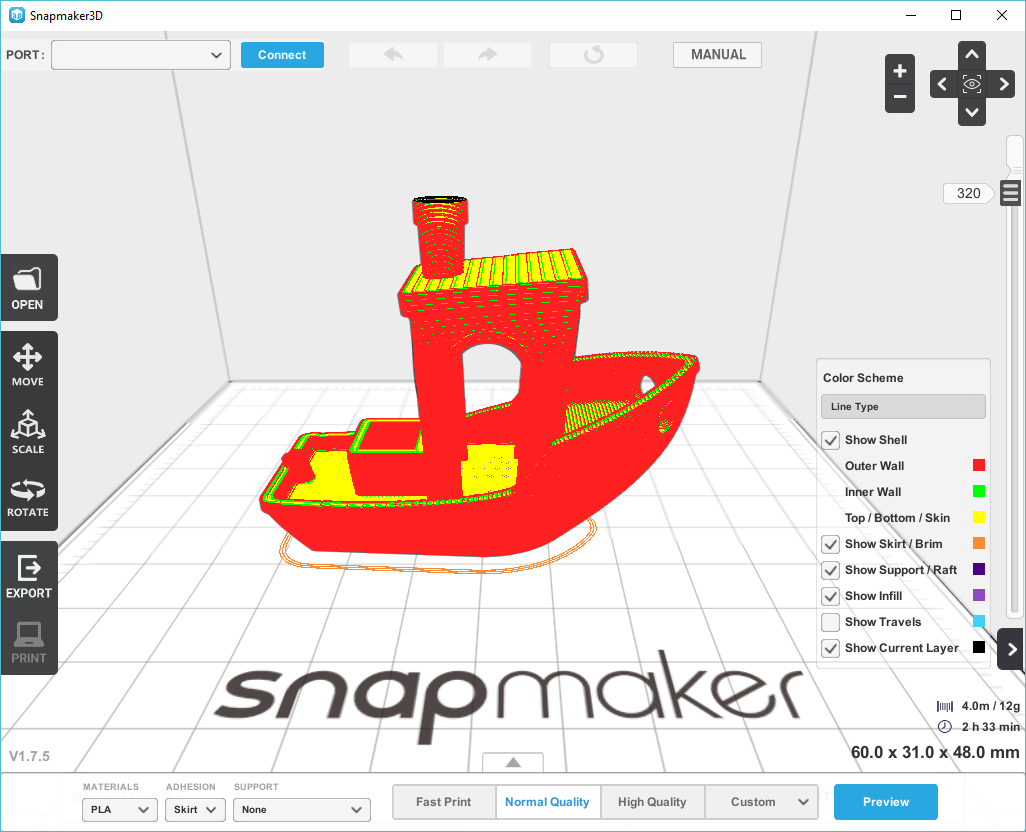
For our sample prints, we opted for the ever reliable 3DBenchy. We printed two of them, both sliced using the Snapmaker3D proprietary software. The company provides an alternative in the all-in-one Snapmakerjs software, which allows for job preparation for 3D printing, laser engraving and CNC carving.
The slicing of 3D models is powered by Cura inside Snapmaker’s own software. It is claimed that Snapmaker will also place nice with the standard version of Cura, Slic3r, and paid solutions like Simplify3D.
In any case, the bundled software and filament is enough for preliminary testing. These models were printed at 150 microns with 20% infill. They required roughly 2 and a half hours each to print.
In operation, the Snapmaker 3D printer is very noisy. The decibel levels are so high that you couldn’t comfortably work with this thing perched next to your desk.
But the results are quite impressive. The details are fine and immaculate, to the point where you could almost read the 3DBenchy nameplate on the stern of the boat.
Only one strange anomaly to report is that the bow of the boat has a, well, a bow in the curve. Potentially down to an overly hot print bed, we’ve yet to repeat this error.
Laser Engraving
Switching between the three modules of the Snapmaker is as trivial as changing vacuum cleaner bags. You first unscrew four hex screws and detach the cable. Then you fasten the laser module with the same four hex screws and attach the dedicated RJ45 module cable. The entire process is foolproof. We should know, cos we’re the fools.
The last step is to switch the heated bed with the engraving platform — a simple process of loosening four screws at the bottom. The entire conversion from 3D printer to laser engraver takes a minute or so, depending on the dexterity of your digits.
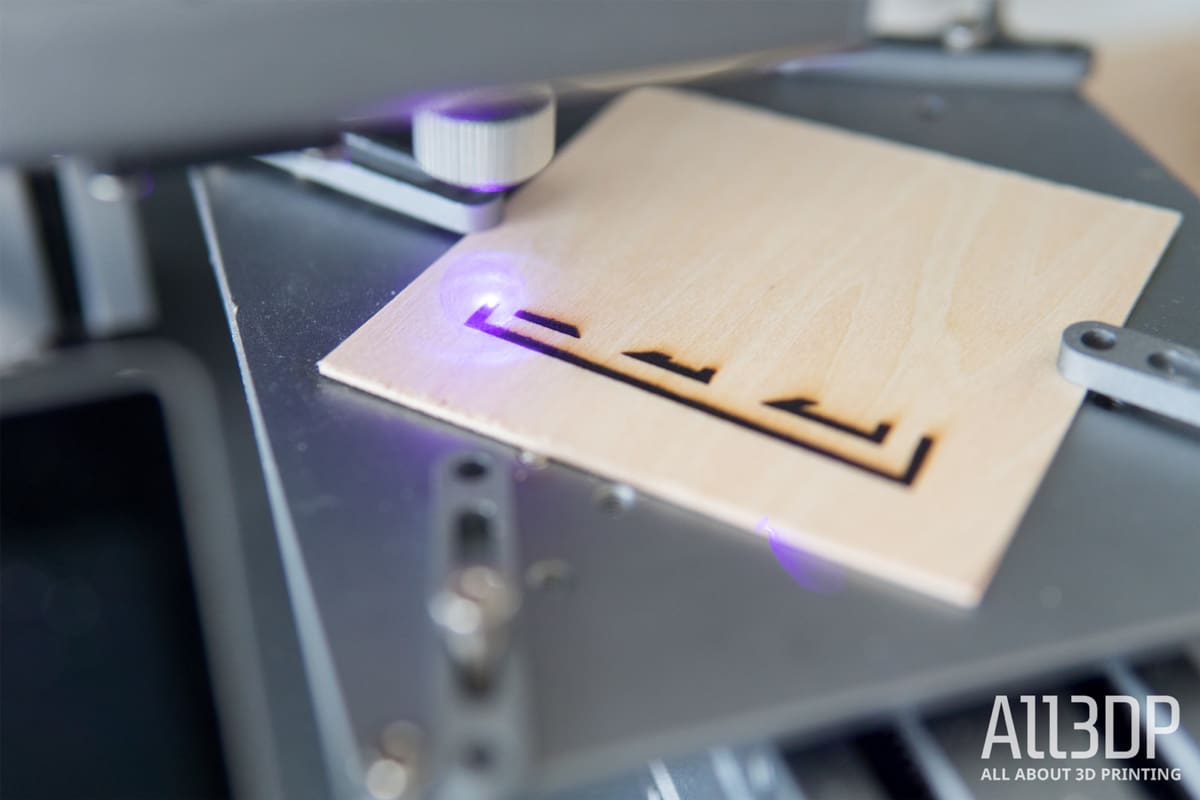
Calibration of the laser module requires you to focus the laser to a point — a forgiving process that uses both the machine’s Z-height and a focusing ring to accommodate a wide range of material thicknesses.
A lack of end stops for the laser and CNC functions mean that every job requires you to set an origin point. Across both the Snapmakerjs software and the Snapmaker’s gorgeous umbilically attached touchscreen, whipping the module to your desired origin and locking the coordinates is effortless.
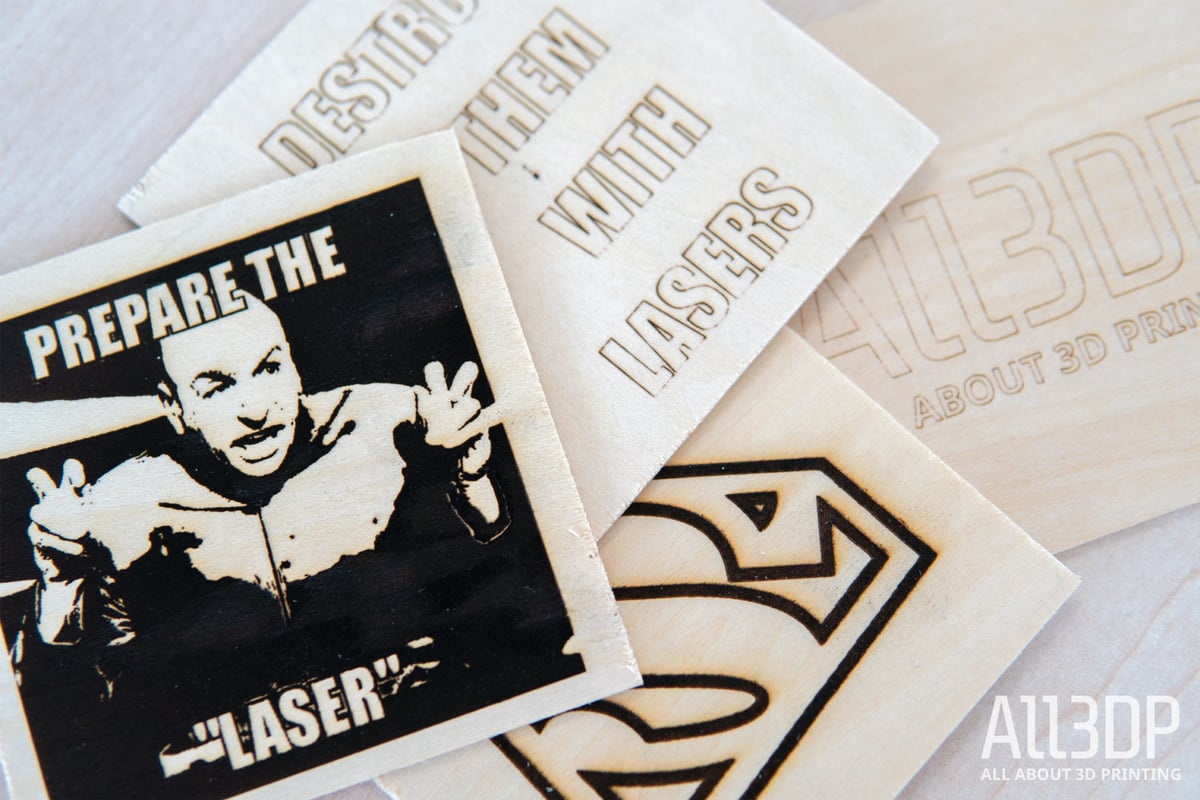
Speaking to the functionality of the laser module, you have four engraving options off the bat: black & white, greyscale, vector, and text. The latter is a simple text generation option that lets you rattle off quick engravings directly inside Snapmakerjs itself. It works.
There’s no documentation included with the printer or available online to explain the best use cases for each, though it’s clear that black & white and greyscale work with standard file formats such as Jpg to achieve detailed drawing work and gradients. Vector mode is compatible with SVGs, presumably for scaling work without loss of detail.
To achieve the best results you need considerable time making test engravings to find the right work speed and laser power.
CNC Carving
As detailed in the Multi-function section above, gearing up for CNC carving was a cinch. There is a supreme quality about the Snapmaker and the interplay between its elements.
At this point in the review, it’s worth us pointing out that we’re primarily a 3D printing publication. CNC carving is not our forte, and so we have approached this review from the perspective of someone well versed in 3D printing exploring the additional functionality the Snapmaker offers.
In practice, much like the laser engraving function, CNC carving and cutting is procedurally different from 3D printing and as such can trip the mind up at times. Things are not helped by Snapmaker’s software, Snapmakerjs, proving unhelpful at times. Inconsistency across the machine’s three functions and the steps you go through to perform them can be jarring, compounding (to our minds at least) the change in thinking required for operating what you might consider the “pure” CNC of laser and carving.
We concede that the CNC carving functionality of Snapmaker’s software is still in Alpha — the program declares this – and as such is excused for errors and bugs, but the alternative G-code generation method for CNC suggested by the company is a sprawling process involving Autodesk’s Fusion 360. No bad thing, but a dramatic step change from the relative simplicity on offer within Snapmakerjs.
A recommendation from the company for a simpler alternative while they iron the kinks out would go a long way to making the Snapmaker accessible to complete beginners.
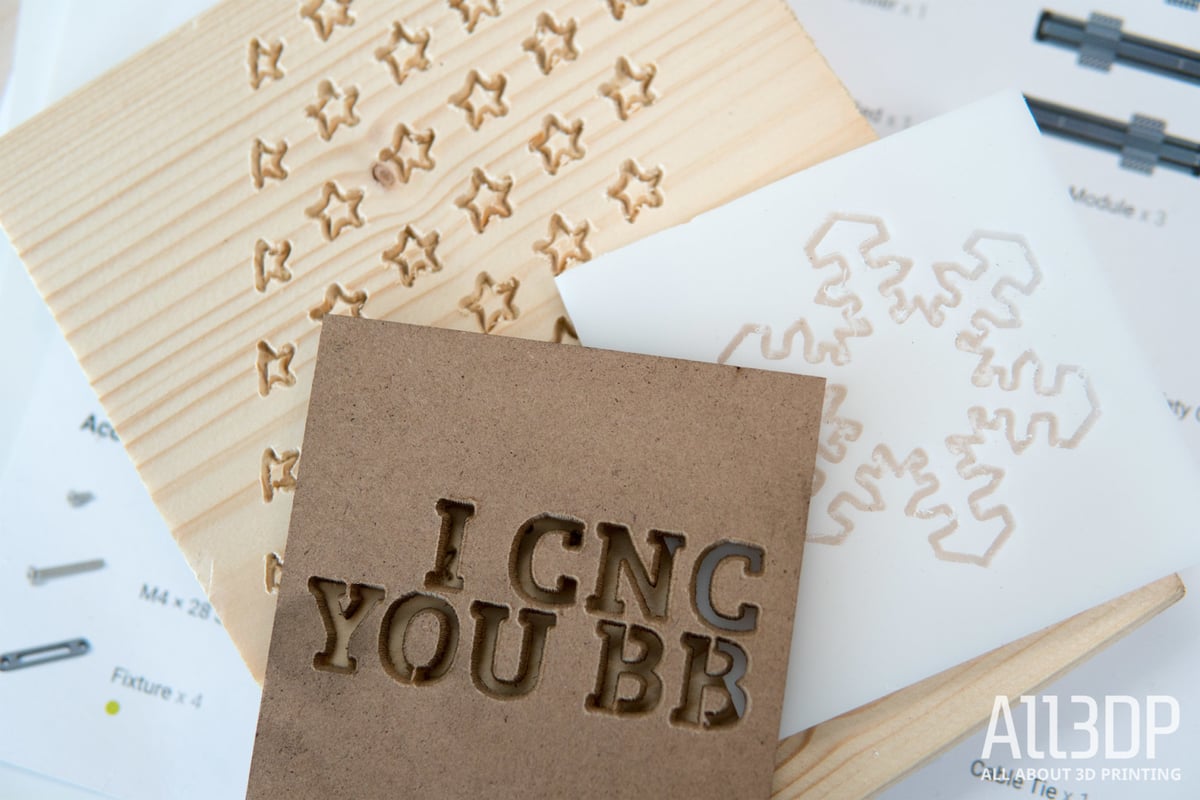
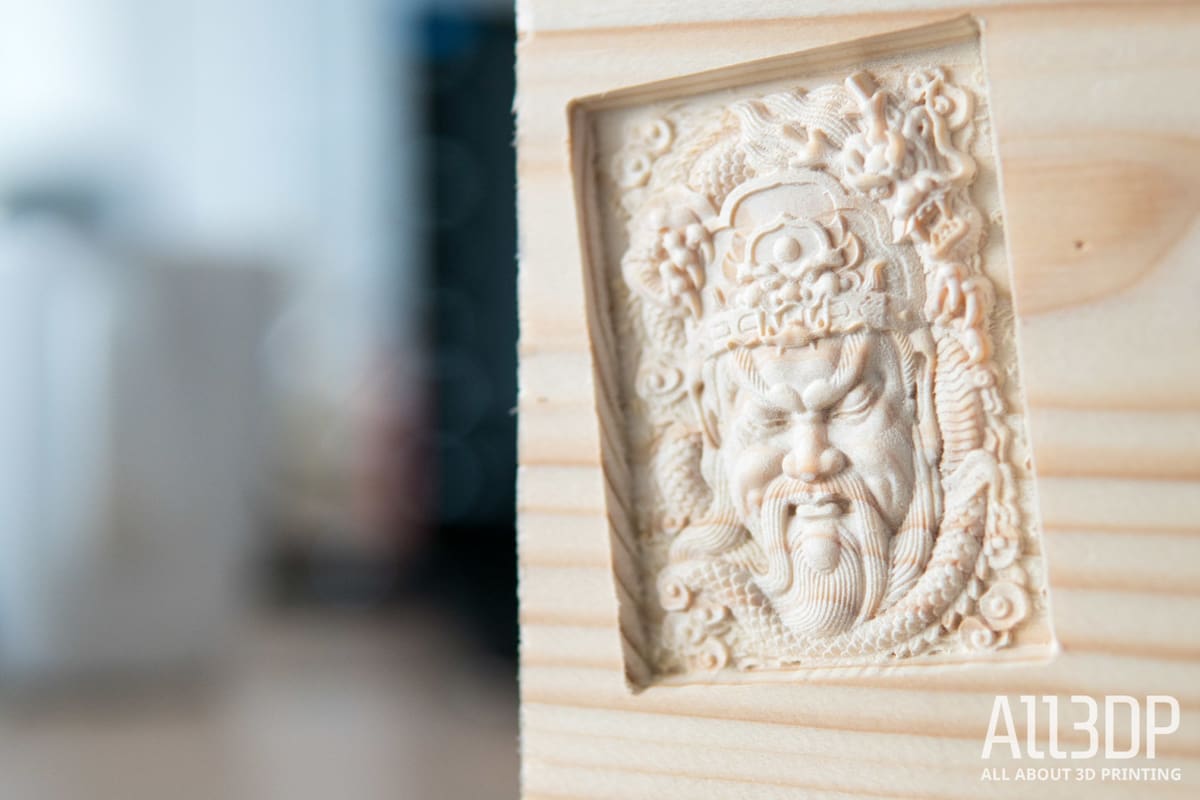
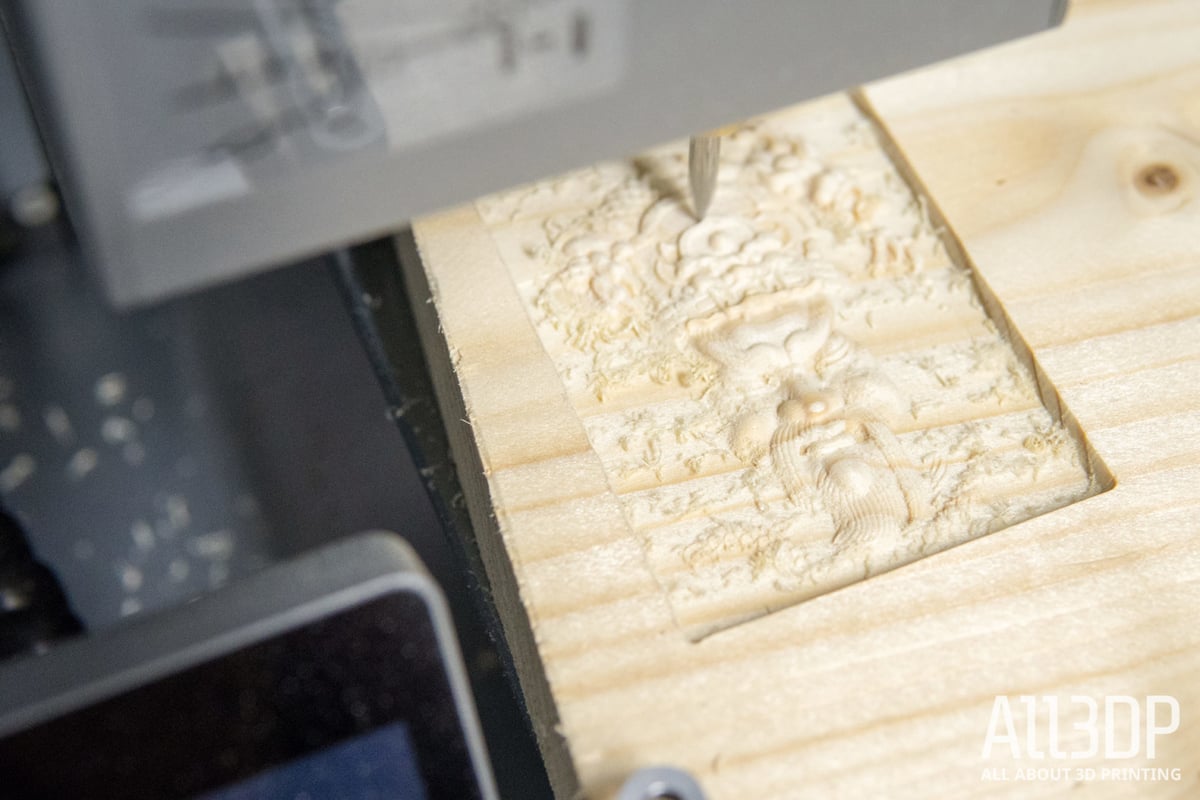
For CNC carving works precisely as you might hope. The provided milling and carving bits gnash and chew their way through wood and acrylic like nonbody’s business and, with some careful attention to the working speed, even carbon fiber. A sample pack of materials comes included with the Snapmaker.
There’s no option to prepare 3D models for carving within Snapmakerjs, which is limited to flat SVG files as source material to generate G-code. It is 100% possible to carve intricate 2.5D pieces, providing you prepare the G-code outside of the Snapmaker ecosystem. Alternatively, you could fudge your way to a 2.5D effect by layering many cuts together.
In our estimation, the full functionality of the Snapmaker is not as beginner friendly as the funky packaging and foolproof setup might suggest. It’s a productivity tool, geared toward multifunctional making.
Is it Worth it?
We have found the Snapmaker to be an exciting and competent little machine. Out of the box the print quality is fantastic, and in the Snapmakerjs software you have a simple to use — albeit imperfect — platform to jump between 3D printing, laser engraving, and CNC carving without missing too many beats. Unification between some UI elements and a better relay of information would help — both in-software and from Snapmaker’s supporting documentation — but overall the experience using the software and machine together is a positive one.
Going from boxed to working is effortless and quick, and switching between functions is as simple as four (CNC – laser) or eight (3D printing – CNC/laser) screws.
We can’t help but express some disappointment in the work volume though. For a machine to be brimming with such possibility, it’s quite the thump back to Earth when you have a measly 100 or so millimeters to work within. For some, that’ll likely do just fine, but we found this size limitation to be a little frustrating when approaching the machine with no specific function in mind.
Our problem, we know, but our point is that the hobbyist looking at the Snapmaker with similar aimless fun in mind find this limitation frustrating too.
With your requirements and the Snapmaker’s boundaries in mind, however, this little box of tricks is a competent addition to the workshop pushed for space and those in need of a versatile machine useful for the odd job. There are better single function 3D printers, laser engravers and CNC carving machines for less than the Snapmaker’s $799, but very few, if any, that do all three for close to that price.
Specifications
3D Printing
- Heated Bed Up to 80 ℃
- Layer Resolution 50~300 microns
- Build Volume 125 x 125 x 125 mm (4.9″ x 4.9″ x 4.9″)
- Supported Materials Non-proprietary 1.75mm PLA, ABS, etc.
Laser Engraving
- Work Area 125 x 125 mm
- Laser Power 200mW
- Supported File Types SVG, JPEG, PNG, etc.
- Supported Materials Wood, bamboo, leather, plastic, fabric, paper, non-transparent acrylic, and so on.
CNC Carving
- Work Area 90 x 90 x 50 mm
- Shank Diameter 3.175mm
- Supported File Types* SVG, STEP, IGES, IGS, DWG, DXF, etc.
- Supported Materials Wood, acrylic, PCB, carbon fiber sheet, etc.
*Users can work with these supported files with the help of third-party software such as Autodesk Fusion 360.
Where to Buy
The Snapmaker is available from the retailers listed below.
License: The text of "Snapmaker Review: Best Budget 3-In-1 3D Printer" by All3DP is licensed under a Creative Commons Attribution 4.0 International License.
CERTAIN CONTENT THAT APPEARS ON THIS SITE COMES FROM AMAZON. THIS CONTENT IS PROVIDED ‘AS IS’ AND IS SUBJECT TO CHANGE OR REMOVAL AT ANY TIME.