Snapmaker 2.0 Review: Best Budget 3-In-1 3D Printer
Rating

The Snapmaker 2.0 A350 3-In-1 3D printer, laser engraver/cutter, and CNC mill is our budget pick for 3-In-1 machines. Check out our review to find out why.
Few 3D printer manufacturers have managed to broach the mainstream quite like Snapmaker. First, the Snapmaker Original became the third-most funded tech project in Kickstarter history, delivering a multi-function tool for makers (even if some would argue it didn’t live up to the vision used to sell it).
Snapmaker then surpassed this with the Snapmaker 2.0 — THE most funded tech product launch on Kickstarter. Attracting the attention of general tech media (unusual for a 3D printer), this hotly anticipated 3-in-1 carries a mountain of expectation on its shoulders.
The original Snapmaker, now known as the Snapmaker Original, proved such a machine needn’t cost thousands. The Snapmaker 2.0 is all about refinement, and expanding the possibilities with form factors teased, but not realized with the original.
So, with a mountain of some $7 million in orders weighing heavy over the launch of the Snapmaker 2.0, how does the finished article stand up? We’ve gone hands-on to find out.
Update - April 06, 2022
Snapmaker quietly slipped out updates to its machines late in 2021. New and relevant to this review is the Snapmaker 2.0 A350T, an upgraded model that brings several design improvements to the A350, including general usage and, particularly, 3D printing performance.
Here’s a quick rundown of what’s new and different:
- Quieter power module with intelligent cooling.
- Faster 3D printing performance with better cooling and an improved motion algorithm.
- Silent 3D printing with the addition of TMC2209 stepper motor drivers.
- X- and Y- axes lead screw pitch increased from 8mm to 20mm.
The original Snapmaker 2.0, the A350, is no longer available, but getting the A350T is preferable anyway. If you want to save a buck, the F350 is the Snapmaker 2.0 with only the 3D printing modules so you can buy the base unit now and expand later. Or, you can check out Snapmaker’s latest offering, the Snapmaker Artisan.
Verdict
Pros
- Slick, well-built hardware
- More useful than ever with large work area (A350 model)
- Thoughtful quality of life extras
Cons
- Frustrating workflow
- Native CNC carving/cutting is undeveloped
- Good gosh is it loud – the linear modules sound horrendous
Where the Snapmaker Original was good enough, the Snapmaker 2.0 takes this and, well… it’s still good enough. Except it’s also much, much bigger, and with enough bells and whistles to keep you up at night. There were, and continue to be minor frustrations with it (be them bugs or poor UI choices – there’s a smattering of both), but fundamentally the hardware is tip top, can handle whatever you throw at it while offering enough to suit the multi-talented maker looking to up their game without sacrificing desktop space.


Hands-On With a Record-Breaker
The Snapmaker 2.0, like its predecessor, makes use of an arrangement of all-metal modules – each contributing some element of the machine’s vital functions. Linear modules give the Snapmaker its motion in the X-, Y- and Z-axes, while a bundle of three tool heads gives the machine its functionality.
To speak of the Snapmaker 2.0 is actually to speak of three different machines. The Snapmaker 2.0 covers three sizes and price points with the smallest, the A150 (160 x 160 x 145 mm build volume), roughly matching up to the diminutive Snapmaker Original. Then there is the A250 (230 x 250 x 235 mm), which you could closely equate to a Prusa i3 MK3S in size. Lastly, there is the beefy A350 (320 x 350 x 330 mm), which has a much larger work area and could be equated to a Creality CR-10 in size.
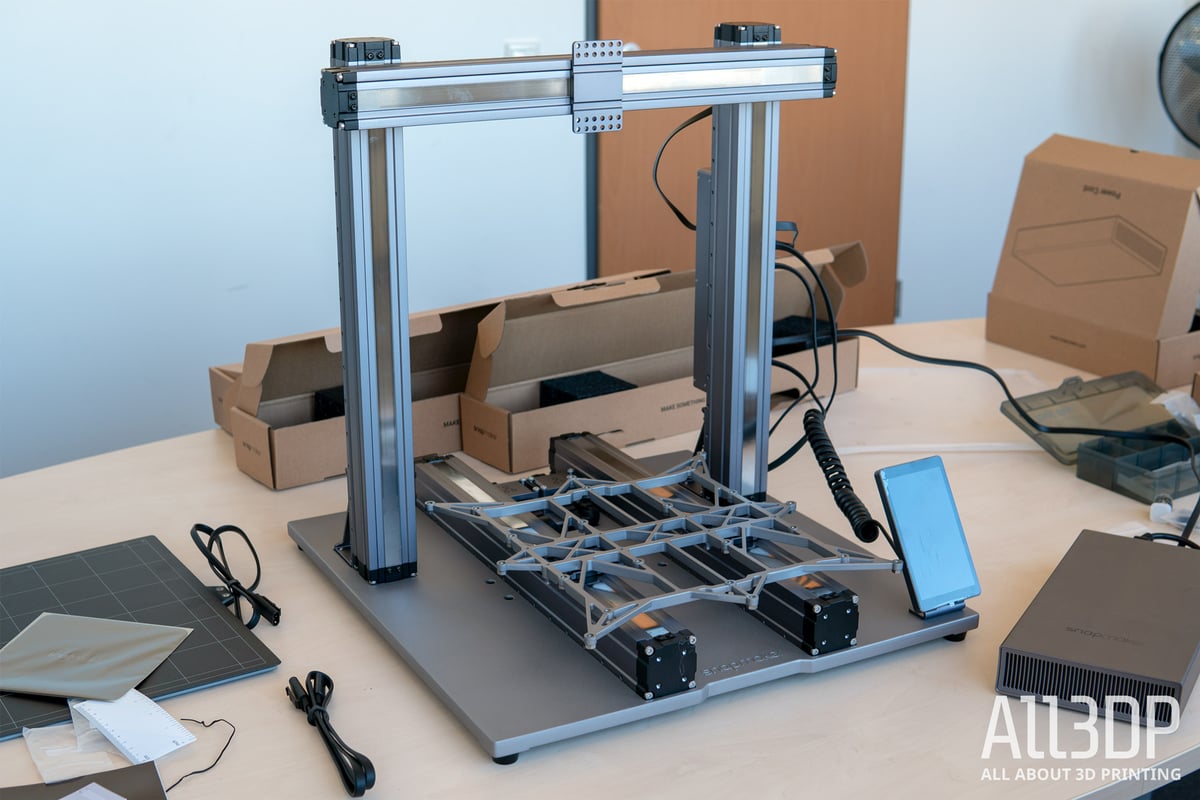
Snapmaker kindly provided us with an A350 unit for this review, so all experiences detailed are of this larger machine, not the other two.
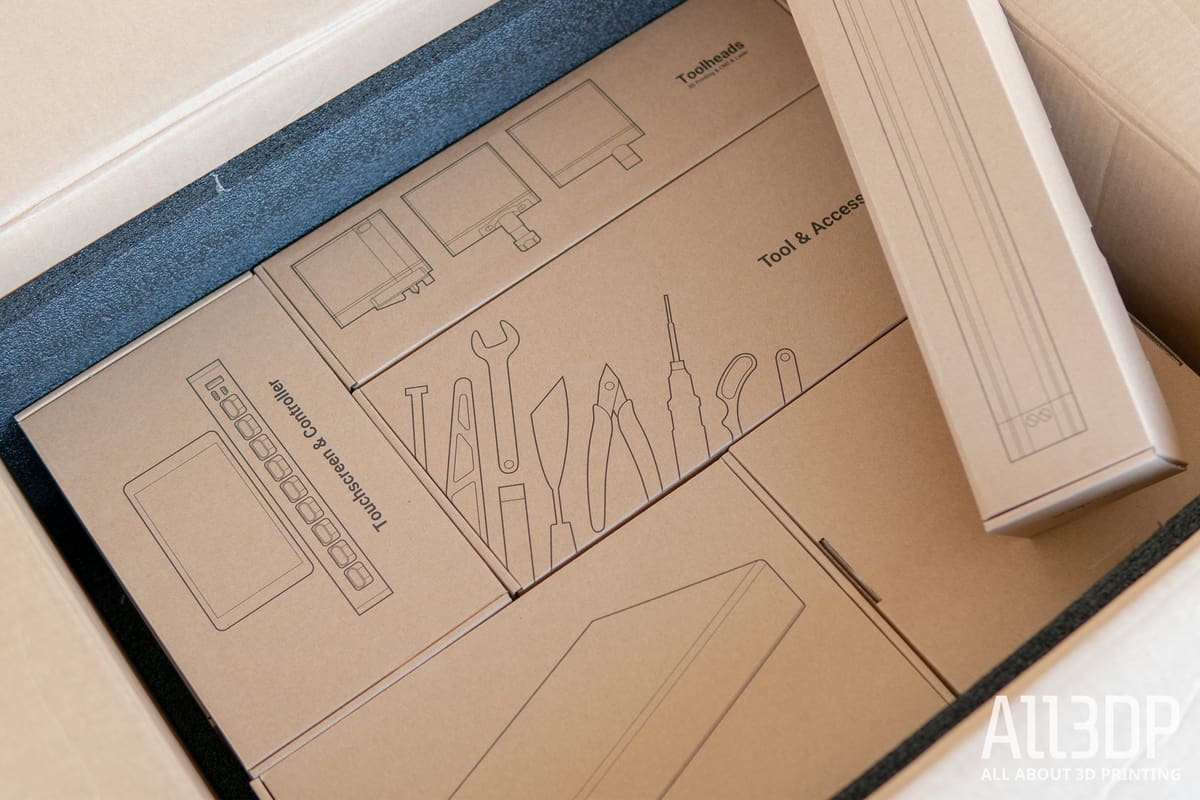
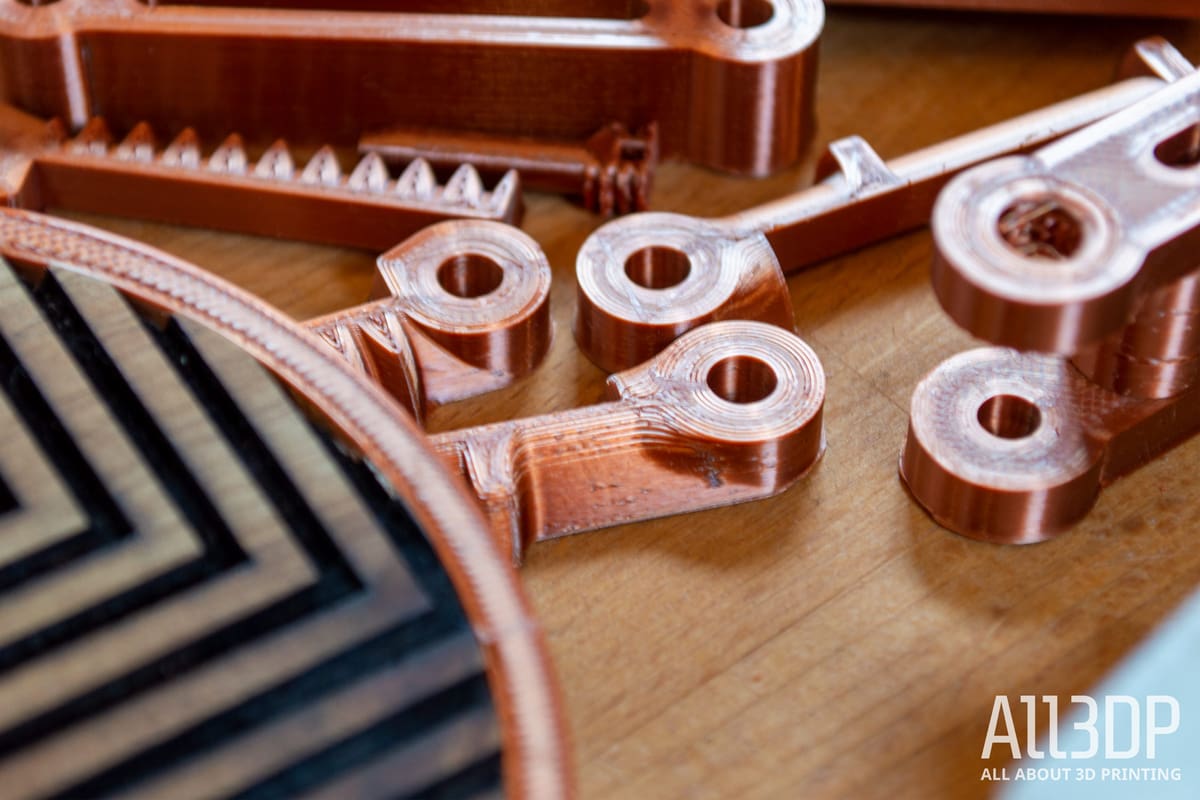
Out of the box, you get a 1.75 mm 3D printing head, an ER-11-collet toting CNC machining head and a 1,600 mW blue diode laser. These three tools alone mean there is a bafflingly large number of materials you can chuck at the Snapmaker 2.0 from the get-go, crafting projects of all shapes and sizes.
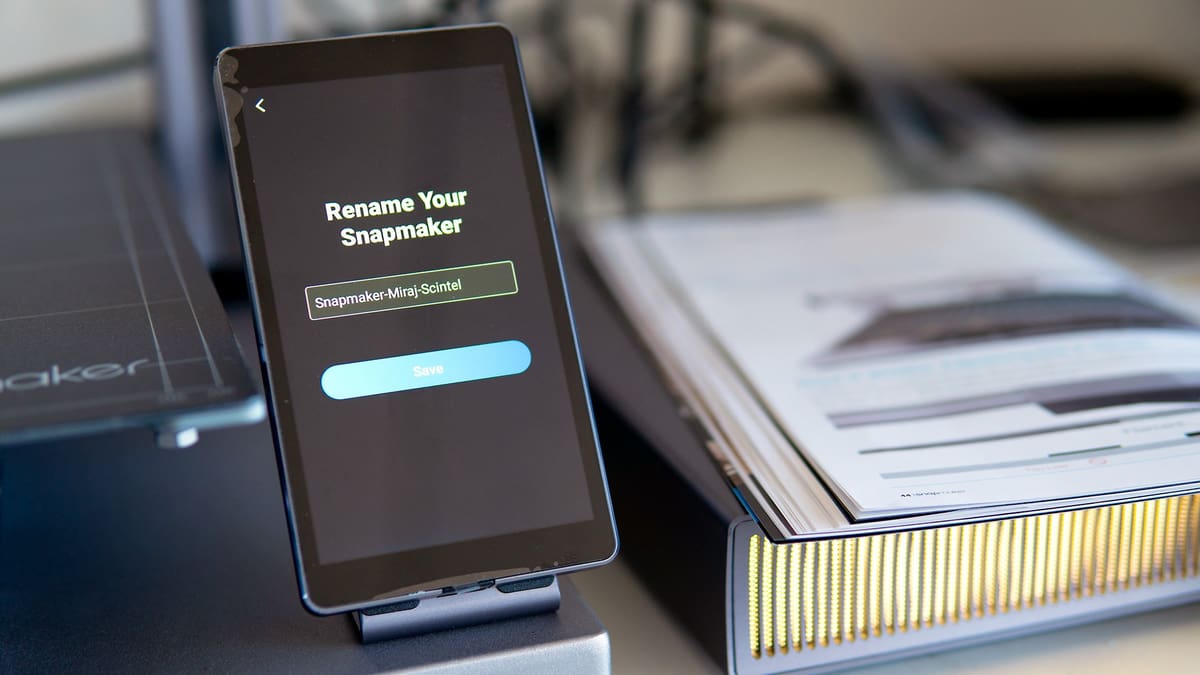
The culmination of several years’ fervent following, not to mention a small degree of criticism thanks to an arguably unfulfilled vision for the initial machine, plus overflowing coffers from a record-breaking Kickstarter campaign, the Snapmaker 2.0 is a noticeably more developed machine than the original. We like the soft pulsing glow of the power supply’s LED lighting and jazzed up UI on the large full-color Android-powered touchscreen.
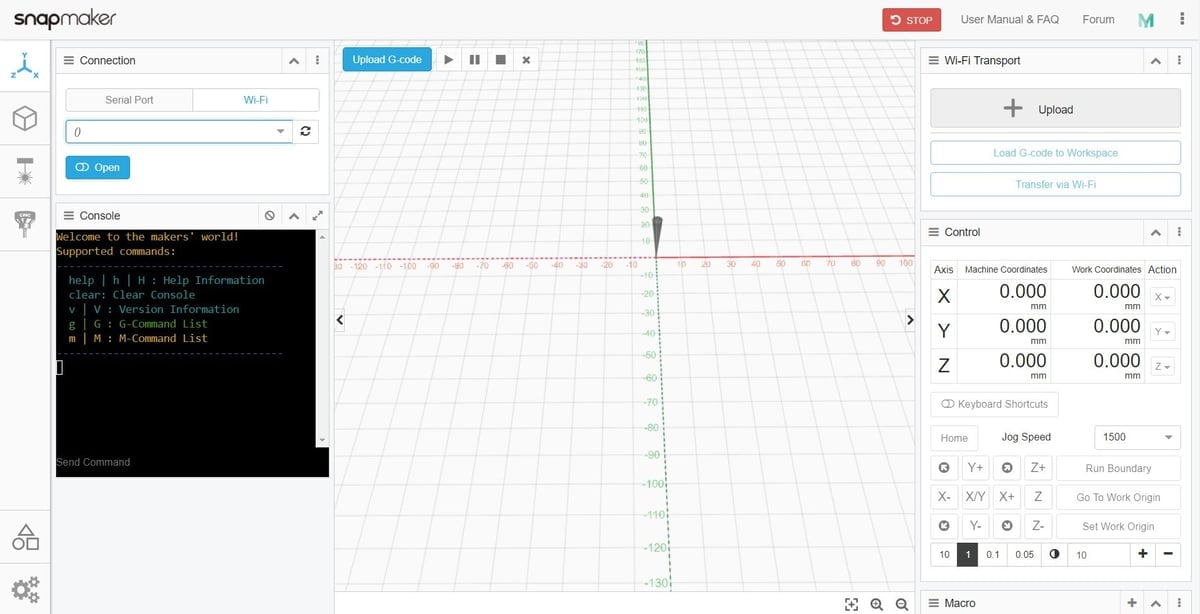
The accompanying Snapmaker Luban software – an evolution of the modified CNCJS that Snapmaker has been using since the Snapmaker Original – offers dedicated workspace areas for each of the main tool heads, in addition to a general area from which you pipe tasks to the printer via Wi-Fi. This workspace also allows you to send G-code commands and observe vital information about the machine and tasks in progress.
Visually speaking, there’s a bit of a disconnect between the Luban software and the machine itself; the overabundance of buttons and consoles are at odds with the clean and uncluttered hardware and UI. In time we can see how this jumble of windows could grow with camera feeds and other functions yet to be dreamt up but, for now, it’s just kind of messy.
At its core, the Snapmaker 2.0 is a productivity machine, but there’s also an authentic veneer of effort to craft something unique. Which is all the more remarkable when you consider the price structure. The largest Snapmaker 2.0, the A350, will have a sub-$1,800 RRP; The baby Snapmaker 2.0, the A150, sub-$1,200. For the uptick in build quality, the new Snapmaker machines are not priced out of contention as exotic playthings. For the modularity they offer and future-proof design (we hope – ask us again in three years), it’s a fairly reasonable investment.
But being unique isn’t worth much if the machine itself doesn’t perform, which it does. Mostly. It’s complicated.
3D Printing: Decent, But Inflexible
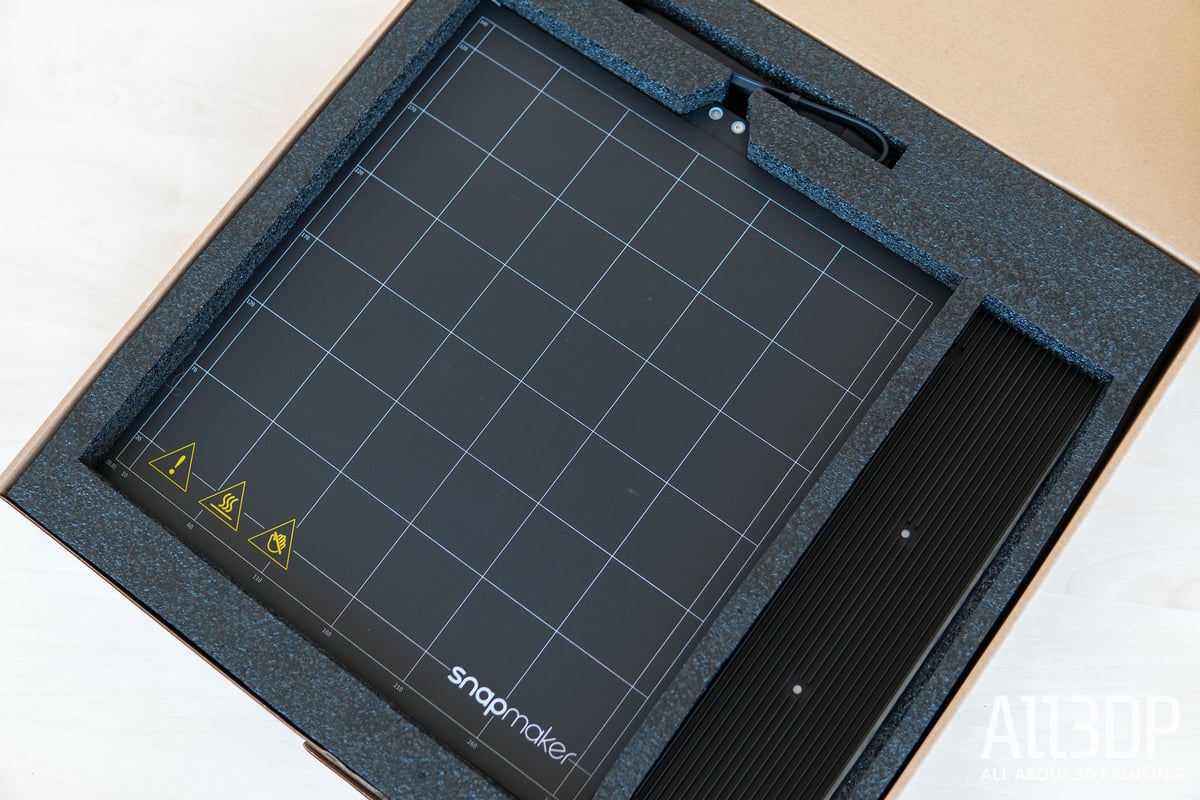
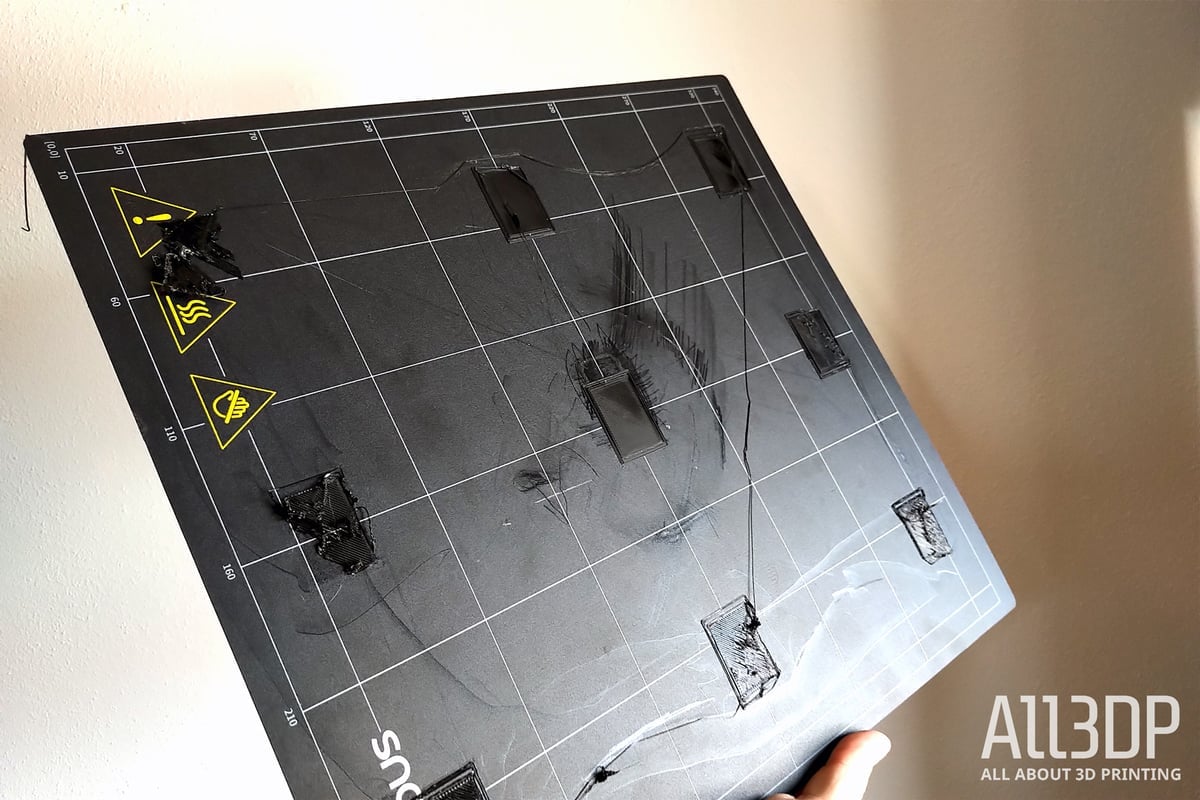
For the uninitiated, setting the Snapmaker up for one of its multitude of tool functions is a simple matter of fixing the tool head to the X-axis linear module – four bolts – and attaching the appropriate work plate for the tool. In the case of the 3D printing tool, this means a large heated bed with a magnetic print sheet. Fixed to the skeletonized Y-axis carriage by a dozen or so screws, mounting the print bed is, frankly, tedious.
The printing experience of the Snapmaker 2.0 in its current state doesn’t stretch much beyond tedious either, unfortunately. Thanks to a raft of workflow frustrations with our machine (some of which have been patched during our time with the machine), a general sense of inflexibility, and sloooow out-of-the-box print settings, we won’t be rushing to make it our primary 3D printer.
Which is a huge shame, given the outstanding overall presentation and, actually, the Snapmaker 2.0’s ability to output great prints (if only you didn’t have to wait an eternity for them.)
Despite the hum-drum, the Snapmaker 2.0 can, actually, be fun. Much of what we find frustrating about 3D printing with the Snapmaker 2.0 lies in the Luban software, firmware, and the interplay between them.
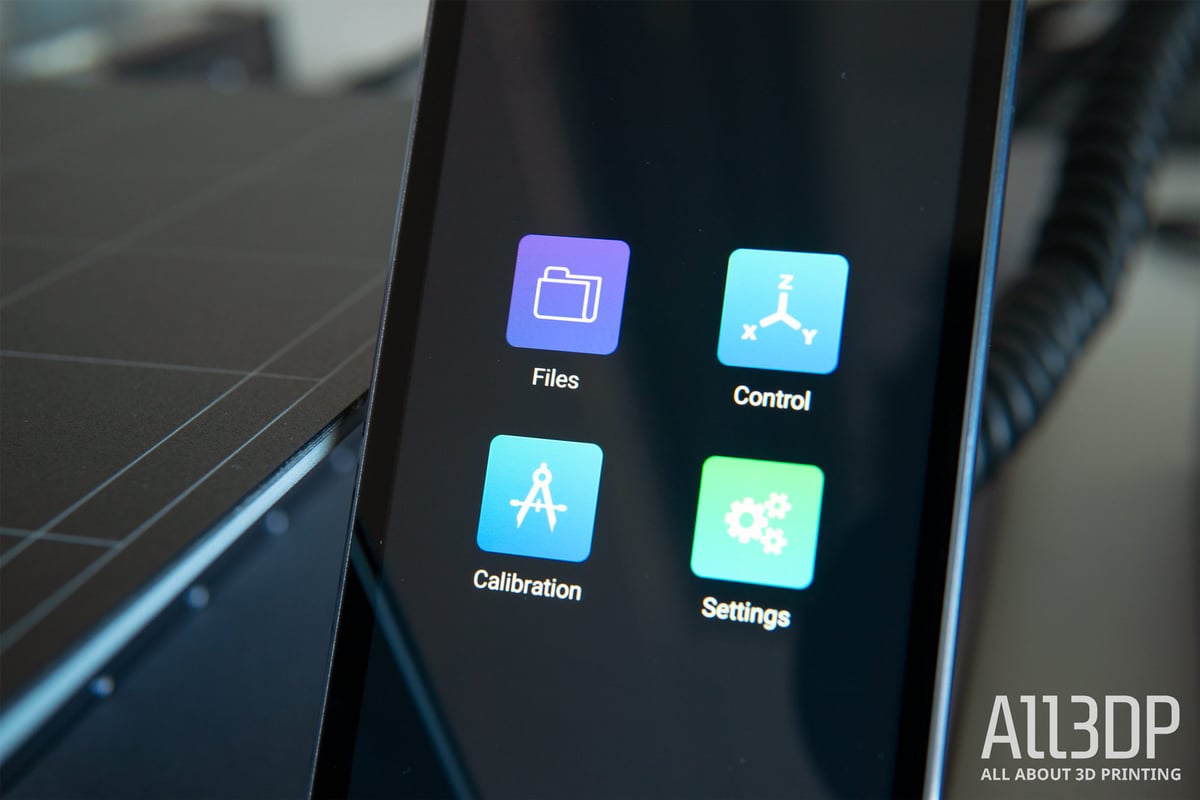
Little of note stood out when whizzing through the guided setup, other than how slick-looking the user interface is. It could use a little more signposting – primarily the landing screen when not connected via Wi-Fi.
Presented with the ‘Start’ button – which takes you to the available job files on local or attached storage – there’s nothing to indicate that swiping left will take you to an app page of sorts, where you can access machine settings, control movement, configure your connectivity, and, again, dive into the available job files. This would make a more natural home screen.
A particular point of frustration using the Snapmaker 2.0 loaned to us comes from the automatic nine-point mesh bed-leveling routine, that, ultimately, didn’t help all that much. We found it rare for this pre-print routine to result in a level first layer. You can set a Z-offset in increments as fine as 0.05 mm, but even this level of control did nothing to address the unevenness on our review machine.
We have it from Snapmaker that early units suffer from issues as a result of the bed leveling probe being overly sensitive and fixed to the print head at the wrong height. A manual fix, detailed in a Snapmaker forum post is required to correct this. After repositioning, things improved somewhat, but even then we find it a bit of a crapshoot to get a decent first layer. The company is exploring other solutions but will stick with this tricky sensor and fix, redoubling QC checks to catch further misaligned sensors.
Toggled to run before every print you attempt, it is possible to skip the automatic leveling if you dig into the machine’s settings and disable it, and instead perform a manual calibration (using the same 0.05 mm stepping down to the plate at the nine predetermined measurement points on the bed).
In the 3D printing partition of Snapmaker’s Luban software, you are provided three generic material profiles for PLA, ABS, and PETG. Each material profile has three corresponding print profiles to swing things between fast (low detail), standard, and high detail (sloooooow.) As far as generic profiles go, they do the job.
These defaults can not be adjusted on the fly for a quick setting change (not even to add support structures), meaning you have to copy, rename, and configure a fresh profile each time. It’s pretty convoluted and means you will have to clone Snapmaker’s generic materials profiles just to have a canvas to make fine adjustments to. You won’t be able to revert these profiles to their default should you make some changes that don’t work out, so grab a pen and paper, or get in the habit of cloning your own new profiles before making any changes.
Powered by CuraEngine, the slicing in Snapmaker is a poor shadow of the slicing experience using current slicers such as Cura actual, or PrusaSlicer. Where and when possible, we’d use those (and others) instead.
We could gripe further, but the nature and flavor of our grievances with 3D printing on the Snapmaker 2.0 are all in a similar vein. Users of the machine, we’re sure, will find their own nits to pick, but the above are those we’re certain will frustrate users of the machine as is, until altered by the Snapmaker team.
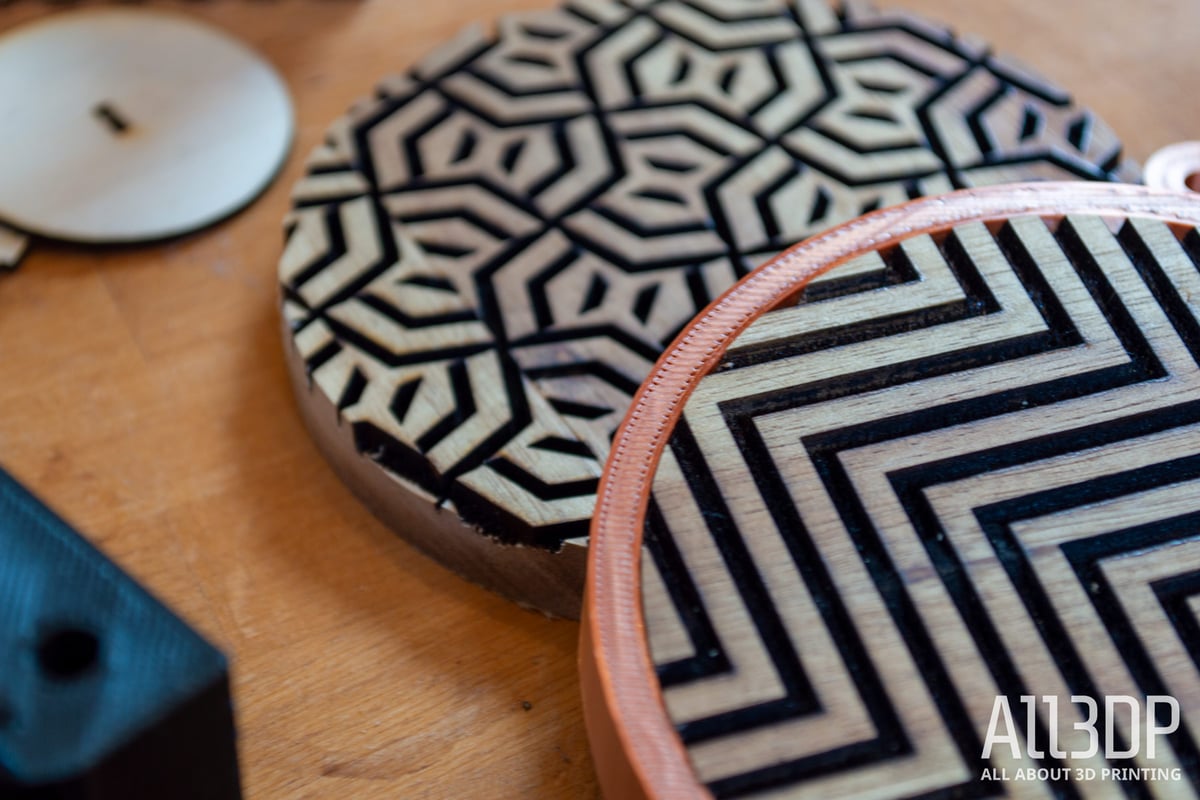
Laser Engraving: Great, But a Few Kinks to Iron Out
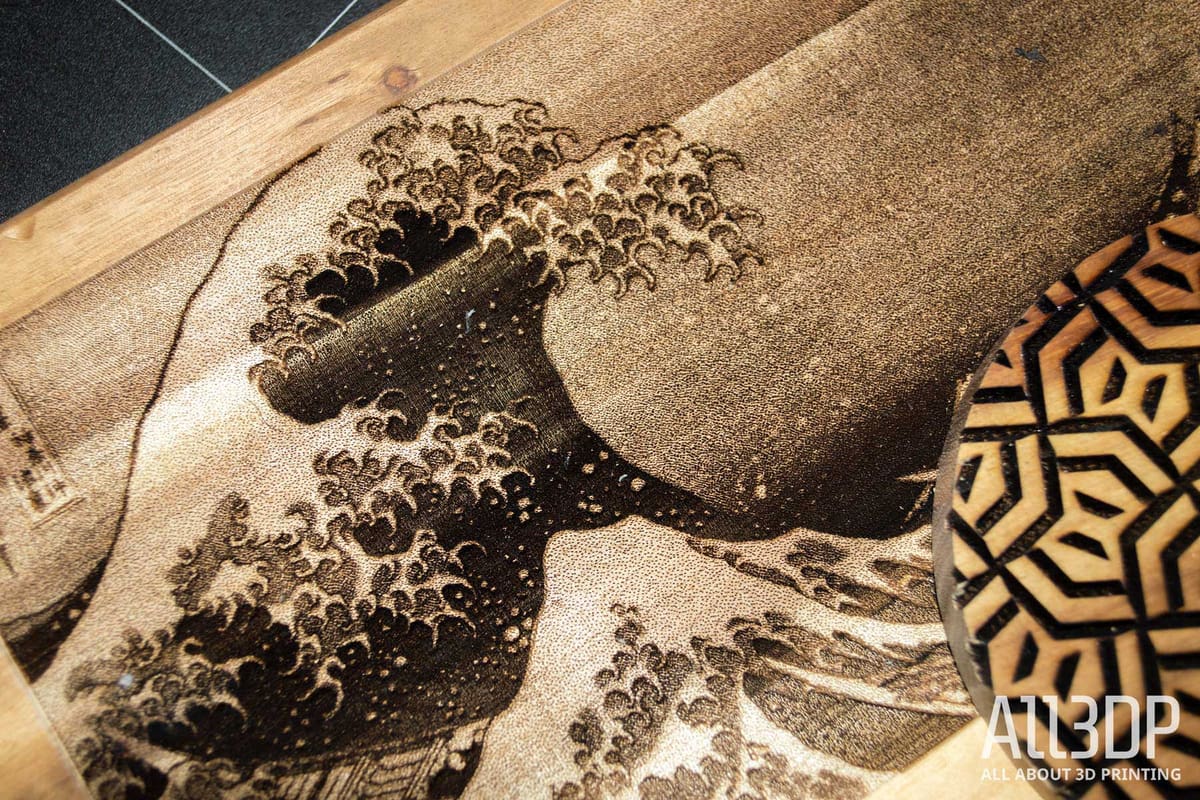
Laser engraving is, we’d argue, the simplest and easiest to use of the Snapmaker 2.0’s three core functions, and is where the most improvement in terms of function and ability comes to the new machine.
On top of the Snapmaker Original’s lasering abilities – four modes of “Black & White”, “Greyscale”, “Vector”, and “Text” – is the Snapmaker 2.0’s addition of a dedicated lasering table, camera, and automatic calibration routine.
The laser table comes as four separate aluminum slabs, which are then fixed to the skeletal Y-axis carriage. There to eliminate the risk of the laser reflecting off the underside and allowing for sufficient cooling, it’s one way the Snapmaker 2.0 caters better to its individual modes. We’d be comfortable using the machine long term as a laser this way, without feeling like it is a compromised solution.
The four laser modes cover the basics necessary for engraving images and cutting outlines on a variety of soft materials such as leather, woods, acrylics and the like. The laser power available is significantly greater than that of the Snapmaker Original, meaning you can burn through material faster than before – a necessity on the much larger A350 machine – but, fundamentally, what lasering is possible remains the same.
Every time you switch to the laser tool head from another function, it is necessary to recalibrate. Handily, the Snapmaker 2.0’s laser calibration routine is quick and painless.
A noteworthy addition to the Snapmaker 2.0’s laser engraving module is the inbuilt camera. This allows you to capture a snapshot of your material, importing it to Luban where you can perfectly align the job – eliminating the need to manually set a work origin and the general worry about ruining your work with a misalignment.
The laser itself is a beefy upgrade over the Snapmaker Original but, by and large, the process and options available to you are the same. Most coming to the Snapmaker 2.0 will, we suspect, ignore some of the new stuff and use it ‘dumb’, for lack of a better word.
Some of the smarter functions do work well, though. The automatic laser calibration is great, cutting a series of lines from different heights and, using the camera, figuring out which is the best. Should it fail, it gives you the option to help by picking the best line for it.
CNC Engraving/Cutting: Most Improved, But a Missed Trick
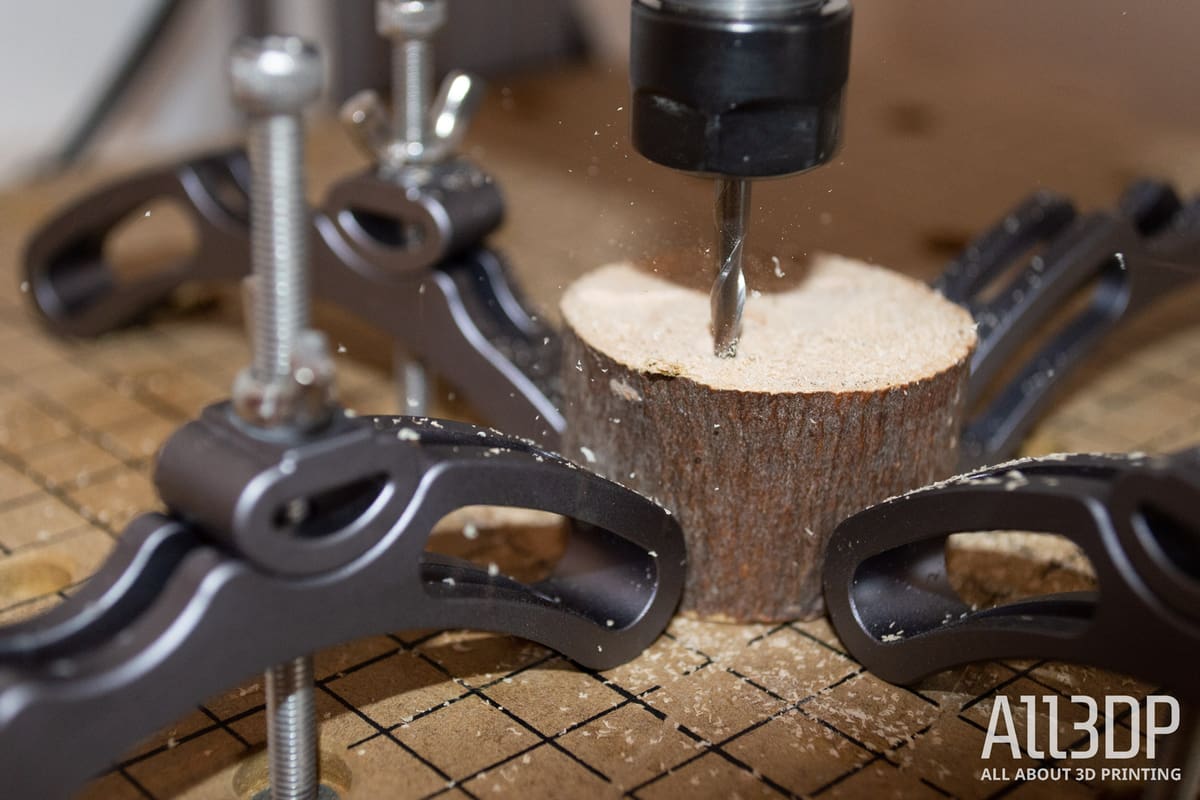
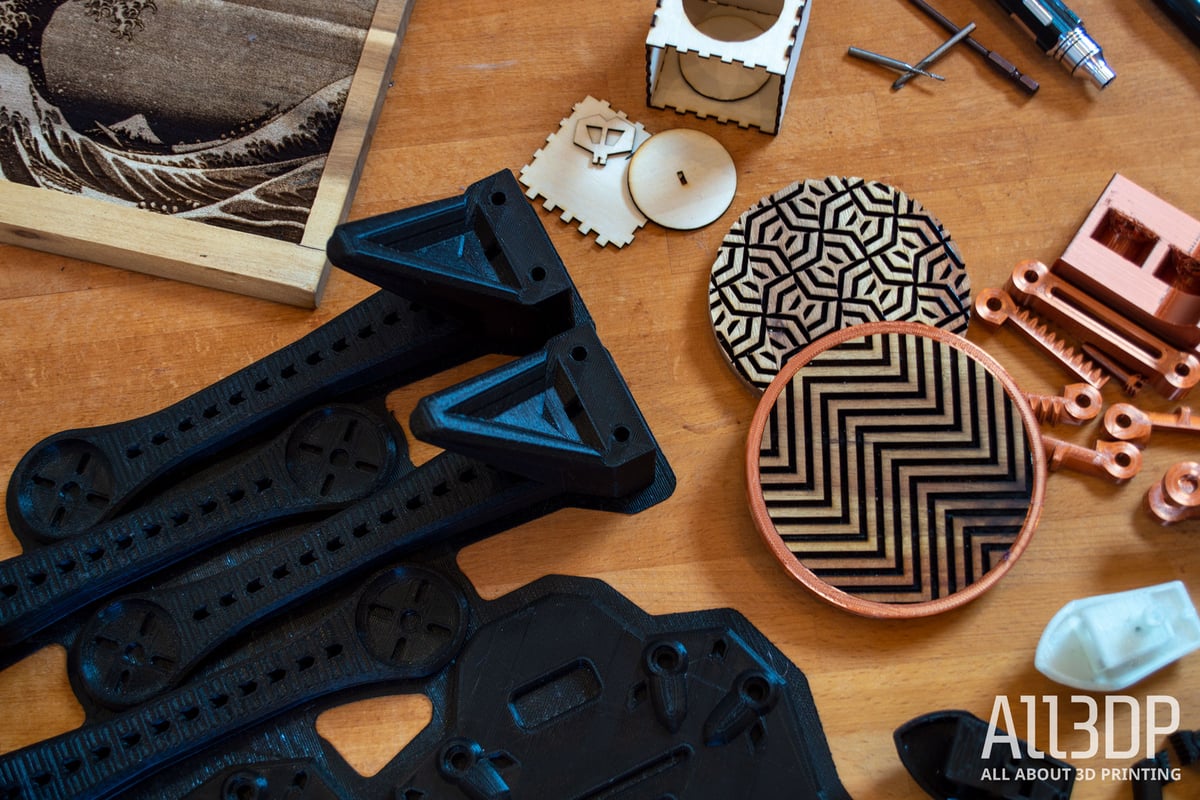
The CNC engraving abilities of the Snapmaker 2.0 remain largely as found on the Snapmaker Original, albeit with the addition of new hardware elements that make the job easier and more flexible. Namely, the waste-board-topped work plate, and an ER-11 collet on the tool head. Inserting and removing CNC bits is easier with the two provided spanners.
It’s not really a quantifiable thing, but these additions make the Snapmaker 2.0 feel more like an actual CNC engraver/router than its predecessor. Less a plaything, and more an option you can be productive with right out of the box.
We wish we could say the same for Luban and its CNC partition, which hasn’t changed a jot since the Snapmaker Original.
There’s the opportunity for Snapmaker to add a little sophistication to its software with the CNC feature, which would absolutely level it up in our eyes. The closest competitor to the Snapmaker 2.0 would be ZMorph, which allows for the handling of 3D models and simulation of feedstock in its CNC engraving partition. But alas. The Snapmaker 2.0’s core CNC engraving workflow is still the most basic of introductions, offering relief, vector, and text (a constrained version of the vector) engraving.
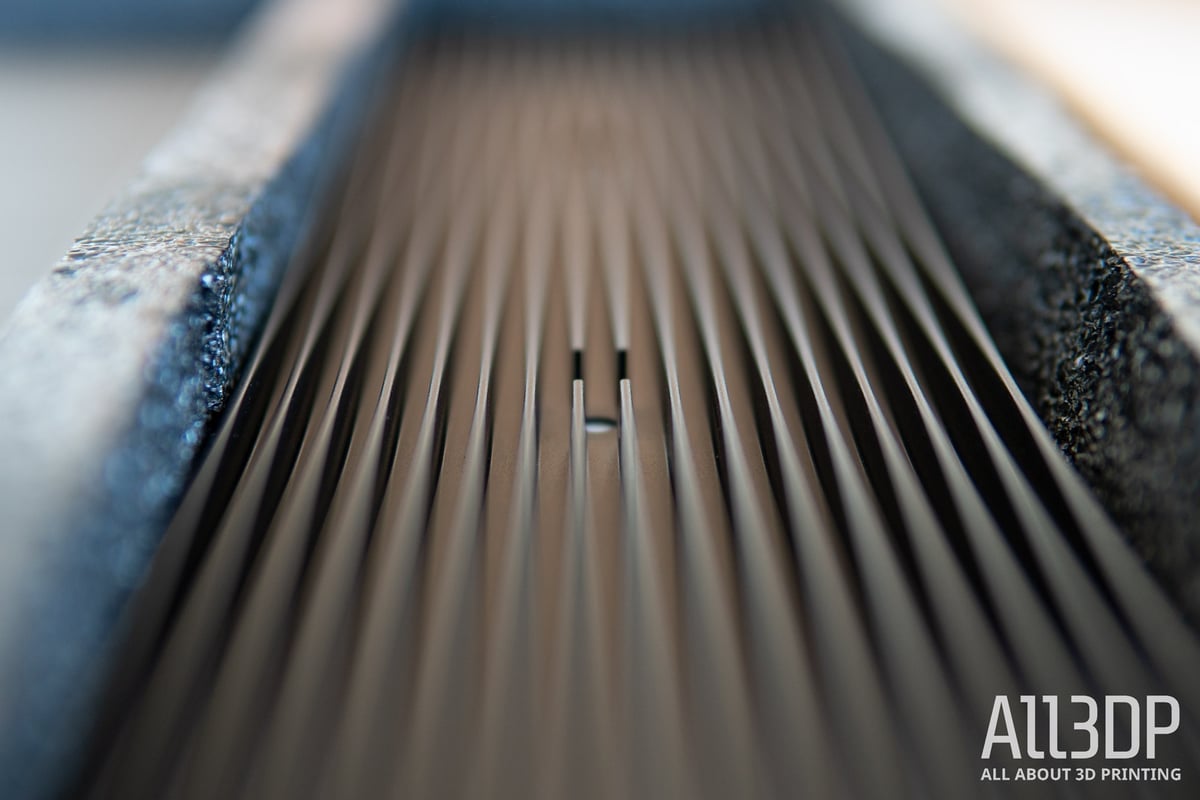
Relief can be used to convert a bitmap image into a, well, relief engraving, with varying depths carved in passes to imitate shading. Vector focuses on outlines and is the Luban function to use to cut objects out of other objects. We’re fans of Luban’s option to add tabs to a job, connecting objects that would otherwise become islands free from any workholding.

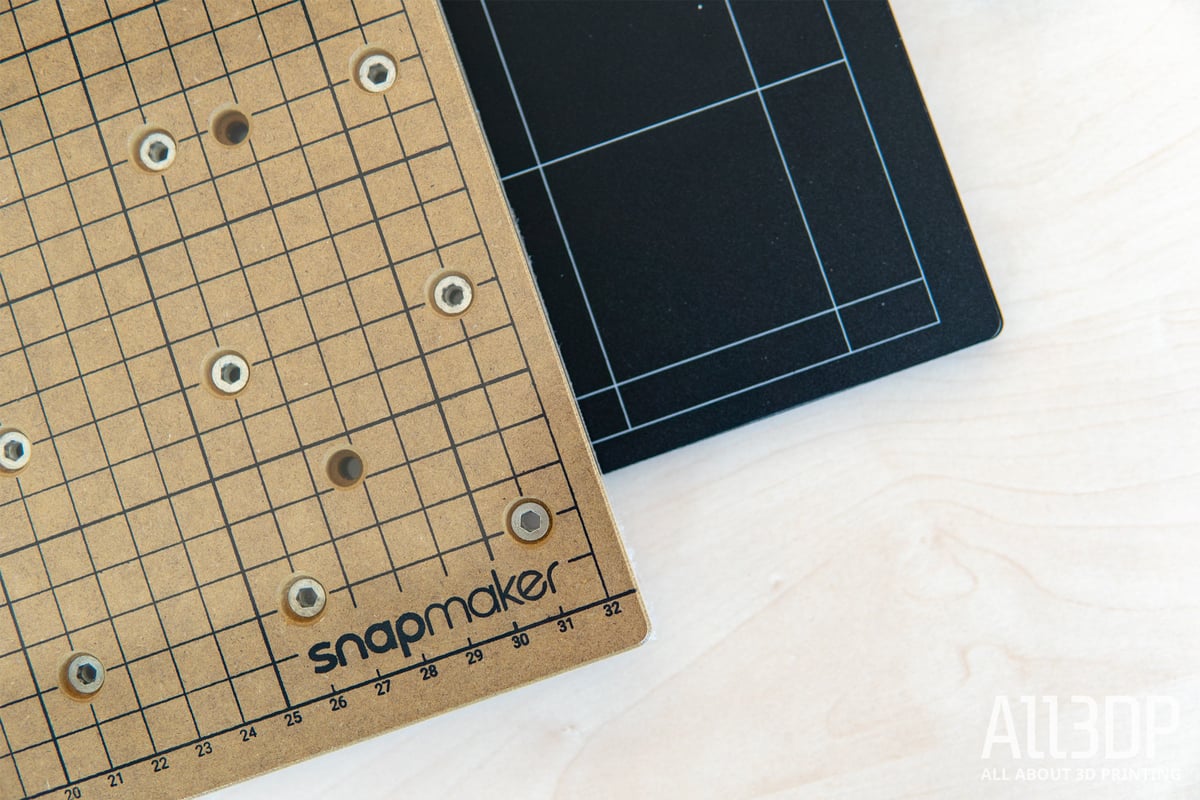
And, speaking of workholding, the Snapmaker 2.0 comes with a set of four three-position clamps that are fixed in place with long M4 bolts and wing nuts. The excellent new wasteboard for CNC engraving is peppered with threads for securing your material any which way.
The provided clamps are good, though the bolts are rather long, and can only drive through the bed so far before they pass through the other side and obstruct the movement of the bed. It is the occasional challenge to orient your cut so the tool head doesn’t crash into these clamps.
If you want to do anything more sophisticated than shapes and image reliefs, such as taking a 3D model and carving it from a block of wood, or running multiple passes using different tools (such as a roughing pass before adding detail with an engraving bit) you are pointed to Autodesk’s Fusion 360, a tool library import, a post-processing script, and the seat of your pants.
We’ve been informed of plans to develop additional G-code post processors for other popular CAD software, including the likes of FreeCAD, ArtCAM, Mastercam, and Aspire. As of the time of writing, there are no dates attached to these.
The Snapmaker 2.0 comes equipped with flat-end and ball-end mill bits, which between them are suitable for clean cuts and smooth cutaways and pockets. Luban includes tool profiles for three bits (V-shape carving bit being the third, a tool curiously not provided with the Snapmaker 2.0), making the job setup a simple affair of configuring the detail, passes, depths, lead in speeds and similar variables.
Is It Worth It?
There is no denying that the Snapmaker 2.0 offers something unique as a three-in-one machine with oodles of build space. Going larger is the natural progression from the Snapmaker Original, and we’d be surprised if the A350 didn’t become the bestselling version of the three Snapmaker 2.0 models available.
For all the grumbling we do above, we do, begrudgingly, like the Snapmaker 2.0. There were and continue to be irritations to using it that would render other single-function machines forgotten and unloved, yet we accommodate them here just for the sheer fact that you have such a large build area and, fundamentally, decent tool heads that can achieve whatever you throw at them.
There are still plenty of kinks for the Snapmaker team to iron out, but we’ve already seen some progress towards that in the few short months since the Snapmaker 2.0 first started shipping to users. That the company has managed to ship something usable without buckling under the pressure of all that money and expectation is commendable.
Hopefully, Snapmaker can make good on the expanded vision set out for the Snapmaker 2.0, but not before improving the core experience and functionality of the machine. One tepid thumb up from us. The Snapmaker 2.0 is a good enough printer, laser, and CNC engraver (more so the latter two), just expect a handful of early-life quirks and irritants to work around while you use it.
Notes
- The Snapmaker 2.0 comes with a snazzy toolbox with everything you need and more to get up and running. It’s exceptionally useful and comprehensive.
- The new CNC and laser specific build plates are great. Fact.
- Don’t unplug the screen while the machine is running – the Android-powered brains are in there and unplugging that little USB-C stops the machine dead in its tracks.
- If you plan to use the CNC toolhead a lot, acquaint yourself with Fusion 360.
- Beware of printing with new tightly-wound rolls of filament. Auto-homing the machine raises the X-axis carriage to the top, close to the spool holder, and results in energetic loops of filament leaping free to wrap around the spool holder and the printer’s frame.
- You cannot be connected via Wi-Fi and control the machine locally. It’s one or the other, not both.
Tech Specs
General Specifications
- Frame: Aluminum alloys
- Connectivity: Wi-Fi, USB
- Touchscreen: 5-inch TFT LCD
- Software: Snapmaker Luban, third-party slicers
- Supported OS: MacOS, Windows, Linux
- Rated Power: 320W
3D Printing Specs
- Build Volume
- A150: 160 x 160 x 145 mm
- A250: 230 x 250 x 235 mm
- A350: 320 x 350 x 330 mm
- Heated Bed:
- A150: 110 °C
- A250: 100 °C
- A350: 80 °C
- Layer Resolution: 50-300 microns
- Nozzle Temperature: Up to 275 °C
- Nozzle Diameter: 0.4 mm
- Supported Materials: PLA, ABS, flexible filament, etc.
- Supported File Types: STL, OBJ
Laser Engraving Specs
- Work Area
- A150: 160 x 160 mm
- A250: 230 x 250 mm
- A350: 320 x 350 mm
- Laser Power: 1.6W
- Wavelength: 450 nm
- Safety Class: Class 4
- Supported Materials: Wood, leather, plastic, fabric, paper, non-transparent acrylic, etc.
- Supported File Types: SVG, JPEG, PNG, etc.
CNC Specs
- Work Area
- A150: 160 x 160 x 90 mm
- A250: 230 x 250 x 180 mm
- A350: 320 x 350 x 275 mm
- Shank Diameter: 0.5mm-6.35 mm (0.02-0.25 inches)
- Spindle Speed: 6000-12,000 RPM
- Supported Materials: Wood, acrylic, PCB, carbon fiber sheet, jade, etc.
- Supported File Types: .CNC/.NC
License: The text of "Snapmaker 2.0 Review: Best Budget 3-In-1 3D Printer" by All3DP is licensed under a Creative Commons Attribution 4.0 International License.
CERTAIN CONTENT THAT APPEARS ON THIS SITE COMES FROM AMAZON. THIS CONTENT IS PROVIDED ‘AS IS’ AND IS SUBJECT TO CHANGE OR REMOVAL AT ANY TIME.