MakerBot Design Series: The Bike Saddle
Learn how Felipe Castañeda, MakerBot Industrial Designer, used CAD and 3D printing to develop his very own custom bike saddle.
This story is part one of MakerBot‘s series of design studies, exploring iterative design and the relationship between designers and their tools. The author is Felipe Castañeda, MakerBot Industrial Designer.
“Bikes are amazing machines. They’re simple yet complex; a perfect symbol for the intersection of form and function. For over a century, that beauty has drawn the attention of designers and engineers looking to leave their mark on the bicycle’s legacy.
I’m one of those designers teetering on the edge of full-blown bike obsession — so I set out to design my own custom bike saddle. This resulting sprint is an excellent example of how to go from idea, to sketch, to CAD, to 3D printing — all in a weekend.”
Here’s how he did it:
Research Existing Bike Saddles
I started by organizing saddle designs I’ve seen in the wild and gathering other environmental influences on ergonomics. My goal was to get a nice bird’s eye view of the sort of critical design features that a saddle requires. Does it fit on the bike properly? Can it support a rider? Does it look as good as it functions? For this design, I was inspired by the forms of early supersonic jets and organic cellular structures.
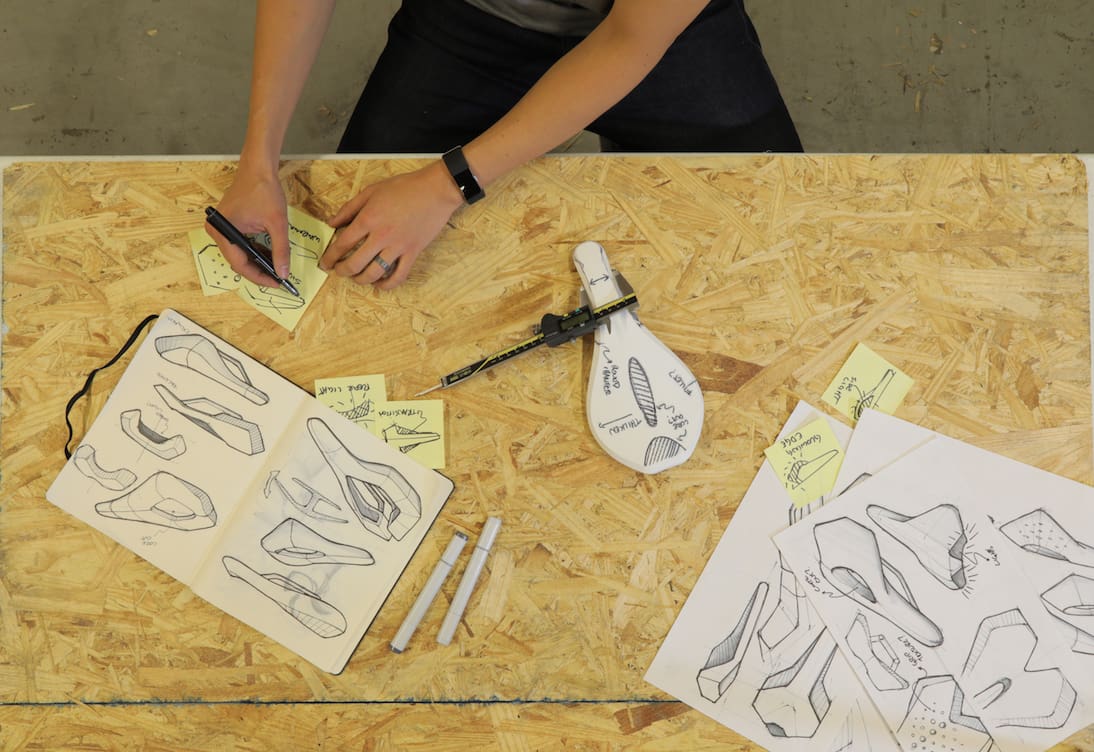
Sketch Form Ideas
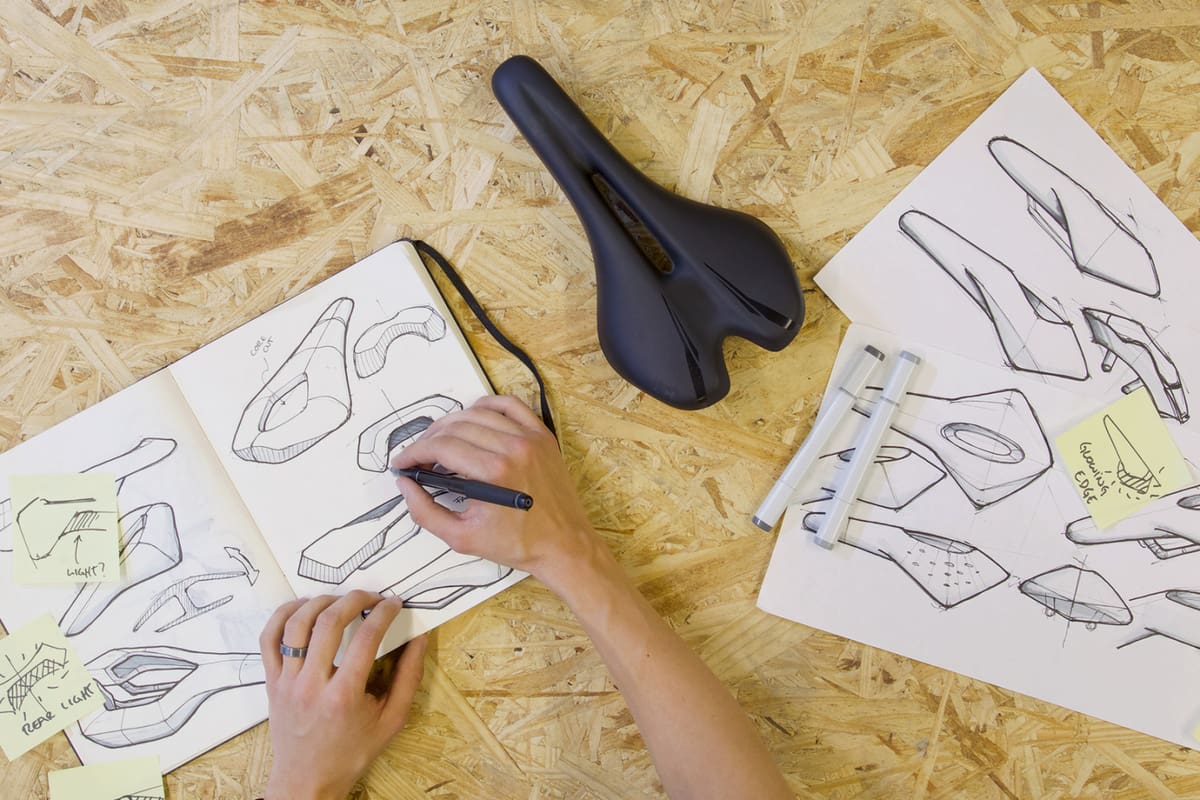
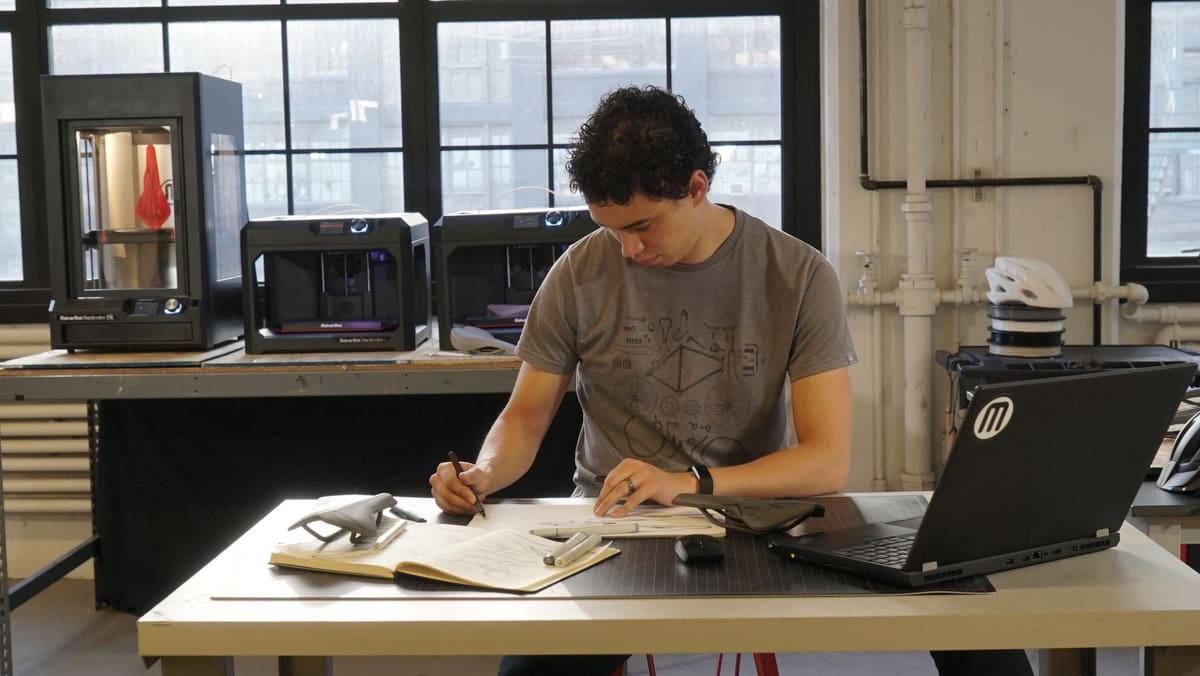
Sketching on paper is a critical step in the iterative design process. By creating thorough sketches beforehand, I’ll have a strong plan to refer to once I move over to CAD. This isn’t to say that I’ll only model what I’ve sketched—3D modeling will also allow me to learn more about the form as a three-dimensional shape. Exploring the shape in 3D space will help me learn more about proportions, dimensional accuracy, and design for manufacturing or 3D printing.
Create CAD Models From Sketches
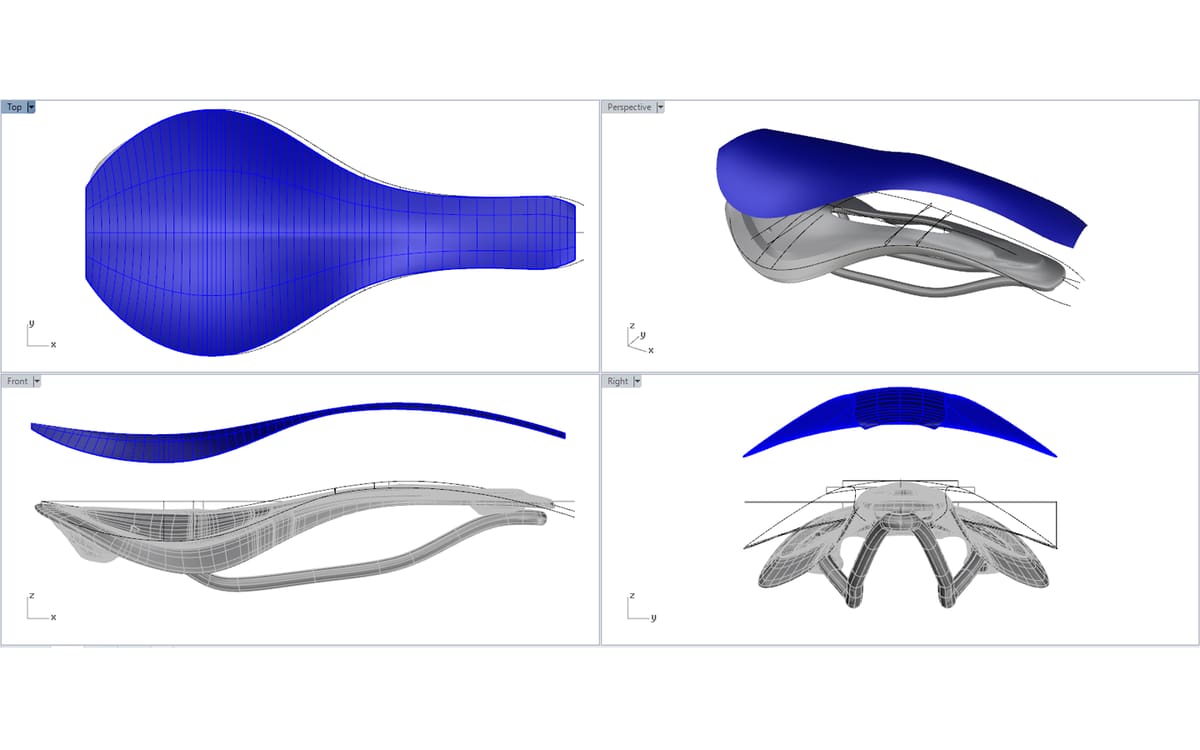
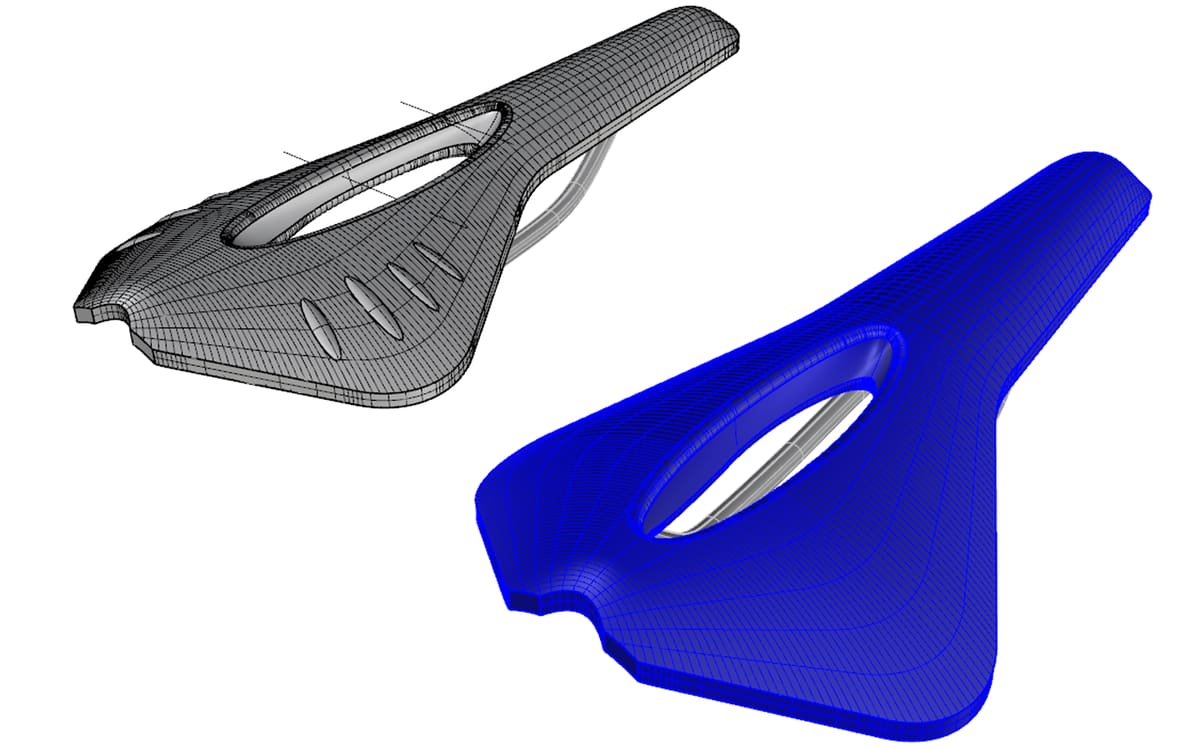
While there are plenty of great CAD tools out there, I decided on Rhino for this particular project. Rhino is a NURBS (Non-Uniform Rational B-Splines) based 3D modeling tool with a high degree of flexibility and accuracy. The tool works well for a bike seat because it allows for uninhibited form exploration, unlike many other parametric modeling programs.
In Rhino, I created multiple iterations of my original seat design by cloning the base model and altering features of each iteration. The features range from hole patterns, to the seat saddle profile, and everything in between. Once I’m satisfied with one of these iterations, I drag and drop the .3DM CAD file directly into MakerBot Print, which converts it automatically to a .STL, to prepare it for fast, high-quality printing.
Prepare CAD Model for 3D Printing
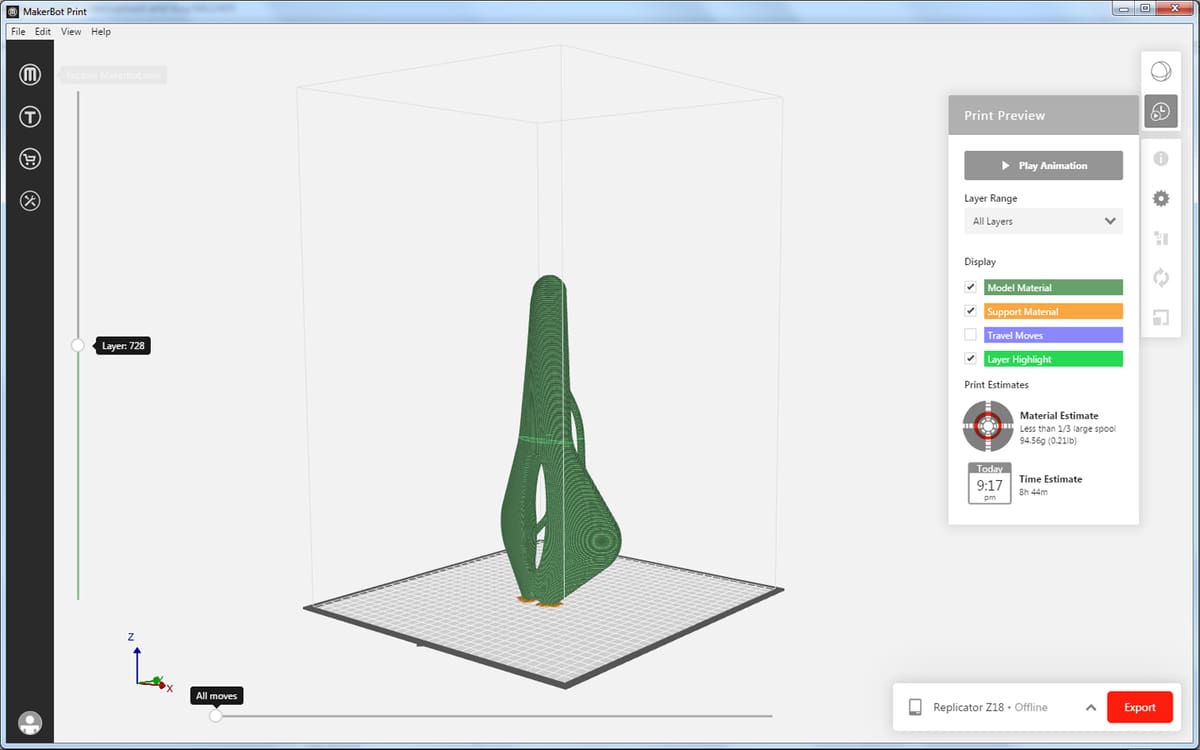
3D printing has come a long way from the days of build-it-yourself kits, but make no mistake—it’s still a deep skill set with tons of room for optimization. Here, the two most important things to consider are the print settings and the model’s orientation. For my first print, we don’t need a super-durable print because I won’t be sitting on it just yet, so I can feel free to use faster, more minimal settings; less internal support material (3-5% infill), bigger layers (.3-.4mm layer height) etc.
Getting a good feel for print orientation takes practice, but one trick worth knowing is that MakerBot Print will automatically generate supports for any angle more dramatic than 68°. With the seat oriented vertically, none of the curves exceed that limit, and the slice preview confirms that the saddle will print cleanly with no supports.
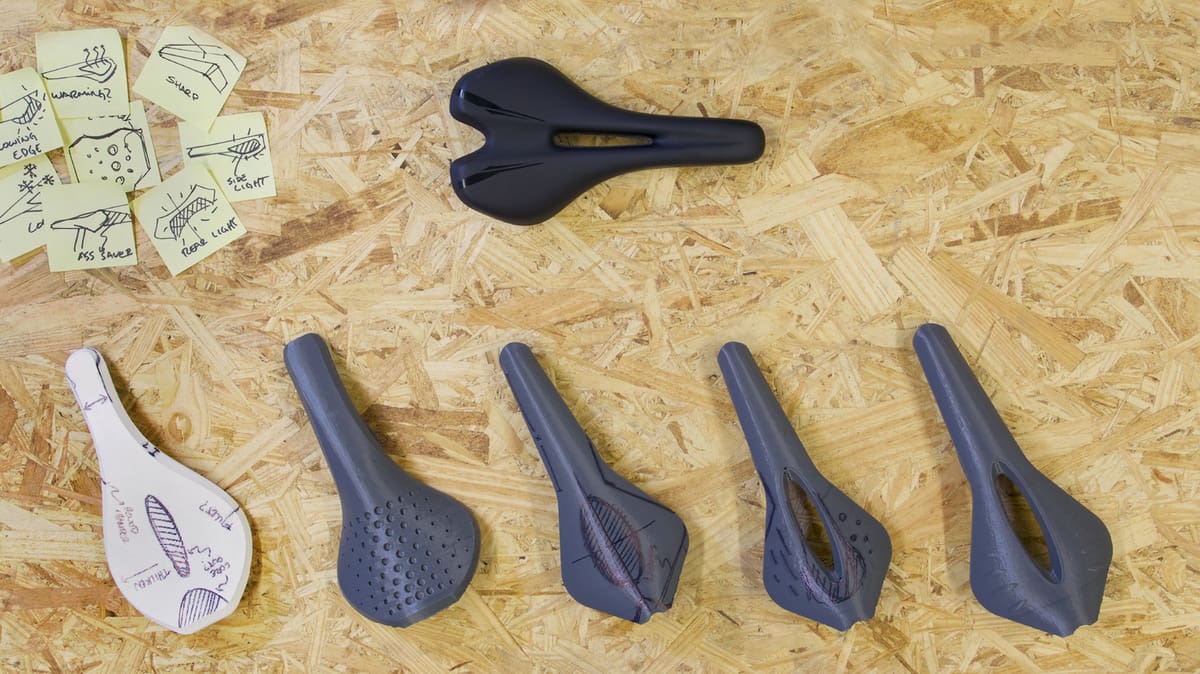
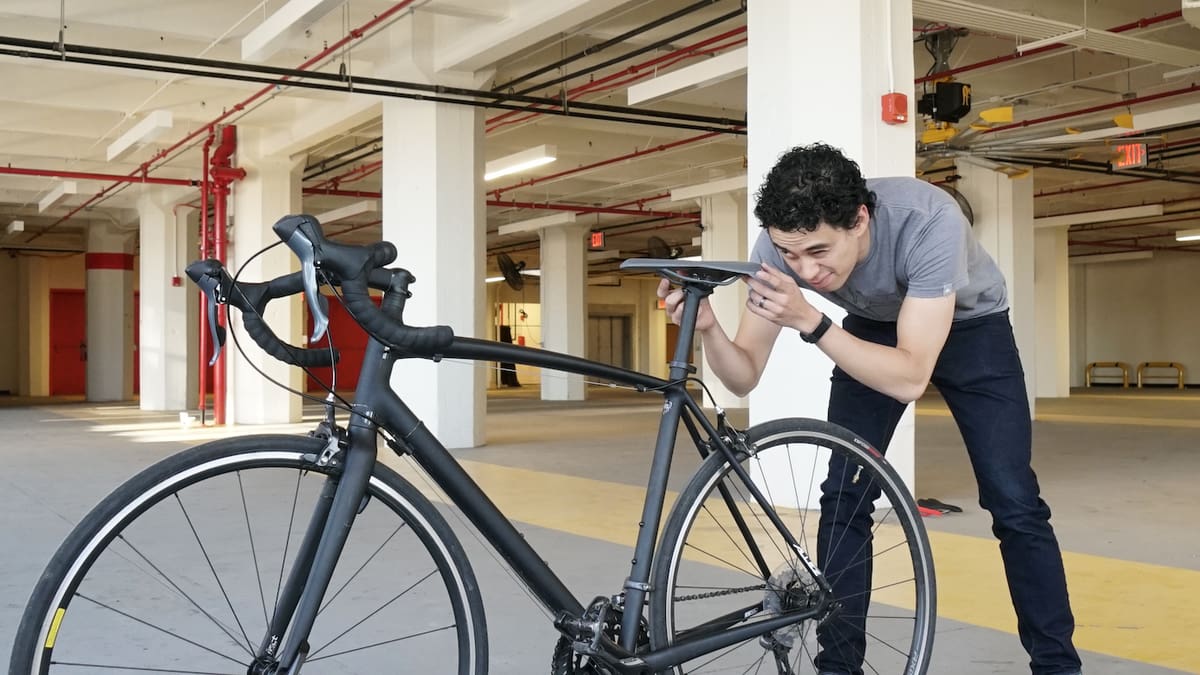
Test Bike Saddle Prototype
With a physical part in hand, I can now interpret my design with real world context. At this stage, I can mount the saddle to a bike and fine-tune dimensional accuracy and compare the design to existing bike saddles. Once I have a better idea of the changes I need to make, I use a marker to make notes directly on the part.
Having access to a 3D printer directly on my desk allows me treat it more like a sketchbook, and each 3D print more like a sketch. Because I didn’t outsource for the prints, spending a few weeks or a few hundred dollars to get them, they’re not precious to me. I can tinker with, write on, or even break the prints knowing I’m not derailing the process, and all the while getting a deeper physical understand of the saddle.
Revise, Print, Test – Repeat
With the additional notes from my real-world testing, I can now go back into Rhino and make some final design adjustments.
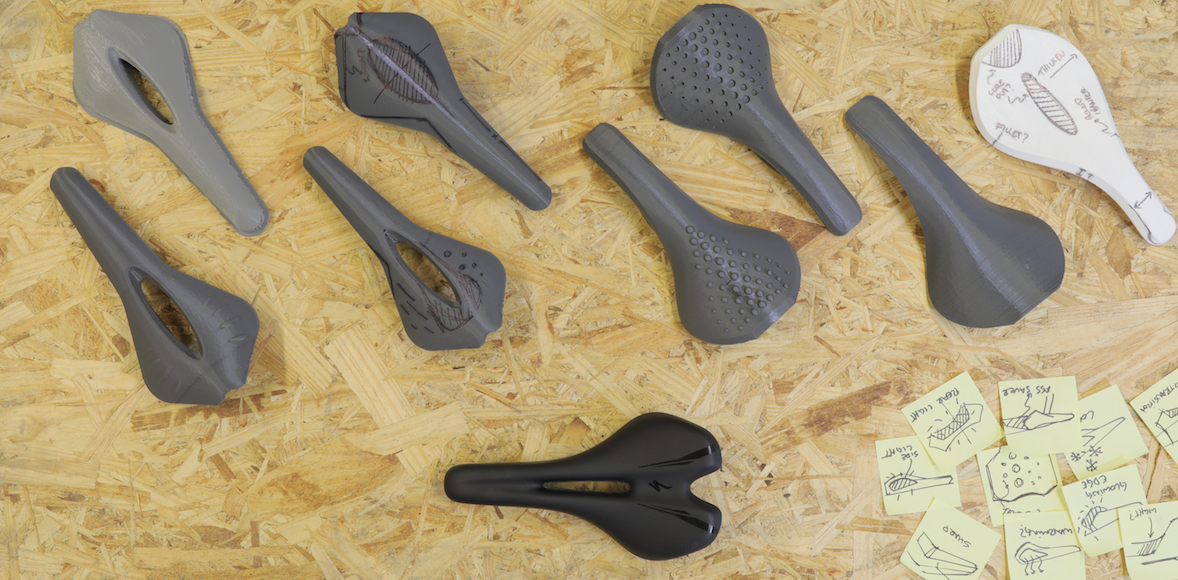
Being able to print my idea and bring it out to the physical world has given me a ton of additional information to work with. At the same time, my project has gained focus and definition. As I keep printing, testing and polishing my ideas, I inch closer to my final design.
Adding a texture to the saddle, coring out material to make it lighter, improving the aerodynamic profile of it are just a couple of ideas that I was able to test along the way as I iterated.I was able to immediately test out my ideas by having direct access to my printer.
Print the Finished Design
With the final design changes made to my CAD model, I can easily send the revised design file back over to MakerBot Print and print my final model. Having tested a wide range of options has given me a very solid starting point for the manufacturing steps that would follow.
More importantly, I was able to physically test my ideas. Not having them trapped in a flat sheet of paper or embedded on a screen has enabled me to get an in-depth understanding of the real world implications my design decisions have.
A 3D printer is more than a rapid prototyping tool; it’s a sketchbook, a research tool, a second set of hands, and all told—a paradigm shift. By placing it seamlessly in your design process, you can explore broader and deeper, then design faster than ever before.
***
MakerBot, the Brooklyn-based 3D printing company, pioneered the first connected desktop 3D printers and operates Thingiverse, the world’s largest 3D printing community and file library.
This article was sponsored and paid for by MakerBot
License: The text of "MakerBot Design Series: The Bike Saddle" by All3DP is licensed under a Creative Commons Attribution 4.0 International License.