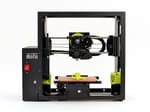
LulzBot Mini Review: This Mighty 3D Printer Does the Job
Rating

The LulzBot Mini is an open-source desktop 3D printer which is an absolute joy to use on a day-to-day basis. Read our LulzBot Mini review.
The holy grail of desktop 3D printing can be summed up in six words — just set it and forget it. It’s the lofty ideal that digital fabrication should be simple and painless; a machine that can produce dependable results with minimal errors.
Of course, the reality is that the majority of 3D printers designed for the home, office or classroom are not quite there yet. Regardless of a manufacturer’s claims, and no matter how sophisticated the marketing, a 3D printer is an incredibly complex machine that requires steady patience and observation.
And oh boy, things go wrong far more often than they don’t. We’ve all been emotionally mugged by a 3D printer at one time or another.
That’s why using the LulzBot Mini over the course of several months has been such a revelation. Here at the ALL3DP offices, we’ve been operating this wondrous little box alongside several other fused deposition modeling (FDM) machines in our workshop. The LulzBot Mini outshines them all for ease of use and quality.
Why the surprise? Because this is open-source hardware. Anyone who tells you that consumer technology must operate within a closed ecosystem for usability and results is telling you a big fat lie. The LulzBot Mini zeroes in on the things that matter, tidies away the things that don’t, and lets you get on with making stuff.
This article is split into two parts. The first half is a straight-up review of our experiences using the LulzBot Mini. The second is set of LulzBot Mini maintenance tips provided by Aleph Objects. The two parts together will provide you with a complete overview of what it’s like to use a LulzBot Mini 3D printer.
Part One: LulzBot Mini Review
The most complete LulzBot Mini review you will find anywhere on the planet, covering features, design, setup, printing, software, filament, and much more.
Pros
- Great for beginners
- Robust design
- Excellent documentation
- Custom version of Cura software
- Reliable, consistent results
- Hackable, expandable
- Autocalibration and autocleaning nozzle
- PEI print surface
Cons
- No on-board controls
- Requires PC tethering
- Small build volume
- Optimized for speed, not detail
- Noisy
- Pricey
Verdict
By golly, we can’t think of a better introduction to the wonderful world of 3D printing than a LulzBot Mini. It’s nimble yet sturdy, and built on the noble foundations of open-source hardware. But the name of the machine doesn’t do it justice; a more accurate handle would be “LulzBot Mighty”.
It should be said that the lack of on-board controls on the Lulzbot Mini — and a workflow where it must be constantly tethered to your PC — came as something of a surprise. We weren’t sure about this design choice. But it turns out that in daily use, having one less step in the 3D printing process makes it less prone to error.
Something else to consider is the stock size of the nozzle; by opting for 0.5mm over 0.4mm by default, the LulzBot Mini is better for printing big and fast as opposed to small and detailed. If you prefer the latter, then you’ll have to switch out the nozzle by yourself. And if you’d really prefer on-board controls, then you have the freedom to go ahead and build some using Raspberry Pi and OctoPrint.
If you’re looking for a top quality desktop 3D printer for single extrusion, then call off the search. The LulzBot Mini has been engineered with love, care and attention by the good folks at Aleph Objects; so much so that using it on a daily basis becomes a genuine pleasure.
The Looooong Read
Still with us so far? Good. Let’s take a deep dive into the nitty gritty, shall we? Aleph Objects is a small company based in Colorado, United States. Their business is built around the development of open-source hardware for 3D printing, with full support for free and open-source software.
They’ve developed a strong reputation for their LulzBot 3D printer range, which closely follows the RepRap philosophy of having 3D printable components. And because it satisfies the requirements for open-source hardware and software, the LulzBot has a much-coveted “Respects Your Freedom” certification from the Free Software Foundation.
Based on the brief outline above, you may be expecting the LulzBot Mini (or indeed its bigger sibling, the LulzBot Taz 6), to take the form of a DIY 3D printer kit. After all, it’s open-source, so it’s supposed to be put together by hardcore geeks and engineers, right?
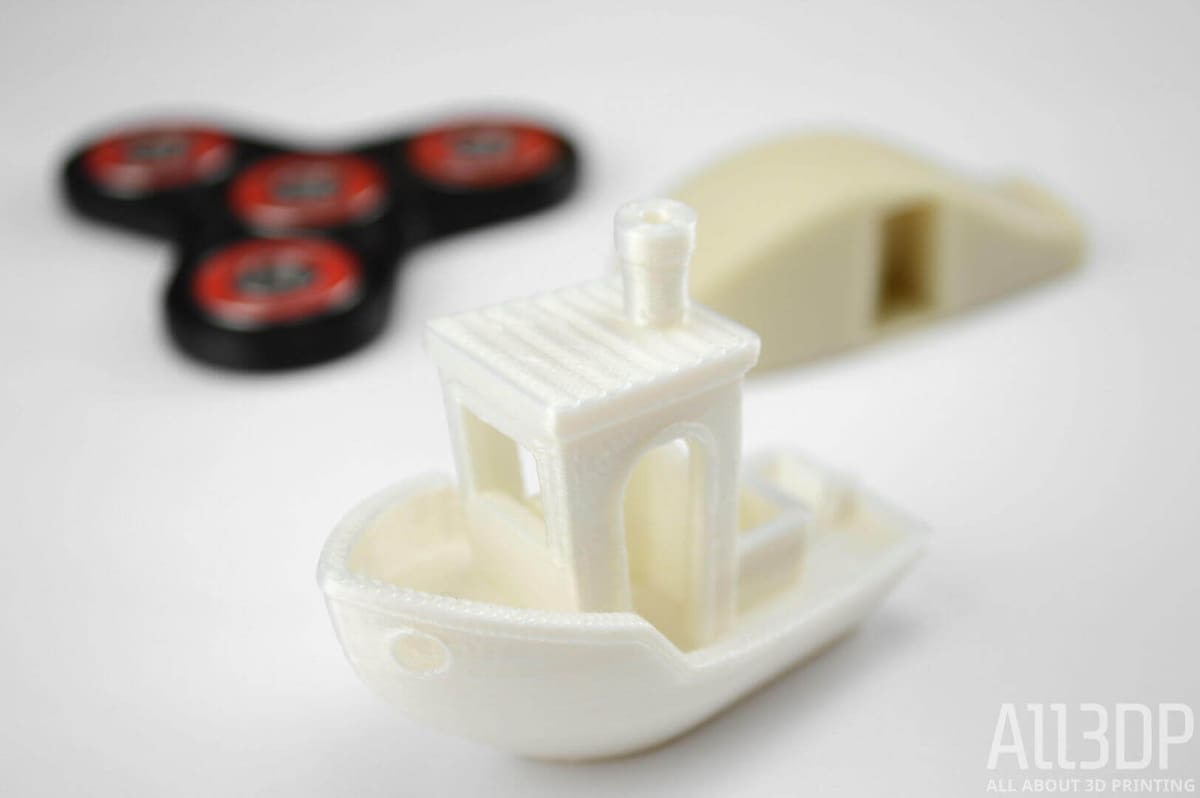
Nope! All the printers in the LulzBot range are fully assembled. They are famed for their ease of use and maintenance, and they’re incredibly well-documented. In effect, the process from unboxing to printing is smoother than the ceramic bearings on a high-end fidget spinner. Newbies welcome!
Design
The LulzBot Mini 3D printer sits in the fused filament fabrication category. It pushes molten thermoplastic filament through a heated nozzle, and builds a solid object by depositing one thin layer of plastic after the other.
The design is a Cartesian frame of black powder-coated metal, with 3D printed components and linear rails, where the tool head moves on the Z and X axis and the print bed moves on the Y axis.
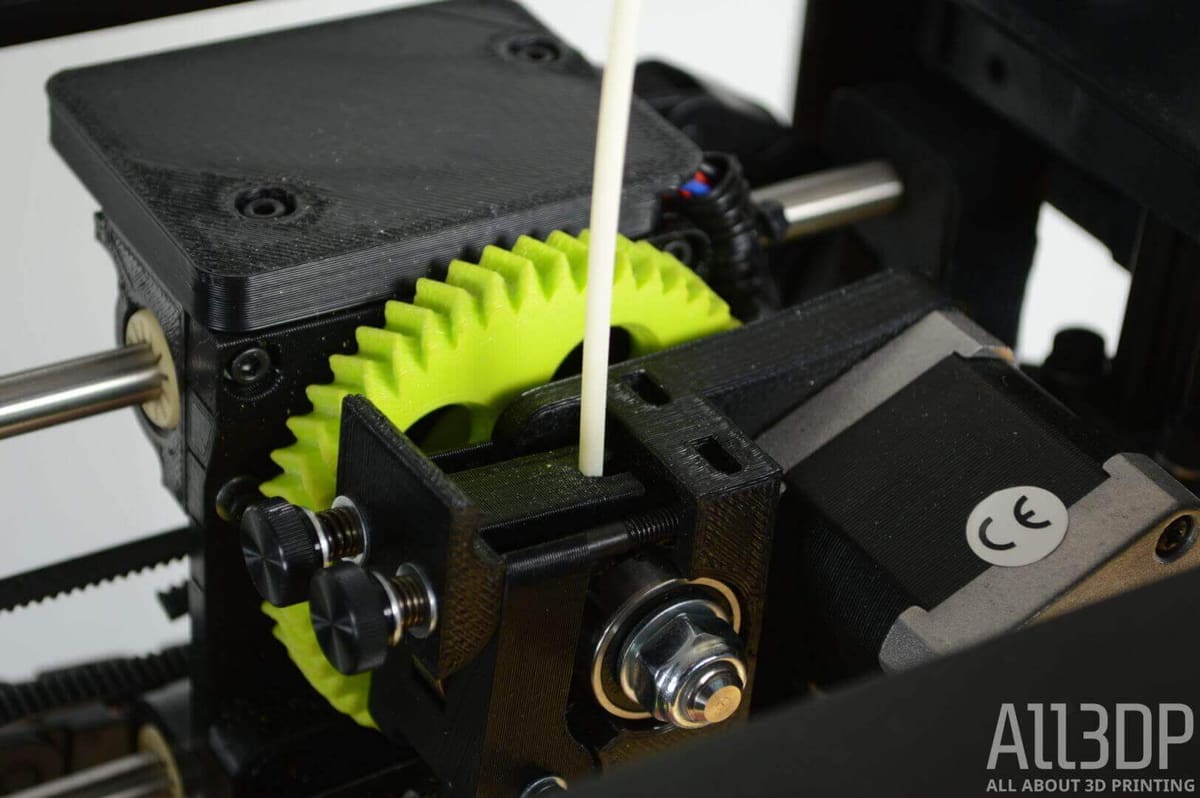
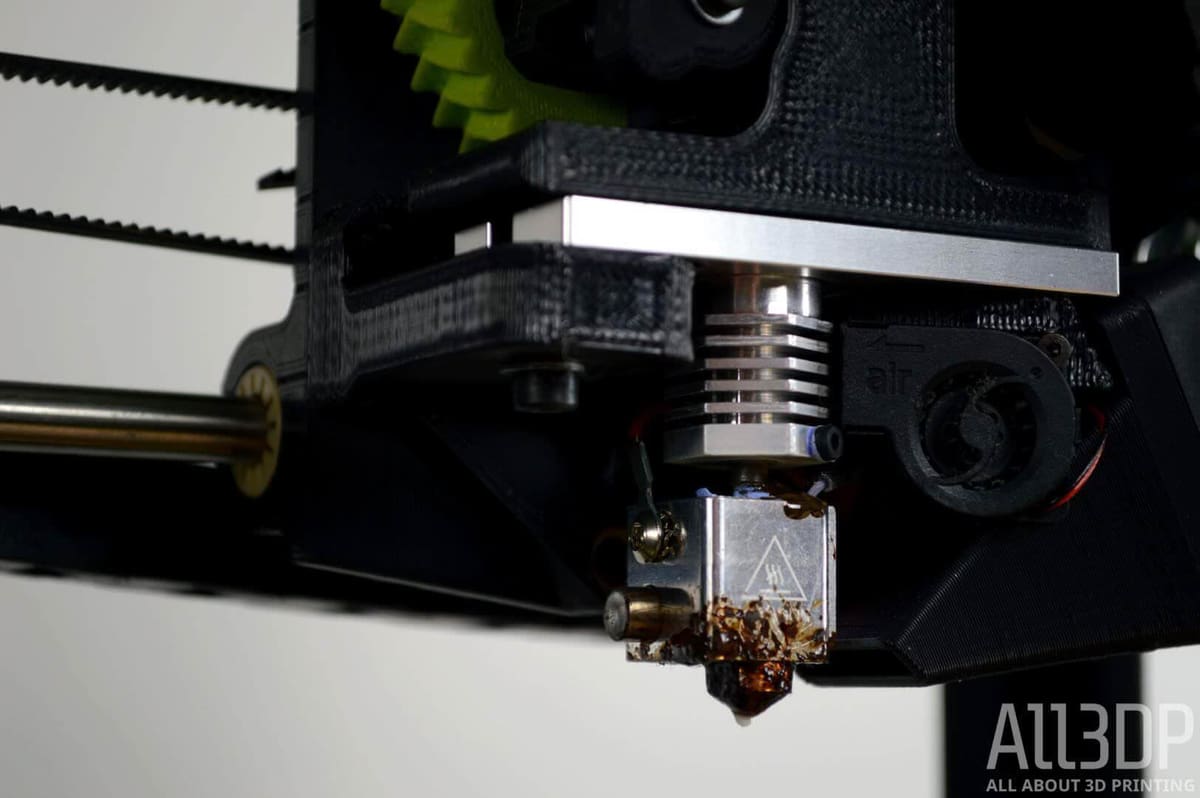
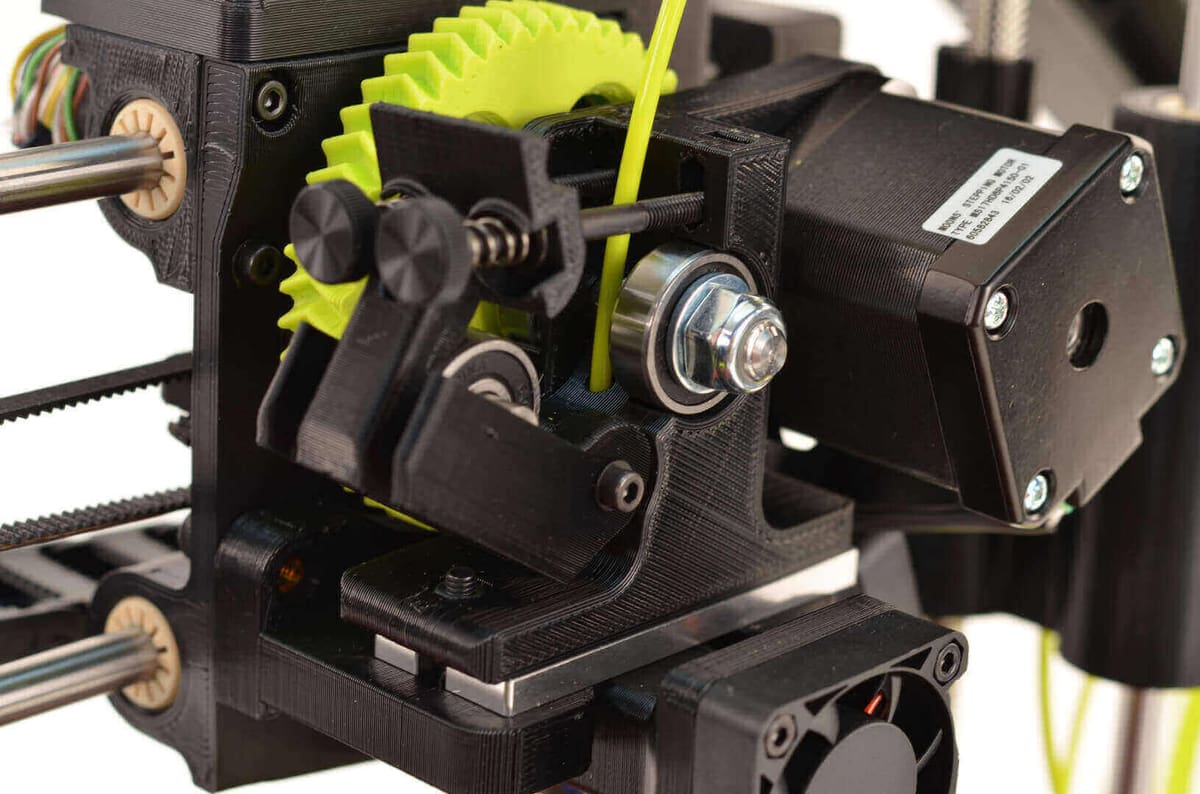
As for the tool head itself, this is a direct drive design. The filament extrusion and hot end is handled within a single unit, and the filament is fed into the top from a spool suspended overhead. The Lulzbot Mini is a single extrusion machine, which means it can print with only one spool of filament at a time.
Features
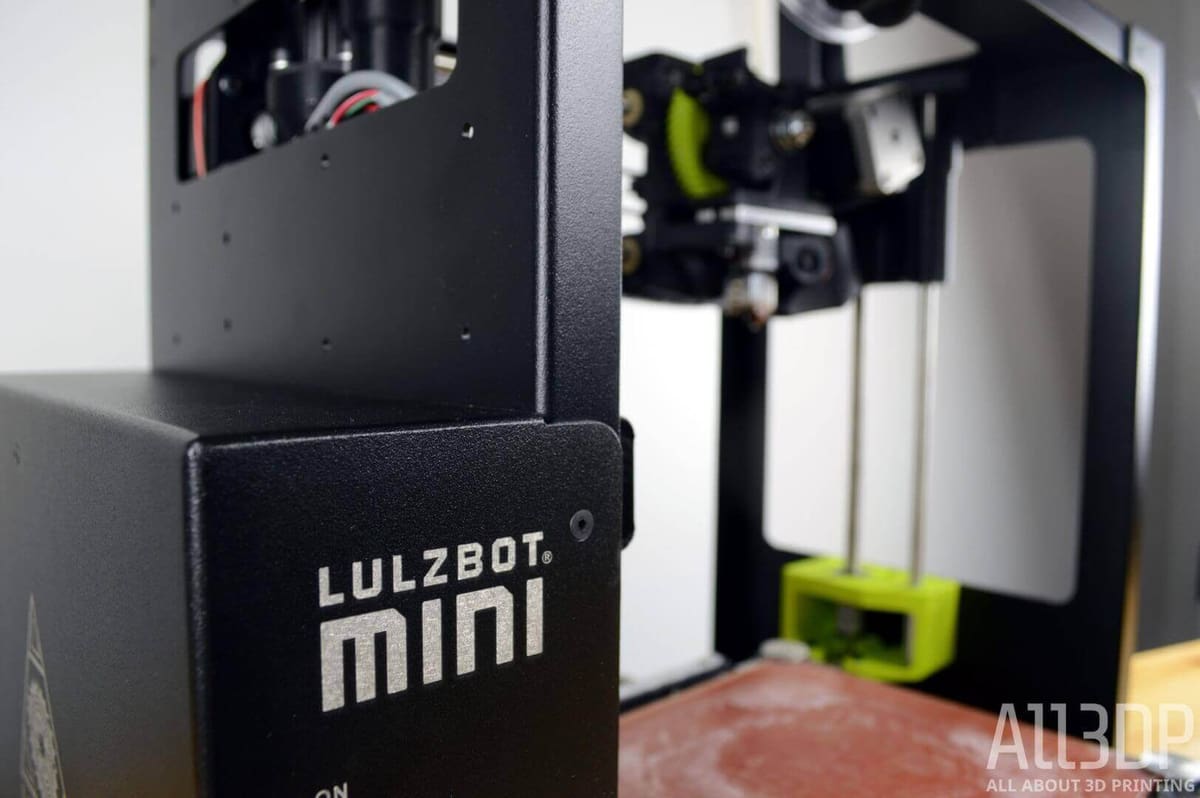
One curious thing about the LulzBot Mini that you’ll notice sooner rather than later; there’s no control panel. Nor is there an SD card slot. There’s just a power button and a USB slot. This machine requires tethering to a PC for operation.
It’s a big thing to take into account, and in a daily use case scenario it might be best if you had a dedicated or spare PC computer you can use for the task.
Those specs in full:
- Print surface of heated borosilicate glass bed
- Print area of 152 x 152 x 158 (6 x 6 x 6.2 in)
- Print volume of 3,650 cm3 (223 in3) of usable space
- Top print speed of 275 mm/sec (10.8 in/sec) at 0.18 layer height
- Layer thickness from 0.05 mm to 0.50 mm (0.002 in – 0.020 in)
- Standard usable filament sizes of 3 mm (0.1 in)
Finally, we should call attention to topline features like automated-bed leveling, automated nozzle cleaning, and a special PEI print surface. More about those later.
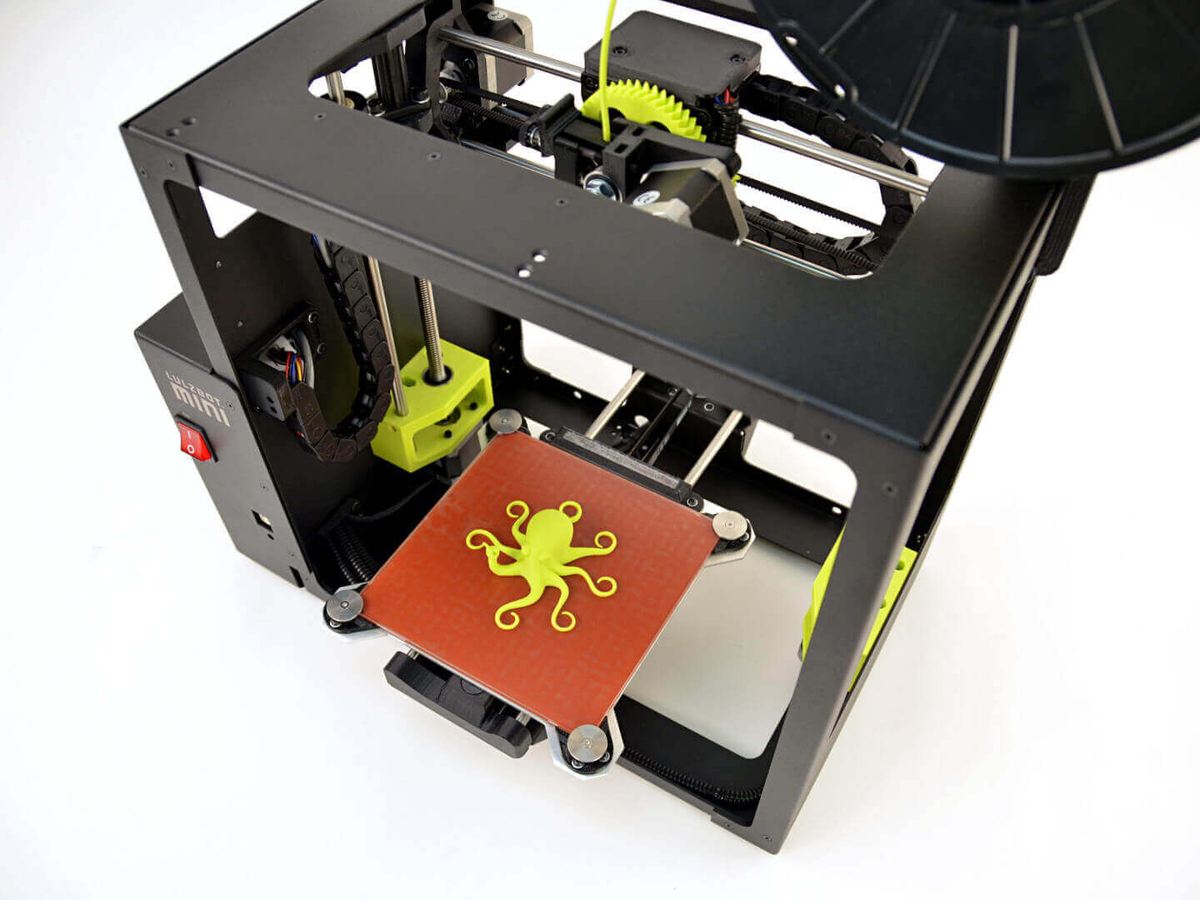
Unboxing & Setup
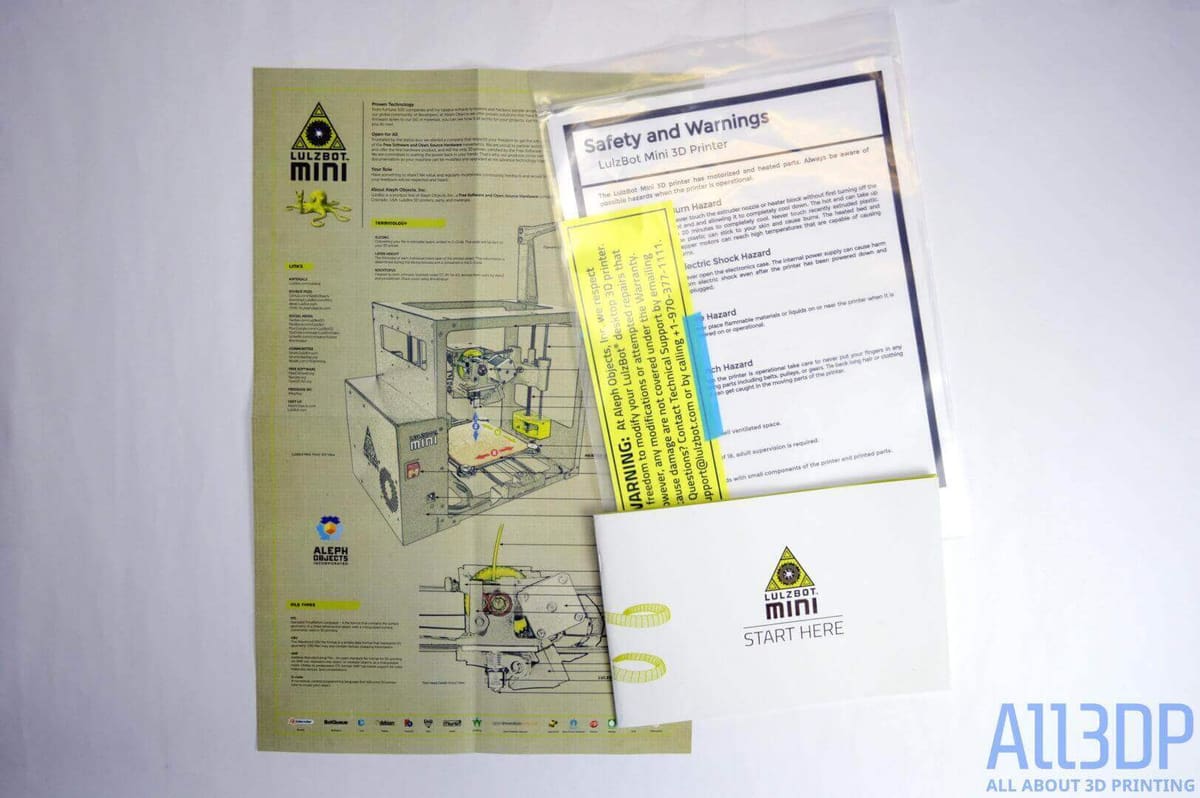
Opening the box, the LulzBot Mini is securely packed in foam casing with a small set of tools and supporting documentation. Moving parts are secured in place with foam blocks and zip-ties.
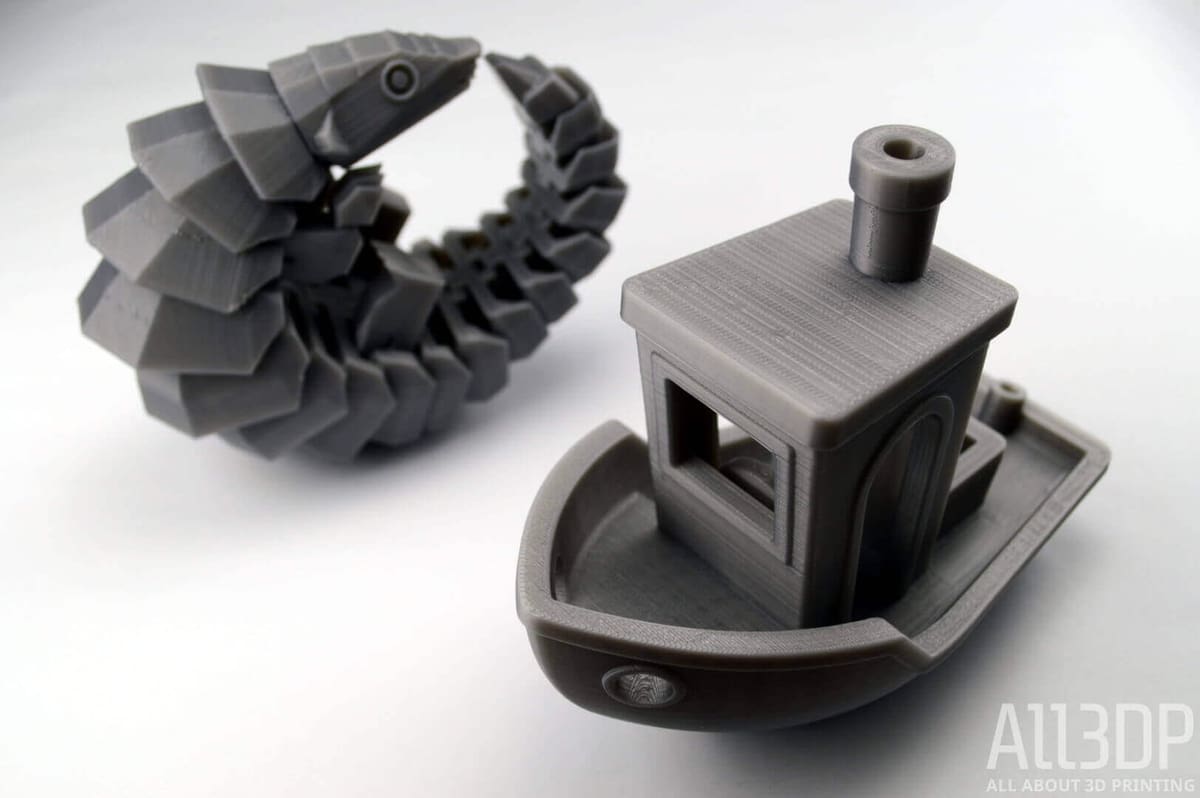
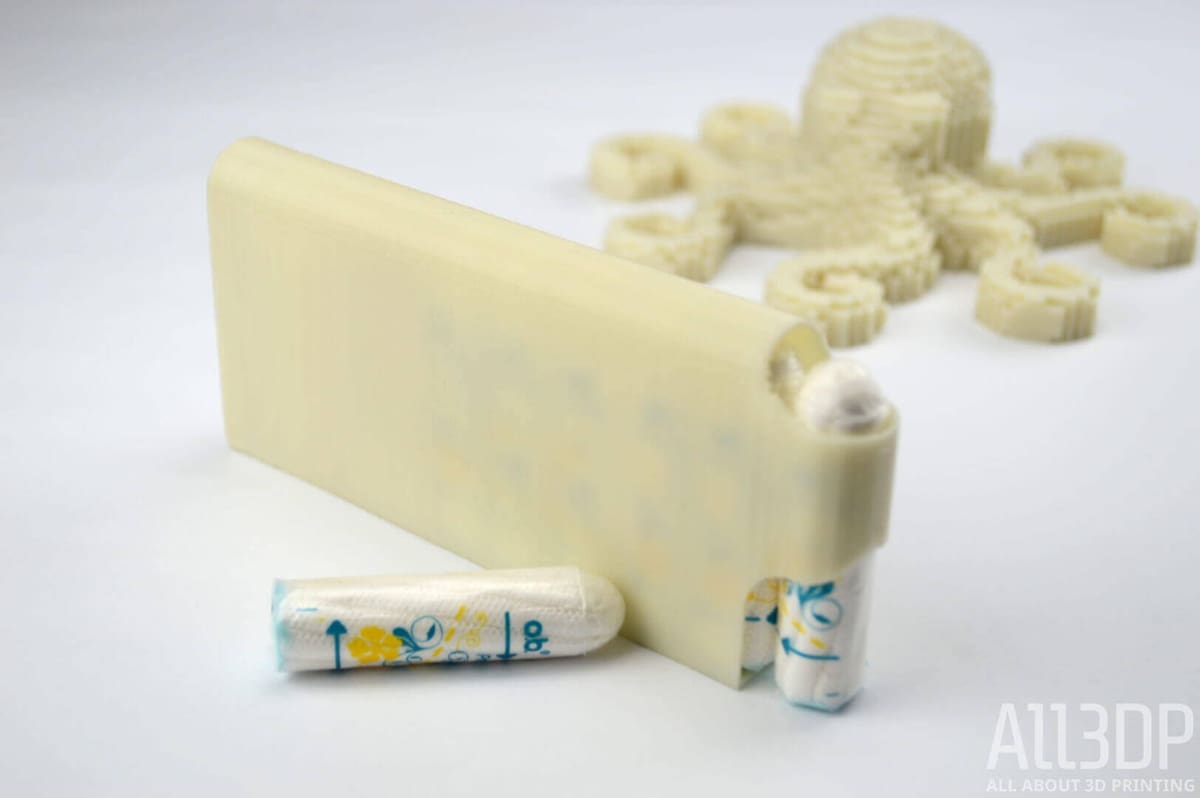
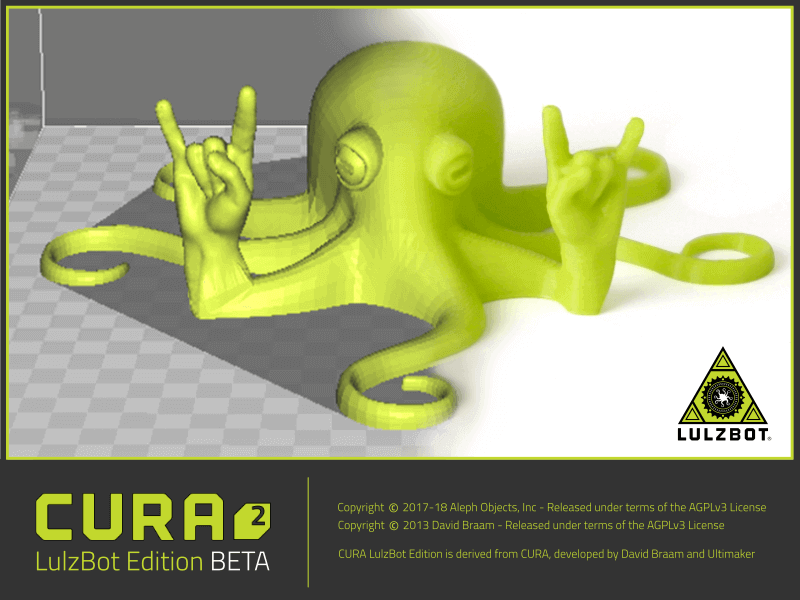
There’s also a little Rocktopus mascot in there, holding a fist aloft in gnarly salute. This item has been printed on your LulzBot Mini as a final test before shipping onward to its final destination.
But it’s the documentation that really impresses. It’s comprehensive and clear, and comprised of three parts. The first is a bundle containing the packing list, quality assurance record, safety and warning notice, and regional declaration of conformity.
These first two items are actually a pair of checklists by an Aleph Objects technician, outlining the QA and packing procedure. If anything is missing from your Lulzbot Mini, these are the documents to refer to.
The second part is a poster of the printer in 3/4 profile, with the individual parts annotated for quick reference, plus explanations of terminology and resources.
Finally, we have the quick start manual, which is a masterclass in technical writing. It takes you step by step through setup, software installation, calibration, loading filament, and your first print. It’s incredibly easy to follow.
Filament
In terms of materials, the world is practically your oyster. The LulzBot Mini prints with ABS, PLA, HIPS, PVA, wood filled filaments, Polyester (Tritan), PETT, bronze and copper filled filaments, Polycarbonate, Nylon, PETG, conductive PLA and ABS, UV luminescent filaments, PCTPE, PC-ABS, Alloy 910, and much much more.
But we did say “practically”. 3D printing with carbon fiber filaments is not recommended for the LulzBot Mini. While these materials boast physical properties of high strength and durability, they’re also highly abrasive. This can degrade the performance of the hotend over time.
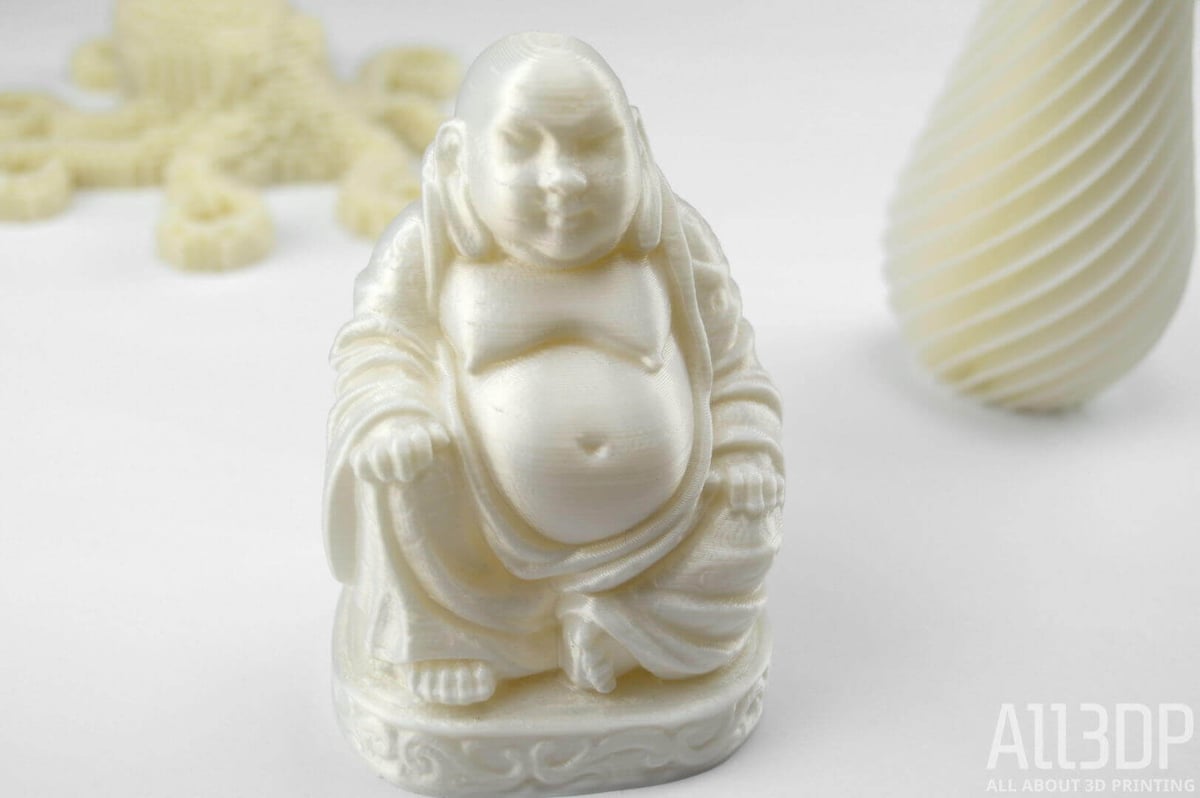
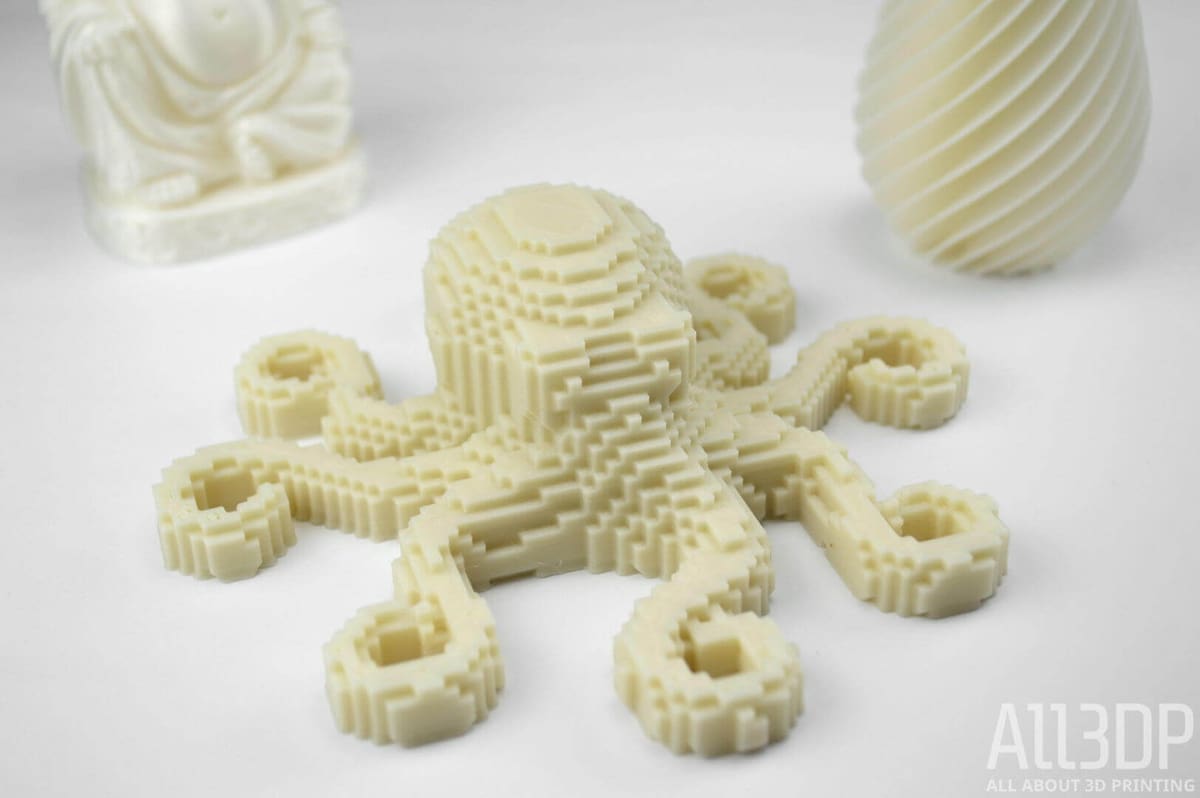
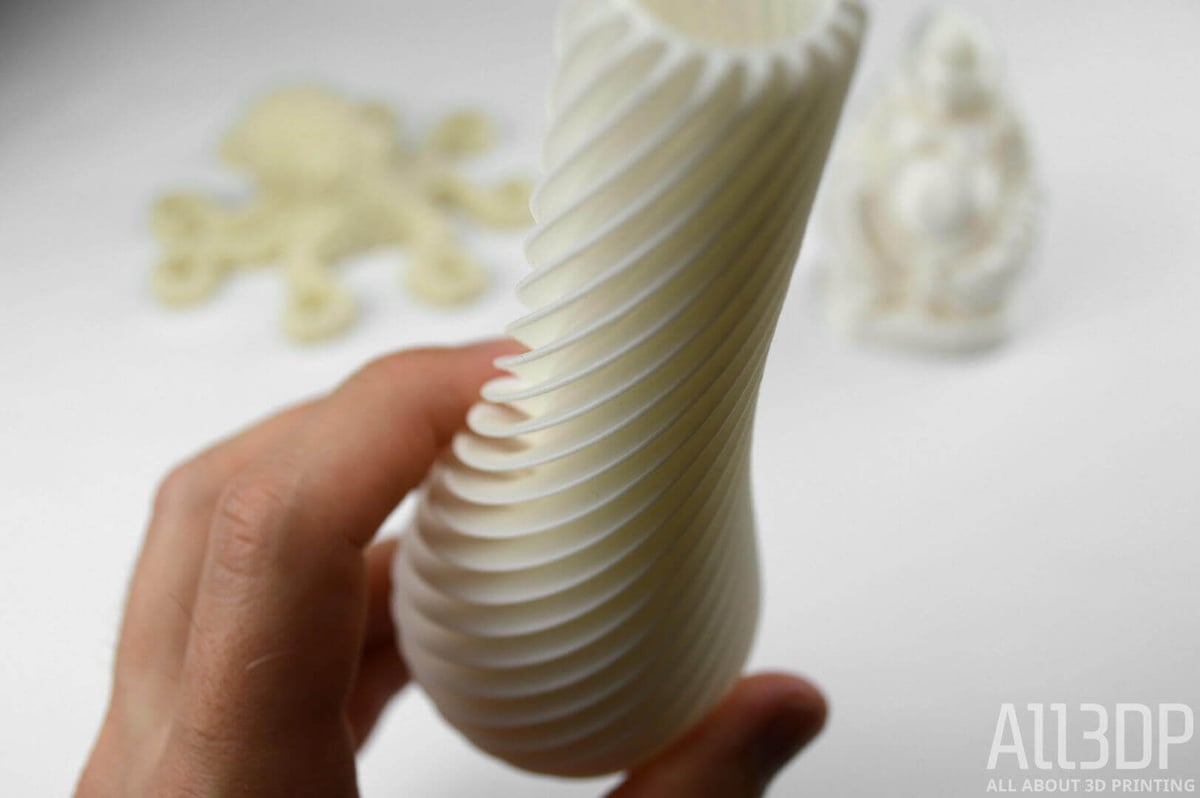
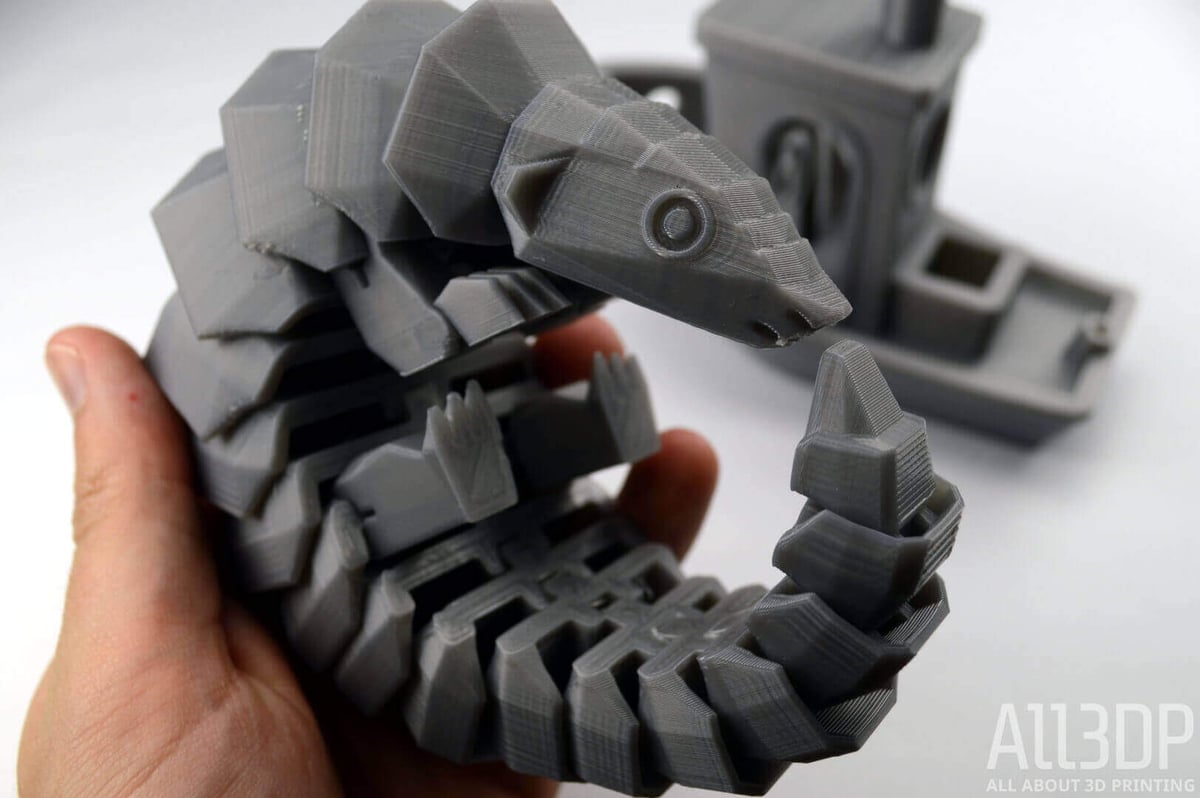
In our tests, we printed mainly with Verbatim PLA, Biofila Silk, and ColorFabb GlowFill. We also conducted smaller tests with ColorFabb XT, Innofil3D PET, and NinjaTek Armadillo (mainly to 3D print some fidget spinners, but that’s another story).
Software
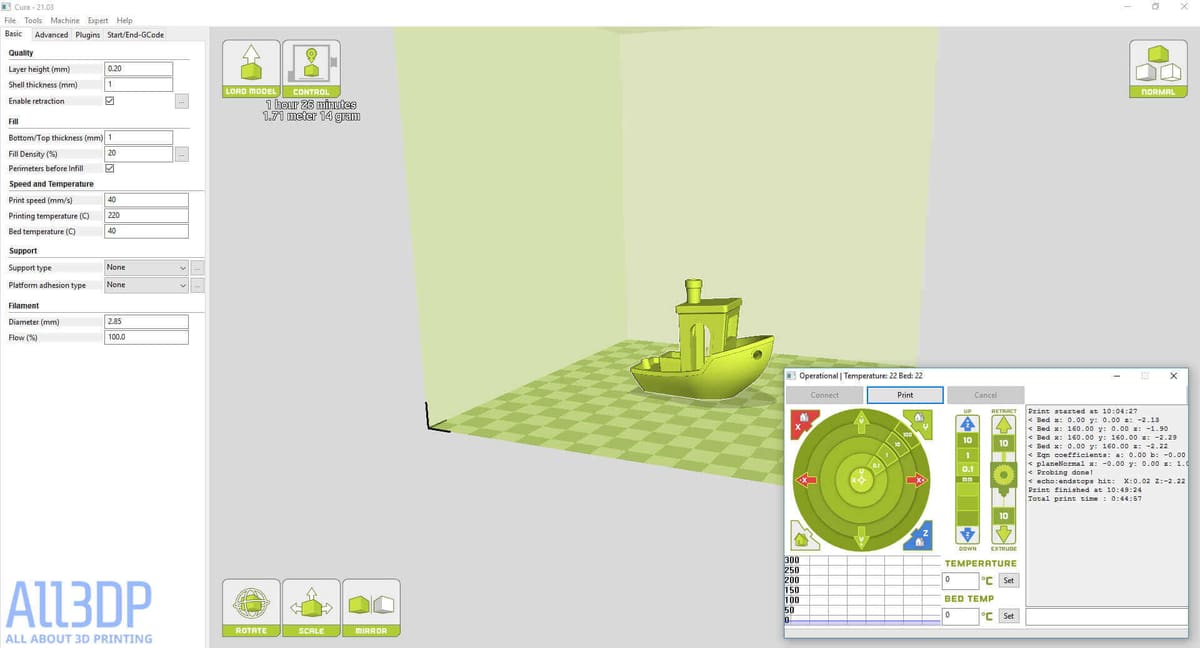
In line with the open-source credentials of the LulzBot Mini, users have the freedom to use any number of 3D printing software programs. Cura LulzBot Edition is bundled together as standard. Other compatible software is OctoPrint, BotQueue, Slic3r, Printrun, MatterControl, and more.
The Cura LulzBot Edition is a forked version of Cura, which doesn’t have the same interface or slicing speed as the current release. If anything, it resembles an older version but re-skinned with the lime green color-scheme.
The value it brings, however, is not just being preconfigured to work with your LulzBot Mini. It’s also about the library of filament presets.
By default, the software has a series of quickprint settings arranged around material and quality. It has presets stored for most major brands of filament, which can be selected from a dropdown menu. From there, users are invited to choose between “standard”, “high speed” and “high detail” quality prints.
It’s a good way to hit the ground running, but power users may find these settings too limited. To this end, you can easily switch over to the expert mode and tinker to your heart’s delight.
Once a model is uploaded and prepped for printing, you then call up the print control panel to initiate the job. This panel also provides real-time monitoring of both the status of the job and the machine itself. It’s a far cry from monitoring a print from a dinky on-board LCD, and we have to say that we’ve come to prefer this method.
Printing
The build volume of the LulzBot Mini is a comfortable 152 x 152 x 158 mm. That means objects up to 6 inches square should be easily accommodated, and the print-head can move swiftly but precisely within the space.
Before a print job commences, the printer takes two small but important steps to ensure that everything is running smoothly.
Firstly, it cleans the nozzle. The LulzBot Mini does this by rubbing the tip back and forth along a thick felt pad towards the rear of the print bed. This is very important to clean the hot end of any gunk or residue, and ensures that you get a clean print at the start of each job. These pads are consumables; five are supplied with the machine, and you may have to buy more at a later date.
Secondly, it calibrates the print-head in relation to the bed. Since the LulzBot Mini only moves the print bed on the Y-axis, bed-levelling is less tricky than other printers like the Ultimaker or the BCN3D Sigma, where the bed moves on the Z-axis. The Mini does this by simply tapping the metal contacts at each corner of the bed, and that’s it.
Once complete, the print-head moves into position and begins heating up the hot-end.
More Printing
In operation, the LulzBot Mini 3D printer is not a quiet beast. It makes a lot of high-pitched squealing and whining, despite the polymer IGUS bushings it has on the rails.
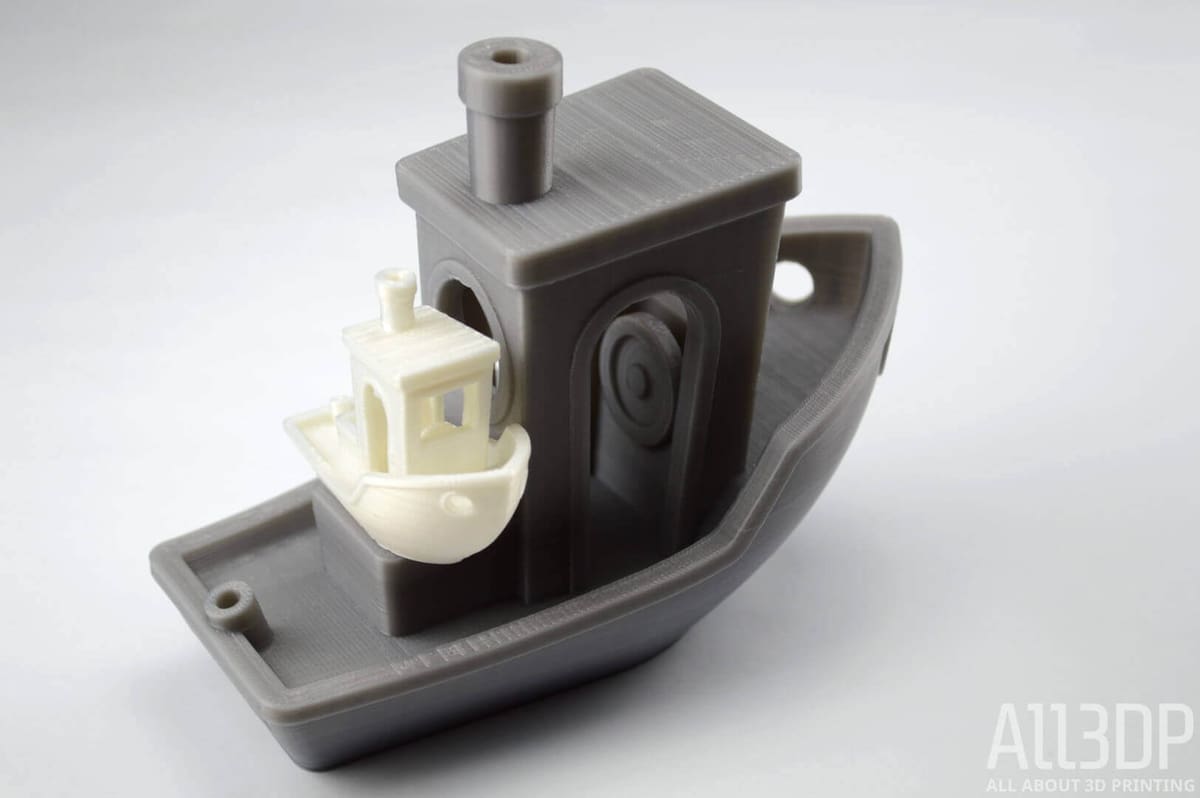
First layer adhesion to the print bed is pretty reliable; depending on the demands of the material, you won’t have to use the glue-stick at all. This is thanks to the PEI print surface which adheres to the glass plate with a semi-permanent adhesive. PLA sticks fine without any additional coercion.
As for the prints themselves, they are super fine. Robust, solid, and evenly fabricated. Because the nozzle size is 0.5mm and not your standard 0.4mm, the Lulzbot Mini is predisposed towards printing large objects quickly rather than small objects in high detail.
This becomes especially apparent when printing with more demanding filaments. It’s not a problem if you’re prepared to switch out the nozzles every once in a while, but it’s something to be aware of.
Hackability
We’ve focused very much on the ease of use and accessibility of the LulzBot Mini. That’s because we imagine that’s what people will be looking for in their first 3D printer. And in regular operation, they won’t be disappointed.
But that’s not to disrespect the open source community that makes this machine what it is. Some makers don’t need their hands held, they want the freedom to experiment and tinker. And the LulzBot Mini delivers on that front too.
For further reference on upgrades and maintenance, or maybe just to learn how it all works, pay a visit to the Open Hardware Assembly Instructions. Here you’ll find a wealth of tutorials and guides for the complete LulzBot range.
Wrapping Up
If it’s not already apparent, we totally love using the LulzBot Mini 3D printer. We’ve had it on loan for the past several months, and in that period of time it’s been our go-to machine for daily use. The entire office will be very sad to see it go.
In some respects it may appear conservative — the lack of on-board controls; the single extruder; using an older fork of Cura software — but in others it’s very foward thinking. Features like automatic bed-leveling, nozzle cleaning and the PEI print surface significantly enhance reliability and repeat-ability.
There’s no denying the premium price tag, but what you get is a well-built 3D printer that just works out of the box. And there’s comprehensive documentation and technical support to fall back on when it doesn’t. In the end, that’s the best you could ask for from any form of technology. The LulzBot Mini gets two thumbs up.
This 3D printer's robust design yields reliable, consistent results. Most importantly, it's very easy to use.
Part Two: LulzBot Mini Maintenance
The LulzBot Mini is a tidy powerhouse of a desktop 3D printer, but it still needs some TLC. Here are some Lulzbot Mini maintenance tips direct from Aleph Objects.
Large and Small Herringbone Gear
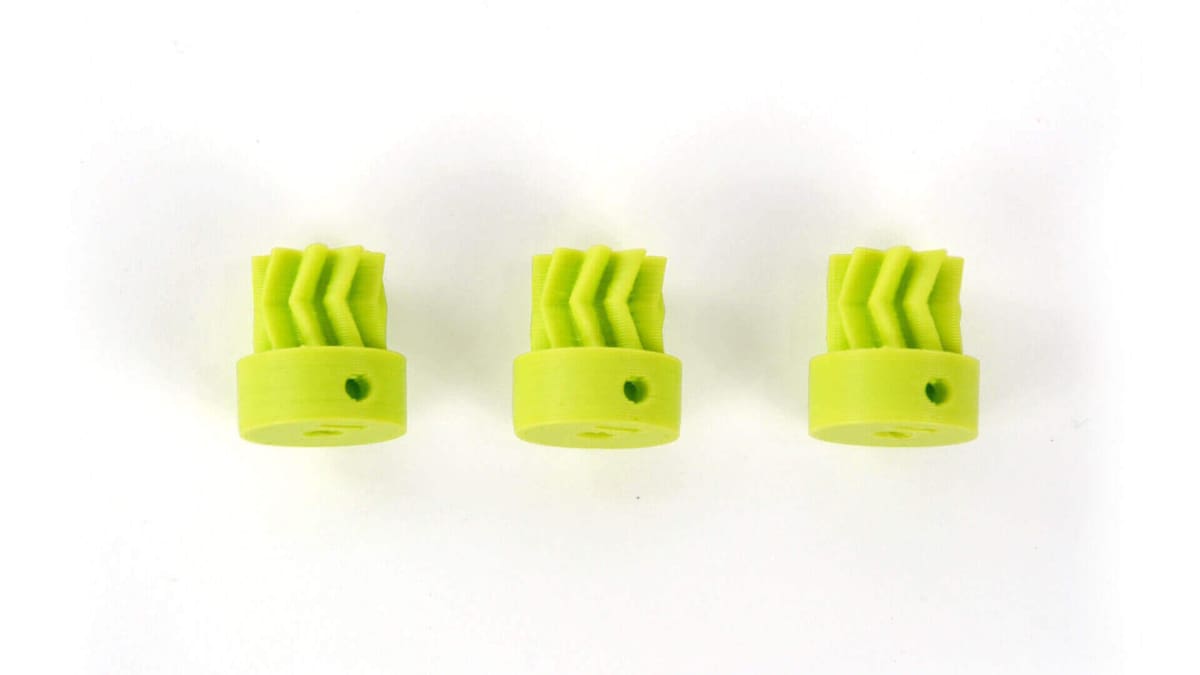
The large and small herringbone gears on the LulzBot Mini work together to drive the filament through the extruder and into the hot end. Keep spare large and small herringbone gears on hand for future maintenance needs.
- Download the Small Herringbone Gear and Large Herringbone Gear in STL file format.
- Load the Small Herringbone Gear model into Cura LulzBot Edition and 3D print with ABS filament at 65% infill.
- Remove the completed print and set aside in a safe place for future use.
- Load the Large Herringbone Gear model into Cura LulzBot Edition and 3D print with ABS filament at 74% infill.
- Follow the assembly and installation instructions available at OHAI.LulzBot.com when needed:
- Large Herringbone Gear, Step 12
- Small Herringbone Gear, Step 21
Beefy Extruder Idler
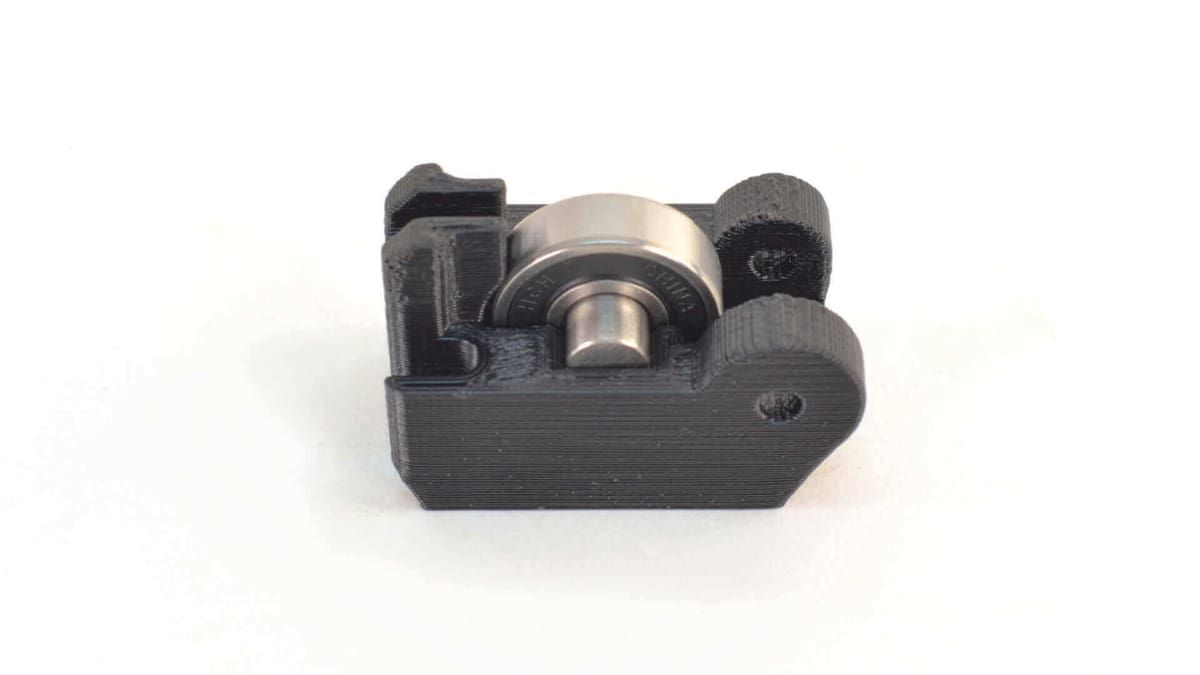
Another integral part of the LulzBot Mini 3D printer’s tool head is the extruder idler. The extruder idler presses the filament against the hobbed bolt driving the filament through the extruder into the hot end. The new and improved Beefy Idler is a must-have to be prepared for anything. This new idler is featured in the new LulzBot Mini Tool Head v2.1, which also has improved cooling for the heat sink!
- Download the Beefy Idler 3D Model in STL file format.
- Load the model into Cura LulzBot Edition and 3D print with ABS filament at 60% infill.
- Remove the completed print and set aside in a safe place for future use.
- Follow the assembly and installation instructions in step 15 at OHAI.LulzBot.com when needed.
Extra Wiper Pads
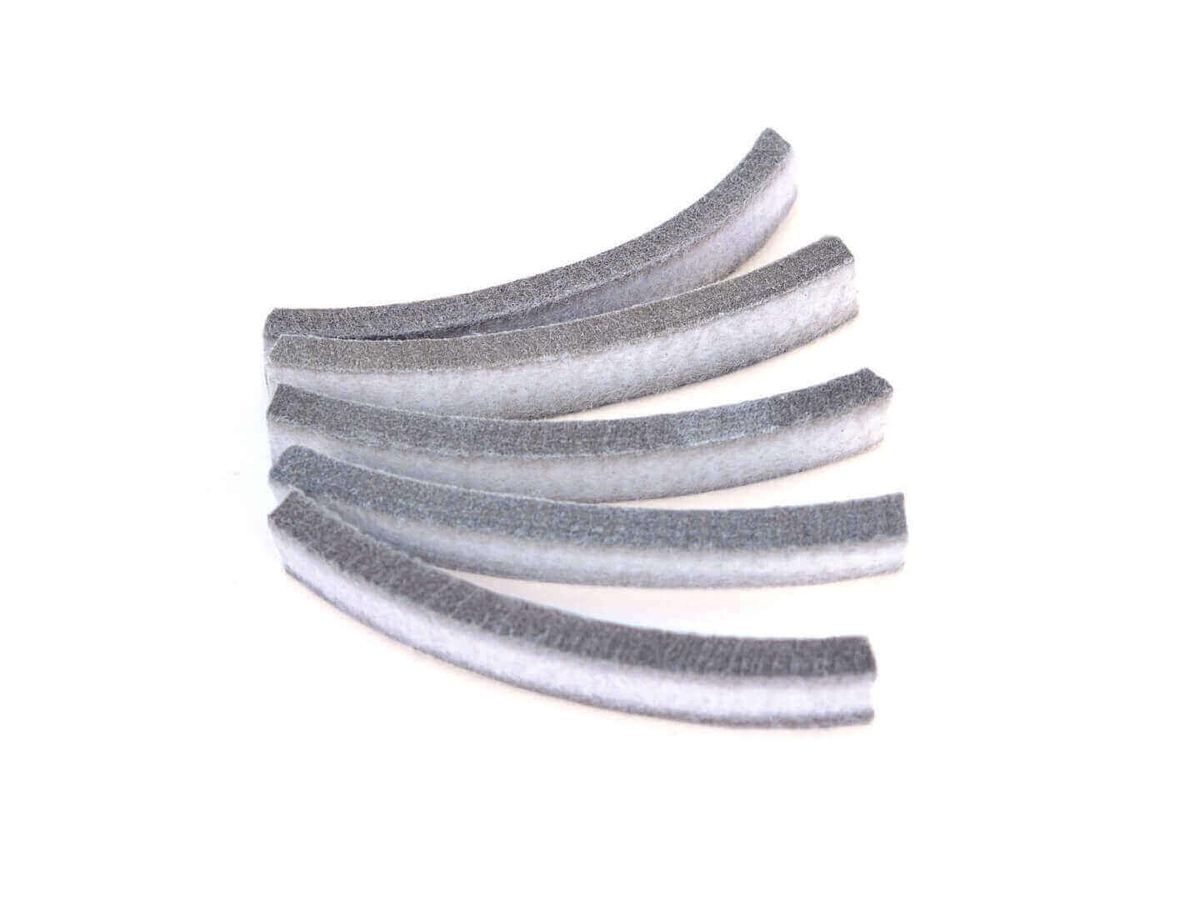
Great 3D prints start with a perfect first layer. The LulzBot Mini sets the height for the ideal first layer thickness through the Automatic Bed Leveling system. This process uses the tip of the hot end nozzle to complete an electrical circuit on each corner of the print surface. The LulzBot Mini keeps the nozzle clean by wiping it off at the beginning of each bed probing sequence on a specially prepared wiping pad.
Note: Do not use the metallic hobbed-bolt cleaning brush to clean the nozzle or heater block.
Every LulzBot Mini 3D printer includes a comprehensive tool kit and five dual-sided replacement wiping pads.
- Replace this pad when plastic build up is visible on the pad surface and can no longer be picked clean.
- Follow the Wiper Pad Replacement guide at OHAI.LulzBot.com.
- Replace the Wiper Pad Mount if needed.
- Follow the Wiper Pad Mount Replacement guide at OHAI.LulzBot.com.
Self-Lubricating Bushings
The LulzBot Mini 3D printer uses self-lubricating bushings on each axis to provide smooth, soft movement. These bushings do not need any additional lubricants, but do like to be clean.
- Keep each axis moving quietly by wiping any dust off the smooth rods with a clean dry cloth or paper towel.
- Squeaking noises or axis-specific vibration is a sign that the smooth rods need to be cleaned. Remove any built-up residue with a gentle scrubbing with a green scrub pad.
Clean the Hobbed Bolt
Filament is driven into the hotend in the extruder by a hobbed bolt. This bolt is centered within the large 3D printed herringbone gear and uses small teeth to pull filament through the extruder. Included with each LulzBot Mini 3D Printer is a fine metallic brush and a sharp, pointed dental pick. Use these tools to clean the hobbed bolt.
- With the LulzBot Mini powered off, open the extruder idler and lower out of the way.
- Use the fine metallic brush to clean the hobbed bolt teeth.
- Rotate the large 3D printed herringbone gear to expose more teeth.
- If needed, use the dental pick to remove any stubborn impacted filament. Note: The dental pick is sharp.
- A gentle dusting with compressed air will help remove fine dust.
Replacement PEI Sheet
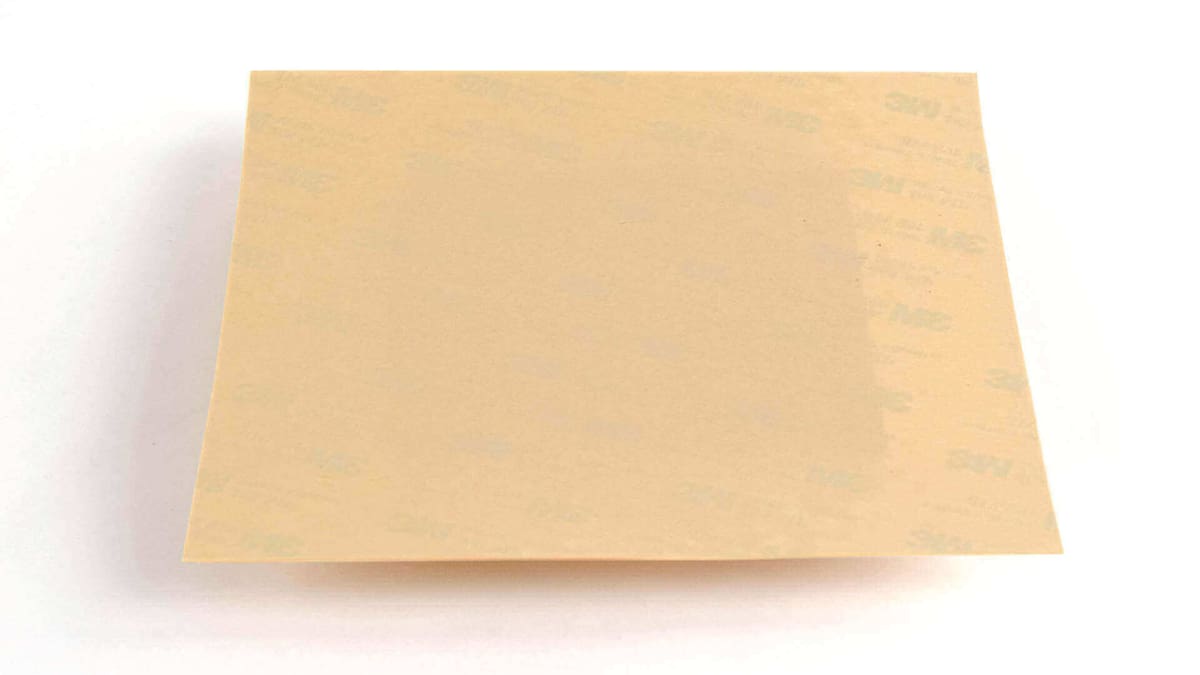
The LulzBot Mini uses a PEI sheet on the heated print surface. While this film is designed to last a very long time, it is a consumable item. Follow the PEI Print Surface: Maintenance guide to refresh and extend the life of your print surface. Replace the PEI sheet on your LulzBot Mini when damaged or if the film begins to lift.
Note: Extend the life of your PEI sheet by allowing the print surface to fully cool before removing prints.
- Purchase a replacement LulzBot Mini PEI Sheet.
- Follow the replacement guide at OHAI.LulzBot.com to remove the print bed and replace the PEI sheet.
Update Cura LulzBot Edition
Aleph Objects are constantly improving their software to provide the best possible print quality and user experience. Download and install the most recent version of Cura LulzBot Edition for new firmware, filament support, print profiles, and more.
Upgrade your LulzBot Mini 3D printer’s firmware after updating Cura LulzBot Edition by following these step by step instructions.
Please Note: This LulzBot Mini maintenance guide originally appeared on the LulzBot website. All copy and images have been reprinted with permission.
License: The text of "LulzBot Mini Review: This Mighty 3D Printer Does the Job" by All3DP is licensed under a Creative Commons Attribution 4.0 International License.
CERTAIN CONTENT THAT APPEARS ON THIS SITE COMES FROM AMAZON. THIS CONTENT IS PROVIDED ‘AS IS’ AND IS SUBJECT TO CHANGE OR REMOVAL AT ANY TIME.